
Introduction
Painting behind radiators means prepping a tight, hot-prone area so paint adheres and edges stay clean while you work around pipes and fins. It’s a hands-on job of turning off heat, protecting floors and fins, and using the right tools and edge control to reach back surfaces without making a mess. Check paint and primer labels and any appliance instructions for heat exposure guidance before you start.
Think like a tradesperson: dry, clean metal and steady access are more important than fancy products. Work in short sessions around the radiator, control edges with brushes, scrapers, or masking as fits the clearance, and cycle the heat slowly back up after the paint has cured per the manufacturer’s directions. If you’re unsure about clearances, materials, or safe reheat timing, check product labels or ask a professional.
Key takeaways
- Plan coating compatibility with radiator heat, room temp, and ventilation before painting.
- Remove or shield radiators and valves to avoid accidental paint transfer.
- Wear eye protection; use edge-control tools for crisp lines around fixtures.
- Test paint on a hidden area to ensure heat resistance and drying behavior.
- Verify radiator clearance for removal or access without bending components.
- Plan for possible touch-ups after heat-cycle and seasonal use.
Table of Contents
- Introduction
- Key takeaways
- Project Planning and Safety Overview
- Tools and Materials Checklist
- Preparing the Surface and Radiator Area
- Access Methods: Paint in Place Vs Remove Radiator
- Edge-Control Techniques for Crisp Joins
- Paint Selection and Material Compatibility
- Drying, Curing and Heat-Cycle Considerations
- Cleanup, Touch-Ups, and Long-Term Maintenance
- Conclusion
- FAQ
Project Planning and Safety Overview
Decide whether to paint behind radiators when access and room temperature allow for a quality finish; balance convenience against the extra effort of radiator removal for superior results. Consider timing relative to your heating season and any planned boiler work before you begin.
Put safety first: isolate and cool heating elements, follow any appliance shut-down instructions, and wear PPE for dust and old paint. Use a short checklist: confirm radiator temperature is safe, verify boiler schedules if needed, and plan ventilation and waste containment before starting.
When to Schedule the Work
Timing is crucial when painting behind radiators. You don’t want to start a job and then have your heat turned off unexpectedly.
Heating Season: Try to avoid painting during peak heating season. If you must paint, do it early in the season before cold weather sets in.
Planned Downtime: Check if there’s a planned maintenance or downtime for your building’s radiators. This could be an ideal time to tackle this project.
Drying and Curing: Paint needs time to dry and cure properly. Make sure you have enough time between painting and when the heat comes back on.
Safety and Plumbing Cautions
Safety should always be your top priority, especially when working near heating systems.
Turn Off Heat: Before you start, turn off the heat to prevent any accidents. If you’re unsure how, consult your building’s management or a professional.
Draining Radiators: If you need to remove radiators for painting, make sure they’re drained first. This should be done by a licensed plumber to avoid leaks and damage.
Valve Issues: If you encounter any issues with valves or pipes, stop work immediately and consult a professional plumber.
Permits and Building Rules
Before you start painting behind radiators, especially in shared buildings or historic properties, check if there are any rules or regulations you need to follow.
Shared Buildings: Some buildings have specific guidelines for alterations. Check with your building’s management or association before starting work.
Historic Properties: If you live in a historic property, there may be restrictions on what you can alter. Consult local preservation guidelines or your property manager.
Permits: In some cases, you might need a permit to alter radiators or pipework. Check with your local building department for more information.
Tools and Materials Checklist
Prioritize narrow-angle sash brushes, mini rollers with thin covers, flexible metal or plastic shields, low-residue painter’s tape, and thin spatulas or small fillers made for tight gaps. Choose durable, easy-clean tools and a particulate-capturing vacuum or brush to keep the confined space tidy.
Select primers and paints rated for the substrates you have and PPE that fits in small spaces, such as disposable gloves and a dust mask or respirator. If a product spec matters, check the label or technical data sheet for substrate recommendations and cleaning instructions.
Brushes, rollers and extension tools
Before you start painting behind your radiators, make sure you have the right tools for the job. Here’s a checklist to help you.
- Angled sash brush (1.5-2 inches): Use this for cutting in edges and getting into tight corners.
- Mini-roller (4-6 inches): Ideal for rolling paint onto the main surfaces behind radiators.
- Narrow extension rods: Essential for reaching deep behind radiators without straining yourself.
- Angled roller cover: Helps you reach those hard-to-get-to spots with ease.
- Synthetic or nylon bristles: Choose brushes and rollers with these for easy cleaning and durability.
- 2-inch angled sash brush (for detailed work): Use this for touch-ups and small areas.
- 3-4 inch roller cover (for larger surfaces): Swap out your mini-roller cover for this when you need to paint a wider area.
- Extension pole (6-8 feet): Use this with your roller to reach high places without needing a ladder.
Quick rule: Always check your tools before starting. Damaged brushes or rollers can ruin your paint job.
Edge-control and masking supplies
Proper edge control is key to a clean, professional-looking paint job behind your radiators. Here’s what you’ll need:
- Low-tack painter’s tape (1-2 inches): Use this for protecting edges from overspray and drips.
- Metal paint shields: Ideal for protecting the front of your radiator from paint.
- Magnetic or stick-on shields: These are great for protecting other metal surfaces nearby.
- Scotch-Blue painter’s tape (for delicate surfaces): Use this when you need to protect wallpaper, woodwork, or other sensitive areas.
- Drop cloths: Lay these down to protect your floor from drips and spills.
- Edge guard tool: This helps create a crisp line between painted and unpainted surfaces.
- Masking paper (for large areas): Use this for protecting wide expanses of wall or floor.
Quick rule: Always test your tape on a small, hidden area first to ensure it won’t damage the surface when removed.
Cleaners, fillers and primers
Preparing the surface behind your radiators is crucial for a lasting paint job. Here’s what you’ll need:
- Degreaser or soap and water (for cleaning): Use this to remove dirt, dust, and grease from the surface.
- Spackle or caulk (for hairline cracks): Fill any small gaps or holes with this before painting.
- Primer (tinted or white): Apply a coat of primer to seal the surface and help your paint adhere better. Choose a primer suited to your surface – metal or plaster.
- Sandpaper (120-grit): Lightly sand the surface after cleaning and filling to ensure good paint adhesion.
- Tack cloth: Use this to remove dust from the surface before painting.
- Stain-blocking primer (for tough stains): If you have stubborn stains, use a stain-blocking primer to prevent them from bleeding through your new paint.
Quick rule: Always let your cleaning solutions and primers dry completely before painting. Rushing this step can lead to poor paint adhesion and other issues.
Preparing the Surface and Radiator Area
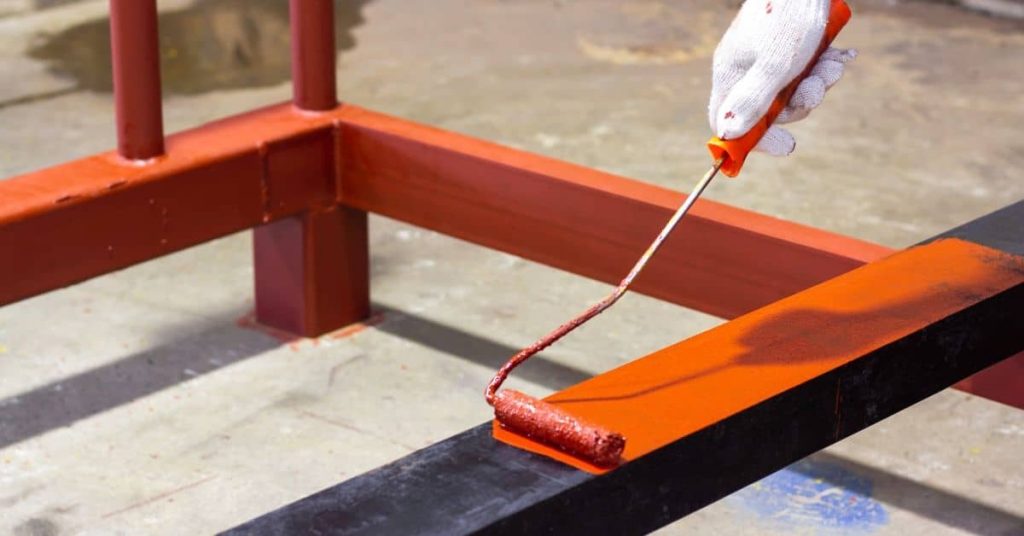
Clean loose dust, grease, and cobwebs first, then address rust and flaking paint with a wire brush or abrasive pad until you reach sound material. Use appropriate rust converters or metal primers as the product instructions require before applying topcoat.
Smooth small dents or gaps with a filler suited to the substrate, sand feathered edges, and remove sanding residue with a tack cloth or vacuum. Confirm readiness by checking for a clean, dry surface with no loose material and that primers are fully set per manufacturer guidance.
Cleaning and degreasing
Start by removing any loose dust or debris behind the radiator. A soft brush or vacuum can help with this.
Degreasing is crucial to ensure paint adhesion. Use a degreaser suitable for your surface – oil-based for greasy areas, water-based for general dirt. Apply it, let it sit, then scrub and rinse clean.
Be careful not to get any cleaner on the radiator itself or other painted surfaces. If you do, wipe it off immediately with a damp cloth.
Rust and metal prep for pipes and radiator backs
Light rust can be treated before painting. First, remove any loose or flaking rust with a wire brush or sandpaper.
For minor rust, use a rust converter primer. It converts rust into a stable compound that paint can adhere to. For heavier rust, mechanical removal might be needed followed by a rust inhibitor primer.
Always follow the manufacturer’s instructions for application and drying times. Ensure you’re using a primer suitable for metal surfaces to prevent future rust issues.
Visual checkpoints before priming
Before applying primer, use this quick checklist to ensure your surface is ready. It’s a final pass to catch any missed spots and save you time in the long run.
- Smooth surface: Run your hand over the area. It should feel smooth with no rough patches or raised edges.
- No dust: Check for any remaining dust particles. A quick wipe with a damp cloth can help confirm it’s clean.
- Adhesion test: Perform a simple adhesion test by sticking a piece of painter’s tape on the surface, then pulling it off. If paint comes off with it, you need more prep work.
- No grease or oil: Check for any remaining greasy spots. These can prevent primer and paint from adhering properly.
- No rust: Ensure there’s no visible rust on metal surfaces. If there is, treat it as described earlier.
- No peeling paint: Inspect for any flaking or peeling old paint. Remove these areas before priming.
- Edges are defined: Check that your masking edges are clean and well-defined to prevent bleed-through.
- No moisture: Ensure the area is dry. Moisture can cause problems with adhesion and may lead to mold or mildew growth.
Quick rule: If anything fails these checks, address it before priming to avoid potential issues later on.
Access Methods: Paint in Place Vs Remove Radiator
Painting in place is fastest and least intrusive but limits access and may compromise edge quality; partial removal improves access with moderate plumbing risk; full removal gives best results but requires plumbing skill or pro help. Match the method to your comfort with plumbing, time, and desired finish level.
Evaluate trade-offs: if you choose removal, verify whether you need to drain or isolate the system and follow manufacturer or local plumbing guidance. If unsure about the plumbing steps or radiator support, check appliance instructions or contact a qualified technician before proceeding.
Painting with the radiator in place
The easiest method is painting while the radiator stays put. Here’s how to keep your finish looking sharp.
Masking: Use painter’s tape and plastic sheeting to protect walls, floors, and nearby surfaces. Work from top to bottom, applying tape first, then covering with plastic.
Working around brackets and pipes: Use a small paintbrush or roller cover to carefully paint around brackets and pipe connections. Take your time; it’s worth the effort to avoid drips and mess.
Partial disassembly or shifting the radiator
Sometimes, you can’t paint in place. Limited disassembly might be your best bet. Here’s when it works.
Lifting off brackets: If brackets are in good shape and not rusted, you might be able to lift the radiator slightly by removing screws from the brackets. This gives you better access to paint edges and sides.
Shifting the radiator can also help. Gently rock it back and forth to break any seal between the radiator and wall, then slide a thin piece of wood or plastic behind it for support while painting.
Full removal — what to check first
Before you start unscrewing, follow this checklist. It’s crucial to avoid leaks and damage.
- Turn off system: Shut down your heating system at the main valve to prevent hot water from flowing while you work.
- Isolate valves: Close both the inlet and outlet valves on the radiator. This stops water from entering or exiting during removal.
- Capture water: Place a large container under the radiator to catch any remaining water. You may need an assistant to help support the radiator while you unscrew it.
- Check for leaks: Before removing, inspect all connections for leaks. If you find any, do not proceed. Hire a professional plumber instead.
- Inspect brackets: Check the condition of mounting brackets. If they’re rusted or damaged, replace them before reinstalling the radiator.
- Gather tools: Have all your tools ready: screwdriver, adjustable wrench, container for water, new brackets if needed, and a towel to dry any remaining moisture.
- Prepare workspace: Clear the area around the radiator. You’ll need space to work safely and lay out your tools.
- Check building rules: Before starting, ensure you’re allowed to make changes to your home’s heating system according to local building codes and regulations.
Quick rule: If at any point you feel unsure or find issues beyond your skillset, stop. Hire a professional to avoid costly mistakes.
Edge-Control Techniques for Crisp Joins
Use a thin shield or a magnetic edge where available, a narrow-angle brush for cutting in, and tape techniques that suit the gap width to reduce bleed; practice steady, controlled strokes for best results. For very tight gaps, consider pulling a single-filament brush through the space or using a thin, stiff artist brush for spot control.
Work wet-on-wet where possible to blend edges and avoid overloading the brush or roller, and remove tape while the paint is still tacky to prevent peeling. If a tape or method’s performance matters, consult the manufacturer’s instructions for recommended surfaces and removal windows.
Using a paint shield or scrap metal
When painting behind radiators, protecting trims and pipes is crucial. Here’s how to use a paint shield or scrap metal:
First, position the shield or scrap metal against the trim or pipe you want to protect. Hold it firmly in place with one hand.
With your other hand, dip your brush into the paint and start cutting in along the edge. Keep the shield or scrap metal close to your brush to prevent any paint from getting onto the protected area.
Tip: Use a steady, smooth motion. Don’t press too hard; let the brush do the work.
Tape and release strategies for confined spaces
In tight spaces behind radiators, using tape can help achieve clean lines. Here’s how to use it effectively:
Choose a low-tack painter’s tape. This type of tape is designed not to damage paint or surfaces when removed.
Apply the tape along the edge where you want your paint line to stop. Press down firmly to ensure a good seal and prevent paint from bleeding underneath.
Leave the tape in place for no more than 24 hours. Any longer, and the paint might start to peel off with the tape. Before removing, make sure the paint is completely dry.
Brushwork and feathering for invisible joins
To create a seamless edge when painting behind radiators, follow these brushwork techniques:
Hold your brush at a 45-degree angle. This allows you to control the paint flow and create a smooth line.
Lightly load your brush with paint. You don’t want too much paint on the bristles; this can lead to drips and bleed.
As you approach the edge, feather the paint. This means lightly brushing back and forth across the edge, blending the paint into the wall. The key is to use a light touch and let the brush do the work.
Paint Selection and Material Compatibility
Choose paints formulated to tolerate heat cycles and compatible with the substrates you have—metal radiators, plaster, and old enamel often require different primers or adhesion promoters. Match sheen to durability needs while considering how finishes show imperfections in tight spaces.
Always check product data sheets or labels for temperature limits, recommended primer systems, and compatibility with previous coatings. When in doubt about a specific pairing, test a small area or consult the manufacturer’s guidance before committing to the whole job.
Heat-tolerant topcoats and finishes
When painting behind radiators, you need a paint that can handle the heat. Look for these characteristics:
High Heat Resistance: Check product data for temperature tolerance. It should be at least 150°F (66°C) for areas near radiators.
Durability: Opt for paints with good adhesion and resistance to peeling, blistering, or cracking under heat cycles.
While standard wall paint might work in cooler spots, it may not hold up as well near your radiator. Choose a heat-resistant finish for longevity and peace of mind.
Primers and bonding aids
Before painting behind radiators, use the right primer to ensure good adhesion and prevent issues like lifting or staining:
Metal Primer: For metal surfaces like pipes or radiator backs, use a metal primer. It seals the surface and provides a better base for your topcoat.
Bonding Primer: If you’re painting over porous plaster or an old enamel finish, consider using a bonding primer. It helps to seal the surface and improve adhesion, preventing peeling or staining.
Always follow the manufacturer’s instructions when applying primers for best results.
Matching texture and sheen
To create a seamless look at the join between your wall paint and the radiator, consider these tips:
Sheen Matching: Choose a topcoat with a similar sheen to your wall paint. This helps minimize any noticeable difference at the join.
For example, if your walls are eggshell, use an eggshell finish behind the radiator. If they’re flat, use a flat finish there too.
Texture Blending: To blend textures across the radiator gap, you can feather your paint at the edge. Use a smaller brush or even a sponge to lightly dab paint onto the radiator back, blending it into the wall paint.
Drying, Curing and Heat-Cycle Considerations
Heat will speed surface drying but can affect full curing and off-gassing; plan a conservative delay before returning the system to service to avoid tacky finishes or solvent-driven issues. Coordinate your painting schedule with expected heat cycles and any required recoat windows from the manufacturer.
Check the paint’s drying and curing guidance for recommended wait times and any temperature constraints, and allow extra buffer time if ambient conditions are uncertain. If you can’t verify a spec, follow the product label or data sheet and err on the side of longer cure periods before exposing the coating to repeated heat.
When to restore heat and gradual warm-up
Hold off on turning your radiators back on until the paint has at least surface-dried. This usually takes a few hours, but check your paint’s specific drying time.
Once dry to touch, start your heating system. But don’t rush it. Gradually increase the temperature over a few days to prevent blistering or tackiness caused by sudden heat.
Here’s how: Day 1 – Set thermostat to lowest comfortable temp. Day 2 – Increase by 5-10°F (3-6°C). Day 3 – Reach your usual heating level slowly.
Seasonal and environmental factors
Drying times can vary depending on the season. In winter, cold rooms mean slower drying. So, keep that in mind when planning your painting.
Also, dusty start-of-season firings can kick up particles that stick to wet paint. To avoid this, clean your radiators before painting and let the dust settle after turning them on for the first time each season.
Humidity plays a role too. High humidity slows drying. So, if you live in a humid area or it’s rainy season, expect longer drying times.
Test patches and verification
Before painting your entire space, do a small test patch. This lets you check adhesion and appearance under heat cycles.
Paint a small area, let it dry, then run your heating system through a full cycle. Check the paint after each cycle for any signs of peeling, blistering, or other issues.
If all looks good after several cycles, you’re ready to finish painting the rest of the space. But if there are problems, troubleshoot and adjust your approach before proceeding.
Cleanup, Touch-Ups, and Long-Term Maintenance
Remove tape and shields gently to avoid peeling, clean tools per the product’s instructions, and dispose of contaminated rags and waste following local rules. For touch-ups, keep a small amount of the original paint sealed for future repairs and apply with the same technique used originally for best blending.
Inspect behind radiators periodically for flaking, rust, or staining and address small issues promptly to prevent larger repairs. If disposal or storage specifics matter, consult container labels and local regulations for hazardous waste handling.
Best practice for removing protection
Timing is key when removing tape and shields behind radiators. Wait until the paint is fully dry, usually 24 hours.
For tape, pull it off at a 45-degree angle to avoid pulling fresh paint with it. Start from one corner and pull slowly and steadily.
With shields, gently lift them straight up once the paint is completely dry. If you feel any resistance, wait a bit longer.
Inspecting after first heat cycles
After restoring heat for the first time, inspect your work closely. Look for edge lift, where paint peels back from the edges, and any signs of discoloration or blistering.
For edge lift, touch up with a small brush while the area is still warm. For discoloration or blistering, scrape off the affected paint, sand lightly, prime, and repaint.
If you find any rust, treat it immediately with a rust converter primer before painting over it.
Periodic maintenance tips
Regular maintenance keeps your paint job looking fresh and prevents rust. Every few months, wipe down the area with a damp cloth to remove dust and dirt.
If you notice any rust spots or edge chips, touch them up immediately. Use a small brush and some leftover paint to fill in the gaps.
For long-term storage of contaminated rags, place them in a sealed plastic bag to prevent odors from spreading. For disposal, follow local regulations for hazardous waste. It’s usually best to take them to a designated recycling center or hazardous waste facility.
Conclusion
Finish this job right and you protect the wall, keep the radiator functioning, and ensure the finish stays crisp through heat cycles.
First, check that you have a clear plan, proper ventilation, and the right compatible paint; decide if you can paint in place or if you need to remove the radiator, then mask everything you don’t want touched, prep the surface thoroughly, and apply thin coats with adequate dry times before the next pass; test a small patch first and follow the manufacturer’s cure times, not the clock on your phone, to avoid heat or moisture damage.
Common mistakes to avoid are skipping the test patch, rushing the edges, or skipping proper edge-control and masking; other safety rules are to turn off heat during painting, wear eye protection, and keep heat sources and open flames away from drying paint; never sand or abrade near electrical connections or valves, and always use the right compatible materials for the surface and radiator.
If the radiator is stubborn, you’re unsure about removal, or you encounter leaks, corrosion, or unusual fittings, call a professional and don’t push on alone; with careful planning and disciplined steps, you can finish with a durable, clean edge that lasts through heat cycles and years of use.
FAQ
Can I paint behind a radiator without removing it?
Yes, you can if you access the gap with a narrow brush or small roller. Use masking to cover the radiator and floor, and work slowly to avoid drips. If you’re unsure about reach, removing the radiator is safer—check its mounting method and follow manufacturer instructions.
How do I protect the edge where the radiator meets the wall while painting?
Mask the radiator face and the wall edge with painter’s tape and plastic drop cloths. Use a sharp, angled brush to tidy the line where wall and radiator meet. If you see bleed, touch up carefully after the main coat dries.
What paint type is best for areas that undergo heat cycles?
Use a paint that’s rated for heat exposure and compatible with metal surfaces. Read the label for temperature tolerance and surface prep requirements. If in doubt, check the manufacturer instructions or ask in-store for guidance on heat-prone spots.
How should I handle drying and future heat cycles after painting behind a radiator?
Let the coating cure per the product label before putting the radiator back or turning it on high heat. Avoid heavy use until you’re sure the finish has set. If you notice issues after power-up, inspect for touch-ups or potential edge damage and recoat as needed.