
Introduction
Special-effect paint rollers create textured or patterned finishes on walls using unique roller covers. They work with ordinary paint and standard tools, but the roller design dictates the look. This introduction covers the main types, how to apply them, and common failure points to watch for.
Types include swirls, stipple-like textures, comb patterns, and other embossed effects. For each finish you’ll need the right roller, plus basic prep, steady pressure, and clean edges to control the result. Be mindful of common mistakes and always check product labels and your local rules if unsure.
Key takeaways
- Select the right roller type (foam, nap, or texture) for the finish.
- Test each technique on scrap panels to prevent surprises on walls.
- Keep consistent pressure and direction to avoid streaks and uneven texture.
- Inspect during cleanup for loose fibers, flaking paint, or glazing pitfalls.
- Safety: work in dry conditions with proper ventilation and respirator as needed.
- Plan large jobs by batching finishes and allowing adequate cure and rework time.
Table of Contents
- Introduction
- Key takeaways
- Quick Overview: What Special-Effect Rollers Do and the 9 Finishes Covered
- Tools and Materials Checklist
- Step-by-Step Techniques for Each Finish
- Suitable Surfaces, Conditions, and Prep
- Common Failures, Root Causes, and Troubleshooting
- Safety, Cleanup, and Environmental Considerations
- Cost Comparison, Time Estimates, and Planning for Large Projects
- Longevity, Maintenance, and When to Repaint or Repair
- Conclusion
- FAQ
Quick Overview: What Special-Effect Rollers Do and the 9 Finishes Covered
Special-effect rollers create textures and patterns that standard rollers cannot. They are designed to manipulate coatings to reveal depth, sheen, and movement on walls, ceilings, concrete, or decorative plasters. They differ from plain rollers in nap construction, drum pattern, and the way the material flows and sets on the surface.
This article surveys nine finishes, each with a one-line descriptor to set expectations: bold trowel-like textures, soft marbling, subtle stipple, feathered swirls, combed lines, stippled speckle, clouded glaze, metallic sheens, and color-bleed effects. Use cases vary with design intent, light in the room, maintenance needs, and durability demands. You’ll find quick criteria for choosing a finish and essential setup checks that influence outcomes, such as nap length, loading technique, rolling pressure, and overlap. Expected failures like pulling, skipping, and uneven texture are flagged with brief remedies for reassurance.
Group A — Texture finishes (sand, orange peel, knockdown)
Special-effect rollers aren’t just for smooth surfaces. They can create tactile textures that change the whole feel of a room.
Sand rollers give walls a gritty, rustic look. They’re great for hiding imperfections and adding depth to feature walls.
Orange peel rollers mimic the texture of an orange’s skin. This finish works well in bathrooms and kitchens, providing a non-slip surface.
Knockdown rollers create a subtle, leather-like texture. They’re perfect for adding a touch of elegance to living rooms or bedrooms.
Group B — Pattern and faux finishes (stipple, swirl/comb, faux woodgrain)
Pattern-based finishes let you mimic the look of other materials or add interest to plain surfaces.
Stipple rollers create a speckled effect, similar to that of textured paint. They’re often used in nurseries or children’s rooms.
Swirl/comb tools work with regular rollers to create unique patterns. Swirling gives a soft, cloud-like appearance, while combing creates linear designs.
Faux woodgrain rollers mimic the look of natural wood grain. They’re ideal for adding warmth to modern spaces or updating old paneling.
Group C — Decorative surface finishes (suede/venetian, metallic shimmer, raised/embossed)
Specialty rollers can create soft, luxurious textures and striking metallic effects.
Suede/venetian rollers give walls a soft, velvety feel. They’re perfect for creating a cozy atmosphere in bedrooms or home theaters.
Metallic shimmer rollers add a touch of glamour to any room. They reflect light and create a dynamic, sparkling effect.
Raised/embossed rollers create 3D textures that can mimic the look of leather, fabric, or even stone. They’re great for adding drama to accent walls.
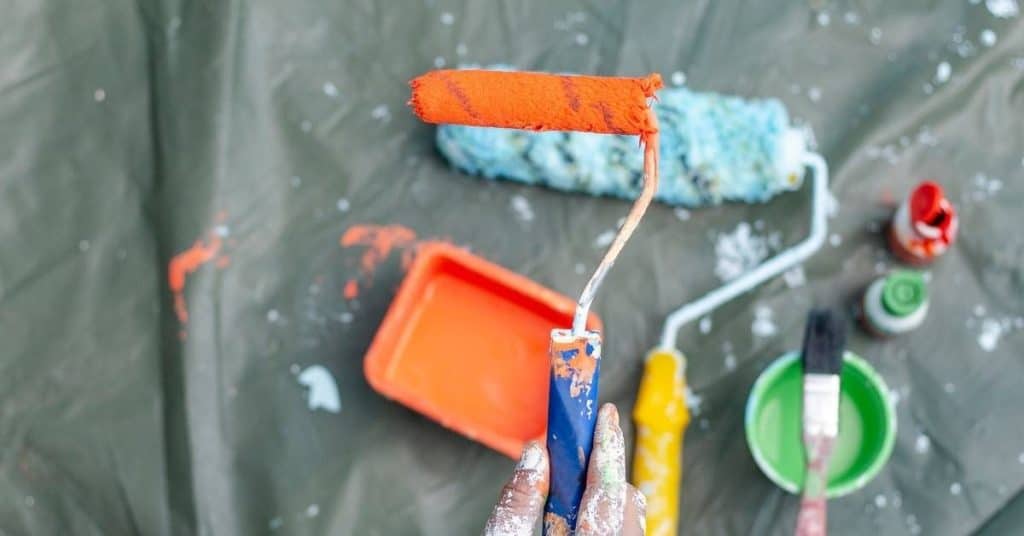
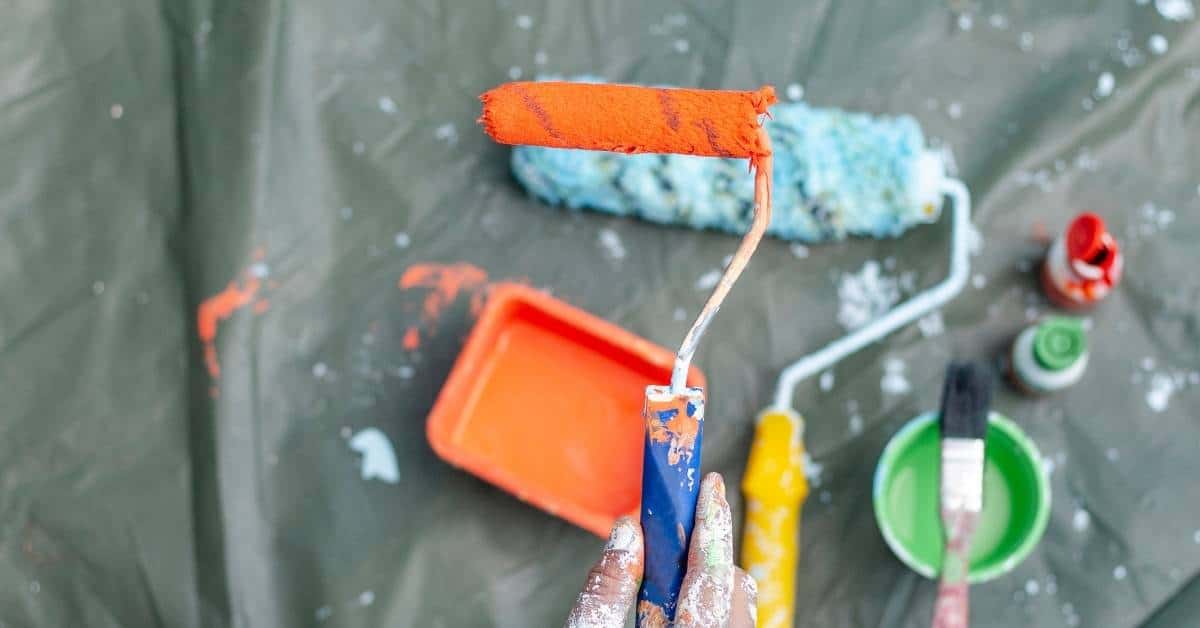
Tools and Materials Checklist
Start with the right roller types and nap sizes tailored to your finish, from fine textures to deeper patterns. Foam and fabric options behave differently, and select nap lengths accordingly. Have a range of naps ready so you can swap as textures shift.
Keep trays, liners, frames, and extension poles in ergonomic, easy-to-clean configurations. Check primers, base coats, paints, and extenders for compatibility, and have bonding primers or sealers on hand when needed. Texture tools, combs, stipplers, and adapters pair with rollers to achieve planned effects, while patching compounds, sanding blocks, masking tape, and drop cloths prepare the surface. Don’t forget tools for cleanup and storage to prolong roller life.
Rollers, frames, and specialty attachments
Use this checklist before starting any concrete rolling work to ensure you have the right tools for the job. This will help you achieve a smooth finish and prevent costly rework.
- Smooth Finish Roller Core: Check that the roller core is solid, not hollow. Hollow cores can leave voids in your concrete surface.
- Nap Height for Smooth Finish (1/8″ – 3/16″): Measure nap height to ensure it’s suitable for a smooth finish. Too high or low can lead to an uneven surface.
- Pattern Roller for Broomed Finish: Ensure the pattern roller has the desired broom pattern and is in good condition to avoid leaving marks on your concrete.
- Nap Height for Textured Finish (3/16″ – 1/4″): For textured finishes, check that nap height is within this range. Too low can result in a smooth finish, too high may leave voids.
- Specialty Attachments: If using specialty attachments like grooving or sawing tools, ensure they are compatible with your roller frame and in good working order.
- Roller Frame Size: Check that the roller frame is the correct size for your project. Too small can lead to uneven rolling, too large may cause damage.
- Frame Condition: Inspect the roller frame for any signs of wear or damage. A weak frame can result in an uneven finish.
- Rent vs Buy Decision: For occasional use, consider renting rollers and frames to save on costs. However, buying may be more cost-effective if you plan to use them frequently.
Quick rule: Always check your roller’s condition before starting work. A worn-out roller can cause expensive rework and leave you with a poor finish.
Paints, additives, and surface primers
Before you start painting, use this checklist to ensure you have the right materials for a smooth, long-lasting finish.
- Paint sheen: Check label for sheen level (flat, eggshell, satin, semi-gloss, gloss). Use flat or eggshell for walls, semi-gloss to gloss for trims and doors.
- Paint viscosity: Ensure paint is not too thick or thin. Stir well and check with a paint comb or feel it between your fingers. Too thick? Add water (check manufacturer’s guidelines).
- Roller cover: Match roller cover to sheen: short nap for flat, medium nap for eggshell/satin, long nap for semi-gloss/gloss.
- Primer or texture basecoat: Use on new drywall, bare wood, or heavily patched surfaces. Check manufacturer’s instructions for specific product recommendations.
- Additives (extenders): Consider using to extend paint life and improve coverage. Check label for compatibility with your chosen paint.
- Metallic additives: If using, ensure they’re compatible with your paint type and sheen. Follow manufacturer’s mixing instructions.
- Surface primer (stain blocker): Use on surfaces prone to tannin bleed or stains (e.g., knotty wood). Check label for stain-blocking claims.
- Texture basecoat: For textured surfaces, use a texture basecoat before applying your final paint. Ensure it matches the desired texture.
Quick rule: Always prime or seal surfaces that are porous, new, or prone to stains for better adhesion and coverage.
Prep and repair supplies
Before you start painting, use this checklist to ensure your surfaces are clean, smooth, and ready for a consistent finish. Tackle repairs first, then move on to cleaning and masking.
- Sandpaper (120-grit): To remove old paint, smooth rough spots, and prepare the surface for painting. Check grit size to ensure it’s fine enough for a smooth finish.
- Joint compound: For filling cracks and gaps in drywall. Make sure it matches your wall type (lightweight or regular).
- Patching materials (spackling, joint tape): To repair nail holes, dents, and other small imperfections. Check that the spackling is suitable for the surface you’re repairing.
- Sandpaper (220-grit): For smoothing out patched areas after sanding. Ensure it’s fine enough to create a smooth finish.
- Tack cloth: To remove dust from sanded surfaces. Check that it’s clean and free of debris before use.
- Masking tape (blue or painter’s tape): For protecting edges and creating crisp lines. Ensure it’s blue or painter’s tape to avoid pulling off drywall paint.
- Plastic drop cloths: To protect floors from spills and drips. Check that they’re large enough to cover the area you’ll be working in.
- Masking paper: For covering light switches, outlets, and other areas not being painted. Ensure it’s wide enough to create a proper seal.
Quick rule: Always spot-prime patched areas before painting to seal them and prevent tannins (brown stains) from bleeding through.
Step-by-Step Techniques for Each Finish
For every finish, you’ll have a named effect, its purpose, and its appearance lined up with required tools and base coats. Include a clear mixing order, any primer, and the base layer that underpins the texture. The procedure then guides you through the exact roller technique, including pressure, direction, and overlap to create the intended texture.
Timing and layering come next, with open and recoat windows, curing guidance, and the sequence from base to texture to topcoat. Troubleshooting tips address common issues like blistering or pinholes, plus safety and cleanup notes to keep the process smooth. A simple workflow for each finish helps you follow along without guessing at steps.
Step-by-Step Process
Follow these practical steps to achieve any special-effect paint finish. Safety checks, main work, and cleanup are all covered.
- Inspect the surface for damage or moisture. Repair if needed.
- Wear gloves, goggles, and a respirator. Cover floors with drop cloths.
- Mix your paint and additives according to instructions. Stir well.
- Apply base coat using even pressure, rolling in ‘M’ or ‘W’ patterns. Let it dry as per manufacturer’s guidelines.
- Create texture or pattern using the appropriate roller technique (see specific finish sections).
- Let your finish dry according to open time and recoat windows.
- Apply sealant or topcoat if required, following the same drying times.
- Inspect for evenness, thickness, and edge neatness. Make touch-ups if needed.
- Clean up rollers, frames, and tools immediately after use to preserve finish quality.
Technique steps for Group A textures
Prep your surface by sanding lightly, priming if needed, and removing dust. Use a 3/8″ nap roller for these finishes.
For sand, thin paint with water (1:2 ratio) to create a light, even texture. Roll on in ‘M’ or ‘W’ patterns, applying medium pressure.
For orange peel, use full-strength paint and apply heavy pressure, rolling in small circles. Let it dry slightly before using an orange peel comb to create the finish.
For knockdown, apply base coat with light pressure, then let it dry until tacky (about 15-30 minutes). Use a knockdown roller or trowel to smooth out texture. Let it dry completely before applying sealant.
Technique steps for Group B patterns
Start with a primed, dust-free surface. Use a 1/2″ nap roller and apply base coat using even pressure.
For stipple, use a stippling comb to create texture. Apply glaze or paint with a small roller, working in sections. Let it dry slightly before stippling.
For combed swirl, apply base coat and let it dry until tacky (about 15-30 minutes). Use a combed swirl roller to create the pattern. Let it dry completely.
For faux woodgrain, use a wood grain roller or comb to create the pattern. Apply glaze or paint with a small roller, working in sections. Let it dry according to open time and recoat windows.
Technique steps for Group C decorative effects
Start with a primed, dust-free surface. Use a 1/4″ nap roller or specialty roller for these finishes.
For suede/venetian, apply base coat and let it dry until tacky (about 15-30 minutes). Use a suede or venetian roller to create the texture. Let it dry completely before applying sealant.
For metallic shimmer, use a metallic paint additive and mix well with your base coat. Apply using even pressure, rolling in ‘M’ or ‘W’ patterns. Let it dry according to open time and recoat windows.
For raised/embossed, apply base coat and let it dry until tacky (about 15-30 minutes). Use an embossing roller or comb to create the pattern. Let it dry completely, then apply sealant. Allow final cure time before heavy use.
Suitable Surfaces, Conditions, and Prep
Identify which finishes suit drywall, plaster, concrete, or primed wood, and map the best roller textures to each substrate. Surface texture and porosity influence how the finish reads, so prep is critical to avoid texture defects. Plan for how the surface will respond under different finishes before you start.
Prep steps cover cleaning, dust removal, moisture checks, smoothing, and priming requirements tailored to the finish and substrate. You’ll note bonders for bare concrete, drywall primers, and wood primers, plus any stain-blocking or porosity-fillers. Environmental conditions and application windows affect texture formation, so verify temperatures, humidity, and recoat timing before work begins.
Substrate Compatibility by Finish
Each special-effect paint roller finish behaves differently on various surfaces. Here’s what works best:
Drywall & Plaster: Most finishes work well here. Seal high-porosity areas first with a primer-sealer.
Concrete: Use bonding primers for better adhesion. Sand or attenuate rough surfaces before applying texture finishes.
Primed Wood: Choose finishes that complement the grain. Use wood-specific primers if needed.
Environmental & Timing Considerations
Temperature, humidity, and ventilation impact application and curing:
Ideal Conditions: 70-85°F (21-29°C), 40-60% RH. Good ventilation.
Marginal Conditions: Below 50°F (10°C) or above 90°F (32°C)? Preheat surfaces and use heat lamps if needed. High humidity? Use dehumidifiers.
Follow recoat windows to avoid texture defects. Most finishes need 4-24 hours between coats.
Large-Area vs Small-Area Considerations
The scale of your project affects prep and product choices:
Large Areas (walls, floors): Use continuous blending techniques to avoid visible start/stop points. Apply finishes in manageable sections.
Small Repairs: Match textures carefully. Overlap edges when recoating to blend old and new surfaces.
Test patches first to ensure consistency. Touch-ups should mimic surrounding texture, not stand out.
Common Failures, Root Causes, and Troubleshooting
Typical DIY issues include lap marks, fading patterns, poor adhesion, sagging, and clogging. Describe where these symptoms appear on textured surfaces so you can locate the problem quickly. Each issue is linked to a likely root cause such as surface residue, improper nap choice, or improper loading.
Step-by-step troubleshooting guides cover prep refinishing, paint loading adjustments, rolling pattern changes, and careful re-rolling to avoid unwanted overlaps. Practical preventive strategies address cleaning, priming, correct texture pairing, and mindful material handling. A concise decision flow helps you decide when to recoat or switch techniques, plus a brief maintenance plan to prevent clogging and prolong tool life.
Application errors and immediate fixes
Mistakes happen, but knowing how to spot them early can save you time and effort. Here are some common application issues and quick fixes.
- Lap marks: Caused by uneven paint distribution or overlapping strokes. Avoid: Maintain consistent rolling direction and overlap edges minimally.
- Uneven texture: Inconsistent roller pressure or technique can lead to an uneven finish. Fix: Sand lightly, recoat with a smooth roller, or use a sprayer for better consistency.
- Mottling: Visible variations in color or texture due to improper paint mixing or application. Avoid: Stir paint thoroughly and maintain consistent rolling speed.
- Sagging: Excessive paint loading can cause drips and sags. Fix: Lightly sand, wipe off excess paint, and recoat with less paint on the roller.
Remember, prevention is key. Plan your rolling direction before starting, maintain consistent pressure, and avoid overloading your roller.
Material and product failures
The right materials make all the difference in a successful finish. Here are some common material issues and how to address them.
- Peeling: Poor adhesion due to incompatible primer or insufficient surface preparation. Test: Scrape off a small area, if it comes off easily, recoat with a better bonding primer.
- Flaking: Inadequate paint film build-up or weak primer can cause flaking. Spec: Look for paints with good hiding and adhesion properties. Avoid: Skimping on coats.
- Blistering: Trapped moisture or contaminants under the paint cause blisters. Check: Surface for signs of moisture or contamination before painting.
- Metallic flake settling: Inconsistent stirring or application can cause metallic pigments to settle unevenly. Spec: Stir paint thoroughly and maintain consistent rolling speed.
Always test your materials on a small area first to ensure compatibility with your surface and desired finish.
Design and aesthetic pitfalls
Even the best techniques can’t save a poorly designed pattern. Here are some common design mistakes to avoid.
- Overly busy patterns: Complex designs in small spaces can feel overwhelming. Avoid: Simplify your design or use it sparingly.
- Wrong scale for room size: Large patterns in small rooms can make the space feel smaller. Test: Create a mockup using painter’s tape to see how the pattern looks in the space.
- Inconsistent color scheme: Clashing colors can detract from your finish. Avoid: Stick to a consistent color palette and test colors before painting.
- Poor contrast: Low contrast between the paint and the surface can make your finish look dull. Spec: Choose paints with good color contrast for your surface.
Remember, less is often more when it comes to design. Keep it simple and test your ideas before committing to them.
Safety, Cleanup, and Environmental Considerations
Outline PPE including eye protection, chemical-resistant gloves, respirators as appropriate, and proper fit. Have an eyewash station reminder for indoor work and a plan for splashes or skin contact. Ensure ventilation is adequate to control fumes and dust during application and cleanup.
Discuss VOC awareness, product labeling, and how to read MSDS or manufacturer data. Safe handling covers compatibility checks and avoiding cross-contamination, with containers kept closed when not in use. Cleanup steps include washing tools, storing materials, and proper disposal for solvent-soaked waste, plus tips to minimize environmental impact and waste over the project life.
Personal protection and ventilation
Safety first, mate. Here’s what you need:
Respirator: If your paint or roller has VOCs or aerosols, wear a respirator rated for organic vapors. It should fit snugly.
Gloves: Chemical-resistant gloves protect your hands from solvents and specialty additives. They should be long enough to cover your wrists.
Eye protection: Safety glasses or goggles keep splashes out of your eyes. If you’re indoors, have an eyewash station ready.
Ventilation’s crucial too. Open windows, use fans to blow fumes away, and avoid enclosed spaces. It’s like cooking with gas – you need fresh air.
Cleanup, storage, and disposal
Once you’re done, it’s time to tidy up. Here’s how:
Rollers: Clean ’em while they’re still wet. Use warm water and a mild detergent. Rinse well and let dry before storing.
Specialty paints: Keep lids on tight when not in use. Store upright, away from heat sources, and out of reach of kids or pets.
Disposal: Solvent-soaked rags are fire hazards. Let them dry out first, then dispose according to local regulations. Never pour solvents down drains – they can contaminate water supplies.
Recycle what you can. Check with your local waste management for details. And remember, a little planning goes a long way in minimizing waste.
Cost Comparison, Time Estimates, and Planning for Large Projects
Consider cost drivers such as roller type, texture media, primers, and sealers, and decide whether to buy, rent, or hire pros based on project size. For large jobs, think about bulk material needs and potential discounts, but verify current pricing and availability with suppliers. Track the overall value rather than just the sticker price.
Estimate time by breaking the project into prep, rolling, curing, texture setting, and cleanup. For multiple rooms, plan sequencing, crew shifts, and material storage. A budgeting checklist helps you anticipate hidden costs, and a decision point framework guides when to rent equipment versus hire professionals, with notes on quality control and contingency planning for large projects.
What to check and safe cost ranges
Before you start your large project, use this checklist to ensure you’re getting the best value for your money.
- Roller types/naps: Check local hardware stores. Expect to pay $5-$15 per roller cover, depending on nap length and quality.
- Specialty paint: Prices vary widely by brand and finish. Allocate $30-$80 per gallon.
- Texture media: Sand, glass beads, or other materials can add $10-$50 per bag.
- Primer: Essential for adhesion and coverage. Budget $20-$40 per gallon.
- Sealant: Optional but recommended for durability. Around $30-$60 per can.
- Bulk discounts: Check if suppliers offer discounts for large quantities.
- Hidden costs: Don’t overlook masking materials, protective gear, and waste disposal.
- Contingency funds: Set aside 10-15% for touch-ups or unexpected expenses.
Quick rule: Always compare prices per square foot, not just total cost. This helps account for varying room sizes and surface areas.
Labor, time per finish, and scheduling tips
Prep work is crucial. Allocate at least half a day for each room to sand, clean, and prime surfaces.
Rolling takes about 1-2 hours per room, depending on size and complexity of the pattern. Allow 4-6 hours drying time between coats.
For large projects, consider hiring helpers or painters. One experienced painter can handle a typical room in under two hours, including rolling and touch-ups. More hands make light work, but ensure they’re trained to maintain finish consistency.
Scheduling tip: Plan your project around weather forecasts. Avoid painting in damp conditions or extreme temperatures.
When to hire a professional or rent equipment
Knowing when to DIY and when to call in the pros can save you time, money, and stress.
- Complex patterns: Intricate designs may require a pro’s steady hand. Expect to pay $20-$50 per hour for labor.
- Large surface area: Renting industrial rollers or lifts can save you backache and time. Lifts rent for around $100-$300 per day.
- Limited time: Pros can complete jobs faster, freeing up your schedule.
- Access difficulty: High ceilings or hard-to-reach areas may warrant a lift or scaffolding rental ($50-$200 per day).
- Finish consistency: Pros ensure consistent results across multiple rooms. Expect to pay a premium for this expertise.
- Optional tools: Rentable texture sprayers can save you time and effort, around $50-$150 per day.
- Realistic price cues: Get quotes from local pros before deciding. Compare with your DIY costs to make an informed decision.
Longevity, Maintenance, and When to Repaint or Repair
Provide a practical durability comparison across the nine finishes, noting typical indoor performance and how texture and method influence longevity. Color-fastness, texture retention, and the impact of substrate and environment are considered. The application approach, including nap type and overlap, also affects lifespan.
Offer a maintenance routine with cleaning, prevention tips, and re-sealing or topcoat intervals if applicable. Include clear signs that a finish needs repair or replacement and how to diagnose root causes. Share step-by-step repair guidance, from patching to reapplying texture, along with storage and care tips to extend life between projects.
Durability by finish and protective topcoats
The durability of special-effect paint finishes varies greatly. Here’s a quick rundown:
High-traffic areas: Metallic, Mica, and Glitter hold up best due to their resilient binders and minimal texture.
For all finishes, consider clear sealers or topcoats for added protection. They extend life, especially in high-moisture or UV-exposed areas. Re-coat every 3-5 years for optimal performance.
Repair techniques and touch-up strategy
Small repairs are possible with most finishes, but matching texture can be tricky. Here’s how:
Spot repairs: Lightly sand, prime, then re-apply the finish using a small roller or brush. Match color and nap size for best results.
For full refinishing, strip old paint first. It’s labor-intensive but ensures longevity of the new finish. Touch-ups should be done within 6 months to maintain consistency.
Conclusion
With the finishes you can achieve and the techniques covered, your next moves should be clear: prep right, choose the finish that suits the project, and follow the steps and drying times to keep texture and color consistent. The goal is a durable, professional look that lasts and doesn’t damage the surface or your line of sight on the project.
To proceed, focus on this practical check: evaluate the surface exactly as you would for any paint job, pick the right special-effect roller for the finish you want, mix and load correctly, apply in controlled passes with steady pressure, and keep the area ventilated and clean. Test a small area first, then scale up in stages, watching for trouble signs and stopping if you see color bleed, texture separation, or lifted edges. Clean tools as you go and plan for repaint or touch-ups as part of the project timeline.
Common mistakes to avoid are skipping prep, using the wrong roller texture or nap for the finish, and overworking the material. Don’t skip safety: wear a mask when sanding or spraying, use good ventilation, cover nearby surfaces, and clean spills immediately. Don’t push a project when you’re unsure of the drying window or compatibility with the surface—pause, reassess, and test again.
If you encounter persistent issues beyond your comfort zone—unexpected adhesion problems, severe texture failures, or a huge area where consistency matters—call in a pro rather than forcing a risky fix. Stay deliberate, follow the plan, and you’ll finish with confidence and a result that you can be proud of.
FAQ
What types of special-effect paint rollers exist and how do you tell them apart?
Common types include swirl, texture, stipple, sponge, rag, foam, and patterns like faux brick or wood grain. Each has a distinct surface or cage pattern that leaves a different mark or texture when you roll. Check the roller’s label or packaging to see the effect it’s designed to create and test a small section before committing to a whole wall.
What techniques apply each finish and where is each best used?
Lightly roll with even pressure for most textures, and vary your stroke to control the pattern. Use finish-specific techniques in dry, open areas where you can see the texture develop; avoid overlaps that blur delicate patterns. If a finish looks muddy, adjust pressure or try a fresh coat with clean tools.
What tools do I need beyond rollers to get good results?
Have compatible trays, an extension pole for reach, a brush for tight spots, and a clean rags or towels for quick corrections. A roller grid helps load the roller evenly, and a dropcloth or plastic sheet saves cleanup time. Read the roller’s instructions for any special tool recommendations.
What are common mistakes and how can I avoid them, plus cleaning and maintenance of roller brushes?
Common mistakes are overloaded rollers, rushing coats, and moving the roller in random directions. Clean rollers promptly after use as per the manufacturer’s instructions; let brushes dry fully before storage. If a roller loses its texture, replace it rather than forcing it to work and damaging the finish.