
Introduction
Stopping brush marks on trim means using the right additives, a controlled layoff pass, and sanding between coats to create a smooth finish. Choose compatible additives per the product label and follow local rules, then do a single light layoff before each coat. Check manufacturer instructions for drying times and sanding grit, and tailor your approach to the stain or paint you’re using.
After each coat, lightly sand with the right grit and wipe down before applying the next. Keep coats thin, maintain a steady hand, and use long, even strokes to minimize ridges. If you see brush marks, reassess the drying time and the compatibility of your additive, then adjust and recoat.
Key takeaways
- Choose water-based or oil-based trim paint per room temperature and ventilation.
- Lay off with long, smooth strokes toward the edge as it dries.
- Sand between coats with fine grit and keep dust to a minimum.
- Use primer and proper surface prep to reduce showing brush lines.
- Inspect and touch up edges after first coat before final finish.
- Safety: Ventilate well, wear mask and goggles during sanding and painting.
Table of Contents
- Introduction
- Key takeaways
- What Causes Brush Marks on Trim
- Tools and Materials Checklist
- Choosing the Right Paint and Additives
- Prep and Priming for a Smoother Surface
- Brush Technique and Layoff Method
- Sanding Between Coats for Professional Results
- Troubleshooting Common Problems and Fixes
- Step-by-Step Workflow and Timing for Trim Painting
- Conclusion
- FAQ
What Causes Brush Marks on Trim
Brush marks happen when paint flow and brush pickup don’t balance well. The brush can drag and lift separate layers as you work. Environmental factors can make the film dry unevenly, revealing the texture you see later.
Understanding how paint moves across a surface helps you fix it. Look for how the brush shape, nap, and loaded amount interact with the substrate. Check how temperature, humidity, and air movement affect leveling according to manufacturer guidance.
Paint Rheology and Drying Behavior
The way paint flows, levels, and dries is key to whether it leaves brush marks. This is all about rheology, a fancy word for how paint moves.
Viscosity’s the first thing to consider. Thick paints don’t flow as well, so they’re more likely to show strokes. That’s why you’ll see fewer marks with high-quality, low-viscosity paints.
Coalescence and film formation are also important. As paint dries, its solids come together and form a smooth film. If this process is slow or incomplete, brush marks can be accentuated.
So, paints that level well – meaning they flow out smoothly before drying – will hide strokes better. But remember, we covered this in detail earlier, so I won’t go into too much depth here.
Brush Quality and Stroke Mechanics
The type of brush you use and how you apply paint with it can make a big difference in whether you see marks.
First off, bristle type matters. Natural bristles hold more paint but may leave more visible strokes than synthetic ones. And speaking of holding paint, loading your brush right is crucial. Too much or too little paint can both lead to marks.
Stroking technique also plays a role. Long, smooth strokes are better than short, choppy ones. And be sure to lay off – that means using lighter, overlapping strokes at the end of each section to blend and level the paint.
Lastly, keep your brush in good condition. Old, worn-out bristles won’t hold paint well and can leave marks.
Environmental and Surface Factors
The conditions on your jobsite and the state of your substrate can speed up drying time, leaving you with visible brush strokes.
Temperature’s a big factor. Warmer temperatures make paint dry faster. But remember, too fast isn’t always better. Quick-drying paint doesn’t have time to level out and hide marks.
Humidity also plays a role. High humidity can slow down drying, but it can also lead to poor adhesion and other issues. As for your substrate, if it’s rough or porous, it’ll absorb more paint, leaving less on the surface to level out.
So, keep an eye on these factors. If you’re painting in hot, dry conditions, you might need to slow down drying time with a humidifier or by using a slower-drying paint.
Tools and Materials Checklist
Put together a practical set of brushes, abrasives, and cleaners. Separate items should be ready to use or be clearly labeled for reuse. Check labels for compatibility with your coating system.
Include inspections tools to evaluate smoothness and coverage. Verify whether additives are appropriate with your paint by reading the product data sheet or manufacturer instructions. Keep a clean workspace to avoid cross contamination.
Brushes, rollers, and pads
Before you start painting your trim, make sure you have the right tools for the job.
- Angled sash brush: Ideal for cutting in along edges. Look for synthetic filaments with a 1-1.5″ tip.
- 2-3″ paint roller: Great for larger, flat surfaces. Use a high-density foam or lambswool cover for smooth finishes.
- Mini roller: Perfect for small areas and tight corners. Choose a 4″ nap cover for better control.
- Pad applicator: Useful for applying stain or sealant to trim. Opt for a natural bristle pad with a 3-6″ size.
- Quality check: Inspect brushes and rollers for loose filaments, holes, or uneven surfaces that can cause marks.
Quick rule: Always use applicators suited to the job. Cheap tools lead to poor results.
Additives, thinners, and compatibility testers
To improve paint flow and reduce brush marks, consider using additives. Always test for compatibility first.
- Flow improver: Enhances paint flow to help eliminate streaks. Look for products like Floetrol or Flood PM.
- Retarder: Slows drying time to give you more working time. Consider using products like Penetrol or Retarder Plus.
- Thinner: Reduces paint viscosity, making it easier to apply. Use mineral spirits or water (depending on your paint type) sparingly.
- Compatibility test: Mix a small amount of additive with your paint and observe for separation, clumping, or changed consistency before use.
Quick rule: Always test additives with your specific paint to avoid unwanted reactions.
Sanding and cleaning supplies
Proper sanding between coats ensures smooth, mark-free results. Here’s what you need:
- 120-grit sandpaper: Ideal for light sanding between coats. Use it dry or with a tack cloth.
- Sanding block: Helps maintain even pressure and prevents over-sanding.
- Tack cloth: Removes dust and debris after sanding, ensuring a clean surface for painting.
- Respirator: Protects you from inhaling harmful dust particles during sanding.
- Damp rag or tack cloth: Wipes away any remaining dust before applying the next coat.
Quick rule: Never skip sanding between coats. It’s crucial for a smooth, professional-looking finish.
Choosing the Right Paint and Additives
Choose a trim-friendly paint formulation and sheen that aligns with your project. The goal is even flow and minimal brush drag as you work.
Use a flow enhancer or extender only when recommended by the paint maker. Always follow the label directions for both paint and any additive, and verify any required surface prep notes first.
Paint sheen and formulation effects
The sheen of your paint – gloss, satin, eggshell – affects how it flows and covers. Gloss paints have better leveling but show more imperfections. Satin or eggshell offer a compromise.
Oil-based paints flow well, hide better, but take longer to dry. Waterborne paints are faster drying, easier to clean up, but may require more coats for full coverage.
Tip: For trim, consider satin or semi-gloss sheens and oil-based or high-quality waterborne formulations.
Using flow improvers and extenders safely
Flow improvers help paint spread evenly, reducing brush marks. Extenders slow drying time for better leveling. Both can be added to waterborne paints.
To use them safely, first assess if your paint needs improvement. Then, follow the manufacturer’s dosing instructions or start with a small test ratio on a scrap piece of trim.
Caution: Overuse can cause excessive sagging or slow drying, leading to poor results.
Compatibility testing and colorants
Before adding any additive, test it with your specific paint. Mix a small amount in a cup, apply it on a scrap piece of trim, let it dry.
Check for proper flow, leveling, and no adverse reactions like curdling or separation. If you’re tinting the paint, do this test after tinting to ensure the colorant doesn’t affect flow.
Remember: Always follow manufacturer guidelines for testing and using additives with their paints.
Prep and Priming for a Smoother Surface
Start with a clean, dust-free surface and remove any old coatings that could cause texture. Fill dents and gouges so the substrate is consistent to the touch.
Choose a primer that promotes even adhesion and helps seal the substrate. Check for surface smoothness with a light pass and verify that the primer recommended by the manufacturer is suitable for trim.
Cleaning, filling, and deglossing
Start by removing all dirt, grease, and grime from your trim. Use a degreaser or soap and water solution.
Fill nail holes and gaps with spackling compound using a putty knife. Let it dry, then sand smooth with fine-grit sandpaper.
If your trim is glossy, degloss it to promote paint adhesion. Use a deglosser or lightly sand with medium-grit paper, then wipe clean.
Primer selection and application tips
Choose the right primer for your substrate. Bonding primers are great for bare wood, while stain-blocking primers work well on knots or stains.
Apply primer evenly with a brush or roller, following the grain of the wood. Let it dry according to the manufacturer’s instructions.
Proper priming reduces the number of finish coats needed and minimizes brushing artifacts. It also helps paint laydown and adhesion.
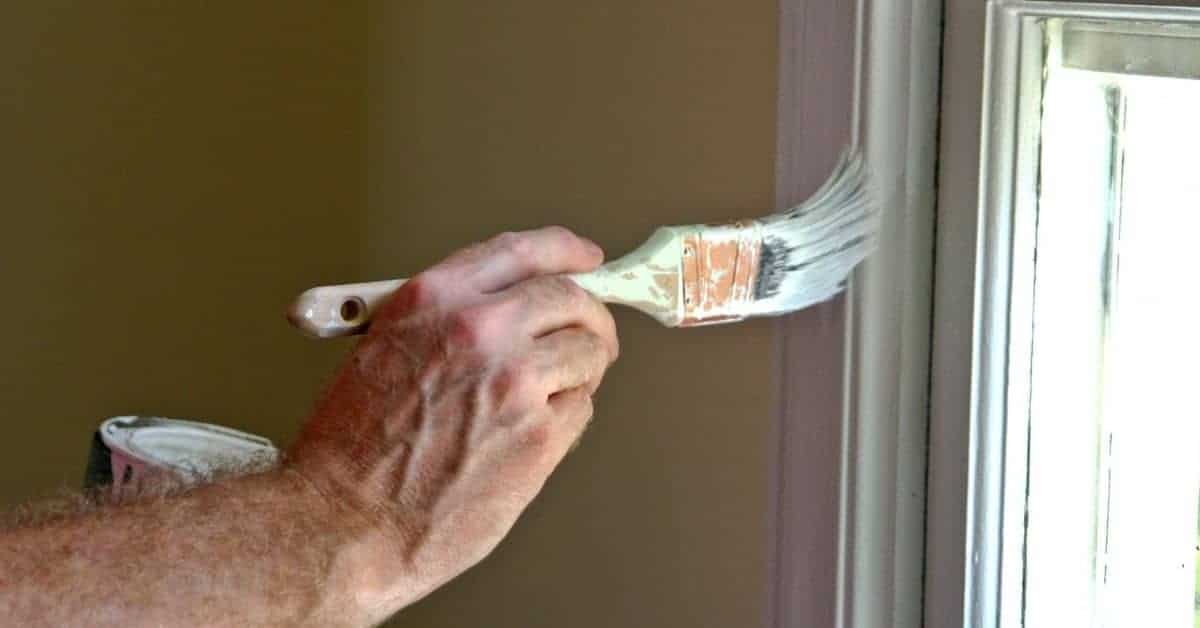
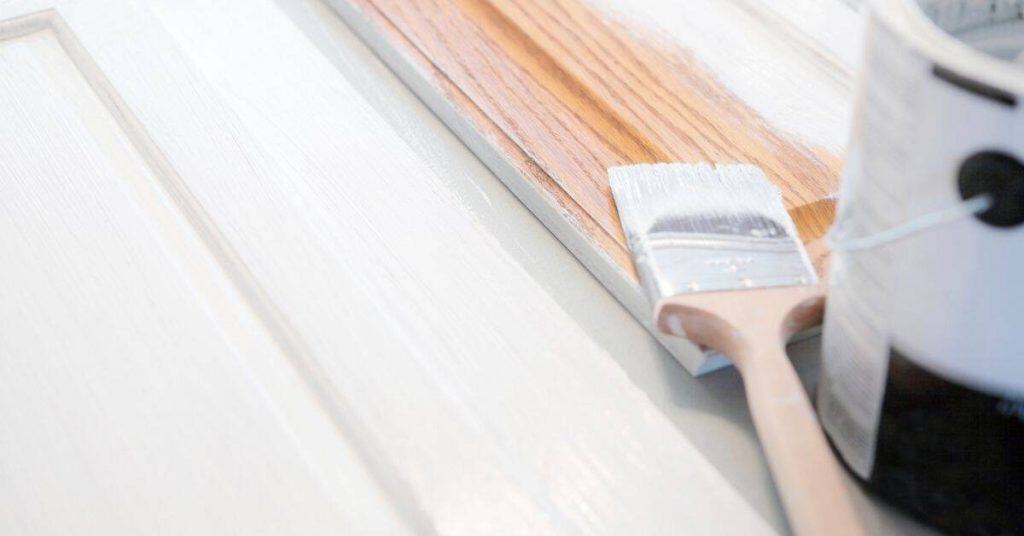
Brush Technique and Layoff Method
Load the brush with a consistent amount of paint and avoid overloading. Use long, even strokes to keep the brush in contact with the surface.
Finish with a layoff to blend marks while the coating is still wet. Practice maintaining a wet edge and watching for slight changes in glide and drag as you work.
Loading the brush and stroke patterns
Dip your brush about two-thirds into the paint. Swirl it around to coat evenly, avoiding globs.
For directional strokes, start at one end of the trim piece and pull the brush towards you in smooth, steady motions. This works well for long, straight pieces.
Feathering involves overlapping strokes, starting with a heavier load and gradually reducing paint as you move across the surface. This helps blend edges and reduce visible marks.
The layoff technique explained
Lay off when you reach the end of a trim piece or need to stop for any reason. Lightly stroke back over previously painted areas, flattening bristle lines and evening out paint.
Use light pressure and short strokes, working from one direction only. This helps maintain a consistent finish across all trim pieces.
When you resume painting, start at the point where you laid off, blending in with your previous stroke pattern.
Maintaining a wet edge and timing between panels
Keep an eye on your paint’s drying time. You want to lay off just before it starts to lose its tackiness.
For long trim runs, work in sections, keeping the edges wet by occasionally brushing back over them with light strokes. This helps prevent visible lines where sections meet.
Time your work so that you can lay off and then resume painting within a few minutes. This gives you enough time to maintain a consistent finish without leaving visible marks.
Sanding Between Coats for Professional Results
Light sanding between coats smooths nibs and raises fibers for a flat final look. Use a fine grit suitable for your coating to avoid creating new scratches.
Dust carefully and wipe the surface before the next coat. Confirm you are following safety and dust-control guidance on the product label or SDS.
Grit Selection and Sanding Technique
When it comes to sanding between coats, you want a fine abrasive grit that won’t leave deep scratches. I recommend using 220 or 320-grit sandpaper for your final coats.
Here’s how to use it: Start with light pressure and work in cross-grain motions. This helps remove nibs – those tiny raised bits of paint – and smooth out any raised fibers. After a few strokes, switch to longitudinal motions to ensure you’ve covered the entire surface.
Remember, every product’s different. Always check the manufacturer’s guidance for their recommended grit range.
Surface Cleaning and Inspecting Before Recoating
Before you grab your paintbrush again, you need to clean the surface. Dust can ruin a perfect finish.
First, use a tack cloth. It’s sticky, so it’ll pick up dust and debris. Run it over the surface in long, smooth strokes. If you don’t have one, a damp cloth will do, but make sure it’s not too wet – we don’t want water marks.
Next, give it a once-over with a vacuum or a soft brush to remove any remaining dust. Then, inspect the surface. Look for any missed spots, raised grains, or other defects. This is your last chance to catch them before they’re sealed under another coat.
Troubleshooting Common Problems and Fixes
If brush marks appear after curing, identify whether leveling or adhesion was the issue. Try a targeted fix in a small, inconspicuous area first.
Address sags, drips, orange peel, or fisheyes with approved methods and materials. Always verify fix steps against manufacturer instructions and test before broader application.
When brush marks remain after the final coat
If you’re left with visible brush strokes after your paint has cured, don’t panic. First, assess if they’re correctable or cosmetic.
Correctable: Lightly sand using 220-grit paper, follow up with a tack cloth to remove dust. Recoat with a fresh layer of paint, ensuring you maintain a wet edge and proper layoff technique.
Cosmetic: For deeper marks, you might need to spot-sand more aggressively (up to 80-grit), refill if necessary, then prime and recoat. Always test in an inconspicuous area first.
Dealing with runs, sags, and heavy brush lines
Sags and drips happen. Here’s how to fix them:
Let the paint partially dry (until it’s no longer wet but still tacky). Lightly sand using 220-grit paper, working perpendicular to the line. Be gentle – you don’t want to create more damage.
Once sanded, wipe off dust with a damp cloth. Let it dry, then spot recoat using a small brush or foam applicator. Work in thin layers, allowing each to dry before assessing if more coats are needed.
Surface texture issues like orange peel or fisheye
Orange peel and fisheyes can be caused by incompatible products, incorrect thinning, or application errors. Here’s how to tackle them:
Compatibility: Ensure your primer, paint, and any additives are compatible. Test in an inconspicuous area if unsure.
Thinning strategy: If using latex, thin with water (10-15%). For oil-based paints, use the recommended thinner. Stir well before each use to maintain consistency.
Severe cases: If texture issues persist, you might need to strip the paint and restart. Sand lightly (220-grit), clean, prime, and repaint using proper technique and compatible products.
Step-by-Step Workflow and Timing for Trim Painting
Outline a sequence from prep through the final coat and note practical checkpoints. Plan to work doors, window casings, and baseboards in stages to manage flow.
Schedule realistic breaks to maintain a wet edge and avoid rushing. Use a steady pace and verify consistency with each stage as you progress.
Step-by-Step Process
This section guides you through a clear, numbered sequence of practical steps for trim painting. It starts with preparation and safety checks, then covers the main work, and finishes with cleanup or final checks.
- Preparation: Gather your materials – paint, primer (if needed), brushes, sandpaper, etc. Check the weather forecast to ensure a suitable painting environment.
- Safety Checks: Ensure the area is well-ventilated. Cover nearby surfaces with drop cloths. Put on gloves and safety glasses.
- Main Work – First Coat: Begin at the top of each trim piece, working your way down. Use the layoff technique explained earlier in this article. Maintain a wet edge to avoid visible brush marks.
- Sanding Between Coats: After the first coat dries (follow the drying time on the paint can), lightly sand the surface using 220-grit sandpaper. This helps to smooth out any imperfections and ensures better adhesion for the next coat.
- Cleanup: Wipe off any dust from sanding with a damp cloth. Allow the trim to dry before applying the second coat. After completing all coats, clean your brushes thoroughly and remove drop cloths.
Typical sequence for one trim element (case study)
Here’s a concise sequence of steps to follow when painting a single piece of trim. This example assumes you’re using the recommended primer and paint.
Preparation: Gather your materials, ensure the trim is clean and dry, and perform any necessary repairs.
Priming: Apply a coat of primer, following the manufacturer’s instructions. This helps to seal the surface and improve paint adhesion.
First Coat: Once the primer is dry (usually 1-2 hours), apply your first coat of paint using the layoff technique. Maintain a wet edge to avoid visible brush marks. Allow this coat to dry according to the paint can’s instructions before proceeding.
Job planning and environmental controls
When painting multiple trim pieces, it’s important to plan your work sessions effectively. This helps you maintain a consistent workflow and avoid rushing through coats.
Staging: Group similar trim pieces together (e.g., all window casings in one area, baseboards in another). This allows you to work on multiple pieces at once without having to wait for each one to dry completely.
Environmental Controls: Try to maintain a consistent temperature and humidity level while painting. Ideal conditions are between 65-85°F (18-29°C) with low humidity. If possible, move trim pieces indoors if the weather becomes too hot or humid.
Planning Work Sessions: Allocate enough time for each coat to dry properly. Rushing through coats can lead to visible brush marks and other issues. Plan your work sessions accordingly, allowing at least 4-6 hours between coats (or as recommended by the paint manufacturer).
Conclusion
Painted trim that looks smooth and durable starts with solid prep, careful technique, and safe habits you can trust to hold up under daily use. If you follow the steps and test adjustments first, you’ll finish with less rework and fewer brush marks, and you’ll protect the surrounding surfaces and your own safety.
First, test a small area and confirm the right paint and additive mix, then prep and prime the surface, choose the correct application method, and lay off while the paint is still workable. Next, apply in one direction with steady tool control, wait the recommended dry times, lightly sand between coats, and repeat the sequence for a clean, professional finish. Finally, inspect the work, clean your tools, and store materials properly to avoid surprises later.
Common mistakes to avoid are skipping a test spot, using improper or incompatible additives, and overworking the paint on the trim. Also watch out for rushing through coats, skipping sanding between coats, and neglecting ventilation and eye or breathing protection. Safety rules: wear a dust mask or respirator as needed, use a stable ladder and clear work area, and never mix finishes without checking compatibility.
If you’re dealing with lead paint, structurally compromised trim, or you’re unsure about room ventilation or masking, it makes sense to call a professional. When in doubt, don’t push past safe limits—plan, test, and proceed step by step, and you’ll finish confident and ready to move on to the next project with a job that lasts.
FAQ
Why do brush marks show up after painting trim, and what should I check first?
Brush marks usually come from improper layoff, thick coatings, or a sticky surface. Check that you’re using the right paint and that the surface is clean, dry, and properly primed. Always follow the product label for recoat times and any prep steps.
What’s the best way to use a layoff technique without creating new marks?
Apply a thin, even coat and use a soft, smooth stroke along the wood grain while the paint is still workable. Don’t drag the brush back over the just-applied area too soon. If you see ridges forming, lightly blend them with short, straight passes before the coating dries.
Are additives worth using, and how do I pick them without risking adhesion problems?
Some additives can help flow and leveling, but they must be compatible with your paint. Always check the label or manufacturer instructions for compatibility and mixing ratios. If in doubt, test a small area and verify with the product’s guidance and local rules.
When should I sand between coats, and what’s the safe approach?
Sand between coats when the previous coat is dry to the touch but not fully cured, using a light, even motion. Wipe away dust after sanding and inspect for any texture or brush marks before applying the next coat. Follow the paint label for any specific sanding notes and safety suggestions.