
Introduction
Pinholes in Venetian plaster are small surface holes that appear when the plaster or glaze dries with trapped air.
They usually come from air pockets formed during mixing, application, or drying, especially if coats are too thick or work is too wet. Filling them after the fact is harder than preventing them.
To prevent pinholes, keep a steady hand, work in thin, even coats, and avoid overworking the surface.
Make sure the surface is clean and free of dust, and follow the manufacturer’s instructions for mixing, priming, and drying. If pinholes still show up, identify whether the issue was moisture, temperature, or product quality and adjust your approach accordingly, checking labels for guidance.
Key takeaways
- Proper substrate prep key: clean, dry, dust-free to prevent pinholes formation.
- Inspect plaster for air pockets and avoid overworking to minimize pinholes.
- Use even trowel passes with consistent pressure during application to prevent pinholes.
- Environmental factors: regulate humidity and cure conditions to reduce pinhole risk.
- Visual checkpoints: pause before finish coat, recheck with raking light and flashlight.
- Safety: wear eye protection and respirator when sanding plaster edges or dust.
Table of Contents
- Introduction
- Key takeaways
- Quick Overview: What Pinholes Are and Why They Matter
- Common Root Causes of Pinholes
- Environmental Factors That Increase Pinhole Risk
- Substrate Preparation and Corrective Steps Before Plastering
- Tools and Materials Checklist for Preventing Pinholes
- Application Tweaks and Step-by-Step Technique to Minimize Pinholes
- Visual Checkpoints and in-Process Quality Control
- Repair, Remediation, and Preventative Maintenance After Installation
- Conclusion
- FAQ
Quick Overview: What Pinholes Are and Why They Matter
Pinhole defects in Venetian plaster show up as small hollow spots or tiny craters on the finished surface. They can look like air pockets that never fully filled or surfaced after troweling. These points can catch light differently and may allow moisture to seep behind the layer if left untreated.
Beyond appearance, pinholes can compromise sheen, durability, and washability. They often become focal points where dirt collects or where the plaster wears unevenly. Understanding what you’re seeing helps you decide if you need a repair or a tweak to your method moving forward.
Definition and typical appearance
Pinholes in Venetian plaster are tiny, crater-like imperfections that appear on the surface. They’re smaller than blisters or dust nibs – usually around 1/16 to 1/8 inch in diameter.
They can be scattered randomly or form clusters. To spot them, look closely at your finished surface under natural light. You might need a magnifying glass for a closer inspection.
Pinholes are distinct from dust nibs – which are tiny indentations caused by trapped air or particles – and blisters, which are larger, raised bumps that can burst.
Aesthetic and functional impacts
Pinholes mar the smooth, seamless look of Venetian plaster. They stand out like tiny craters on an otherwise flawless surface, detracting from its beauty.
Functionally, pinholes can compromise durability. Moisture or dirt can get trapped inside, leading to further deterioration over time. This can affect subsequent coatings or sealers, making them less effective and potentially causing them to peel or crack.
Long-term consequences: Untreated pinholes can grow in size, become more numerous, and eventually lead to costly repairs or even replacement of the entire surface.
Common Root Causes of Pinholes
Pinholes usually trace back to three areas: the substrate, the mix, and the application process. A porous or uneven base can pull air and impact how the plaster cures. Cracks or holes in the substrate can invite air to migrate into the layer above.
Mixing errors, wrong consistency, or insufficient adhesion can trap air in the plaster. Application technique like high-speed troweling or rushed passes often seals in air pockets. Identifying which stage caused the issue helps you fix it at the source.
Substrate-related causes
The surface you’re applying Venetian plaster to plays a big role in pinhole formation. Here’s what to look out for:
Porosity: If your substrate is too porous, it can suck moisture out of the plaster too quickly, leaving air pockets that turn into pinholes.
Contamination: Any dirt, grease, or other contaminants on the surface can prevent proper adhesion and cause air to get trapped, leading to pinholes.
Unevenness: If your substrate isn’t smooth and even, it can create low spots where air gets trapped and forms pinholes.
Material and mixing-related causes
The materials you use and how you mix them can greatly impact the final result. Here are some common issues:
- Incorrect water ratio: Too much or too little water can cause air to get trapped in the mixture, leading to pinholes.
- Overmixing: Overworking the plaster can introduce air bubbles that show up as pinholes later on.
- Trapped air: If your mixing process doesn’t properly release air from the plaster, it can lead to pinholes.
- Inconsistent batches: Using different materials or ratios for each batch can cause inconsistencies that show up as pinholes.
- Wrong material: Using a material with poor quality or incorrect rating can result in cracking, staining, and weak bond, which can also lead to pinholes.
Application and technique-related causes
The way you apply the Venetian plaster can also cause pinholes. Here are some common application mistakes:
Trowel pressure: Using too much or too little pressure with your trowel can entrain air into the plaster, leading to pinholes.
Speed: Working too fast can cause you to miss spots and leave air pockets that turn into pinholes.
Overworking: Overworking the plaster can introduce air bubbles and cause pinholes. Be sure not to overwork the material once it’s on the wall.
Incorrect layering: Applying coats too thickly or without proper curing time between layers can trap air and lead to pinholes in successive coats.
Environmental Factors That Increase Pinhole Risk
Drying environment matters a lot. Temperature, humidity, and airflow influence how quickly plaster releases air as it cures. If the area is too dry or too warm, faster evaporation can pull air into the surface.
Monitor conditions and compare them to the product’s guidance. If you see rapid surface setting, pause and adjust airflow or moisture levels accordingly. Following supplier recommendations reduces unexpected pinholes during cure.
Temperature and humidity considerations
Too high or too low temperatures, and excessive humidity can mess with your Venetian plaster’s drying time. This can lead to pinholes.
Check the manufacturer’s guidelines for ideal temps (usually 70-85°F or 21-29°C) and relative humidity (40-60%).
Too hot or humid? Slow down drying with fans on low speed. Too cold or dry? Warm up the room and add moisture.
Airflow and draft control
Strong drafts or localized airflow can create a skin on your plaster that traps air underneath. This forms pinholes as the trapped air tries to escape.
Manage ventilation during application:
– Keep windows closed.
– Use fans, but not too close or strong.
– Avoid applying in areas with direct drafts (like near open doors).
Substrate Preparation and Corrective Steps Before Plastering
Clean and dry the substrate so it won’t carry dust or residue into the plaster layer. Patch any holes or gouges and level high spots to reduce air movement beneath the coat. A stable base helps the plaster lay down smoothly.
Prime or seal as the product dictates to control absorption. Test a small area if you’re unsure how the substrate will interact with the plaster mix. These prep steps cut down the risk of pinholes forming after application.
Cleaning, patching, and leveling
The first step to preventing pinholes is a clean, uniform surface. Use a degreaser or TSP to remove dirt, grease, and old paint.
Fill any gaps, voids, or cracks with a suitable filler. Let it dry, then sand smooth. A level surface reduces air pockets and suction that cause pinholes.
Pro tip: Inspect your substrate under bright light to spot any missed imperfections.
Primers, sealers, and material specs explained
Choosing the right primer or sealer is crucial. It affects adhesion, absorption, and final appearance.
- Acrylic primers: Good for most surfaces. Promotes adhesion, seals pores. Use with Venetian plasters rated for it.
- PVA primers: Suitable for porous surfaces. Reduces absorption, improves adhesion. Avoid with high-gloss plasters.
- Shellac sealers: Ideal for preventing tannin bleed. Use before plastering on natural woods.
- Avoid: Latex primers. They can cause cracking and weak bonds with Venetian plasters.
Moisture checks and substrate testing
Before plastering, check your substrate’s moisture content. Excessive moisture can cause pinholes and weak adhesion.
Use a moisture meter to test. Follow product-specific thresholds for acceptable levels. If it’s too high, wait until the surface dries or use a dehumidifier.
Pro tip: Test multiple spots as moisture levels can vary across the substrate.
Tools and Materials Checklist for Preventing Pinholes
Assemble the right trowel, mixing container, and a reliable mixer. Include clean water and any recommended primers or bonding agents. Have a few leveling tools ready for quick adjustments as you work.
Keep testing tools handy to check consistency and adhesion on a sample or scrap board. Refer to the product label or instructions to confirm what to use and in what sequence. A ready checklist keeps missteps from creeping in.
Essential tools and consumables
Before you start, make sure you have the right tools. This checklist helps reduce pinholes.
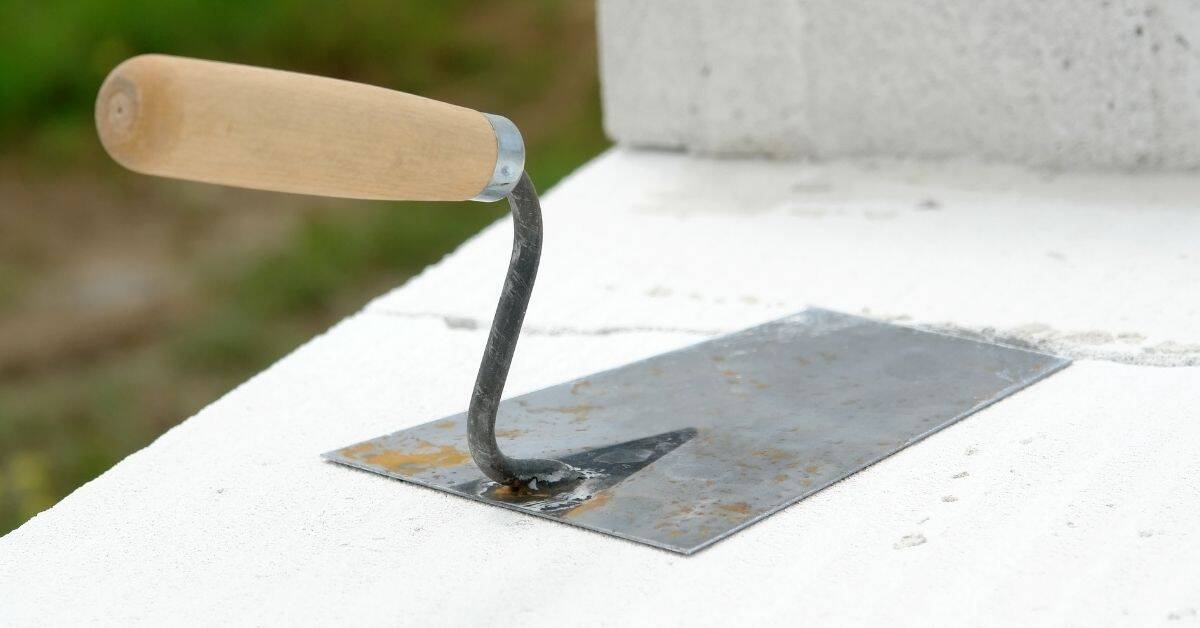
- Trowels: Use high-quality trowels (6″ – 12″) for smooth application. Dull trowels cause streaks and pinholes.
- Floats: Smooth surfaces with floats to remove excess material and reduce pinholes.
- Mixing buckets: Use clean, dedicated buckets for each plaster batch to avoid contamination.
- Filters: Strain materials through filters or sieves (1/8″ – 1/4″) to remove lumps and air pockets.
- Scrapers: Use scrapers to clean tools and remove excess material, preventing buildup that causes pinholes.
- Tape measure: Accurate measurements prevent over-applying or under-applying plaster, which can lead to pinholes.
- Level: Ensure surfaces are level before applying plaster. Uneven surfaces cause pinholes and poor finish.
- Plastic sheeting: Cover floors and nearby areas to protect from drips and splashes that can harden into pinholes.
Quick rule: Invest in quality tools. Clean, sharp trowels and floats are your best defense against pinholes.
Mixing equipment and aids
Proper mixing reduces air entrapment, preventing pinholes. Here’s what to check.
- Drill: Use a variable-speed drill (600 – 800 RPM) with a paint mixer attachment for consistent results.
- Mixer attachment: Ensure the mixer is clean and in good condition to avoid introducing contaminants or air into the mix.
- Mixing time: Mix materials thoroughly (5 – 10 minutes) to ensure even consistency and reduce air pockets.
- Speed control: Maintain a steady, moderate speed. Too fast introduces air; too slow leaves unmixed material.
- Mixing container: Use a large enough container (at least 5 gallons) to allow the mixer to move freely and thoroughly mix materials.
- Water temperature: Check water temperature (70°F – 80°F). Too hot or cold affects plaster curing and can cause pinholes.
- Plaster-to-water ratio: Follow manufacturer guidelines for accurate ratios. Incorrect ratios lead to improper curing and pinholes.
Quick rule: Thorough, consistent mixing at the right speed prevents air entrapment and reduces pinholes.
Additives, admixtures, and compatibility notes
Additives enhance plaster performance. Ensure they’re compatible before use.
- Plasticizers: Add to improve workability and reduce cracking. Check manufacturer guidelines for correct amounts.
- Retarders: Slow curing time, useful in hot or humid conditions. Verify compatibility with your plaster product.
- Accelerators: Speed up curing. Ensure they’re compatible and used correctly to prevent pinholes from rapid curing.
- Consistency agents: Improve flow and reduce segregation. Check manufacturer guidelines for correct usage.
- Colorants: Add for desired color. Ensure they’re compatible with your plaster product and follow mixing instructions.
- Fungicides/Mildewcides: Prevent mold growth. Verify compatibility and follow application guidelines.
Quick rule: Always check additive compatibility with your specific plaster product to prevent pinholes or poor curing.
Application Tweaks and Step-by-Step Technique to Minimize Pinholes
Work with a consistent mix and avoid over-agitation to prevent air introduction. Apply in controlled passes and avoid stopping mid-coat unless you’re ready to blend. Use a light touch to blend edges rather than digging into the surface.
Time your steps so each layer has a chance to settle before the next pass. Test tweaks on sample boards first and compare results against your target finish. Use the manufacturer’s guidance for unintended textures and filling strategies.
Step-by-Step Process
Follow these practical steps to minimize pinholes while applying Venetian plaster. Safety checks, main work, and cleanup are all covered here.
- Preparation: Gather tools, check safety gear, and test a small area first.
- Mix plaster: Follow manufacturer’s instructions for consistency and additives.
- Apply base coat: Spread evenly with trowel, using even pressure. Let it set until it’s no longer sticky but not completely dry.
- Apply second coat: Use same technique, working in small sections to avoid overworking the surface. Let it set again.
- Burnish and polish: Use a soft cloth or trowel to smooth out any imperfections. Check for pinholes and address them before final polish.
- Cleanup: Wipe tools clean with damp cloth, rinse if necessary. Store properly until next use.
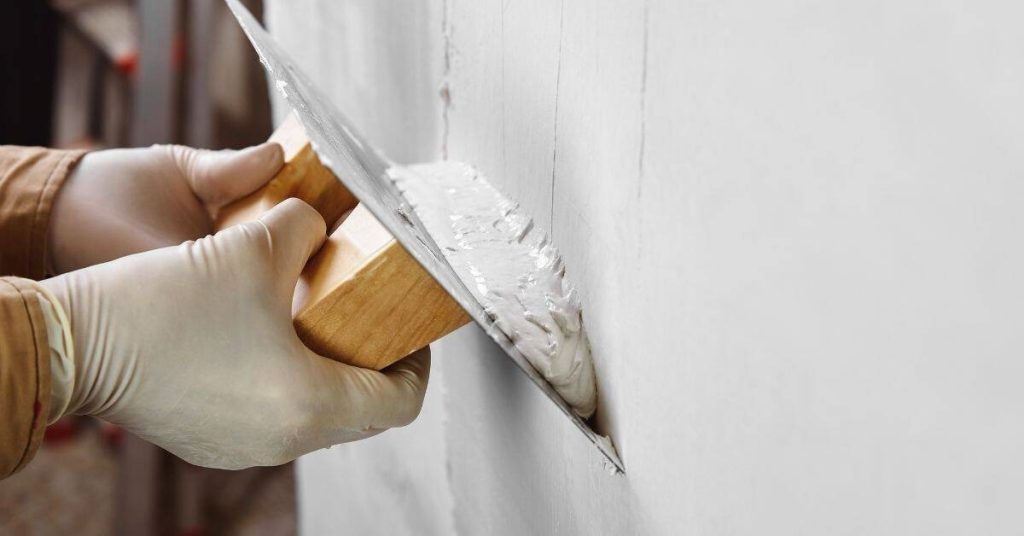
Trowel technique, pressure, and stroke strategy
Mastering trowel technique is key to minimizing pinholes. Here’s how:
Start with a light touch. Too much pressure can trap air and create pinholes.
Angle the blade at about 45 degrees. This helps spread the plaster evenly without pushing it around too much.
Maintain a steady rhythm. Quick, jerky strokes can introduce air bubbles. Slow, controlled movements are best.
Layering strategy: number of thin coats vs heavy coats
Thinner coats are your friend when it comes to minimizing pinholes. Here’s why:
Heavy coats can trap air and create pinholes as they dry. Thin coats allow for better control and even drying.
Let each coat set until it’s no longer sticky but not completely dry before applying the next one. This gives trapped air a chance to escape.
Follow product recommendations for recoat windows. Some plasters need more time between coats than others.
Burnishing, polishing, and final finishing adjustments
Finishing steps can make or break your Venetian plaster job. Here’s how to get it right:
Use a gentle touch when burnishing. Too much pressure can create new pinholes.
Pause occasionally during polishing to allow trapped air to escape. This helps prevent pinholes from forming as the plaster dries completely.
Check for pinholes regularly throughout the finishing process. Address any you find promptly to avoid them becoming bigger or more noticeable.
Visual Checkpoints and in-Process Quality Control
Inspect the surface during and right after application for obvious pinholes or pin-sized hollows. Look for uneven sheen, gaps, or air bubbles that show through the top coat. Address defects before proceeding with additional coats.
Use a simple touch-up test on a small area to confirm the fix blends in. Keep a log of what you changed and the results so you can repeat successful steps. Early detection saves larger repair work later.
Early inspection cues and what they indicate
Inspect your Venetian plaster work in progress to catch pinholes early. Here’s a checklist to guide you.
- Tiny dimples: These could be air pockets or improperly mixed material. Use a trowel tip to pop them and rework the area.
- Uneven sheen: This might indicate varying trowel pressure or inconsistent layering. Adjust your technique for even results.
- Crackling sounds: These often signal trapped air. Lightly mist the area and rework it.
- Dry spots: These can lead to pinholes if not addressed. Misting and reworking should help.
- Wrinkles or ripples: These are signs of too much material or improper spreading. Lightly sand and reapply.
- Bubbles: These usually mean trapped air or moisture. Pop them with a trowel tip and rework the area.
- Dark spots: These could indicate contamination. Remove affected material and start fresh.
- Feeling resistance while troweling: This might mean you’re hitting something under the surface. Lightly sand and reapply.
Quick rule: If in doubt, mist, rework, or lightly sand. It’s easier to fix now than later.
Mid-application interventions
If you spot issues mid-application, here are some safe corrective actions to take.
- Air pockets: Use a trowel tip to pop them. Rework the area gently to redistribute material.
- Uneven layering: Lightly mist the area and rework it for better distribution.
- Dry spots: Misting should help, but if not, lightly sand and reapply.
- Wrinkles or ripples: Lightly sand to remove them. Be careful not to sand too deep.
- Bubbles: Pop them with a trowel tip. If they keep forming, you might need to let the area rest and come back later.
- Dark spots: Remove affected material. Start fresh in that spot.
- Feeling resistance while troweling: Lightly sand to remove any buildup. Be careful not to sand too deep.
Quick rule: If you’re unsure, it’s better to let the area rest and come back later. Rushing can make pinholes worse.
Repair, Remediation, and Preventative Maintenance After Installation
For isolated pinholes, plan a targeted spot repair with matching plaster and careful feathering. Decide whether a light recoat is necessary based on the area’s depth and surrounding finish. Follow up with an appropriate sealing or topcoat if recommended by the product data.
Institute a maintenance routine to monitor for new pinholes and address them promptly. Consider periodically testing adhesion and surface condition to catch issues before they spread. Use product guidance as your baseline for prevention going forward.
Spot repair and patching techniques
For isolated pinholes, spot repairs are your best bet. Here’s how:
Step 1: Clean the area around the pinhole with a damp cloth to remove any dust or debris.
Step 2: Use a compatible patch material – usually a thin mix of Venetian plaster and water. Apply it sparingly over the pinhole using a small trowel, feathering out the edges to blend with the surrounding surface.
Step 3: Let it dry, then lightly sand and buff the area to match the sheen of the rest of your wall.
When to remove and redo vs remediate
Not all pinholes are created equal. Some may indicate bigger issues:
If you find multiple pinholes or larger defects, it might be a sign of systemic problems like poor substrate preparation or inconsistent application. In such cases, you might need to remove the affected area and start over.
However, if you’re dealing with just a few isolated pinholes, targeted remediation – as explained in the previous section – should suffice. It’s all about assessing the scale and cause of the problem.
Conclusion
Pinholes aren’t a mystery flaw if you treat them as a symptom you can control: proper prep, careful application, and smart maintenance protect the look and the life of the plaster. Prioritize safety, protect framing and wiring, and you’ll avoid costly fixes later.
Check these steps in order as you finish: confirm the substrate is sound and clean, apply any corrective prep you noted, set up the room with proper ventilation and illumination, follow the application tweaks and step-by-step technique, then perform visual checkpoints and in-process quality control before the final coat dries. Test a small area first, then move to larger sections, and keep a log of any adjustments you make so you don’t repeat mistakes.
Common mistakes to avoid are skipping substrate prep, rushing the mix or environmental controls, and ignoring early signs of pinholes during the first pass. Never work with damp or overheated surfaces, and always wear eye protection and a dust mask. If you notice persistent pinholes after a repair pass, or you’re unsure about the substrate or environmental limits, pause and reassess rather than pushing through—repair now can save you from bigger problems later.
If the problem repeats after multiple repairs, or the surface constraints are outside your comfort zone, it makes sense to bring in a professional. A good pro can validate the substrate, optimize the mix and technique for your room, and quickly prevent recurring issues. Stay steady, stay safe, and you’ll have a durable, smooth finish you can be proud of.
FAQ
Why do pinholes show up after plastering, and what should I check first?
Look for surface moisture, dust, or loose material that could trap air. Check your substrate and primer compatibility, and review the plaster manufacturer’s instructions for application and cure. If in doubt, confirm with the product label or local contractor guidance before reworking.
Is it okay to fix pinholes with a quick spray of water or a new skim coat right away?
A light mist can cause more problems if the surface isn’t ready. Follow the product’s drying and recoat recommendations, and use a thin, compatible skim coat to fill pinholes, feathering the edges to blend.
What steps help prevent pinholes during the actual plaster application?
Keep the mix workable and free of air. Use the correct trowel technique, don’t overwork the surface, and apply in controlled passes with a consistent bed depth. Check that your primer, plaster, and substrate are all compatible per the manufacturer’s instructions.
How do I repair pinholes if they appear after the first repair or soon after finishing?
Clean the area, lightly roughen the pinhole area to ensure adhesion, and apply a thin, compatible skim coat. Feather the edges, let it cure as instructed, and recheck for a uniform finish before final sealing or painting.