
Introduction
Raised paint edges at tape lines are ridges formed where tape seals and paint creeps under. This guide shows how to sand them smooth and refinish without pulling off surrounding paint. Use a light touch, gentle feathering, and follow the tape and paint manufacturer’s instructions.
Sanding should be light and even, targeting only the raised edge without digging into surrounding paint. Wipe away dust and reapply paint along the tape line with a smooth, controlled stroke, keeping the line crisp. If the edge reappears, recheck the products’ instructions and local rules before trying again.
Key takeaways
- Inspect tape edges for raised lines and moisture before starting sanding.
- Lightly sand along the edges with consistent, even strokes to blend.
- Use sanding blocks or pads for flat, uniform contact across surfaces.
- Match edge repair materials to existing paint and substrate for compatibility.
- Test cleanup and recoat on a hidden area before full resurfacing.
- Wear eye protection and a respirator when sanding dust is generated.
Table of Contents
- Introduction
- Key takeaways
- Quick Diagnosis: What “Raised Paint Edges” Are and When to Sand
- Tools and Materials Checklist
- Surface Assessment and Visual Checkpoints Before Sanding
- Sanding Strategy: Step-by-Step Approach
- Blending, Filling and Edge Repair Techniques
- Recoat Strategy and Product Compatibility
- Drying, Inspection, and Final Quality Checkpoints
- Prevention and Best Practices to Avoid Raised Edges in Future Jobs
- Conclusion
- FAQ
Quick Diagnosis: What “Raised Paint Edges” Are and When to Sand
Raised paint edges occur where tape lines create a ridge as the top layer dries and shrinks. They look like a visible edge that catches light differently from the surrounding field paint.
Distinguish them from dirt nibs, solvent bubbles, or film shrinkage by inspecting the edge under lighting and feel. Sanding and a subsequent recoat are typically appropriate when the edge is the primary defect, but stripping or full refinishing may be needed for severe cases or compromised substrate.
Common causes at tape lines
Raised paint edges at tape lines are typically caused by a few common issues. Understanding these can help you decide the best repair method.
Tape pull: If the tape was removed too soon or wasn’t well-adhered, it can cause raised edges. This usually requires sanding and recoating.
Heavy build at edge: Overapplying paint at the tape line can lead to raised edges. Sanding and feathering out the excess before recoating should fix this.
Incompatible coats: Using different types of paint or primer that aren’t compatible can cause raised edges. This might require stripping and refinishing.
When sanding is appropriate vs when to remove coating
Before you start working, check a few things to decide if sanding and recoating will work.
Surface hardness: If the paint is still soft or tacky, it’s too soon to sand. Wait until it’s completely dry and hard.
Adhesion test: Perform a simple adhesion test by sticking a piece of tape on the raised edge and pulling it off. If the paint comes off with it, you’ll need to remove the coating and start over.
Extent of defect: If the raised edges are extensive or cover large areas, sanding might not be enough. In this case, consider removing the entire coating and refinishing.
Tools and Materials Checklist
Assemble a compact set of abrasives, from fine to very fine, plus a sanding block or pad. Include a compatible primer or filler appropriate for the existing paint system.
Gather finish coats, masking tapes, and a finishing product compatible with the base paint. Always verify product labels, data sheets, or manufacturer instructions to confirm suitability and compatibility before use.
Abrasives and sanding tools
Before you start, make sure you have the right tools to get the job done. Here’s a quick checklist.
- Sanding blocks: Essential for flat surfaces. Prevents over-sanding.
- Sandpaper sticks: Ideal for edges and corners. Use with care to avoid gouging.
- Grit progression (120, 150, 220): Start coarse, finish fine. Skipping grits can leave scratches.
- Random-orbit sander: For large areas. Reduces swirl marks if used correctly.
- Sandpaper (wet/dry): Use for water-based paints to minimize dust.
- Sanding sponges: Great for curves and contours. Softens touch for gentle sanding.
- Check manufacturer’s guidelines: Always follow their advice on grit choices.
Quick rule: Start coarse, finish fine. Use the right tool for the job.
Primers, sealers and touch-up materials
Choose the right primers and touch-up materials to ensure a smooth finish. Here’s what you need.
- High-build primer: For filling and sealing porous surfaces. Ideal for new drywall or bare wood.
- Thin primer (sealer): For feathering edges and spot repairs. Prevents taped edges from bleeding through.
- Touch-up paint: Match existing color exactly. Use a small amount to avoid waste.
- Stain-blocking primer: For covering stains or knots in wood. Prevents bleed-through.
- Clear sealer (optional): For protecting unfinished surfaces before painting. Allows paint to adhere better.
- Polyester filler (for gaps): For filling small gaps or holes. Sand smooth after drying.
- Check existing paint system: Ensure your primer and touch-up paint are compatible with the current finish.
Quick rule: Use high-build for new surfaces, thin for repairs. Always match existing color.
Tapes, maskants and consumables
Protect your work area and ensure clean lines with the right tapes and consumables. Here’s what you need.
- Painter’s tape: For protecting edges. Blue tape is preferred for its strong adhesion and easy removal.
- Masking paper: For covering large areas. Use with painter’s tape to create clean lines.
- Tack cloths: For removing dust before painting. Essential for a smooth finish.
- Cleaning agents (soap, water): For cleaning surfaces before taping. Ensures good adhesion.
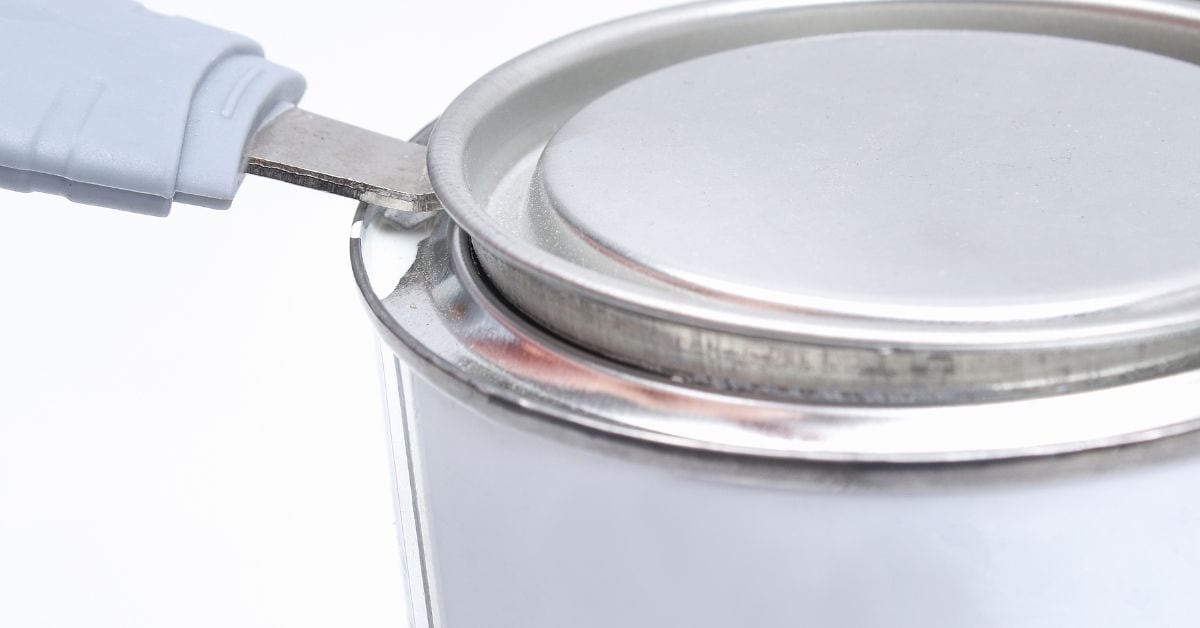
- Mixing sticks: For stirring paint and primer. Prevents lumps and ensures even consistency.
- Safety glasses: Protect your eyes from debris and splashes. Always wear when sanding or painting.
- Dust mask (respirator): Protect your lungs from dust particles. Use when sanding dry surfaces.
Quick rule: Tape first, clean later. Always wear PPE for safety.
Surface Assessment and Visual Checkpoints Before Sanding
Run an adhesion test in an inconspicuous area to confirm the surface will hold a new coat. Inspect the edge profile and ensure there is a distinct ridge that is not simply surface dirt.
Check flash and dry times per the product label and observe substrate condition for any peeling or soft spots. Visual cues should guide whether sanding alone will fix the issue or if a more involved repair is needed.
Adhesion and contamination checks
Before you start sanding, check your paint’s adhesion and for any contaminants. This helps prevent further damage or poor results.
- Tape pull test: Stick a piece of tape on the raised edge, pull it off quickly at a 45-degree angle. If the paint comes off with it, you’ve got adhesion issues.
- Solvent wipe: Wipe the area with a solvent like mineral spirits. If the paint dissolves or becomes tacky, there’s contamination present.
- Mold or mildew: Look for any greenish-black spots that could indicate mold growth.
- Dirt and dust: Inspect for visible dirt or dust particles that might have settled on the surface.
- Previous repairs: Check if there are any old repairs with poor adhesion or contaminants.
- Cracking or peeling: Look for signs of cracking or peeling paint, which could indicate underlying issues.
- Alligatoring: This is when the paint surface looks like alligator skin. It’s a sign of poor adhesion and needs attention before sanding.
- Blistering: Blisters are raised, often bubble-like areas on the paint film. They indicate moisture or other contaminants beneath the paint.
Quick rule: If you find any adhesion issues or contaminants, address them before sanding to avoid making problems worse.
Edge profile and high spot mapping
Map out the raised edges and identify high spots to plan your sanding approach effectively.
- Visual inspection: Look at the tape lines with a critical eye. Identify any raised edges or high spots.
- Feeler gauge: Use a feeler gauge to trace along the edge and confirm where sanding is needed. It helps you find exact high spots.
- Low spots: Check for any low spots that might need filling before sanding.
- Wide edges: Identify any wide raised edges that will require more aggressive sanding or skimming.
- Narrow edges: Look for narrow high spots that can be feathered out with light sanding.
- Corner spots: Check corners and angles for any raised edges or high spots that might need special attention.
- Uneven surfaces: Inspect for uneven surfaces that could cause inconsistent sanding results.
- Previous repairs: If there are previous repairs, check if they’re level with the surrounding surface. If not, you might need to skim them before sanding.
Quick rule: Accurate mapping of high spots helps ensure even sanding and prevents over-sanding or under-sanding areas.
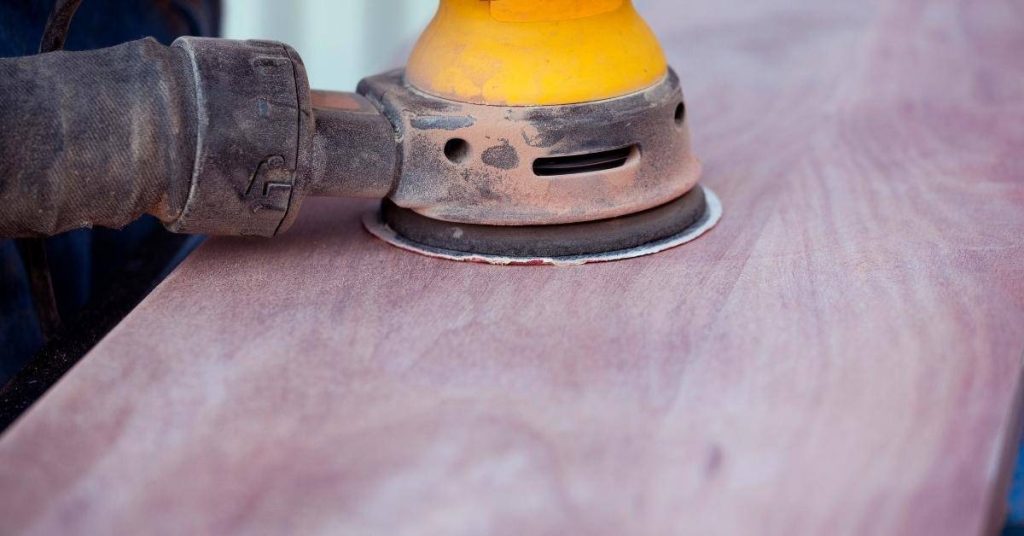
Sanding Strategy: Step-by-Step Approach
Begin by removing the ridge with careful, small motions along the edge, staying within the taped line. Transition to feathering the edge so the repaired area blends into the surrounding surface.
Follow the grit progression recommended by the product instructions and avoid creating new sanding marks. Stop when the edge reads smooth to the eye and a light touch test confirms flatness.
Step-by-Step Process
The following steps guide you through the sanding strategy to remove raised paint edges at tape lines effectively.
- Preparation: Gather your tools and materials. Ensure you have safety gear like goggles, gloves, and a dust mask.
- Inspect the area: Check for any contaminants or weak adhesion points. Mark high spots with a pencil.
- Main work: Start with coarse sandpaper to remove the ridge. Use short, controlled strokes and light pressure.
- Feather the edge: Switch to finer grits to smooth out the transition between the sanded area and the surrounding finish.
- Cleanup: Vacuum or wipe off any dust. Inspect your work for any missed spots or new imperfections.
Start: removing the ridge without over-sanding
Begin by carefully addressing the raised lip. The goal is to eliminate the ridge while keeping the surrounding finish intact.
Use short, controlled strokes with light pressure. Work in one direction, following the grain of the paint or filler if possible.
Never press down hard on the sandpaper as this can damage the surrounding area and create more work for you.
Regularly check your progress to ensure you’re not over-sanding. A magnifying glass can help with this.
Feathering progression and grit guidance
A progressive grit approach helps achieve a smooth, blended finish. Start coarse to remove the ridge, then gradually move to finer grits to feather the edge.
Typically, start with 120-grit for removing the ridge, followed by 180- and 220-grits for feathering. Always check your paint or filler manufacturer’s recommendations for exact numbers.
Remember, each grit level requires 2-3 passes to ensure a smooth finish. Be patient; rushing can lead to missed spots or new imperfections.
Wet vs dry sanding and tool selection
Understanding when to use wet or dry sanding, and choosing the right tools, is crucial for a high-quality finish.
- Dry Sanding: Quick and easy. Ideal for small areas with minimal dust. Use a tack cloth after to remove any residual dust.
- Wet Sanding: Slower but produces less dust. Great for large areas or when using power tools. Rinses away residue, preventing clogging of sandpaper.
- Hand Sanding: Best for small areas and intricate details. Offers more control than power tools.
- Power Tools: Faster and easier on larger surfaces. Orbital sanders are versatile; palm sanders are great for edges. Rentals available at most hardware stores, typically around $20-$40 per day.
Blending, Filling and Edge Repair Techniques
Use a light skim with filler or a high-build primer to build a tapered edge, then smooth with progressively finer abrasives. Work in thin coats to maintain control and avoid overfill.
Continue sanding and check visual checkpoints to determine when the repair is flush with the surrounding paint. Stop when transitions look invisible under typical room lighting.
When and how to use spot filler or high-build primer
To level raised paint edges, you’ll want to use a thin spot filler or high-build primer. These products are designed to fill small voids and provide a smooth surface for painting.
Selecting the right product: Choose one that’s suitable for your substrate – drywall, wood, etc. Read labels carefully.
Application technique: Apply sparingly with a 2-inch brush or roller cover, working from the edge towards the center to avoid overfilling. Let it dry according to manufacturer’s instructions before sanding.
Feathering tips to avoid hard lines
When repairing paint edges, it’s crucial to avoid creating visible transitions or ‘hard lines’. Here are some tips to help you achieve a seamless finish.
- Avoid sagging: Apply filler or primer in thin, even coats. Avoid over-brushing or rolling which can cause drips and sags.
- Use low pressure: When applying with a brush or roller, use light pressure to avoid building up too much product at the edge.
- Feather out: Work the filler or primer beyond the tape line to ensure a smooth transition. This is called ‘feathering’.
- Avoid sanding lines: When sanding, use even, overlapping strokes to avoid creating visible transitions.
By following these tips, you’ll minimize the risk of creating hard lines and achieve a more professional-looking finish.
Recoat Strategy and Product Compatibility
Decide between spot-priming, full-area priming, or direct topcoat based on the repair extent and current finish. Ensure adhesion by following the data sheet instructions for surface prep and priming if required.
Verify color match and system compatibility before mixing or applying products. Check the label or manufacturer instructions to confirm that the topcoat will bond to the repaired area.
Spot prime vs full prime: decision criteria
The choice between spot priming and full-area priming depends on the size of your repair, substrate exposure, and sheen difference.
Spot Prime: Use this for small repairs (less than 1 sq ft) where the surrounding area is in good condition. It’s quicker and uses less product.
Full Prime: Opt for this when repairing larger areas, exposing raw substrate, or if there’s a significant sheen difference between the old and new paint. It ensures better adhesion and color match.
Topcoat application and blending approaches
For recoating, you have spray, brush, or roller options. Each has its pros and cons:
Spray: Offers even coverage but requires proper ventilation and may be messier.
Brush: Provides better control for small areas or intricate details but can leave visible strokes if not done right.
Roller: Great for large, flat surfaces. Use a high-quality roller cover for smooth results.
To blend the new paint with the old, lay down thin, feather coats at the edges. This helps match sheen and texture. Start with the edge of your repair and work outwards in overlapping ‘W’ or ‘M’ strokes.
Drying, Inspection, and Final Quality Checkpoints
Environmental factors like temperature and humidity influence dry and cure times; maintain appropriate conditions as recommended on the product label. Use practical inspection steps to verify readiness before the next finish work.
Perform visual, touch, and tape tests to confirm repair integrity, then consult the product’s exact dry times for confirmation. If in doubt, recheck the label or data sheet for guidance.
Test methods to confirm adhesion and cure
Before moving on to the final topcoat, ensure your repair is fully cured and ready. Use this checklist after the recommended dry time from your product label.
- Finger pressure: Lightly press with your fingernail. If it leaves an indentation or feels soft, it’s not yet cured.
- Tape adhesion: Apply painter’s tape, let it sit for a minute, then pull off quickly at a 90-degree angle. No paint should come off if it’s fully cured.
- Scratch test: Lightly scratch the surface with a nail or coin. If it scratches easily, it’s not ready.
- Water drop test: Place a few drops of water on the surface. If they bead up and don’t soak in, you’re good to go.
- Temperature check: Ensure the temperature is within the recommended range for your paint. Too cold or too hot can affect cure time.
- Humidity check: High humidity can slow down cure times. Make sure it’s not excessively humid.
- Ventilation: Good airflow helps cure time. Ensure there are no obstructions to ventilation.
- Time check: Even if it looks dry, wait the full recommended cure time before proceeding.
Quick rule: If in doubt, wait a bit longer. It’s better to be sure than to rush and end up with a poor finish.
Final visual and tactile inspection checklist
Before applying the final topcoat or reinstalling trim, ensure your repair is uniform, smooth, and ready. Use this checklist to double-check.
- Edge uniformity: Check all edges for consistency in profile and height. They should match the surrounding surface.
- Sanding scratches: Feel along edges and surfaces for any remaining sanding marks. None should be present.
- Sheen match: Compare your repair to the surrounding area. It should match in sheen level.
- Feather transition: Ensure there are no hard lines where the repair meets the existing surface.
- Color match: Check for any discoloration or differences in color between your repair and the surrounding area.
- Cracking or peeling: Look for any signs of cracking, peeling, or lifting. If present, you may need to sand and recoat.
- Dust or debris: Ensure there’s no dust or debris on the surface that could interfere with adhesion.
- Level check: Use a level to ensure your repair is flat and even.
Quick rule: A thorough inspection now can save you from having to redo work later.
Prevention and Best Practices to Avoid Raised Edges in Future Jobs
Adopt consistent taping and removal techniques, and plan paint application to minimize edge tension. Consider tape choice that is compatible with the paint system and substrate.
Implement a drying workflow that avoids rushes between coats and verification checks, and document any procedure changes for future projects. Review manufacturer guidelines if you switch products or system types.
Tape selection and correct masking technique
Choosing the right tape is crucial to prevent paint lift. Go for painter’s tape with a low tack adhesive, designed for delicate surfaces.
The edge type matters too. Use a tape with sharp, well-defined edges to create clean lines. Avoid tapes with fuzzy or irregular edges.
Rule of thumb: Apply tape in the morning when temperatures are cool. This helps prevent the adhesive from becoming too aggressive and lifting paint later on.
Remove tape promptly after painting, but not immediately. Wait 24 hours for the first coat to dry, then gently pull off at a 45-degree angle. This minimizes the chance of pulling up dried paint.
Application techniques to minimize build-up at edges
The key is even, thin coats. Avoid heavy edge loading by starting your strokes a few inches away from the tape line and working towards it.
Use a ‘feathering’ motion as you approach the line. This helps distribute paint evenly and prevents a thick ridge from forming at the edge.
Tip: Lightly touch the tape with your brush, then pull it away to create a smooth transition. Don’t press down hard on the tape; let the paint flow onto it.
After applying paint, don’t let it sit too long before removing the tape. This can cause the paint to dry and lift when you remove the tape.
Conclusion
The core idea is simple: fix the raised edges with careful sanding and a matching recoat so the surface looks smooth, durable, and paint that holds up. Doing it right protects the finish, avoids costly mistakes, and keeps the job looking professional from a distance and up close.
Check in this order: inspect the edge with a light touch to confirm the raise, equip the right grit and tools, mask surrounding areas, test a small patch on a hidden spot, sand in light passes until the edge blends, clean dust completely, apply a compatible primer and topcoat in thin layers, and let each coat dry fully before the next. Keep the work area well ventilated, wear eye protection and a dust mask, and work with moderate pressure to avoid gouging or burning through the tape line.
Common mistakes to avoid include going too aggressive with sandpaper and digging into the tape line, skipping the dust removal step, applying the next coat too soon or with incompatible products, and rushing the drying times. Safety rules are simple: test on a small area first, use the right grit for the job, and never skip ventilation or eye and skin protection. If you start to see rapid edge lifting, peeling in layers, or you’re unsure about product compatibility, back off and reassess rather than forcing a fix.
If the repair involves stubborn edges, multiple cuts in the same spot, or a setup that needs specialized primers or finishes, it makes sense to call a professional rather than push on solo. Stay confident by following the checks, keep the work controlled, and you’ll end up with a clean edge that lasts. You’ve got this—start with a careful test patch and move forward one small step at a time.
FAQ
What causes raised paint edges at tape lines after sanding and how can I prevent them next time?
Raised edges usually come from leaving a thin film or edge ridge where the tape line ends. Clean the edge well, feather the surrounding paint, and avoid over-sanding in one spot. Check your painter’s tape type and product instructions to ensure it’s suitable for the finish you’re applying.
How do I safely blend a raised edge without making a visible lump or color mismatch?
Lightly sand the edge with a fine grit to feather it, then wipe away dust before touching up. Apply a thin coat over the edge and blend into the surrounding paint. If in doubt, follow the product’s blending guidance on the label or datasheet.
What steps should I take if the edge reappears after recoating?
Stop and inspect the edge under good light. Lightly re-sand the edge to feather, remove dust, and recoat with careful, thin layers. If the problem persists, re-evaluate tape placement, surface adhesion, and compatibility per manufacturer instructions.
Which tools and touch-up techniques improve edge repair without creating new ridges?
Use a sharp sanding block or sanding sponge and a steady hand to avoid gouging. Feather edges with a light touch and wipe between coats. For guidance on exact tool choices, refer to the product label and follow local rules for finish work.