
Introduction
Wall painting checklist is a practical, step-by-step guide to inspect, measure, and repair walls before painting. It helps you spot cracks, peeling paint, stains, and uneven surfaces so you can plan the work. Use it to map prep steps, materials, and timelines so the finish lasts longer.
If permits apply in your area, check with your local building department for requirements and exemptions, what documents you might need, and any possible fees. Verify that any repairs or changes follow local rules and that you have permission for the work. This keeps the project smooth and avoids surprises when you’re ready to paint.
Key takeaways
- Verify local permit requirements and exemptions before starting any painting project.
- Gather essential permit documents, application forms, and payment methods from agency.
- Check permit status online or by calling, and note expected processing timelines.
- Prepare for exterior and interior inspections by documenting condition and repairs.
- Use appropriate safety gear and ventilation during surface prep and paint application.
- Record materials, estimate quantities, and track waste to avoid overordering.
Table of Contents
- Introduction
- Key takeaways
- Planning, Scope, and Timeline
- Permits, Regulations, and Approvals
- Tools, Materials, and Safety Gear Checklist
- Exterior Inspection Checklist
- Interior Inspection and Moisture Management
- Measure, Record, and Estimate Materials
- Repair and Surface Preparation Tasks
- Application Best Practices, Safety, and Final Walkthrough
- Conclusion
- FAQ
Planning, Scope, and Timeline
Start by clarifying what success looks like for the wall painting project. Define goals such as a lasting finish, even coverage, and minimal peeling, then outline surface prep, coating choices, and texture tolerances for concrete walls. Identify any decorative or texture work and note how these factors influence the overall schedule.
Map out a room-by-room scope and sequence, listing target surfaces, moisture-prone zones, and repairs needed. Build a realistic timeline with phases for inspection, patching, priming, and multiple coats, while accounting for humidity, temperature, and occupancy. Create a staging and protection plan to move or cover furniture and isolate work zones to prevent backtracking.
Project scope and sequencing
The first step is breaking down your wall painting project into clear phases. This helps you stay organized, avoid rework, and ensure a lasting finish.
Inspection and Repairs: Start by inspecting all surfaces for damage or moisture issues. Prioritize repairs in this phase to address any structural concerns before moving on to painting.
Preparation: Next, prep the surfaces. This includes patching holes, sanding rough areas, and cleaning dust off. Priming comes after, ensuring better paint adhesion and coverage.
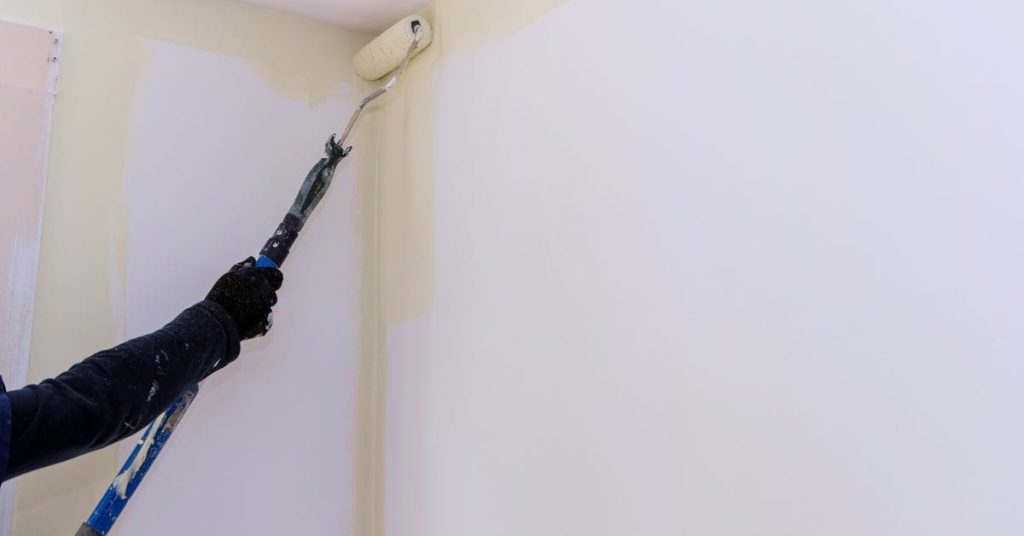
Painting: Finally, apply your coats of paint. The first coat lays down the base color, while the second provides full coverage and a smooth finish. Remember to factor in drying times between each phase.
Cost factors and budgeting
Understanding what drives costs helps you create an accurate budget for your wall painting project.
Preparation Labor: Repairs, patching, and sanding can take up a significant portion of your budget. Estimate these tasks based on the size and condition of the surfaces.
Paint Quality: Higher quality paint provides better coverage and longevity but comes at a premium price. Balance this with your project goals and tolerance for touch-ups in the future.
Access/Equipment: If you need to rent scaffolding or other equipment, factor these costs into your budget. Also, consider any specialized tools required for repairs or texturing work.
Permit and contractor considerations
Knowing when to DIY and when to hire a professional can save you time, money, and stress. Here’s what to consider:
Hiring Pros: If the job is large, complex, or involves specialty trades (like plaster or stucco work), consider hiring licensed professionals. They have the experience and equipment to get the job done right.
Credentials: Always request credentials from any contractor you hire. This includes liability insurance, licenses, and references. Check these thoroughly before signing any contracts.
Permits: Some painting projects may require permits, especially if they involve structural changes or are part of a larger renovation. Check with your local building department to ensure you’re in compliance.
Permits, Regulations, and Approvals
Determine whether interior or exterior painting requires a permit and note exemptions for cosmetic work. Differentiate between minor repainting and changes that trigger code-driven requirements or structural considerations. Check for approvals that could affect scheduling or scope.
Identify the governing authorities to cite for rules and timelines, such as the local building department, zoning office, or historic preservation office. Gather the documentation and plans that may be needed, including scope of work and product specs. Understand typical review timelines and what inspections may be required before, during, and after the project.
When permits are required and common exemptions
Permits keep your project safe and legal. But when do you need one?
Exterior work often requires a permit, especially if it’s structural or affects the building’s envelope. This includes:
- New siding or sheathing
- Large exterior painting jobs
- Structural repairs
Interior painting usually doesn’t need one, unless you’re making structural changes or altering load-bearing walls. Always check local codes to be sure.
Common exemptions include:
- Minor touch-ups and repainting
- Painting existing colors with the same type of paint
- Decorative painting that doesn’t affect structure or safety
How to apply and required documentation
Applying for a permit is straightforward. Here’s what you’ll need:
Plans and drawings: Sketches or blueprints showing the work area, colors, and any new elements.
Scope of work: A detailed description of what you’re doing. Include materials, methods, and any special considerations.
Product/material specs: Details about paints, primers, and other products used. This helps ensure they meet code requirements.
Verification tests: Proof that your surfaces are safe to paint. This might include lead paint testing or moisture barrier verification.
Fees, payment methods, and processing tips
Permit fees vary by jurisdiction. They’re usually based on the project’s value or square footage.
Find fee tables: Check your local building department’s website for a fee calculator or table. This will give you an estimate before applying.
Payment methods: Most places accept cash, checks, and credit cards. Some may offer online payment options.
Processing tips: To speed up review:
- Provide clear, complete documentation
- Avoid common mistakes (like missing signatures or incomplete forms)
- Be patient – permit reviews can take time
Tools, Materials, and Safety Gear Checklist
Assemble essential inspection, repair, and painting tools in a logical order for easy access and dust control. Include moisture meters, knives, scrapers, brushes, rollers, grinders or sanders, levels, and a labeling system for organized dust-free zones. Plan for proper ventilation during prep and painting.
List PPE and safety gear such as respirators, goggles, gloves, hearing protection, and weather-appropriate clothing. Include guidance on renting versus buying heavier or specialty tools and how to organize a convenient, portable inventory to avoid double purchases and lost materials.
Paint types and material selection
Before you start painting, it’s crucial to select the right paint system for your wall type and exposure conditions.
- Check substrate: Concrete, masonry, or plaster? Each needs a specific primer and paint.
- Consider exposure: Interior, exterior, or both? Different paints handle weathering better than others.
- Read datasheets: Understand coverage rates, drying times, and application methods.
- VOC levels: Check for low or zero VOCs to minimize environmental impact and indoor air pollution.
- Avoid cheap paints: They often lack durability and may require more coats.
- Match sheen: Flat, eggshell, satin, semi-gloss, or gloss? Choose based on your desired look and maintenance needs.
- Check color accuracy: Ensure the paint matches your chosen shade using a test patch.
- Avoid mixing brands: Different paints may not bond well together, leading to peeling.
Quick rule: Always choose paint systems designed for your specific substrate and exposure conditions.
Tools, access equipment, and PPE
Safety and efficiency start with the right tools, access gear, and personal protective equipment (PPE).
- Scrapers: Remove loose paint or peeling surfaces. Use a 4-in-1 scraper for tough spots.
- Sanders: Smooth rough patches with an orbital sander or pole sander for high areas.
- Caulk guns: Seal gaps and cracks before painting to prevent moisture intrusion.
- Ladders: Use a stable, approved step/extension ladder. Consider a ladder leveler for uneven surfaces.
- Scaffolding: For high walls or multiple stories, rent or buy scaffolding for safe access.
- Respirator: Protect against paint fumes and dust with a NIOSH-approved respirator or organic vapor mask.
- Eye protection: Wear safety goggles to shield your eyes from debris and splashes.
- Gloves: Use work gloves for handling rough surfaces, tools, and paint cans.
- Hearing protection: Protect your ears from loud power tools with earplugs or earmuffs.
Quick rule: Always prioritize safety. Wear appropriate PPE and use the right access equipment for the job.
Exterior Inspection Checklist
Define the exterior scope clearly to prevent scope creep, including roofs, siding, trim, flashings, gutters, and fascia. Set boundaries around what surfaces will be painted versus repaired or replaced. Keep this scope aligned with the overall project plan.
Use a visual defect checklist to note cracks, peeling paint, stains, and any signs of moisture intrusion. Document readings with photos and simple moisture checks when appropriate. Link repairs to the findings to guide the sequence and prevent paint failure.
Roof, flashing, and eaves
Inspect these areas after storms or heavy rain to prevent moisture intrusion that shortens paint life.
- Check for: Missing, damaged, or clogged gutters; they cause water to back up and overflow, leading to siding damage and leaks.
- Inspect: Roof edges and flashings around chimneys, vents, and skylights. Cracks or gaps allow water entry.
- Examine: Eaves for signs of water staining or peeling paint, indicating roof leaks.
- Look at: Fascia boards for rot, warping, or sagging due to moisture intrusion.
- Check: Downspouts for proper drainage and extension if necessary.
- Inspect: Soffit vents for blockage or damage that could trap moisture.
- Examine: Roof tiles, shingles, or membranes for missing, damaged, or curling pieces that expose underlying layers to water.
- Look at: Gutter aprons and drip edges for proper installation and function.
Quick rule: Address any issues found here before painting to prevent moisture problems and paint failure.
Siding, masonry, and exterior finishes
Inspect these surfaces for signs of damage or deterioration that could compromise paint adhesion and durability.
- Check: Vinyl siding for warping, buckling, or loose pieces due to age or improper installation.
- Examine: Wood siding for rot, warping, or cracks that allow water entry.
- Look at: Stucco or EIFS for cracks, holes, or delamination indicating underlying issues.
- Inspect: Masonry walls for failing mortar joints, efflorescence (white powdery deposits), or crumbling bricks.
- Check: Caulk around windows and doors for cracking, peeling, or missing sections that allow water intrusion.
- Examine: Exterior paint for peeling, chipping, or alligatoring (deep cracks) indicating poor adhesion or moisture problems.
- Look at: Metal siding for rusted areas and gaps between panels.
- Inspect: Fiber cement siding for cracks, warping, or delamination due to age or improper installation.
Quick rule: Repair any damage found here before painting to ensure proper paint adhesion and longevity.
Windows, doors, and trim (fenestration)
Inspect these areas for signs of air or moisture infiltration that can cause paint failure and energy loss.
- Check: Weatherstripping around windows and doors for gaps, tears, or missing sections.
- Examine: Glazing putty for cracks or gaps that allow water entry and air infiltration.
- Look at: Window sills for signs of rot, warping, or moisture damage.
- Inspect: Door thresholds for proper fit and function to prevent drafts.
- Check: Trim boards around windows and doors for rot, warping, or movement due to age or moisture intrusion.
- Examine: Caulk around window and door frames for cracking, peeling, or missing sections that allow water intrusion.
- Look at: Window and door hardware (latches, hinges) for proper function and signs of wear.
- Inspect: Storm windows and doors for proper installation and function.
Quick rule: Address any air or moisture infiltration issues found here before painting to maintain energy efficiency and paint longevity.
Interior Inspection and Moisture Management
Identify interior moisture sources and ventilation gaps, such as plumbing leaks or condensation, and outline quick fixes to reduce ongoing moisture before painting. Note any odors or mustiness that could indicate hidden issues.
Inspect surfaces for moisture damage and mold indicators, and document areas where adhesion may be compromised. Outline a plan for humidity management and testing, and decide when to involve specialists for permits or assessments before proceeding with finish work.
Walls, ceilings, and substrates
Before you prime or paint, use this checklist to evaluate your surfaces for damage and necessary repairs.
- Drywall: Check for cracks, holes, or loose tape. Use a taping knife to feel for any give in the surface.
- Plaster: Look for hairline cracks, peeling paint, or sections that sound hollow when tapped.
- Wood paneling: Inspect for warping, splitting, or loose boards. Check for signs of rot or insect damage.
- Popcorn ceilings: Ensure there are no cracks or separations. Be aware that removal may be required for a smooth finish.
- Mold/mildew: Look for stains, discoloration, or musty odors indicating mold growth. Use a moisture meter to confirm.
- Efflorescence: Check masonry surfaces for white powdery deposits, which can indicate moisture intrusion.
- Loose paint/peeling: Inspect for areas where paint is lifting or separating from the surface. Sand and prime these spots before painting.
- Nail pops: Check for nails that have popped out of the drywall, creating small bumps on the surface.
Quick rule: Always address any substrate issues before priming or painting to ensure a lasting finish.
Basements, crawlspaces, and attics
Before tackling the rest of your home, inspect these often-neglected areas for moisture issues that can cause recurring paint problems.
- Rising damp: Check basement walls for water stains or a ‘tide mark’ near the floor, indicating rising damp.
- Condensation: Look for water droplets on cold surfaces like pipes or windows. Use a hygrometer to measure relative humidity.
- Insulation: Ensure insulation is present and in good condition. Check for gaps or compressions that can allow moisture transfer.
- Ventilation: Inspect vents and fans to ensure they’re functioning properly and not blocked. Improve ventilation if necessary.
- Leaks: Check plumbing, HVAC, and other systems for signs of water leaks that could be causing moisture issues upstairs.
- Mold/mildew: Look for visible mold growth or musty odors. Use a moisture meter to confirm elevated moisture levels.
- Flooding history: If your home has experienced flooding, check for signs of water damage and ensure the area is dry before painting.
Quick rule: Address any issues found in these areas to prevent recurring moisture problems that can compromise paint adhesion and appearance.
Measure, Record, and Estimate Materials
Define what surfaces to measure, choose measurement units, and outline steps to calculate total area, including irregular shapes and openings. Decide how to handle textured or porous areas that affect coverage and primer needs. Plan for a sensible waste factor to prevent shortages.
Describe measurement tools and the process, including height, width, angles, and alcoves. Create a uniform defect log tied to priming and repair needs, and ensure measurements feed into material ordering and budgeting templates.
Measuring techniques and area calculations
Start by measuring the height and width of each wall. Use a tape measure or laser measurer for accuracy.
Walls: Measure from floor to ceiling at multiple points to account for any variations. Calculate square footage using the formula: Height x Width = Square Footage.
Trim and Ceilings: Measure these areas separately, using the same method as walls. Subtract the area of doors and windows when calculating paintable area.
Visual checkpoints and documentation
Use this checklist before starting any painting work to ensure you’ve covered all bases. It’s best to do this after measuring surfaces but before ordering materials.
- Peeling Paint: Check for and note the extent of peeling paint. This may require scraping and sanding before painting.
- Cracking: Inspect for cracks, especially around windows and doors. Fill these with spackling compound or caulk as needed.
- Moisture: Look for signs of moisture damage, like water stains or mold. Address any underlying issues before painting.
- Efflorescence: Check for white, powdery deposits on masonry surfaces. Remove with a wire brush and clean the area before painting.
- Mold: Inspect for mold, especially in damp areas like bathrooms or basements. Treat with a mold remover and primer designed to block mold growth.
- Repairs Made: Note any repairs you’ve made, like filling holes or sanding surfaces smooth.
- Product Choices: Record the paint and primer brands, colors, and sheens you’ve chosen for future reference.
Quick rule: Always take photos of defects and repairs to document their existence and your work.
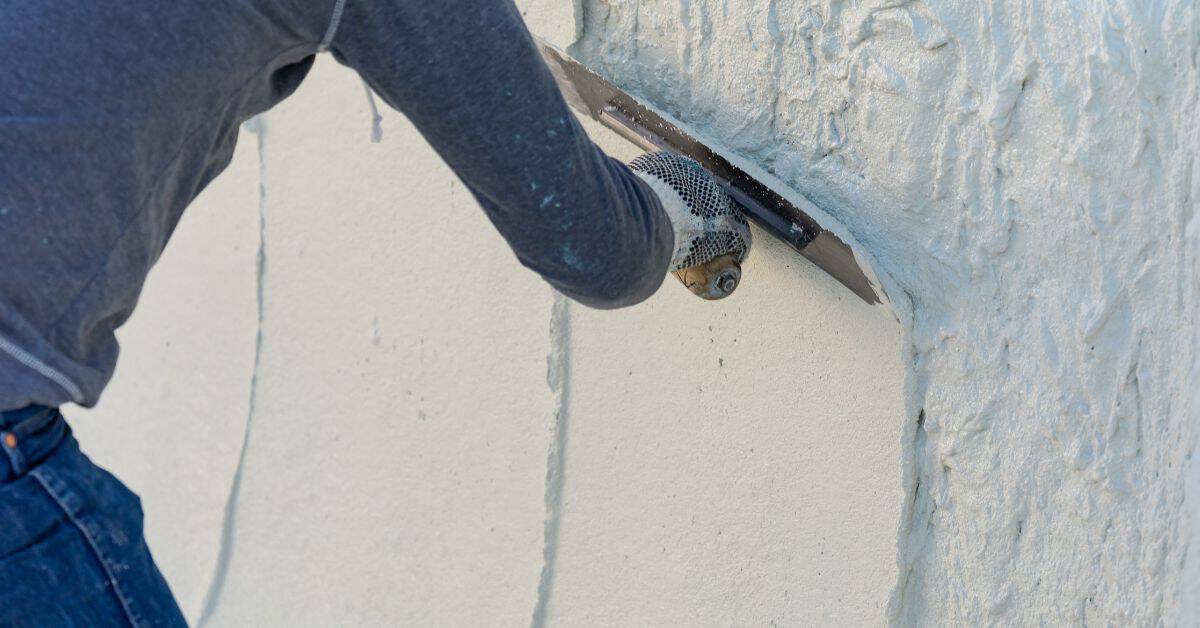
Repair and Surface Preparation Tasks
Establish a logical sequence: cleaning first, then rust removal, followed by patching cracks and holes, replacing rotted sections, and priming before paint. Explain how each step impacts adhesion and finish quality and why you shouldn’t skip ahead.
Detail cleaning and surface checks, moisture remediation, and rust treatment for metal elements. Outline repair methods for cracks, holes, and damaged substrates, and specify when priming and moisture control are needed to ensure lasting adhesion.
Common repairs: crack, hole, and rot remediation
Before you start painting, it’s crucial to address any damage on your walls. Here are some common issues and how to tackle them:
Cracks: Hairline cracks can be filled with spackling compound or lightweight joint compound. Wider cracks may need a flexible filler like elastomeric caulk. Always ensure the crack is clean, dry, and free of loose material before filling.
Holes: Small holes from nails or screws can be filled with spackling compound or joint compound. Larger holes may require backing with mesh tape and multiple coats of filler. Again, make sure the hole is clean and dry before filling.
Rotten Wood: If you find rotted sections, they must be replaced for safety and longevity. Cut out the rot using a sharp utility knife or saw, ensuring to remove all soft, crumbly wood. Replace with pressure-treated lumber if it’s an exterior wall, and seal the new piece before painting.
Priming, sanding, and adhesion promotion
Proper priming is key to a lasting paint job. It seals the surface, promotes adhesion, and provides a uniform base for your topcoat.
Choosing a Primer: Select a primer based on your substrate – oil-based primers for wood, latex for drywall, etc. If you’re unsure, consider an all-purpose primer or consult with a paint professional.
Sanding: Lightly sand the surface after priming to remove any raised grain and ensure a smooth finish. Use fine-grit sandpaper (220-320 grit) and follow up with a tack cloth to remove dust.
Adhesion Tests: Before painting, perform an adhesion test by applying a small amount of paint to a hidden area. If it peels or flakes off easily, you may need to sand more aggressively or choose a different primer.
Application Best Practices, Safety, and Final Walkthrough
Describe surface readiness and product compatibility checks, including moisture testing and assessing existing coatings. Ensure primers and paints are suitable for concrete and prior finishes. Outline how to verify compatibility before you start.
Provide guidance on environmental controls, PPE, and site protection during application. Include a clear final walkthrough checklist to verify coverage, adhesion, edge work, and moisture barriers, plus a plan for touch-ups and ongoing maintenance scheduling.
Painting conditions, technique, and quality checks
The ideal temperature for painting concrete is between 50°F to 90°F (10°C to 32°C). Humidity should be below 85%. Keep an eye on the weather forecast and adjust your schedule accordingly.
Common mistakes include applying paint too thick, not allowing enough drying time between coats, or using incompatible primers/paints. To avoid these, follow the manufacturer’s instructions and let each coat dry as recommended.
Quality checks: After application, perform a wet film check to ensure even coverage and no runs or sags. Use a flashlight at an angle to inspect for any missed spots. Once dried, do a dried-film check for proper adhesion, uniform color, and no visible defects.
Final inspection and maintenance plan
Conduct this walkthrough after the final coat has dried completely to ensure a lasting finish.
- Check coverage: Inspect for any missed spots or thin areas. Inadequate coverage can lead to premature failure.
- Inspect runs and sags: Look for drips, runs, or heavy buildup that could trap dirt and moisture, causing the paint to peel or blister.
- Edge sealing: Ensure edges are properly sealed to prevent peeling. Check corners, where walls meet floors, and around fixtures.
- Moisture barrier contact: Verify that painted surfaces do not come into direct contact with moisture barriers or other sources of dampness.
- Flashing inspection: Ensure all flashing is intact and properly sealed to prevent water intrusion.
- Adhesion test: Gently scratch the surface with a coin or nail. If paint comes off easily, reapply and allow proper curing time.
- Color consistency: Check for any color variations that could indicate improper mixing or application.
- Cleanup: Ensure all tools are cleaned and stored properly to maintain their lifespan and prevent contamination of surrounding areas.
Quick rule: Inspect your painted concrete annually, touching up any small issues before they become big problems. Recoat every 5-10 years, depending on traffic and weather conditions.
Conclusion
Finish with a safe, durable, and good-looking paint job by sticking to the plan, checking every step, and avoiding shortcuts that can cause failures later.
Proceed in clear order: confirm permits and approvals, complete exterior and interior inspections for moisture, measure and estimate materials, prepare and repair surfaces, protect surrounding areas, choose the right weather window, follow application best practices, gear up with safety equipment, and do a small test area before full coverage, then perform a final walkthrough to verify everything is clean and correct.
Common mistakes to avoid are skipping moisture management, skipping a test patch or small-area trial, and rushing through surface prep or the final coat—always wear eye protection, gloves, and a dust mask, use ladders and covers correctly, and never paint over suspect rot or water damage. If a wall or structure shows significant rot, warped framing, lead paint concerns, or persistent leaks, call a professional rather than pushing on solo, then return to the site only after the issue is resolved and the surface is safe to coat. With discipline and the right checks, you’ll get a solid, lasting finish that looks right and endures. Stay focused, stay safe, and push forward with confidence.
FAQ
Do I need a building permit for interior or exterior wall painting, and are there exemptions I should know about?
Most simple interior or exterior painting projects don’t require a permit. Check your local rules or ask the permit office to confirm exemptions. If in doubt, show the project scope to avoid surprises later.
What documents might I need when applying for a permit, and where do I start?
Common documents include a completed permit application and a description of the work. You may also need project drawings or surface preparation plans. Start with the local building department’s website or office to get the exact list.
How do I find out the status of my permit, and how long can it take to approve?
Most places offer an online portal to check status. If online lookup isn’t available, call the permit office with your project address and reference numbers. Watch for required inspections or additional paperwork as the project progresses.
What safety steps should I prioritize during interior and exterior painting to protect people on site?
Keep floors and stairs clear, use drop cloths, and ventilate well. Wear eye protection and a mask for dust and fumes, and never repaint over damaged or unstable surfaces without fixing them first.