
Introduction
Runs and sags in paint are areas where the paint visibly drips or pools, creating ridges or dips. They happen when the coating is too thick, applied unevenly, or dries too fast. Fixing them means assessing the surface, sanding lightly, and reapplying with a smoother coat.
Start by removing the worst sag with a scraper or feathering with a dry brush, then work the edges so they blend in. Lightly sand the repaired area and wipe with a damp cloth before repainting. Choose a technique that matches the surrounding paint and check the product label or manufacturer instructions for recoat times.
Key takeaways
- Identify runs vs sags early by comparing thickness, edge feathering, and light reflections.
- Use a clean, stiff brush or roller to reflow still-tacky area without repainting the whole surface.
- Protect surrounding surfaces with tape, drop cloths, and wear PPE during touch-up.
- Lightly skim with compatible primer after repairs to match sheen and adhesion.
- For cured runs, sand with fine grit and feather edges before spot-priming.
- Exterior or textured surfaces require matching texture and weather considerations; check labels.
Table of Contents
- Introduction
- Key takeaways
- Quick Diagnosis: Distinguishing Runs, Sags, Drips and Other Defects
- Tools and Materials Checklist
- When You Can Avoid Repainting the Whole Surface
- Step-by-Step Fix for Fresh, Still-Tacky Runs (Reflowing)
- Repairing Cured Runs and Sags: Sanding, Filling and Spot-Priming
- Matching Sheen and Texture Without Full Repaint
- Special Cases: Oil-Based Finishes, Exterior Paint, and Textured Surfaces
- Troubleshooting, Prevention and When to Call a Pro
- Conclusion
- FAQ
Quick Diagnosis: Distinguishing Runs, Sags, Drips and Other Defects
Look closely at the shape of the defect. A run will typically bulge and flow downward from a high point. A sag tends to form a curved, continuous drop that sits on the surface.
Drips usually create narrow, stringy lines or beads. Orange peel and brush marks reveal texture differences on the surface. Check whether the issue is only on the top layer or if adhesion feels compromised underneath.
Common causes to check first
The first step in fixing runs and sags is identifying what caused them. Here are the most common culprits:
Over-application: Too much paint on your roller or brush can lead to drips and runs. Check if the affected areas have a thick, heavy feel.
Wrong tip/roller: Using a tip or roller that’s too large for the surface can result in excess paint. Inspect the tool you used; it might be at fault.
Thinning: If your paint is too thick, thinning it with water (for latex) or solvent (for oil-based) can prevent runs. Check if the paint was properly mixed before application.
Surface and paint-type identification
Before you start repairs, identify the surface material and paint type to choose the right fix:
Surface: Check if the defect is on drywall, wood, or metal. The repair method varies depending on the substrate.
Paint type: Determine if it’s latex (waterborne) or oil/enamel. Latex dries faster and cleans up with water; oil/enamel takes longer to dry and requires solvent for cleanup. Inspect the paint can or look up your paint receipt.
Visual checkpoints for severity
Before you decide on a repair, use this checklist to assess the damage:
- Size: Measure each defect. Small (<1 sq ft) might be easily fixed.
- Depth: Check if the paint has soaked into the surface or is just sitting on top. Deep defects may require more work.
- Number of defects: Count them. A few can be spot-repaired, but many might warrant a full repaint.
- Proximity to edges: Check if defects are near corners, ceilings, or floors. Edges often need more attention during repairs.
- Pattern: Runs and sags in a pattern could indicate an underlying issue with the surface prep.
- Color variation: If the defect looks different from the surrounding paint, it might not be just a surface issue.
- Texture change: Feel the affected area. A rough texture might indicate a deeper problem.
- Edge definition: Check if the edges of the defects are well-defined or blurred. Blurred edges could suggest a more serious adhesion issue.
Quick rule: If multiple checkpoints point to severe damage, consider a full repaint instead of spot repairs.
Tools and Materials Checklist
Gather abrasives, a putty knife or scraper, filler or skim coat, and a compatible primer. Include brushes, a blending topcoat, and masking supplies. Have a clean rag and mild solvent for prep on hand.
Different paint types may need different primers and finishes. Always verify label instructions for compatibility before mixing or applying. If unsure, check the manufacturer data sheet or contact the supplier.
Sanding, scraping and abrading tools
Before you start fixing those runs and sags, make sure you have the right tools to prep the surface.
- 80-120 grit sandpaper: For light defects. Starts smooth, ends rough.
- 120-220 grit sandpaper: For heavier defects. Refines and smooths out the surface.
- Scraper tool: For tough, dried paint. Use with a light touch to avoid damaging surrounding finish.
- Sand sponge or block: Helps maintain even pressure while sanding. Prevents over-sanding.
- Steel wool (0000 grade): For fine, detailed work and smoothing edges.
- Tack cloth: Removes dust after sanding. Essential for a smooth finish.
- Sand pole or extension: Reach those hard-to-get areas without ladders or straining.
- Abrasive pad (for power tools): For stubborn defects. Use with caution to avoid over-sanding.
Quick rule: Always test sandpaper on a small, hidden area first. Different paints react differently to sanding.
Fillers, primers and touch-up materials
Once you’ve prepped the surface, it’s time to fill those gaps and prepare for painting.
- Spot putty (for deep defects): Match the color as close as possible. Use a putty knife for application.
- Lightweight spackling compound (for small holes): Dries quickly, sands easily. Not suitable for deep gaps.
- Quick-dry primer: Seals the surface, prevents tannins from bleeding through. Essential for proper paint adhesion.
- Blending glaze or touch-up paint: Match the sheen and color of existing paint. Use a small artist’s brush for application.
- Gloss or semi-gloss paint (for trim): If runs are on trim, use matching gloss or semi-gloss paint.
- Flat or eggshell paint (for walls): For wall runs, match the flatness and color of existing paint.
- Stain-blocking primer: If runs are over stains or previous colors, use a stain-blocking primer first.
- Clear drying accelerator (optional): Speeds up drying time. Use sparingly as it can cause the paint to dry too quickly.
Quick rule: Always test paints and primers on a small, hidden area first. Different paints react differently to touch-ups.
Safety and cleanup supplies
Safety first! Make sure you have the right gear before you start your repair job.
- Gloves: Protects hands from chemicals. Choose according to task: latex for sanding, rubber for painting.
- Dust mask or respirator: Essential when sanding to prevent inhaling dust particles.
- Eye protection (safety glasses or goggles): Shields eyes from debris and splashes. Wear when sanding, scraping, or painting.
- Tack cloth: Removes dust after sanding. Essential for a smooth finish and easy cleanup.
- Solvent (like mineral spirits or paint thinner): Cleans brushes, tools, and hands. Choose according to paint type: oil-based paints need oil-based solvents.
- Rags: For wiping up spills and cleaning tools. Use old rags, not new ones.
- Trash bags or cans: Dispose of waste properly. Follow local regulations for paint disposal.
- Drop cloths: Protects floors from drips and splashes. Use canvas or plastic drop cloths.
Quick rule: Always follow product safety data sheets and local disposal rules when handling chemicals and waste materials.
When You Can Avoid Repainting the Whole Surface
Consider spot repair when the defect area is small and localized. The rest of the surface remains clean and uniform. Severe distribution or matching difficulties may tilt the choice toward a full repaint.
Evaluate the underlying conditions like moisture or substrate issues. If matching paint is hard to obtain, plan for a broader color blending or repaint area. Use your judgment based on visible damage and availability of matching finish.
Size and location considerations
When deciding between spot repair and full repaint, size matters. Small defects – like tiny runs or isolated sags – are usually good candidates for spot repair.
Rule of thumb: If you can cover the defect with your fist, it’s likely small enough to fix without repainting the whole surface.
Location also plays a role. Low-visibility areas like behind doors or under cabinets are easier to touch up than prominent walls or ceilings.
Large sags or numerous runs, however, often require full resurfacing. They’re harder to hide and may indicate underlying issues.
Paint compatibility and sheen match
Before you start repairing, check your existing paint’s type and finish. Spot repairs can stand out if the new paint doesn’t match.
Sheen: Matte won’t match gloss, and vice versa. Use a sheen that matches your existing paint for best results.
Chemistry: Water-based paints don’t mix well with oil-based ones. If you’re unsure about your current paint type, test a small area first.
If you can’t match the paint exactly, consider repainting the whole surface to ensure consistency.
Hidden substrate or adhesion problems
Some defects hint at bigger issues beneath the surface. Bubbling, flaking, or soft spots often mean there’s more wrong than just a sag.
Bubbling: This usually indicates moisture or poor adhesion. You’ll need to address these underlying causes before painting.
Flaking: If paint is peeling off in large pieces, the surface may be damaged or improperly prepared. Full prep or replacement might be necessary.
Before you start touching up, ensure your substrate is sound and clean. Spot repairs won’t stick on compromised surfaces.
Step-by-Step Fix for Fresh, Still-Tacky Runs (Reflowing)
Start with a test spot to confirm compatibility and behavior. Gently heat or re-flow using safe methods recommended by the paint maker. Work within the tacky window without applying excessive heat.
Wipe or lightly brush to even out the surface and recheck dryness. Follow product guidance and stop if the texture worsens. Keep a safe distance from heat sources and use proper ventilation.
Step-by-Step Repair Process
This step-by-step guide helps you fix fresh, still-tacky runs without repainting the entire surface.
- Preparation: Check manufacturer’s recommendations and gather necessary tools. Safety first – wear gloves and eye protection.
- Test area: Apply gentle heat or solvent to a small, inconspicuous spot to ensure compatibility with your paint type.
- Main work: Use low-heat reflow or solvent reflow techniques as described below to smooth out the runs.
- Feathering and smoothing: Gently blend edges using a clean brush or foam pad while paint is still tacky.
- Cleanup: Wipe off any excess paint or solvent, then inspect your work. If satisfied, let it dry completely; if not, repeat steps as needed.
Low-heat reflow with heat source
Using a hair dryer or heat gun on low setting, maintain a safe distance (around 6 inches) and keep the tool moving to avoid overheating. Start from one end of the run, working slowly towards the other.
Caution: Do not use high heat settings as this can damage the paint or cause it to bubble.
If you notice any discoloration or warping, stop immediately and allow the area to cool before reassessing. Always test on a small, hidden spot first.
Solvent reflow and blending
For waterborne paints, lightly wipe the runs with a solvent like denatured alcohol or paint thinner. Use a clean cloth or cotton swab, working quickly before the solvent dries.
Important: Always test compatibility on an inconspicuous area first. Some solvents can damage certain types of paint.
After applying solvent, use a clean brush or foam pad to gently blend and smooth out the runs while the paint is still tacky.
Immediate feathering and smoothing
Once you’ve reflowed the runs, use a clean brush or foam pad to gently pull the paint and blend edges. Work quickly while the paint is still tacky.
Tip: Avoid overworking the area as this can cause more runs or create an uneven surface.
Be sure not to contaminate your tools with other paints or solvents, and clean them thoroughly after use.
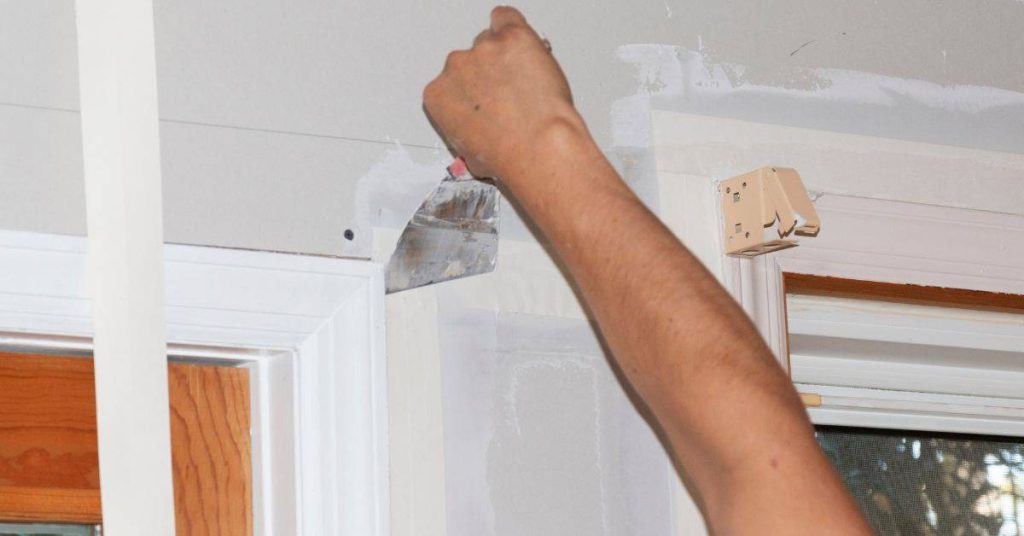
Repairing Cured Runs and Sags: Sanding, Filling and Spot-Priming
Sand the defect with a light touch to feather the edges. Remove dust with a clean cloth before proceeding. Assess whether a thin skim coat or filler is needed for a smooth plane.
Apply a spot-primer where the repair exposes bare substrate or different porosity. Let it dry per label, then blend the edge with the surrounding paint. Maintain dust controls to protect the rest of the finish.
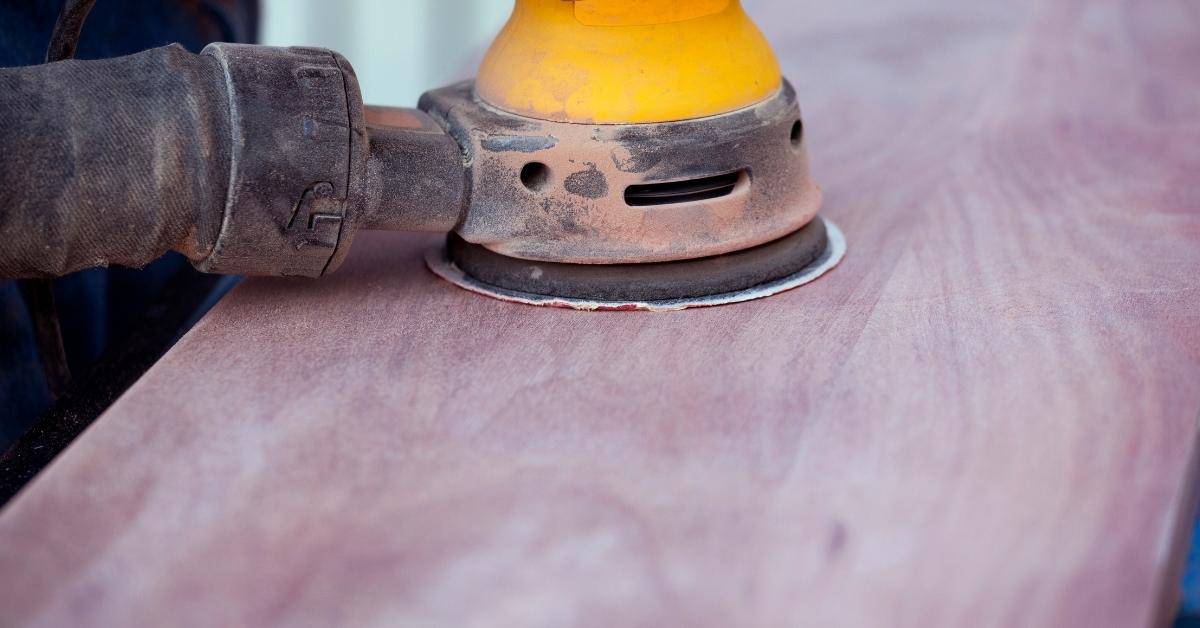
Sanding and feathering technique
Start with a medium grit sandpaper, like 120 or 150, to remove the bulk of the cured run or sag. Be gentle, you don’t want to create more damage.
Use smooth, steady strokes, working from one end of the defect to the other. Switch to a finer grit, say 220 or 320, for the final pass to smooth out any remaining imperfections and feather the edges into the surrounding surface.
Protect adjacent finishes by taping off the area before sanding. This keeps dust from settling on them.
Applying patching compounds or thin skim coats
For small depressions, use a spackling compound or glazing putty. Apply it thinly and evenly with a flexible putty knife, feathering the edges to blend into the surrounding surface.
Let it dry according to the manufacturer’s instructions, then lightly sand it smooth using a fine grit sandpaper (220 or higher). Dry-sanding helps remove any excess material and ensures a seamless finish.
For larger areas, you might need a thin skim coat of joint compound. Apply it in the same way, feathering the edges, and let it dry before sanding smooth.
Spot-priming and adhesion checks
Before painting, apply a compatible spot primer to the patched area. This seals the surface, ensures good paint adhesion, and helps prevent flashing or sheen differences.
Use a small, dense-bristled brush to work the primer into the sanded edges, ensuring full coverage. Let it dry according to the manufacturer’s instructions.
Check for proper adhesion by lightly scraping the primed area with your fingernail or a coin. If the paint doesn’t lift off, you’re good to go. If it does, you may need to sand and prime again.
Matching Sheen and Texture Without Full Repaint
Feather the repaired area into the surrounding surface to minimize a noticeable ring. A light scuff helps the new paint grip and blend. Consider adjusting sheen with compatible finish additives if available.
Use texture tools or approved glazes to mimic stipple or surface texture. Test the effect on a hidden spot first and compare to the rest of the finish. Document the results with a quick test panel if possible.
Feathering paint and blending edges
Once you’ve patched the runs, don’t stop at the edge. You want to blend that new paint into the old.
Use a dry brush or a damp cloth to lightly feather the touch-up area. Work from the patch outwards, gradually reducing pressure and coverage.
This helps reduce the contrast between the patched area and the rest of the wall, making your repair less noticeable.
Adjusting sheen and surface texture
Sheen can make or break a touch-up job. Too shiny or too flat, and it’ll stand out like a sore thumb.
To reduce sheen, scuff-sand the area with fine-grit sandpaper after painting. For more shine, use a glossier topcoat. Or, try glazing to add depth and adjust sheen.
For texture, use a roller with the right nap length or a stippling tool to mimic the original finish. Work in small sections, matching your strokes to the surrounding paint.
Test patches and color match verification
Before you tackle the whole area, do some test patches. Find an inconspicuous spot – behind a door or under a shelf.
Paint a small patch using your chosen method and materials. Let it dry, then check it in different lights. Does it blend? If not, adjust your technique or materials and try again.
Once you’re satisfied with the test patch, go ahead and finish the job. But remember, that test patch was your final check before committing to the whole area.
Special Cases: Oil-Based Finishes, Exterior Paint, and Textured Surfaces
For oil or enamel systems, follow the exact product guidance for adhesion and drying. Exterior exposure may require longer cure and weather-ready techniques. Respect environmental limits in your area when choosing methods.
Textured or stippled surfaces often need matching texture tools and compatible primers. Adhesion can be more challenging, so verify all product instructions and label warnings. When in doubt, consult the manufacturer or supplier for specifics.
Oil-based and alkyd coatings
Oil-based and alkyd paints dry differently than latex. They take longer to cure, so you’ll need to be patient.
Solvent compatibility: Different oil-based paints use different solvents for thinning or cleaning. Make sure your repair materials match the original paint’s solvent type.
Before starting repairs, do a compatibility test. Apply a small amount of your repair material to an inconspicuous area and let it dry. If there are no issues, proceed with your repairs.
Use a shellac-based primer before applying your repair paint. This seals the surface and improves adhesion.
Exterior paint and weather impacts
Temperature, humidity, UV rays, and dirt can affect exterior paint repairs. Here’s what to consider:
Temperature: It’s best to paint when temperatures are between 50°F and 85°F. Too cold or too hot can cause poor adhesion or rapid drying.
Humidity: High humidity can cause moisture to become trapped under your paint, leading to bubbling or peeling. Avoid painting in high humidity conditions.
UV rays and dirt: Direct sunlight and dirt can affect how your repair dries and looks. Try to avoid painting in direct sunlight and clean the area before starting repairs.
If you can’t paint due to weather, use a weather-rated primer to protect the area until conditions improve.
Repairing textured, knockdown or stipple finishes
Textured paints can be tricky to repair. Here’s how to blend your repairs so they’re not obvious:
Match the texture: Use the same application method as the original paint – spray, roller, or brush. For textured paints, you might need to use a specific roller cover or spraying technique.
Apply your repair material in thin layers, letting each layer dry before adding more. This helps maintain the texture’s consistency.
Blend edges: Use a feathering technique at the edges of your repair to blend it into the existing paint. Apply less paint as you approach the edge, tapering off to nothing.
If needed, use a textured roller cover or stippling brush to mimic the original texture in your repaired area.
Troubleshooting, Prevention and When to Call a Pro
Keep a clean workspace and protect surrounding areas to prevent new sags. Maintain steady application and avoid overworking the paint. Address surface preparation issues early to reduce repeats.
Look for warning signs like repeated failures or mismatched adhesion. If defects recur or the finish looks irregular, professional help or a full repaint may be the safer option. Use maintenance tips to extend the results of your repair.
Common repair pitfalls and fixes
Even with the best intentions, DIY repairs can sometimes lead to new issues. Here are some common post-repair problems and how to correct them.
- Flashing: This happens when light reflects off the repaired area differently than the rest of the wall. To fix, re-sand the area lightly and re-prime.
- Sheen mismatch: If the sheen of the repair doesn’t match the surrounding paint, it’ll be noticeable. To avoid, test your touch-up in a small, hidden area first.
- Visible seams: These occur when the repaired area is too distinct from the rest of the wall. To prevent, expand your blending area.
Remember, patience and careful technique are key to avoiding these pitfalls.
Application best practices to prevent future runs
Preventing runs and sags starts with proper application. Here’s how:
Loading tools: Ensure your roller or brush is evenly coated but not dripping. This prevents excess paint from running down the wall.
Application thickness: Apply paint in thin, even coats. Thick layers are more likely to drip and sag.
Tip sizes: For spray painting, use a tip size that matches your surface area. Too large or small can lead to runs.
Environmental control: Paint in a controlled environment, away from drafts or extreme temperatures. This helps paint dry evenly and prevents sags.
Criteria for professional intervention
While DIY repairs are great, there are times when it’s best to call a pro. Here are some signs:
Extensive area: If the damaged area is large, it might be more cost-effective and time-saving to hire a professional.
Structural substrate problems: If the problem lies with the wall itself (like cracks or holes), you may need a pro to assess and fix the issue before painting.
Persistent adhesion failures: If paint keeps peeling or chipping off, it’s time to call in an expert. They can diagnose and fix the underlying cause.
Critical color/texture matching: For high-end finishes or when exact color/texture match is crucial, a pro can ensure the best results.
Conclusion
Fixing runs and sags without repainting the whole surface is about control: you want a durable patch that looks clean and holds up over time, not a quick fix that blows apart next season.
First, identify the defect, gather the right materials, and test a small area before committing. Then follow a calm sequence: work fresh, tacky runs with a reflow, or for cured defects sand, fill, and spot-prime; match sheen and texture in a controlled spot before you spread it out. Always prep, prime, and test in an inconspicuous spot, then proceed only if the test area dries true and blends in.
Common missteps happen when you rush or skip steps: over-sanding or digging into the surface, using the wrong filler for cured defects, or skipping the primer after filling. Always ventilate and wear PPE, protect nearby surfaces, and keep temperatures and humidity in the acceptable range for the products you’re using. If you see peeling over a large area, unusual moisture, or any sign of structural damage, stop and reassess before proceeding.
If the job is large, involves exterior finishes, oil-based coatings, or textured surfaces, or you’re unsure about lead-based paint, it’s wise to call a pro instead of forcing a DIY fix. Stay steady, follow the checks, and you’ll finish with a durable, clean result you can be proud of.
FAQ
Can I fix a run or sag without repainting the whole wall, and how do I tell what I’m dealing with?
First, identify if the issue is a fresh run or a cured sag. Fresh runs can sometimes be reflowed or brushed out if you catch them early; cured sags need sanding and spot repairs. If you’re unsure, check the paint’s label for recoat times and guidance, and follow local rules for surface prep.
What’s the safest way to fix a fresh, still-tacky run without starting over?
Use a clean brush or roller to rework the tacky area, feathering the edges into surrounding paint. Work quickly and don’t press so hard you push more paint around. If the film isn’t pulling away, you may be able to blend it and let it dry per the product instructions, then recoat if needed.
How do I handle a cured run or sag that’s already hard or darkened the surface?
Sand it smooth with a light touch, clean the dust, then fill any low spots with a compatible filler. Prime the repaired area with a compatible primer, and let it dry per the label before touching with matching paint and sheen.
How can I match sheen and texture after spot repairs and avoid a telltale patch?
Use the same sheen level as the surrounding area and apply thin, even coats. If you’re dealing with texture, you may need a light skim and re-spray or roll texture to blend; always test on a small area first and follow the product instructions for recoat windows.