
Introduction
A roller nap is the thickness of the roller cover that determines how well paint or primer sticks to rough walls. For stucco, block, and textured plaster, use a longer nap to reach into the crevices and lay down an even coat. Keep the roller clean and check it often as you work to avoid overloading.
Always test on a hidden patch before committing to the whole wall to see how it lays. If the texture looks rough or pulls, switch to a thicker nap and adjust your pressure, following the manufacturer instructions. Check the product label and local rules for any nap recommendations or limitations.
Key takeaways
- Choose roller nap by texture; rough walls need durable covers and smooth rotation.
- For stucco and block, use thicker-nap covers to trap texture without streaks.
- Keep paint workable with compatible primers and avoid heavy dwell times on rough surfaces.
- Wash rollers promptly to prevent dried paint and fiber shed on walls.
- Inspect edges and corners after rolling to catch patchy coverage early.
- Safety: use ladder stabilizers, eye protection, and protect floors from drips.
Table of Contents
- Introduction
- Key takeaways
- Quick Recommendation Cheat Sheet
- How Wall Texture Affects Roller Choice and Paint Performance
- Roller Nap Lengths and Cover Materials Explained
- Matching Roller to Surface: Concrete, Stucco, and Plaster Guidance
- Paint Types and Compatibility with Roller Covers
- Tools and Materials Checklist for Painting Rough Walls
- Application Techniques for Even Coverage on Uneven Surfaces
- Troubleshooting, Visual Checkpoints, and Finishing Touches
- Conclusion
- FAQ
Quick Recommendation Cheat Sheet
This at-a-glance guide gives you fast picks for nap and material when working on stucco, block, and textured plaster. It also highlights when specialty rollers are the right call. Use it to orient your setup before you start.
Check the product label or manufacturer instructions for exact nap recommendations and material compatibility. Use this sheet as a quick reference, then verify the details with what you have on hand and your local rules if needed.
Best nap by surface type
The nap length on your roller cover is crucial for rough walls. Here’s what works best:
Stucco: Medium to long naps (3/8″ to 1/2″) are ideal. They hold more paint and fill in texture better than shorter naps.
Concrete Block: Long naps (3/4″ to 1″) work best. The deep grooves need extra paint, so longer naps can help.
Textured Plaster: Medium naps (3/8″ to 1/2″) usually suffice. If the texture is very fine, a short nap might do, but for most DIYers, medium is safer.
Best roller cover materials
The material of your roller cover affects how much paint it holds and how well it applies. Here are the best options:
- Polyester: Use for smooth to lightly textured surfaces. Look for covers rated 10/14 or higher. Avoid on very rough walls as it may shed.
- Wool/Mohair: Use for medium to heavily textured surfaces. Look for high-quality, tightly woven covers. Tip: They’re pricey but last longer and apply paint better than synthetic alternatives.
- Microfiber: Use for smooth to lightly textured surfaces. Look for covers rated 10/14 or higher. Avoid on very rough walls as it may shed and stain.
When to use specialty rollers and accessories
For extreme textures, you might need more than just a standard roller. Here’s when to consider specialty options:
High-capacity rollers: Use for very rough surfaces like deeply textured concrete block or heavily stippled plaster. They hold more paint and can cover larger areas faster.
Variable nap covers: Consider if you’re dealing with a mix of textures. These covers have different nap lengths in one, allowing you to adapt to varying surface roughness.
Roller stipplers: Use for surfaces that need a specific texture or pattern, like some types of plaster or faux finishes. They create unique effects and can help achieve a professional look.
How Wall Texture Affects Roller Choice and Paint Performance
Texture depth, porosity, and relief change how paint is picked up and released. These factors also influence how evenly the roller lays material on the surface. Understanding them helps you choose the right roller and technique.
Always compare surface characteristics to the roller you plan to use by checking manufacturer guidance. When in doubt, consult product data sheets and local paint instructions to confirm suitability for your wall type.
Stucco characteristics
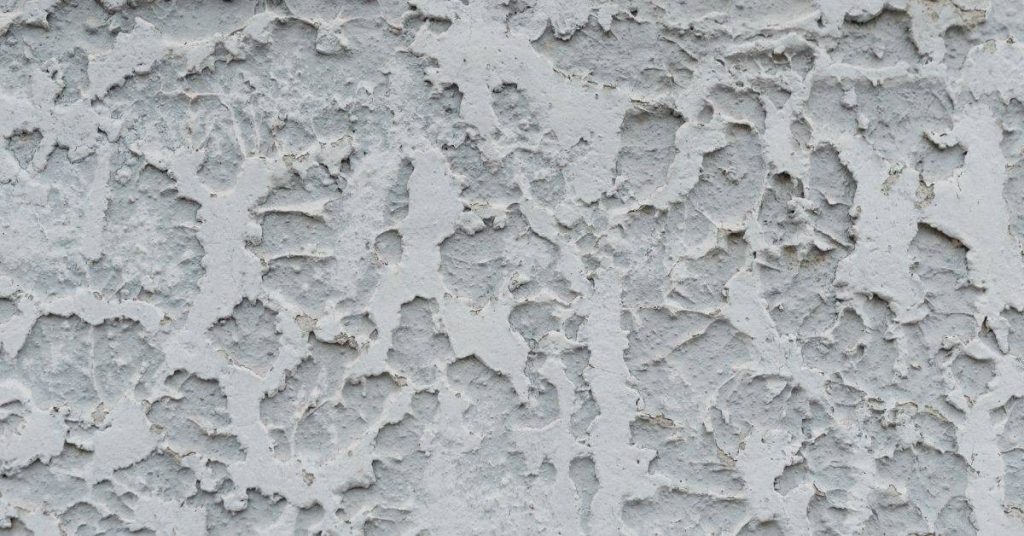
Stucco surfaces are known for their irregular, bumpy texture. This is due to the way it’s applied and cured. The porous nature of stucco means it soaks up moisture and paint like a sponge.
To tackle this, you’ll need deeper-nap roller covers. These hold more paint, helping to fill in those valleys and crevices. Think 3/4″ or even 1″ nap for best results.
High-viscosity coatings are also a must. They stay put on the surface instead of sinking in, giving you better coverage and reducing the number of coats needed.
Concrete block characteristics
Concrete blocks have a coarse face with deep recesses. The grout lines between blocks add another layer of complexity, creating shadows and valleys that need to be filled.
To reach these recesses, you’ll want long-nap roller covers. A 1″ or even 1-1/2″ nap can help get paint into those deep crevices. High-fill paint is also a good idea here; it has more solids and can help fill in those gaps.
Remember, block walls are tough customers. Don’t be afraid to use a higher-density roller cover like 3/4″ or even 1″ nap synthetic or high-density foam.
Textured plaster characteristics
Plaster textures run the gamut from subtle to extreme. From ‘skip trowel’ to ‘orange peel’, each has its own unique relief. The key is choosing a roller cover that can handle the depth of your texture.
For shallow to moderate reliefs, mid- to long-nap covers work best. Think 3/8″ to 1/2″ nap for subtle textures like ‘knockdown’ or ‘orange peel’. For deeper textures like ‘skip trowel’, you might need a 5/8″ or even 3/4″ nap.
Remember, the goal is to fill in your texture without leaving excess paint that can drip or run. So, choose your nap length wisely and don’t be afraid to test it out on a small area first.
Roller Nap Lengths and Cover Materials Explained
Short, medium, and long nap describe how much fiber sits near the surface and how it holds paint. For rough walls, this directly affects coverage and texture transfer. Consider how the roughness and porosity interact with the cover you pick.
Compare common cover materials and their pros and cons by reading the label and manufacturer notes. If you are unsure, verify with the product instructions and choose a familiar option that fits your wall texture and project pace.
Nap length selection (short vs medium vs long)
The nap on a roller cover is the length of the fibers. It’s crucial for DIYers to understand that different nap lengths perform best with specific wall textures.
Short naps (1/8″ to 3/8″) are ideal for smooth surfaces like new drywall or primed walls. They hold less paint, reducing drips and sags on smooth surfaces.
Medium naps (3/8″ to 3/4″) are versatile. They work well with light textures and can be used on most interior walls. Check your wall’s texture depth; if it’s light to moderate, a medium nap should suffice.
Long naps (3/4″ and above) are designed for heavy textures like those found on stucco, concrete block, or textured plaster. They hold more paint, ensuring better coverage in deep crevices.
Cover fabrics: polyester, microfiber, wool/mohair, blended
The fabric of the roller cover affects paint retention and durability. Here’s a quick rundown:
Polyester is durable, resistant to shedding, and holds paint well. It’s a good choice for most surfaces, including masonry paints.
Microfiber is soft, smooth, and also resistant to shedding. It’s great for delicate surfaces but may not hold as much paint as polyester for heavy textures.
Wool/Mohair offers excellent paint retention and a smooth finish. However, it can be more expensive and may shed slightly during use.
Blended fabrics combine the best qualities of different materials. For example, a polyester-wool blend offers durability, paint retention, and resistance to shedding.
Core, density, and pile construction
The core and density of the roller cover affect how much paint it holds and releases. The pile construction determines durability:
A dense core provides better support for the nap, reducing linting (small fibers that shed) and ensuring even paint release.
A solid core is more durable than a hollow one, making it ideal for rough surfaces like stucco or concrete block. It also holds more paint, which is beneficial for heavy textures.
The pile construction can be cut (trimmed to create a flat surface) or uncut (leaving the fibers intact). Cut piles provide a smoother finish but may not hold as much paint. Uncut piles hold more paint and are better for heavy textures, but they might leave slight marks on smooth surfaces.
Matching Roller to Surface: Concrete, Stucco, and Plaster Guidance
Concrete, stucco, and plaster each respond differently to rollers. Tailor nap and cover type to the surface you are painting for best results. Include any prep or primer notes in your planning as you select materials.
Review surface-specific recommendations on product labels or manufacturer guidelines before committing. Keep a note of what you verify so you can adjust if the wall has unique characteristics or guidance from local rules.
Stucco: Recommended Approach
For typical stucco surfaces, opt for a medium to long nap roller cover, around 3/8″ to 1/2″. This range can handle minor imperfections and provide good paint coverage.
The best cover material is usually polyester or microfiber. They’re durable, affordable, and work well with most paints. If your stucco has deep textures or needs heavy coverage, consider a thicker paint or primer first to ensure even application.
Before rolling, make sure the surface is clean and dry. Lightly sand any rough spots, then wipe off dust. Prime if necessary, following the manufacturer’s instructions.
Concrete/Block: Recommended Approach
For concrete block walls, use a long nap roller cover, around 3/4″ to 1″. This length can reach into grout lines and provide even coverage over the rough surface.
The best cover material depends on your paint. For latex paints, polyester or blended covers work well. For oil-based paints, consider natural fibers like wool or mohair for better absorption.
Before rolling, clean the surface thoroughly to remove any dirt or debris. Lightly sand any rough spots, then wipe off dust. Use a primer suitable for concrete and block to seal the porous surface before painting.
For hard-to-reach grout lines, supplement with a small paintbrush. You might also consider using a sprayer for better coverage in tight spaces, but be prepared for some overspray.
Textured Plaster: Recommended Approach
For light to medium textured plasters, a medium nap roller cover, around 1/4″ to 3/8″, should suffice. This length can handle minor textures while providing good paint coverage.
For heavy textures or deep grooves, opt for a long nap roller cover, around 1/2″ to 3/4″. You might also consider using a specialty roller with extended nap or a unique design that can better navigate the texture.
The best cover material depends on your paint and the specific texture. For most cases, polyester or microfiber covers work well. If you’re unsure, consult with a paint professional or refer to the manufacturer’s recommendations for your specific plaster type.
Before rolling, clean the surface thoroughly. Lightly sand any rough spots, then wipe off dust. Prime if necessary, following the manufacturer’s instructions. Work in small sections to ensure even coverage and prevent drips or runs.
Paint Types and Compatibility with Roller Covers
Different coatings, such as masonry paints, elastomeric coatings, and acrylic/latex varieties, interact with roller covers in distinct ways. The interaction affects pickup, leveling, and drying behavior. Check how your chosen coating and roller work together on rough walls.
Always scan the paint label or data sheet for roller compatibility notes. If needed, confirm with the manufacturer instructions and local codes to ensure you are using the right cover for the coating you intend to apply.
Masonry and Elastomeric Coatings
High-build masonry paints and elastomeric coatings are thick, designed to penetrate deep into rough surfaces. They’re high-viscosity, so you need roller covers that can hold a lot of paint.
Go for high-capacity covers with dense piles. These will carry more paint, giving better coverage on your textured walls. Wool or mohair blends work well here, but synthetic options like polyester can also do the job.
Load up your roller thoroughly. With these thick paints, you want to get as much onto the wall in one pass as possible. This helps ensure even coverage and reduces drips.
Standard Acrylic and Latex Paints
Regular acrylic or latex paints are thinner than masonry coatings, but they still need a good roller cover to handle them. Polyester covers work well with these paints.
Check your paint’s label. If it’s too thick, you might want to thin it slightly before rolling. This helps ensure even coverage and prevents drips on your rough surfaces.
If your paint is thin or watery, consider using a longer nap cover. Longer naps can hold more paint and help distribute it evenly over the textured surface.
Primers, Sealers, and Additives
Before painting rough walls, you might need a primer. This helps with adhesion and seals the porous surface to prevent moisture issues.
Some primers have thickeners or flatteners. These change how the roller behaves. Thickeners make the paint more viscous, so you’ll need a high-capacity cover like you would for masonry paints. Flatteners reduce gloss and can affect coverage, so you might need to adjust your nap length.
Always check your primer’s label. It should tell you if it needs a specific type of roller cover or any special application techniques.
Tools and Materials Checklist for Painting Rough Walls
Prepare a practical kit that covers rollers, frames, poles, brushes, scrapers, and prep items for stucco, block, and textured plaster. Organize the setup so you can move from wall to wall without backtracking. Keep spares and replacements ready for a smooth day.
Cross-check each item against product labels and manufacturer guidelines before buying or using. Use the guidance to tailor your list to the texture and condition of your walls, and note any local requirements or recommendations.
Roller and frame recommendations
Use this checklist to choose the right roller frames and extension systems for painting rough walls. It’ll help you maintain control and reach those hard-to-get spots.
- Heavy-duty frame: For thick nap rollers (3/4″ or longer). Provides better support and reduces flexing.
- Extension pole: 18″ to 26″. Helps reach high areas without ladders. Get a telescoping one for easy storage.
- Multi-purpose caddy: Holds paint, brushes, and other tools. Keeps everything organized while you work.
- Screwdriver handle extension: For tight corners or narrow spaces. Attaches to your roller frame for better control.
- Avoid cheap frames: They flex too much, leading to poor paint application and fatigue.
Quick rule: Invest in good quality frames and extension systems. It’ll save you time, effort, and money in the long run.
Prep and safety items
Before you start painting, use this checklist to gather everything needed for prep work and safety. It’ll ensure a smooth job with no nasty surprises.
- Masking tape: Blue or green painter’s tape. Protects edges from paint drips. Remove it before paint dries.
- Drop cloths: Canvas or plastic. Covers the ground, protecting it from spills and splatters.
- Respirator: With a particulate filter. Protects against dust and paint fumes. Essential for textured surfaces.
- Scraper: 4″ to 6″. Removes loose material, preparing the surface for painting.
- Wire brush: Medium stiffness. Cleans out crevices and removes rust or old paint.
Quick rule: Always prioritize safety first. A few minutes of prep can prevent major headaches later on.
Supplemental tools (brushes, pads, sprayer)
Use this checklist to choose the right supplemental tools for your rough wall painting job. They’ll help you tackle those tricky spots and speed up large jobs.
- Angled brush: 2″ to 3″. Reaches corners, edges, and crevices. Essential for textured surfaces.
- Masonry pad: For tight spaces or small areas. Attaches to a pole, providing better control in hard-to-reach spots.
- Airless sprayer: For large jobs or complex textures. Sprays paint evenly and quickly. Requires proper setup and technique.
- Avoid natural bristle brushes: They’re not suitable for latex paints. Use synthetic or polyester/nylon blends instead.
Quick rule: Choose the right tool for the job. It’ll make your work easier, faster, and more efficient.
Application Techniques for Even Coverage on Uneven Surfaces
Load the roller properly, then apply with steady, overlapping strokes to avoid gaps. Back-rolling helps even out texture and flatten ridges that catch excess paint. Practice a consistent cadence to reduce splatter and pooling.
Adapt technique based on texture and paint type by following the manufacturer instructions. If you notice uneven coverage, review your prep, roller selection, and application angle to adjust before proceeding.
Proper roller loading and release
Start by dipping your roller cover into the paint tray, ensuring it’s fully submerged. Press it gently against the bottom of the tray to push out any air bubbles.
Lift the roller out, allowing excess paint to drip off. For rough surfaces like stucco or textured plaster, you want a full cover, but not so much that it drips. You should see paint in all the textures.
Before rolling, check your cover for even release by running it along the tray’s edge. If paint beads up evenly, you’re good to go. If not, gently roll it back and forth until it does.
Rolling patterns and overlap strategy
Start at the top of your wall, rolling downwards in a ‘W’ or ‘M’ pattern. This helps distribute paint evenly across the surface.
Overlap each stroke by about half the width of your roller cover. For example, if you’re using a 9-inch roller, overlap by about 4.5 inches. This ensures consistent coverage and prevents lap marks.
Work in small sections, moving from top to bottom, left to right. Once you’ve finished a section, move on to the next without stopping. This helps maintain a wet edge and prevents drying lines.
Cutting in, edges, and tight areas
For trim and other straight edges, use a brush to ‘cut in’ before rolling. This gives you more control and prevents paint from getting where it shouldn’t.
For recesses and tight areas like corners or behind pipes, use a short-nap mini-roller or a small paintbrush. Mini-rollers are great for textured surfaces as they can get into the nooks and crannies without leaving streaks.
When rolling, don’t press too hard. Let the roller do the work. This helps prevent spatter and ensures even coverage in all those little crevices.
Troubleshooting, Visual Checkpoints, and Finishing Touches
Watch for shedding, blotchy areas, and sudden pooling as you work. Use quick fixes such as light touch-ups and re-rolling of affected zones. Plan for blending edges to avoid obvious lines or streaks.
Decide when to add a second coat or touch up by inspecting coverage and texture consistency. Refer to product labels and local guidelines if coatings require specific curing or recoat windows.
Identifying common issues
Before you start touching up, use this checklist to identify common problems on rough walls.
- Streaks: Check for thin or thick lines of paint. These happen when the roller is too dry or loaded unevenly.
- Missed texture pockets: Look for unpainted areas in textured surfaces. This happens due to insufficient primer or not using an appropriate nap length.
- Lint and debris: Check for small fibers or particles on the wall. These can be from clothing, dust, or old paint.
- Excessive splatter: Look for tiny dots of paint around edges and details. This happens when rolling too fast or using a roller with loose threads.
- Uneven coverage: Check for patches that look lighter or darker than others. This can be due to inconsistent paint application or absorption differences in the surface.
- Pooling: Look for areas where paint has collected and formed small puddles. This happens when rolling too slowly or using a roller with too long of a nap.
- Bubbles or wrinkles: Check for raised, bumpy areas in the paint. These can be caused by applying paint over a dirty or poorly prepared surface.
- Alligatoring: Look for cracks that resemble an alligator’s skin. This happens when applying a new coat of paint over an incompatible previous one.
Quick rule: If you find any of these issues, address them immediately to avoid further problems.
Fixes and touch-up tactics
Use this checklist to troubleshoot common painting problems on rough walls.
- Back-rolling: For thick streaks, lightly roll over the area with a dry roller to even out the paint. Do this before it dries completely.
- Feathering edges: To blend touch-ups into existing paint, use a brush or small roller to feather the edges of the repaired area.
- Spot-rolling: For small missed areas, lightly roll over them with a damp roller to even out the paint and avoid over-applying.
- Sand and re-prime: If you find bubbles or wrinkles, sand them smooth once dry, then re-prime before repainting.
- Scrape and repaint: For alligatoring, scrape off the loose paint, sand, prime, and repaint the area.
- Use a sprayer for edges: To avoid excessive splatter when touching up edges, use a paint sprayer to apply a fine mist of paint.
- Thin paint for touch-ups: For small touch-ups, thin your paint slightly with water or the recommended additive to improve coverage and reduce streaking.
- Lightly sand between coats: To ensure smooth coverage, lightly sand between coats using fine-grit sandpaper and wipe off dust before painting again.
Quick rule: Always test your fixes on a small area first to ensure they work as expected.
When to switch tools or hire a pro
Know when to change your approach or seek professional help for better results.
- Complex textures: For very textured surfaces, consider using a paint sprayer or hiring a professional with experience in textured walls.
- High ceilings: If you’re struggling to reach high areas safely, use an extension pole or hire a pro to avoid accidents.
- Large areas: For extensive touch-ups, consider using a paint sprayer to save time and ensure even coverage.
- Incompatible surfaces: If you’re having trouble with alligatoring or other compatibility issues, consult a professional painter for advice.
- Time constraints: If the job needs to be done quickly, consider hiring professionals who have the right equipment and experience to speed up the process.
- Unique materials: For surfaces like concrete or metal, consult a pro to ensure you’re using the right paint and application techniques.
- Safety concerns: If you’re uncomfortable working at heights, around electrical components, or with certain chemicals, hire a professional for your safety.
- Unsatisfactory results: If you’ve tried everything and still aren’t happy with the results, don’t hesitate to hire a pro to get the job done right.
Quick rule: It’s better to know your limits and seek help than risk damaging your walls or hurting yourself.
Conclusion
Achieving a durable, even finish on rough walls comes down to selecting the right roller setup and sticking to safe, repeatable steps. Start with a patch test and use the proper nap for your texture so you don’t waste material or create blobs that ruin the look.
To move forward, choose the nap and cover for your surface, gather the paint type compatible with that cover, and plan your pass order—pre-wet or work in sections as needed, keep a steady pace, and clean tools as you go. Check your work as you go by applying even coats in the same direction, looking for uniform texture and coverage, and pause to re-cut edges with a fresh roller for sharp lines. Prioritize ventilation, PPE, and scaffold or ladder safety, and always follow manufacturer instructions for the paint and roller materials.
Common mistakes to avoid are overloading the roller, skipping a test patch, and rushing through coats that must dry before the next layer. Keep safety first by working in a well ventilated area, masking off nearby surfaces, and letting each coat dry fully before applying a second. If you’re unsure about the surface integrity, the wrong paint system, or extensive damage, don’t push ahead—consult a professional rather than guessing. With careful prep, the right nap for the texture, and controlled technique, you’ll finish with a solid, lasting result that looks professional and holds up over time.
FAQ
What nap length should I use for stucco and other rough walls?
Use a longer nap designed for rough surfaces. Check the roller label or manufacturer instructions for the recommended range. Test a small patch first to see if you get even coverage without too much shedding.
How do I know when a roller cover needs replacing?
Look for loose or frayed fibers, shedding onto the wall, or fibers that don’t load with paint well. If it feels stiff or won’t hold paint consistently, swap it out. Always trust the coverage you see on the wall rather than the label alone.
Will texture affect how paint spreads with a roller?
Yes. Rough textures can require more load and a longer nap to fill gaps. If the paint is skipping or leaving thin spots, switch to a longer nap or a roller specifically rated for stucco or plaster surfaces. Always test on a small area first.
How should I clean and store roller covers after working on rough walls?
Rinse thoroughly with water or follow the paint label for cleanup. Remove excess water and let the roller dry fully before storing. Keep covers in a clean, dry area to avoid texture damage and mold.