

Introduction
Cleaning a basement concrete floor means removing dirt, grime, and stains to prepare the surface for sealing. It’s a practical, hands-on job you can tackle with common tools and basic cleaners. Check labels and manufacturer instructions for any cleaner you plan to use, and follow local moisture testing guidelines.
Basement floors can show different stains from water, rust, mold, or oil; each type needs a different cleaning approach. Choose a cleaning method based on the stain and the concrete condition, then rinse and dry thoroughly before sealing. When sealing, use proper application techniques and verify moisture and substrate readiness per the product label.
Key takeaways
- Identify stain types and surface conditions before planning cleaning or sealing.
- Gather dependable tools, cleaners, and manufacturer instructions from trusted sources.
- Test moisture and adhesion to prevent sealing failures and efflorescence later.
- Follow proper surface prep and removal of old coatings before sealing.
- Wear eye protection, skin protection, and ventilate work areas during cleaning and sealing.
- Inspect periodically, recoat as needed, and budget for long term care.
Table of Contents
- Introduction
- Key takeaways
- Pre-Project Planning and Assessment
- Common Basement Concrete Stain Types and Difficulty
- Practical Next Steps and Trusted Sources
- Surface Preparation and Removing Old Sealers or Coatings
- Cleaning Methods by Stain Type and Surface Condition
- Choosing and Applying the Right Sealer for a Basement Concrete Floor
- Maintenance, Inspection, Recoat, and Long-Term Care
- Safety, Common Mistakes to Avoid, and Cost Considerations
- Conclusion
- FAQ
Pre-Project Planning and Assessment
Start with a clear view of the basement floor and how you plan to use it. This sets realistic goals and guides every other decision.
Assess moisture, cracks, coatings, stains, and porosity to decide on cleaning, repairs, or resealing. Create a brief checklist of decisions to make before you lift a tool.
Moisture testing and water issues
Before you start cleaning, test for moisture. Here’s how:
Plastic sheet test: Tape a plastic sheet to the floor, leave it for 24 hours. If it’s damp, there’s moisture.
Look for signs of water damage: efflorescence (white powder), mold, or musty smell.
If you suspect active water intrusion, consult a professional. They can pinpoint the source and suggest fixes.
Inspecting concrete condition and repairs needed
Check your floor for damage:
Cracks: Hairline cracks are normal. Wide, jagged ones need attention.
Spalling: Flaking or peeling surface? That’s spalling. It needs repair.
See old coatings? They might need stripping before cleaning. If damage is severe, consider hiring a contractor.
Timeline, permits, and budgeting basics
Plan your project:
Timeline: Allow time for cleaning, repairs, curing, and sealing. Plus buffer time for unexpected delays.
Permits: Check if you need any. It varies by location.
Budgeting: Estimate labor vs DIY effort. Costs vary based on floor size, damage, and sealant type. Get quotes from pros to compare.
Common Basement Concrete Stain Types and Difficulty
Identify the major stain categories you may encounter in a basement: oil/grease, rust, mineral stains, mold, paint, and efflorescence. Think about a typical scenario for each as you plan treatment.
Consider how porous concrete interacts with each stain at the surface and in the pores, and how that affects color permanence. Summarize bonding tendencies by stain family to gauge removal difficulty and sealer implications.
Oil, grease, and petroleum stains
These stains come from spills of motor oil, grease, or other petroleum products. They’re common in basement workshops or storage areas.
Oils penetrate deep into concrete pores due to their low viscosity. This makes them tough to remove with just water or mild cleaners.
Degreasers or poultices are usually needed to break down and lift these stains. Test a small area first to ensure they won’t damage your concrete.
Rust and metal stains
Rust stains come from water-based solutions of iron compounds, often from leaks or condensation. They’re reddish-brown and can be quite stubborn.
Rust stains bond strongly to concrete due to their chemical makeup. This makes them difficult to remove with just scrubbing or mild cleaners.
Acid-based rust removers are usually needed. Always wear protective gear when using these products and follow safety guidelines on the label.
Organic stains, mold, mildew, and efflorescence
Organic stains are caused by biological growth like mold or mildew. They often appear as dark spots or patches.
Efflorescence is a mineral salt deposit that appears as a white, powdery residue on the surface of concrete. It’s usually harmless but can be unsightly.
For organic stains, use biocide-based cleaners to kill and remove mold/mildew. For efflorescence, use a stain remover or acid wash. Always test these products on a small area first.
Practical Next Steps and Trusted Sources
Put together a DIY-friendly tool and gear list that covers cleaning, basic prep, and sealers. Include safe rental options for items you only need briefly.
Detail safety and prep steps, cleaners suitable for common basement stains, and a quick note on avoiding harsh acids. Include guidance on selecting sealers and where to look up manufacturer data sheets for specifics.
Basic and Optional Tools
The right tools make the job easier. Here’s what you need:
- Stiff-bristle brushes: For scrubbing tough stains. Choose one with stiff, durable bristles.
- Push broom: To sweep up debris. A sturdy, long-handled one is best for concrete floors.
- Mops and microfiber mop heads: For general cleaning and applying sealers. Microfiber holds more liquid and leaves fewer streaks.
- Buckets: For water and cleaner solutions. A 5-gallon bucket is standard.
- Scrapers: To remove loose paint, rust, or other debris. Choose a sturdy one with a sharp edge.
- Optional: Pressure washer: For heavy-duty cleaning. Rent one with at least 1500 PSI and a surface cleaner attachment for even coverage. Around $50-$80 per day.
- Optional: Floor grinder or sander: For surface prep beyond cleaning. A rental orbital sander is usually sufficient. Around $30-$50 per day.
Cleaning Agents and Specialty Products
Different stains require different cleaners. Here’s what you’ll need:
Degreasers are great for oil, grease, and petroleum stains. They’re usually alkaline-based and can be harsh on some surfaces, so spot-test first.
Enzymatic cleaners break down organic matter like mold, mildew, and efflorescence. They’re safe but may take longer to work than chemicals.
Rust removers contain oxalic or phosphoric acid to remove rust stains. Always spot-test first as they can damage some surfaces.
Avoid harsh acids like muriatic acid, which can damage concrete if not diluted properly. Always follow product labels and safety guidelines.
Personal Protective Equipment and Ventilation Aids
Safety first! Here’s what you need to protect yourself:
- Gloves: To protect your hands from chemicals and debris. Choose a pair that fits well and provides good grip.
- Safety glasses: To protect your eyes from dust, debris, and splashing liquids.
- Dust mask or respirator: For sanding or using chemical cleaners. A respirator with a particulate filter is best for concrete dust. Always use when working with chemicals to avoid fumes.
- Knee pads: To protect your knees from the hard floor while scrubbing or sanding.
- Optional: Ventilation fan: For heavy-duty cleaning or sanding. A portable fan can help clear the air and reduce fumes. Around $30-$50 to rent.
Surface Preparation and Removing Old Sealers or Coatings
Document baseline conditions by identifying existing sealers or coatings and testing adhesion to decide between chemical or mechanical removal. Include a quick moisture check to anticipate adhesion issues.
Outline PPE, ventilation, and containment for dust and chemical runoff. List preferred tools and materials, then present a clear removal workflow and when to switch methods.
Cleaning and Degreasing Prior to Repairs
Before you start patching or sealing, remove all soil and oil. This ensures your repairs adhere properly.
Use a degreaser designed for concrete. Apply it, let it sit, then scrub with a stiff-bristle brush. For tough spots, use a putty knife.
Note: Always follow the manufacturer’s instructions when using chemicals.
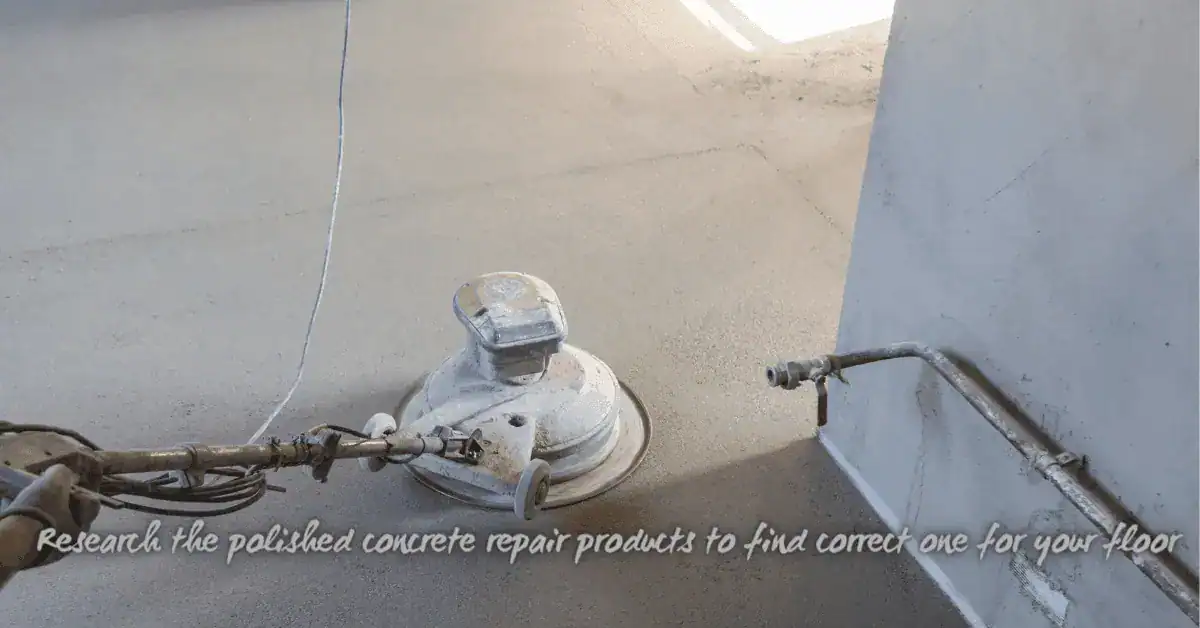
Mechanical Preparation: Grinding, Shot-Blasting, and Etching
Sometimes you need to go beyond scrubbing. Mechanical methods like grinding or shot-blasting can help.
Grinders with diamond bits or scarifiers remove old coatings. Shot-blasting cleans and profiles the surface. Both improve adhesion and prepare for new sealers.
Etching is a light mechanical process that opens the concrete’s pores, improving adhesion without removing much material.
Removing Old Sealers: Chemical vs Mechanical Methods
Old sealers can prevent new ones from adhering. Remove them using either chemical strippers or mechanical methods.
Chemical strippers soften the sealer, making it easy to scrape off. Always wear PPE and follow safety guidelines when handling chemicals. Dispose of used stripper responsibly.
Mechanical removal involves grinding or shot-blasting. It’s faster but can damage the concrete if not done carefully. Verify complete removal before reapplying a new sealer.
Cleaning Methods by Stain Type and Surface Condition
Outline a decision-tree approach that pairs stain types with surface conditions to guide method choice and intensity. Keep a simple path from unsealed or sealed surfaces to the appropriate cleaning action.
Summarize agents, physical methods, and safety steps, plus notes on rinsing, drying, and when sealing after cleaning is advisable. Include reminders to test first on a small area.
Low-impact DIY cleaners and enzymatic options
For light stains on basement concrete floors, start with gentle cleaners. They’re eco-friendly and won’t damage the surface.
Enzymatic products work great on organic stains like coffee or tea. They break down the stain at a molecular level without harsh chemicals.
Household acids like vinegar can help, but use them cautiously. Always spot test first to avoid damaging the concrete. Never mix ammonia and bleach – it creates harmful fumes.
Pressure/power washing and hot-water cleaning
For tough grime, consider pressure or power washing. It’s effective but can damage unsealed surfaces if not done carefully.
Use a wide-angle spray tip to avoid etching the concrete. Keep the nozzle moving to prevent water from pooling and causing damage.
Hot water can help dissolve tough grime better than cold water. But be careful – hot water under high pressure can also cause damage. Always test on a small area first.
Heavy-duty chemical treatments and safety notes
For stubborn stains like rust or efflorescence, you might need heavy-duty chemicals. Muriatic acid or commercial rust removers can do the trick, but they’re dangerous if not used correctly.
Always wear appropriate PPE – gloves, goggles, and a respirator. Work in a well-ventilated area. Follow manufacturer instructions to the letter.
After using these chemicals, neutralize them with baking soda or another base. Rinse thoroughly to remove all residue. And remember, sealing should wait until the floor is completely dry – at least 24 hours.
Choosing and Applying the Right Sealer for a Basement Concrete Floor
Explain penetrating versus film-forming sealers and how each type interacts with pores, moisture movement, and texture. Note typical basement use cases for each.
Assess basement conditions such as moisture, humidity, temperature, and porosity to guide sealer choice. Include a plan for adhesion testing and cure under basement conditions.
Sealer types: epoxy, polyurethane, polyurea, silane/siloxane, and acrylic
Epoxy sealers are tough, durable, and resistant to chemicals. They’re great for high-traffic areas and where chemical resistance is needed. However, they can be sensitive to moisture during application and curing.
Polyurethane sealers offer excellent abrasion and stain resistance. They’re good for basements with normal foot traffic but may not be suitable for damp or wet conditions due to their water-based nature.
Polyurea sealers are fast-curing, flexible, and resistant to chemicals and abrasions. They’re ideal for areas subject to temperature changes and heavy traffic. But they can be sensitive to moisture during application.
Silane/siloxane sealers penetrate deep into concrete pores, providing excellent waterproofing and breathability. They’re great for basements with moisture issues but may not offer the same level of stain resistance as other types.
Acrylic sealers are easy to apply, affordable, and provide good stain protection. However, they can be less durable than other options and may not perform well in high-traffic or damp conditions.
Application tips and surface checks before sealing
Before applying any sealer, ensure your concrete floor is clean, dry, and free of contaminants. Mix sealers thoroughly according to the manufacturer’s instructions. Apply in thin, even coats using a roller or sprayer.
Adhesion test: Apply a small amount of sealer to an inconspicuous area. Let it dry, then try to scratch it off with a coin or nail. If it doesn’t peel or flake, the surface is ready for sealing.
Bead test: Apply a small bead of sealer on the floor. If it spreads out evenly and dries without leaving gaps or craters, your surface is ready.
Curing times, coverage, and what to check on labels
Always follow the product label’s instructions for cure time and coverage. Here’s a quick checklist:
- Recommended surface moisture: Check if your basement’s moisture level is within acceptable limits.
- Temperature range: Ensure your basement’s temperature falls within the product’s application range.
- Humidity levels: Some sealers may not perform well in high humidity conditions.
- Cure time: Allow the recommended cure time before walking on or applying additional coats.
- Recoat window: Follow the manufacturer’s guidelines for when you can apply a second coat.
- Coverage rate: Ensure you have enough product to cover your floor in the required number of coats.
- Cleanup instructions: Know how to clean your tools and equipment after application.
- Safety precautions: Follow safety guidelines, including ventilation and personal protective equipment (PPE).
- Warranty information: Check the warranty period and what it covers.
Quick rule: If in doubt, always err on the side of caution and follow the manufacturer’s instructions.
Maintenance, Inspection, Recoat, and Long-Term Care
Define a practical maintenance cadence for sealed floors and which cleaners to reach for without harming the seal. Keep the regimen simple and repeatable.
Provide an inspection checklist and a path to decide between spot repairs, recoating, or full reseal. Include guidance on timing with seasonal humidity and activities.
Routine cleaning and products to avoid
Regular cleaning keeps your sealed basement floor looking good and protects the seal. Here’s a simple checklist.
- Daily: Sweep or vacuum to remove dust and debris.
- Weekly: Mop with a mild, pH-neutral cleaner. Avoid harsh solvents or acidic cleaners that can degrade certain sealers.
- Avoid: Wire brushes or steel wool as they can scratch the surface.
- Monthly: Inspect for signs of wear (see next section).
Quick rule: Regular cleaning prevents residue buildup and keeps your seal intact.
Visual checkpoints and when to reseal
Regular inspections help you decide between spot repairs, recoating, or full resealing. Here’s what to look for.
- Dulling: Check if the floor looks less glossy than before. This could indicate wear on the seal.
- Peeling: Look for any peeling or flaking sealer, especially in high-traffic areas.
- Staining: Inspect for water stains or discoloration, which may signal moisture issues.
- Cracking: Check for hairline cracks that could allow moisture penetration.
- Efflorescence: Look for white, powdery deposits on the surface, indicating excess moisture.
Quick rule: If you spot any of these signs, test a small area with mild cleaner and water. If it doesn’t restore the seal’s gloss, consider resealing or repairs.
Removing and reapplying sealer over time
Over time, you may need to remove old sealers or recoat. Here’s how to decide.
- Adhesion test: Before recoating, perform an adhesion test. Scratch the surface with a coin or utility knife. If the sealer comes off easily, strip and start fresh.
- Spot-sanding: For minor wear, spot-sand and recoat. This is quicker but less durable than full resealing.
- Full reseal: If adhesion test passes, lightly sand the entire surface before reapplying sealer.
- Timing: Recoating should ideally be done during low-humidity months (spring or fall) for best results.
Quick rule: Always perform an adhesion test before recoating. If the old sealer doesn’t adhere, strip and start fresh.
Safety, Common Mistakes to Avoid, and Cost Considerations
List essential safety steps for basement work, including PPE, ventilation, and moisture awareness. Emphasize a clean, dry work area to prevent slips and mold spread.
Highlight common DIY errors that derail projects, and explain how to interpret product labels and warranties. Outline cost drivers and practical tips to balance performance with budget.
Safety precautions and environmental handling
Personal Protective Equipment (PPE) is crucial when working with chemicals. Wear gloves, goggles, and a respirator to protect yourself from harmful substances.
Ventilation is key in basements. Use fans or open windows to ensure proper airflow and prevent the buildup of toxic fumes.
Safe storage and disposal of chemicals are vital. Follow manufacturer guidelines for storage, and dispose of materials according to local hazardous waste regulations.
Common mistakes and how to avoid them
Here are some common DIY mistakes that can derail your basement floor project:
- Skipping moisture testing: Always test for moisture before starting any work. Moisture can ruin your sealant job.
- Ignoring cracks/pull-reinforcement issues: Address these problems before sealing. Cracks can widen over time, compromising the seal.
- Improper surface prep (etching/priming): A clean, etched, and primed surface ensures better sealer adhesion.
- Incorrect sealer selection or mixing: Choose a sealer suitable for your floor’s condition. Follow manufacturer instructions for mixing to avoid waste and ensure effectiveness.
- Neglecting cure/ventilation times: Allow the sealer to cure properly, following manufacturer guidelines, and ventilate the area to prevent contamination.
Taking these precautions will help you achieve a long-lasting, effective seal on your basement floor.
Cost factors and decision checklist
Before starting your project, use this checklist to make informed decisions about costs:
- Sealer type: Epoxy, polyurethane, etc. Each has different costs and performance characteristics.
- Area size: Larger areas require more materials, increasing cost.
- Prep needs: Moisture mitigation, patching, and etching can add to your budget.
- Equipment rental/purchase: Consider the cost of renting or buying tools like sanders, grinders, and respirators.
- Labor time: Hiring help can speed up the job but adds labor costs.
- Disposal/cushioning for cure: Dispose of materials properly, and account for any additional materials needed during curing.
- Product labels: Check coverage, expected lifespan, recoat intervals, and warranties to ensure you’re getting good value.
Quick rule: Always compare products based on performance vs. cost, not just the lowest price.
Conclusion
Paragraph 1: Start with a core idea: Take control of the basement floor now by planning, testing, and applying the right sealant to get a clean, durable surface that looks right and lasts.
Paragraph 2: The practical next steps in a single sentence: assess the room and the stains, pick a safe method by stain type, prep and remove old coatings, test a small area, choose and apply the right sealer with proper ventilation, and then maintain and inspect regularly.
Paragraph 3: Common mistakes to avoid and safety rules: don’t skip prep or testing, don’t mix cleaners or sealers without checking compatibility, and don’t seal over damp concrete or unknown moisture; always wear PPE, ensure good ventilation, work in small areas first, and follow manufacturer directions exactly to prevent damage.
Paragraph 4: When to call a professional and closing line: if moisture issues show up, if you’re unsure about stain types or coating history, or the project spans a large area, bring in a pro to avoid costly mistakes; stay practical, stay steady, and you’ll get a floor that holds up.
FAQ
What kinds of stains commonly show up on basement concrete floors, and which are the toughest to clean?
Oil and grease stains soak in and can be stubborn. Rust from metal nearby shows up as reddish brown spots. Efflorescence looks like white powder on the surface and is caused by moisture pulling salts to the top. Pet stains or tannins from wood can also darken the concrete.
Different stains respond to different methods. Start with the simplest cleaner and move to more aggressive options only if needed. Always check the product label for stain compatibility and safety.
What are reliable methods for cleaning concrete stains on a basement floor?
Oil and grease: use a heavy-duty degreaser and scrub with a stiff brush, then rinse. Rust: try a rust remover formulated for concrete with careful scrubbing. Efflorescence: use a stiff brush and a cleaner designed for mineral buildup, then rinse well. For stubborn or mixed stains, repeat steps or test a small area first.
How should I test moisture before sealing a basement floor?
Do a simple plastic sheet test by placing a sheet over a small area for a day and checking for moisture underneath. Use a moisture meter designed for concrete if available. If you see dampness or a persistent damp smell, hold off on sealing and address the moisture first.
What are the common mistakes when sealing, and how can I do it properly?
Avoid sealing over damp or dirty surfaces. Don’t skip surface prep or skip drying time per the product directions. Apply in even coats and use the recommended primer if the sealer requires it. Always follow the label for ventilation and cure times, and test a small area first.