

Introduction
Paint smell comes from volatile compounds released as paint dries. To cut odors quickly, open windows, set up good cross-ventilation, and run a fan to move fresh air through the space. Always check the paint label and any safety data for ventilation recommendations.
Long-term odor elimination means letting the space cure in stages and using absorbers or breathable coverings as the painting dries. Plan ahead by keeping air moving during and after the job, and consider inexpensive absorbers or spill cleanup methods as needed. If odors persist, verify local guidelines and product instructions for any extra steps you should take.
Key takeaways
- Open doors and windows widely during painting and for several hours after.
- Set up fans to create cross-ventilation and push fumes outdoors quickly.
- Limit occupancy and remove pets during odor-control steps and airing periods.
- Use absorbers as directed, like activated charcoal or baking soda, with warnings.
- Choose low-VOC paints and proper primers to minimize future odors.
- Follow product labels and local rules when planning ventilation and odor control.
Table of Contents
- Introduction
- Key takeaways
- Why Paint Odors Linger
- Immediate Steps to Cut Down Smell After Painting
- Ventilation Techniques and Timing
- Absorbers and Air-Cleaning Devices That Work
- Longer-Term Solutions for Eliminating Paint Odors
- Safety and Health Considerations
- Planning and Product Selection to Prevent Odors
- Cost-Effectiveness, Common Mistakes, and Tools Checklist
- Conclusion
- FAQ
Why Paint Odors Linger
The chemistry behind lingering paint smells centers on volatile organic compounds and solvents released as paints cure and dry. These compounds off-gas at different rates based on their chemical structure. Their odor strength and how long they persist depend on both the paint formulation and the environment around it.
Water-based vs oil-based formulations, as well as low-VOC or FIFO variants, influence how quickly odors fade. Temperature, humidity, ventilation, room size, and confinement all shape the off-gassing timeline. Look for practical signals like odor intensity, throat irritation, or headaches to gauge how long to expect lingering smells and what will address them in later sections.
Primary causes (VOCs, solvents, and additives)
Paint odors are mainly due to volatile organic compounds (VOCs) and solvents. These chemicals evaporate as the paint dries, a process called off-gassing.
VOCs like benzene and formaldehyde give off strong smells that can linger for days or weeks. Some paints have higher VOC content, especially oil-based ones.
Solvents like mineral spirits or acetone help paint flow and level. They also evaporate quickly, causing initial strong odors. Additives in some paints may also contribute to lingering smells.
How environment and surfaces change off-gassing
Temperature and humidity affect off-gassing. Warmer temperatures speed up evaporation, reducing odor duration. But high humidity can trap odors, making them linger.
Airflow is crucial. Poor ventilation traps odors, while good airflow helps them dissipate quickly. Porous surfaces like unsealed wood absorb chemicals, releasing them slowly over time. Sealed surfaces off-gas faster but may still retain some odor.
Old paint layers can also prolong smells. If you’re painting over old paint, trapped odors can be released and mix with new paint fumes, creating a stronger smell that lasts longer.
When lingering smell indicates a problem
Odors should fade within a few days to a week. If they linger or worsen, it could indicate a problem. Strong, persistent odors can cause headaches, throat irritation, or nausea.
If you notice these symptoms, consider using an air quality monitor to check for high VOC levels. If the smell is unusually strong or persists for more than a few weeks, consider getting professional advice. It might be a sign of poor ventilation, trapped odors in walls, or even a paint defect.
Remember, some paints are designed to off-gas slower (low-VOC/FIFO formulations). Always check the manufacturer’s guidelines to understand your paint’s specific properties and expected odor duration.
Immediate Steps to Cut Down Smell After Painting
Start with a short, prioritized action plan to reduce odor right after painting. The focus is on getting fresh air moving and removing source odors fast. Quick actions set up for longer-term relief in the hours ahead.
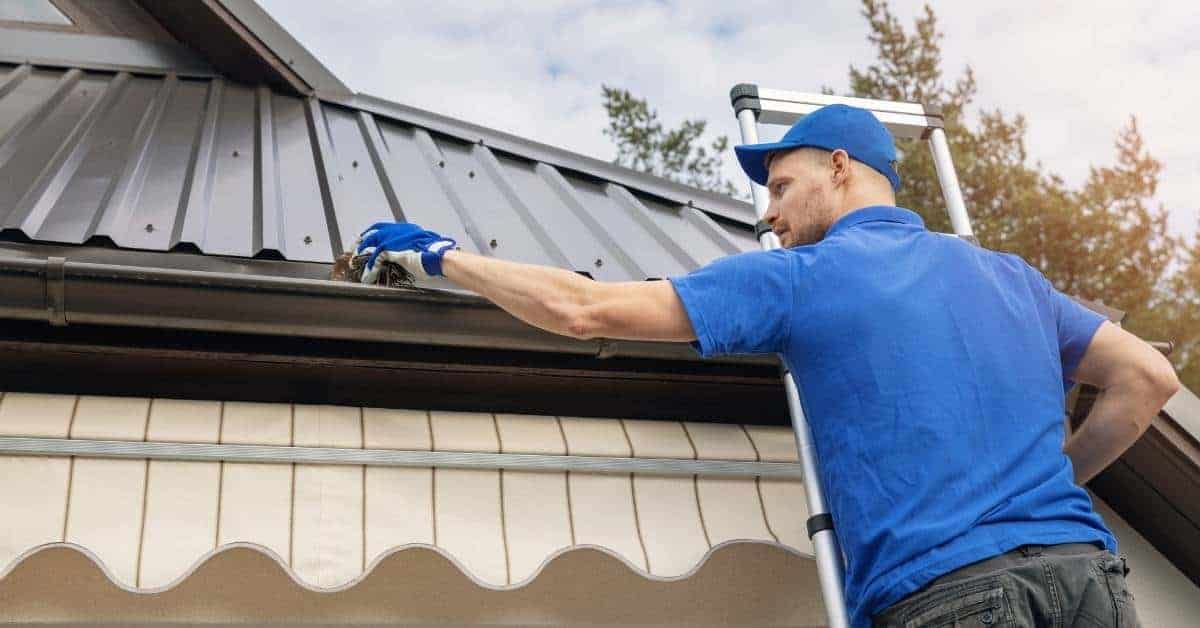
Ventilation is the first line: open windows and doors to establish cross-ventilation, switch on exhaust fans, and keep a portable fan moving air toward an exterior opening. Remove or seal sources like cans and solvent containers, and move items that may have absorbed fumes away from the area. Place simple absorbers like baking soda or charcoal where they won’t touch wet surfaces.
First actions (ventilate, remove rags, isolate)
Start by opening all windows and doors to create cross-ventilation. This helps push out the paint fumes.
Safety first: Remove any solvent-soaked cloths or tacky items that could be releasing strong odors. Keep occupants away from the freshly painted area until it’s safe.
If possible, isolate the room with the door closed to prevent odors from spreading to other areas of your home.
Quick absorbers and neutralizers
Activated charcoal, baking soda, and coffee grounds are excellent odor absorbers. Place them in shallow bowls around the room, focusing on corners where odors tend to collect.
Baking soda is a fast-acting absorber. Use it liberally, but avoid placing it directly on wet paint or near heat sources as it can cause reactions.
White vinegar in shallow bowls also helps absorb odors. It’s less effective than the others but still useful. Remember to replace absorbers every 24 hours for maximum effectiveness.
Surface cleaning to speed odor dissipation
Wipe down floors, trim, and furniture with a damp cloth to remove any paint residue or solvent that may be lingering. Be careful not to spread the smell around.
For tougher residues, use a mild soap solution. Avoid harsh chemicals as they can react with paint fumes and create more odors.
Once you’ve cleaned surfaces, re-ventilate the room to help remove any remaining odors from the surfaces.
Ventilation Techniques and Timing
Natural ventilation includes opening opposite sides of the space and using doors, windows, or louvers to create a clear airflow path. Look for ways to maximize cross-ventilation around the concrete work area. Avoid creating drafts that kick up dust or debris.
Mechanical ventilation uses box or inline fans placed near the odor source and at the farthest exterior opening. Run fans continuously as appropriate and coordinate with ceiling or spot fans to move air low to high. Ventilation duration should be guided by product labels and environmental conditions, with adjustments for room size and climate.
Natural ventilation strategies
Maximize cross-ventilation by opening opposite sides of the space. Start with doors and windows, then optimize window placement for airflow across the concrete work area.
Use existing louvers to your advantage. If you have trickle vents or roof vents, keep them open for continuous air exchange.
Pro tip: Place a small fan near an open window to boost natural ventilation.
Mechanical ventilation and fans
When natural ventilation isn’t enough, use box or inline fans. Place them near the odor source and the farthest exterior opening for best results.
Run fans continuously, but avoid creating drafts that reintroduce dust or debris. Use a combination of fans to create a directional airflow from fresh air intake to exhaust.
Consider: Renting a blower or running your HVAC system to help with ventilation.
Timing and monitoring ventilation
Check the paint label for dry/cure times. Ventilation durations vary, typically ranging from 2–12 hours for small spaces, longer for larger or enclosed areas.
Monitor smell and conditions. If it’s too humid or hot, you might need to extend airing time. Always verify with product instructions.
Safety note: Don’t rush ventilation. It’s crucial to ensure odors have dissipated before finishing the job.
Absorbers and Air-Cleaning Devices That Work
Three solution categories exist: passive absorbers, commercial odor removers, and active air-cleaning devices. Use passive options for quick, small-scale odor, or in well-ventilated spaces. Reserve active solutions for stronger or longer-lasting smells.
Map effectiveness by scenario and product type: activated charcoal or baking soda for passive use; odor-neutralizing sprays or gels for commercial options; and HEPA purifiers with carbon filters for active cleanup. Consider safety, maintenance, and cost when choosing and deploying these tools in combination with ventilation.
Activated Carbon and Other Passive Absorbers
Passive absorbers like activated charcoal and baking soda work by trapping molecules, reducing odors over time. They’re great for small, short-lived paint smells in well-ventilated spaces.
Activated Charcoal: These bags or pouches contain porous material that absorbs VOCs. Place them near the source of the smell, but not too close to heat sources. Replace every 2-3 months or when they stop working.
Baking Soda: An inexpensive alternative, baking soda also absorbs odors. Place open boxes around the room. Unlike charcoal, it doesn’t last as long and needs replacing weekly.
While effective for light smells, passive absorbers struggle with heavy VOCs or sealed rooms. They’re not a quick fix but help maintain fresh air over time.
Air Purifiers and Filtration Options
Active solutions like air purifiers use filters to clean the air. They’re ideal for persistent, strong odors in sealed rooms or when you need quick results.
Look for purifiers with a carbon filter to absorb VOCs and a HEPA filter to trap particles. These combo filters work best against paint smells.
Run the purifier continuously in the room until the smell is gone. Replace filters as per manufacturer’s instructions, usually every 6-12 months or when the indicator light changes.
Air purifiers are more expensive than absorbers but provide faster results and better control over heavy odors. They’re worth it for sealed rooms or when you can’t ventilate naturally.
Odor Neutralizers Versus Masking Agents
Some products neutralize VOCs, breaking down molecules to eliminate smells. Others mask odors with fragrances, temporarily covering up the smell.
Use odor neutralizers for persistent paint smells in sealed rooms or when you need a quick fix before guests arrive. Sprays and gels are easy to apply but need reapplying every few hours or after heavy use of the room.
Masking agents are useful for light, temporary odors. They’re cheap and readily available but don’t solve the problem at its source. Fragrances can also irritate sensitive individuals or pets.
Choose based on your needs: neutralizers for strong, persistent smells; masking agents for light, short-term issues. Always follow safety instructions and keep products out of reach of children and pets.
Longer-Term Solutions for Eliminating Paint Odors
Structural and procedural fixes focus on airflow, humidity control, and sealing problem surfaces. Improve permanent ventilation by upgrading exhaust paths and creating clear cross-ventilation routes. Position vents to pull odors away from living spaces.
Address moisture and future odors by managing humidity and testing for moisture migration. Seal porous surfaces with odor-blocking primers or encapsulants before repainting, and plan a proper repainting sequence to minimize off-gassing buildup over time.
Improving home airflow and HVAC adjustments
Long-term solutions for paint odors often start with improving your home’s natural airflow. Install or upgrade exhaust fans in kitchens, bathrooms, and laundry rooms to pull odors away from living spaces.
Create cross-ventilation paths by opening windows on opposite sides of the house. This encourages air movement and helps carry odors out. Position vents strategically to maximize this effect.
Regularly change HVAC filters to maintain optimal airflow and prevent odors from being recirculated throughout your home. Consider integrating a whole-house dehumidifier into your system to control humidity levels, which can help reduce off-gassing duration.
Sealing, priming, or stripping problem surfaces
Some surfaces may absorb and retain paint odors more than others. Test suspected problem areas using a small, inconspicuous patch of the new paint. If the odor persists, consider sealing the surface before painting.
For porous substrates like concrete or drywall with high moisture content, use an odor-blocking primer or encapsulant to seal the surface and prevent odors from seeping through. Shellac is another effective option for sealing surfaces before painting.
If stripping old layers is necessary, ensure you’re using appropriate solvents and safety measures. This process can help eliminate lingering odors and provide a fresh base for new paint.
When professional remediation is needed
In some cases, persistent high levels of volatile organic compounds (VOCs) may require professional testing and remediation. If you’re experiencing severe or lingering symptoms such as headaches, dizziness, or nausea after painting, consult a professional immediately.
For large-scale jobs or extensive paint coverage, consider hiring professionals to ensure proper ventilation, surface preparation, and application techniques are used. They have the tools and expertise to handle complex projects safely and effectively.
Professionals can also perform air quality tests to identify any remaining VOCs and provide targeted solutions for eliminating them. Don’t hesitate to seek help if you’re unsure about tackling a paint odor problem on your own.
Safety and Health Considerations
VOCs from paints pose health risks that vary with concentration and exposure duration. Symptoms can include headache, dizziness, irritation, and, with longer exposure, more serious effects. Protecting indoor air quality is essential during and after painting projects.
Vulnerable groups such as children, pregnant people, pets, and immunocompromised occupants require stricter precautions. Use proper PPE, ensure thorough ventilation, choose low-VOC products, and store and dispose of materials safely. Seek medical evaluation if symptoms persist or worsen.
Symptoms and immediate responses
Exposure to paint fumes can cause immediate symptoms. If you experience any of these, act quickly:
Headache, dizziness, or irritation (eyes, nose, throat)? Leave the area immediately and increase ventilation.
If symptoms persist or worsen, seek medical attention. Always prioritize your health over completing a task.
Safe handling, storage, and disposal
Minimize re-exposure by following these safe practices:
Store leftover paint in their original containers with tightly sealed lids. Keep them away from heat sources and out of reach of children or pets.
Dispose of solvent-soaked rags properly. Never leave them in a pile as they can spontaneously combust. Rinse them thoroughly, let them dry, then dispose in a sealed plastic bag.
Consider using low-VOC paints to reduce exposure risks during storage and disposal.
Air testing and regulatory limits
Measuring VOC levels can help you understand the air quality in your home. Here’s how:
DIY meters are available, but they’re not always accurate. Consider getting a professional test for reliable results.
Check local guidelines or product safety data sheets for acceptable VOC levels. OSHA sets the Permissible Exposure Limit (PEL) at 5 mg/m³ for most solvents.
If readings are high, take action to improve ventilation and reduce exposure. If symptoms persist, consult a healthcare provider.
Planning and Product Selection to Prevent Odors
Pre-paint planning should focus on low-VOC or zero-VOC options, water-based formulations, and safer primers. Verify product labels and certifications, and check drying times and recoat windows to prevent prolonged fumes. Use a plan to minimize odor sources from the start.
Prepare surfaces to prevent odor entrapment by removing oils, repairing defects, and sealing porous areas before coating. Choose odor-blocking primers for tricky substrates and test compatibility on a small area before full application. Schedule work with weather and ventilation in mind to reduce lingering odors.
Choosing low-VOC or no-VOC products
When it comes to paint, the term ‘VOC’ stands for Volatile Organic Compounds. These are chemicals that easily become vapors at room temperature and contribute to odor and air pollution.
Low-VOC paints have less than 50 g/L of VOCs, while zero-VOC or low-odor paints contain no added solvents. They’re usually water-based and dry faster with fewer fumes.
Before buying, check product data sheets for VOC limits and certifications like GREENGUARD, SCS, or EPA Safer Choice. These ensure products meet strict emissions standards. Also, note expected drying times to prevent prolonged exposure to fumes.
Prep, priming, and minimizing coats
Thorough surface preparation is key to reducing paint smell. Start by removing oils, grease, and residues. Repair cracks and sand smooth for better adhesion.
Choose a compatible odor-blocking primer for glossy or stained surfaces. This seals the old finish, preventing odors from bleeding through. Ensure it’s compatible with your topcoat and test on a small area first.
Applying multiple coats can increase odor exposure. To minimize this, use a high-quality primer that allows you to apply fewer topcoats. Follow recommended coats, drying times, and ventilation needs for each product to keep odors at bay.
Scheduling and staging the job
Timing your painting project right can help minimize odor issues. Plan work during favorable weather with low humidity to ensure proper drying and ventilation.
Consider room occupancy and use when scheduling. Paint bedrooms or living areas last, allowing time for adequate airing before reoccupation. If possible, avoid painting during peak occupancy hours to reduce disruption.
Set a ventilation plan with air changes per hour, exhaust location, and temporary barriers. This helps control odors and prevents them from spreading throughout the home. Also, allow for extended curing periods to reduce lingering odors.
Cost-Effectiveness, Common Mistakes, and Tools Checklist
Compare the costs of DIY remediation against professional help, including materials, equipment rental, and labor time. Consider scenarios where one option is clearly more economical than the other. Use a practical framework to weigh options.
Be aware of common mistakes that extend odors: inadequate ventilation, overusing absorbers, sealing smells with incorrect products, or insufficient surface prep. Build a compact tools and materials checklist with rationale, covering ventilation gear, absorbers, odor-neutralizing products, PPE, and measurement tools for a cost-effective approach.
Cost vs. benefit of common methods
Before you start, check this list to decide when DIY fixes are enough and when to call in the pros.
- Ventilation: Fans and open windows – Inexpensive, effective for mild odors. Check: Ensure proper airflow, don’t seal too soon.
- Absorbers: Zeolites or activated charcoal – Affordable, work well with adequate ventilation. Check: Replace when saturated, don’t over-rely on them.
- Dehumidifiers: Help control moisture-related odors – Moderate cost, effective in damp areas. Check: Empty water tank regularly, maintain proper humidity levels.
- Professional remediation: Expensive but quick and thorough for severe cases. Check: When odor persists despite DIY efforts, or when time is critical.
- Purifiers: Air purifiers with activated carbon filters – Costly, effective for strong odors. Check: Replace filters regularly, ensure proper placement and ventilation.
Quick rule: For mild odors, start with DIY fixes. For severe cases or time-sensitive projects, consider professional help.
Common mistakes to avoid
Don’t let these common errors extend your paint smell ordeal. Check this list before you start.
- Inadequate ventilation: Poor airflow traps odors – Check: Use fans, open windows, ensure proper circulation.
- Sealing too soon: Traps odors inside – Check: Wait for adequate ventilation before sealing windows or doors.
- Reusing solvent-soaked cloths: Reinforces odor – Check: Dispose of used rags properly, don’t reuse with strong solvents.
- Over-reliance on air fresheners: Masks odors temporarily – Check: Use as a supplement to proper ventilation and absorption.
- Incorrect surface preparation: Odors linger in porous surfaces – Check: Prime or seal problem surfaces before painting, strip old paint if necessary.
Quick rule: Proper preparation, ventilation, and absorption are key. Don’t skip steps or rely on quick fixes.
Tools and materials checklist
Gather these essentials before you start to ensure effective paint smell removal.
- Ventilation gear: Box fans, oscillating fans – Check: Ensure proper airflow, place strategically for best results.
- Absorbers: Zeolite bags, activated charcoal packets – Check: Product labels for absorption capacity and replacement frequency.
- Odor-neutralizing products: Activated carbon air purifiers, odor-absorbing sprays – Check: Labels for effectiveness against paint odors, proper usage instructions.
- PPE (Personal Protective Equipment): Gloves, safety glasses – Check: Protect yourself from harsh chemicals and solvents.
- Measurement tools: Tape measure, level – Check: Ensure proper placement of absorbers, fans, and sealants.
- Sealers/primers: Oil-based or shellac-based primers – Check: Labels for effectiveness against paint odors, proper application instructions.
Quick rule: Having the right tools and materials ensures efficient odor removal. Don’t skimp on essentials.
Conclusion
Getting to a smell-free space is about doing the right steps safely and in the right order, not chasing a quick fix. Stay focused on ventilation, use absorbers or air-cleaning devices as recommended, and schedule your actions so you don’t trap fumes or damage finishes.
Start with a simple, practical check as you finish the job: ensure ventilation is active, doors and windows are used correctly, place absorbers or air cleaners where they can work without obstructing paths, and monitor the space with a quick sniff test after each interval. Move through the plan in a steady rhythm, testing small areas first, avoiding overloading the room with heat or humidity, and sticking to the products and timings you planned. If the smell remains stubborn, extend ventilation and repeat the monitoring step until it drops to a tolerable level.
Common mistakes to avoid are trying to seal a room and flood it with air cleaners at once, ignoring safety signs or masking odors with unrelated cleaners, and skipping small-area testing before widening the approach. Always follow safety rules: wear appropriate protection when needed, don’t mix chemicals, never block fresh air paths, and don’t push through a plan that makes you uncomfortable or unsure. If you notice headaches, dizziness, or coughing, stop and reassess; these are signals to slow down and recheck your setup.
If you’re dealing with persistent odors, or you’re ventilating a large or occupied space, consider calling a professional to review layout, product selections, and any potential material issues. With careful planning and steady execution, you can finish with a safer, more comfortable room and avoid costly mistakes. You’ve got this—steady, practical action wins over guesswork.
FAQ
Why do paint odors linger after a project?
Odors stick around because volatile organic compounds release slowly from the paint film and primer. Poor ventilation lets them build up in the room. Check the product labels for odor control notes and follow the manufacturer for airing out times.
What immediate steps should I take right now to reduce the smell?
Open windows and doors to create cross-ventilation as soon as you’re done painting. Run any exhaust or ceiling fans toward the outdoors and avoid re-sealing the space until the air clears. If it’s safe, move people and pets out of the area temporarily.
What long-term methods actually get rid of the odor?
Keep ventilation going for several days after painting and consider temporary air-cleaning devices that are appropriate for in-use occupancy. Use odor absorbers in the space according to product instructions and replace them as needed. Avoid adding new finishes until the smell is gone and the area is well aired.
How can I prevent odors from coming back in future projects and what should I look for in absorbers or ventilation gear?
Plan for good ventilation from day one: set up airflow to move air out of the room. Choose absorbers or air-cleaning devices with clear labeling about what they remove and how to use them. Always follow product instructions and local guidelines for safe use.