
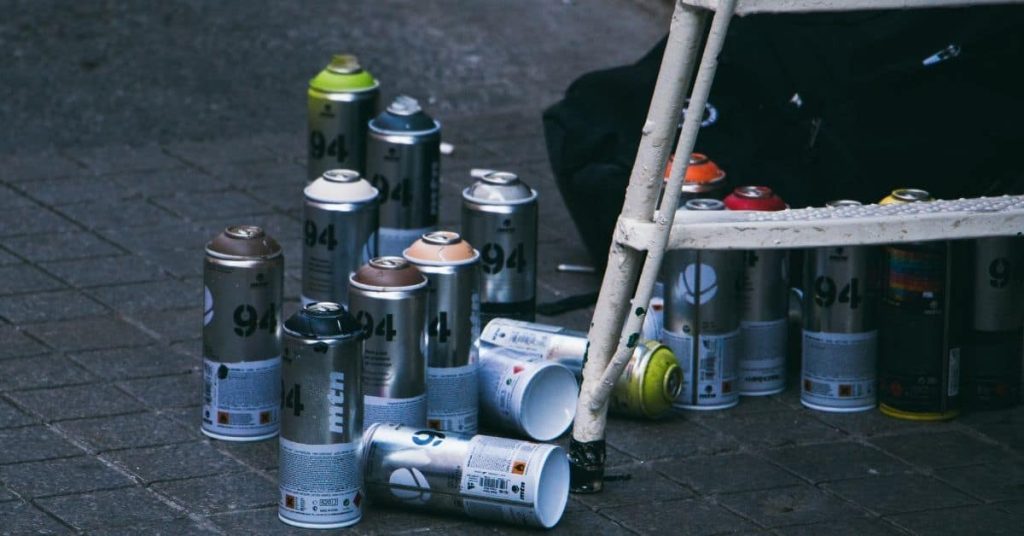
Introduction
Spray paint dry time is how long it takes for the finish to stop behaving tacky and to feel reasonably solid to the touch. It depends on conditions, the product, and how you apply it. Expect real-world timing to vary with air flow, surface prep, and layering.
To test, lightly touch an inconspicuous spot and wait a moment to see if it stays firm. Watch for common mistakes like overloading the can, spraying too thickly, or not letting enough time between coats, and adjust your approach accordingly. If you see runs, sags, or uneven gloss, fix by sanding lightly and reapplying in thin, even layers after the surface has had a chance to set.
Key takeaways
- Understand the difference between drying and curing during spray paint projects.
- Temperature, humidity, and airflow significantly influence drying behavior and finish.
- Test dry by gentle touch, then by holding a second test without smudging.
- Common mistakes include rushing coats, skipping prep, or neglecting ventilation.
- Plan for multiple light coats and proper drying intervals between applications.
- Safety: wear respirator, eye protection, and ensure good ventilation at all times.
Table of Contents
- Introduction
- Key takeaways
- Quick Overview: Drying Vs Curing
- Key Factors That Affect Drying Time
- Typical Drying Behavior by Paint Type (Qualitative Guidance)
- How to Test If Spray Paint Is Dry — Simple and Reliable Methods
- Common Drying Problems and Their Root Causes
- Fixes and Step-by-Step Recovery Procedures
- Tools, Materials Checklist and What to Check on Labels
- Safety, Project Planning, and Cost/Time Implications
- Conclusion
- FAQ
Quick Overview: Drying Vs Curing
Drying to the touch means the surface feels dry and no longer transfers moisture when you press it lightly. Curing is the longer process where the film hardens and reaches its best durability. Both states matter for handling, recoating, and final performance, and cure usually takes longer than touch-dry under the same conditions.
Different spray paints behave differently, and environments shift timelines. Aerosol, solvent-based, and water-based varieties each have distinct touch-dry and cure profiles. The material, surface, thickness, temperature, humidity, and airflow all influence when you can handle, move, or apply a second coat safely.
Dry to touch vs full cure
When you spray paint, the first thing you want to know is when it’s dry enough to handle. This is what we mean by ‘dry to the touch’. It feels not tacky anymore.
But, that doesn’t mean your paint job is fully cured yet.
Full cure happens when all solvents have evaporated, and the film has reached its intended hardness. This takes much longer than just drying to the touch.
Why drying times matter for your project
Getting impatient and handling or moving something too soon can cause runs, adhesion failures, or even long-term finish problems. Planning around actual drying behavior saves you time and money.
For instance, if you’re painting a metal chair, you might think it’s dry enough to move after an hour. But if the humidity is high, it could still be too tacky and stick to something else.
So, always check your paint job thoroughly before handling or moving it, no matter how ‘dry’ it feels.
Key Factors That Affect Drying Time
Environmental factors drive how fast the film dries. Temperature, humidity, and airflow all shape solvent evaporation and film formation. A stagnant space slows drying, while good ventilation speeds ups, but can also cool surfaces.
Paint formulation and application technique matter too. Solvent-based versus water-based sprays behave differently, and drying aids or retarders can change timing. Coat thickness, number of coats, and proper flash-off intervals directly affect how quickly the surface becomes handleable and how long until full cure is reached.
Temperature and humidity effects
Low temperatures and high humidity slow down the drying process of spray paint. Here’s why:
Temperature: Below 50°F (10°C), the evaporation rate of solvents in the paint significantly drops, leading to slower drying. Aim for temperatures between 65-85°F (18-29°C) for optimal results.
Humidity: High humidity levels can also hinder drying as moisture in the air competes with the paint’s solvents for evaporation. Keep humidity below 70% for best results.
Paint formulation and solvents
The type of solvent and chemistry of the spray paint determine its drying rate and cure mechanism. Here’s what you need to know:
Solvent-based paints: These dry faster due to quick solvent evaporation. However, they have strong fumes and slower curing times.
Water-based paints: These are slower to dry but cure faster once the water has evaporated. They also have lower VOCs (volatile organic compounds).
Always check the product data sheet for specific drying and recoat intervals.
Coat thickness and substrate absorbency
The thickness of your spray paint coats and the absorbency of your surface both impact drying time. Here’s how:
Coat thickness: Heavy, wet coats trap solvents, slowing down drying and curing. Apply thin, even coats for faster results.
Substrate absorbency: Porous surfaces like wood or concrete can absorb paint and solvents, extending drying time. Ensure your surface is clean, dry, and primed to speed up the process.
Typical Drying Behavior by Paint Type (Qualitative Guidance)
Drying and curing are two separate stages for spray paints. Surface-dry describes the moment a finish feels dry to touch, while full cure means the film has reached maximum hardness and durability. Use both benchmarks to plan handling and recoat windows.
Common paint families include fast-drying lacquers, enamel/alkyds, and water-based acrylics. In typical conditions, you can expect a qualitative ranking from fastest to slowest, but verify explicit times on labels or data sheets for your product. Surfaces like concrete add factors such as porosity and airflow that can shift speeds.
Fast-drying lacquers and acrylic lacquer aerosols
Lacquers and acrylic lacquer aerosols are your quickest options for touch-dry time. They can be ready to handle in as little as 15-30 minutes, depending on conditions.
Note: While they’re fast to touch, full hardening may take several hours or even a day. Be careful not to apply too thickly, as overspray can slow down drying and lead to drips or runs.
Always check the product label for exact times, as these can vary between brands. Keep in mind that full cure can still take up to 30 days.
Enamels and oil-based/alkyd sprays
Enamel and oil-based or alkyd sprays take longer to harden compared to lacquers. They can remain soft beneath the surface for hours, sometimes even days.
Caution: Be patient with these paints. Handling too soon can leave fingerprints or damage the finish. Expect full cure to take up to a week under ideal conditions.
These paints are sensitive to humidity and temperature. Warmer temperatures speed up drying, while cooler temps slow it down. Keep this in mind when planning your project.
Water-based acrylic or latex sprays
Water-based acrylics and latexes fall somewhere between lacquers and enamels in drying speed. They’re typically touch-dry within an hour, but full cure can take several days.
Tip: Proper ventilation is key with these paints. Good airflow helps water evaporate faster, speeding up the drying process.
Humidity plays a big role in how quickly these paints dry. In high humidity conditions, expect longer drying times. Always check the product label for specific guidance on your paint.
How to Test If Spray Paint Is Dry — Simple and Reliable Methods
Start with a non-invasive visual check: look for uniform finish and absence of tack. A light fingertip touch on an inconspicuous area can confirm tack-free status without marring the surface. If it leaves a faint fingerprint, it isn’t fully dry yet.
Next, perform a gentle pressure test with a gloved finger to assess tackiness. For a more rigorous check, test adhesion on a small, hidden patch using a light scratch or peel check. Use small-area tests like tape pull or micro-wear only when you’re sure the finish will tolerate it.
Step-by-Step Process
Follow these steps to test if your spray paint is dry using simple and reliable methods.
- Prepare the area: Ensure it’s well-ventilated, free of dust, and safe for testing.
- Visual inspection: Check for surface sheen uniformity, absence of tackiness, and no clouding (see next section).
- Light touch test: Gently press with a gloved finger to check for tackiness. Acceptable range is no immediate stickiness or residue.
- Scratch/peel risk test: Perform on an inconspicuous edge using a light scratch or peel check to evaluate adhesion without damaging the whole project.
- Small-area performance tests (if needed): Apply a tiny tape pull, rubber eraser test, or micro-wear check on a hidden patch to confirm cure stability. If any doubt remains, wait longer before proceeding.
Visual and Tactile Checkpoints
Use this checklist when you’re unsure if your spray paint is dry enough for further handling or recoating.
- Surface Sheen: Should be uniform, not dull or patchy. If skipped, it may indicate incomplete drying.
- Tackiness: Absence of stickiness when lightly touched. If present, wait longer before proceeding.
- Clouding: No hazy or cloudy areas. If found, allow more time for drying.
- Color Consistency: Even distribution of color with no visible drips or runs. Inconsistencies may indicate premature handling.
Quick rule: Remember, a dry surface may still not be fully cured beneath. Always perform additional tests before proceeding.
Light Touch, Fingernail, and Tack Tests
Gently testing your spray paint’s dryness helps prevent damage. Here’s how to do it safely.
Start by lightly touching the surface with a gloved finger. If no residue or stickiness is present, proceed to the next step. Be gentle; aggressive probing can cause fingerprints or damage.
Next, try tapping the surface gently with your fingernail. A dry surface should produce a solid, resonant sound. If it’s dull or muted, wait longer before testing again.
Note: Always wear gloves to protect both yourself and the paint job from contamination or damage.
Small-Area Functional Tests
When in doubt, perform a discreet adhesion or flexibility test on an inconspicuous area or scrap to confirm your spray paint’s stability.
Use a small piece of tape to gently pull at the surface. If it lifts easily without leaving residue, the paint is likely dry enough. However, if it sticks or pulls off pieces of the paint, wait longer before testing again.
Alternatively, use a rubber eraser to lightly rub the surface. No residue or smudging indicates a dry surface. If it leaves marks, allow more time for drying.
Quick rule: If any doubt remains after these tests, err on the side of caution and wait longer before proceeding with your project.
Common Drying Problems and Their Root Causes
Runs or sags appear when coats are too thick or sprayed too slowly in one spot. Orange peel shows up with too rapid drying or improper atomization. Blushing or moisture clouding indicates trapped humidity or surface moisture during application.
Wrinkling, solvent popping, and poor adhesion each point to heat, solvents, or incompatible layers. Verify environmental readings, surface prep, and whether solvents are still present in the film before re-coating. Adjust thickness, temperature, or ventilation as needed.
Sagging, runs and pooling
These issues happen when you put on too much paint at once. Or if the surface doesn’t level out right. You’ll see it as drips or puddles.
Fix: Sand it smooth after it’s dry. Then recoat, but go lighter this time.
Remember, patience is key here. Let each coat dry fully before you sand and recoat.
Blushing and cloudiness from moisture
This happens when it’s too humid, or the surface is damp. You’ll see a milky look instead of a smooth finish.
Fix: Warm up the area. Use a heater if you need to. Let it dry out before you recoat.
Check the humidity level. If it’s over 70%, wait for it to drop.
Wrinkling, cracking and solvent pop
These problems happen when the solvents evaporate too fast. Or if you use incompatible topcoats. You’ll see it as texture issues – wrinkles, cracks, or little bubbles.
Fix: If it’s bad, you might need to strip it and start over. Otherwise, sand carefully to smooth it out.
Next time, make sure your topcoats are compatible. And let each coat dry fully before applying the next one.
Fixes and Step-by-Step Recovery Procedures
Pause to assess before acting. Use a quick diagnostic flow to decide whether to wait, sand, or recoat. For common defects like drips, orange peel, or cure mismatches, adjust approach based on what you find.
Prepare the surface with proper cleaning and masking, then recoat with appropriate timing. Wet sanding and light polishing can help level a finish, but only after initial cure checks. If needed, strip and restart, following a methodical plan and testing at each step.
Step-by-Step Repair Process
This step-by-step guide walks you through the repair process, from preparation to final checks.
- Preparation: Clean and degrease the surface. Mask off areas not to be painted. Ensure proper ventilation and wear skin/eye protection.
- Diagnose issues: Check for drips, orange-peel, sagging, or cure mismatch. Refer to the diagnostic flowchart in your spray paint guide.
- Main work: Based on diagnosis, proceed with sanding (if needed), recoating, or stripping. Be patient; let each step dry as instructed.
- Cleanup and final checks: Remove masking tape, clean up any residue, and perform visual/tactile tests to ensure a successful repair.
- Pro tip: If you’re unsure about any step, don’t hesitate to consult a professional. It’s better to be safe than sorry.
When and how to sand and recoat
Wait until the paint film is firm enough to sand without removing too much. Use progressively finer grits (e.g., 120 → 220 → 400) to feather edges.
Never sand through the clear coat into the color layer. Clean the surface before recoating to remove dust and ensure good adhesion.
Allow adequate drying time between coats (as per manufacturer’s instructions) to avoid defects like sagging or wrinkling.
Wet sanding and polishing clear coats
Wet-sanding levels the surface by using water with progressively finer grits (e.g., 800 → 1500 → 2000). This helps remove orange-peel texture and minor imperfections.
Polish using compounds and buffing pads to restore gloss. Be careful not to cut through the clear coat into the color layer or remove too much material.
Always assess levelness before applying any recoats to avoid trapping defects in subsequent layers.
Stripping and repainting problem areas
For severe issues like extended sags or peeling, stripping may be necessary. Test strippers on a scrap piece first to ensure compatibility.
Safely strip the area using mechanical sanding or chemical strippers, following manufacturer’s instructions. Wear proper PPE and ensure full solvent removal before repainting.
Once stripped, clean, prepare, and repaint the surface as you would a new project, taking care to avoid previous issues.
Tools, Materials Checklist and What to Check on Labels
Keep a spray gun, hoses, and a compressor ready, plus PPE like an organic vapor respirator, gloves, and eye protection. Have cleaning solvent and lint-free rags on hand for quick cleanup and prep.
On labels or SDS, verify the recommended spraying temperature and humidity, cure and recoat windows, flash point, VOC content, and surface prep notes. Use test spray on sacrificial surfaces to confirm thinning and technique before committing to the project.
Essential tools and PPE
Before you start spraying, ensure you have all the necessary tools and personal protective equipment (PPE) to keep your project safe and efficient.
- Respirator with organic vapor filter: Protects from solvent aerosols. Check it fits well and has a suitable filter.
- Chemical-resistant gloves: Shields hands from chemicals. Ensure they’re not too thick to hinder dexterity.
- Goggles/face shield: Safeguards eyes from debris and overspray. Make sure they provide full coverage.
- Coveralls: Protects clothing from paint and chemicals. Check they’re long enough to cover shoes.
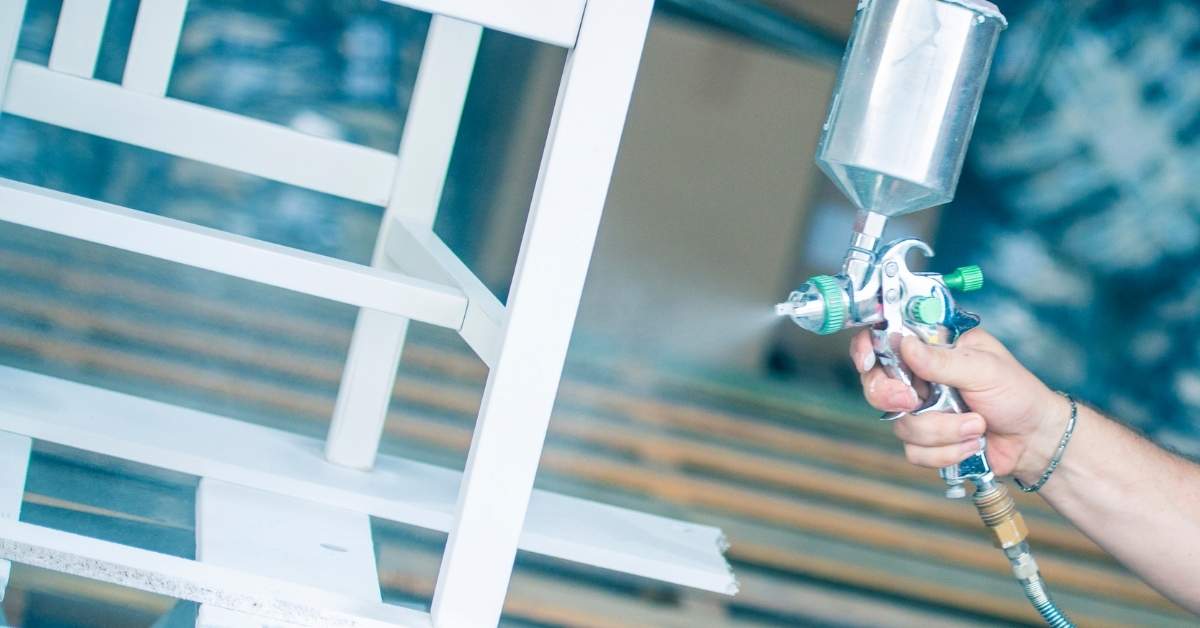
- Spray gun: Choose one suitable for your paint type (e.g., HVLP for high solids paints). Inspect it for any damage before use.
- Hoses and compressor: Ensure hoses are in good condition and the compressor is rated for your spray gun’s requirements.
- Cleaning solvent and lint-free rags: Essential for cleaning equipment post-use. Check you have enough to thoroughly clean all parts.
- Safety glasses with side shields: Provides eye protection during sanding and other prep work.
Quick rule: Always prioritize safety first. Don’t start spraying without the right PPE.
What to read on the product label or technical data sheet
Before you begin, carefully read and understand the information provided on the product label or technical data sheet (SDS). This will help ensure a successful application.
- Dry times: Check stated dry times to plan your project accordingly. Consider humidity and temperature conditions.
- Recoat windows: Note recommended recoat times to avoid over-application or under-curing.
- Application temperature/humidity: Verify the product’s recommended application range for both temperature and humidity.
- Intercoat compatibility: Check for any warnings regarding intercoat compatibility, especially when using multiple products.
- Flash point: Know the flash point to ensure safe handling and storage. Keep it away from heat sources and open flames.
- VOC content: Be aware of VOC levels for environmental compliance and ventilation planning.
- Surface prep requirements: Follow specified surface preparation steps to ensure optimal adhesion and finish.
- Odor and ventilation notes: Note any odor information and plan your ventilation accordingly.
Quick rule: Always follow the manufacturer’s guidelines. They know their product best.
Consumables for finishing and repair
Having the right consumables on hand ensures a smooth finish and quick repairs if needed.
- Sandpaper (grits 120, 180, 240): Essential for surface prep and light sanding between coats. Check grit sizes to ensure you have the right coarseness for your needs.
- Polishing compounds: Choose a suitable compound for your clear coat type. Test it on a small area first.
- Clear coat options: Have compatible clear coats ready for topcoats and touch-ups. Check they match the base color exactly.
- Compatible primers or strippers: Ensure you have primers that are compatible with your paint system. For repairs, have a suitable stripper to remove old paint.
- Tack cloths: Useful for removing dust and debris before painting. Check they’re clean and lint-free.
- Microfiber cloths: Ideal for buffing and polishing. Ensure they’re soft and free of defects.
- Mixing cup/stir sticks: Essential for mixing paints and primers. Check you have enough to avoid cross-contamination.
- Small spare nozzle: Have a spare nozzle in case of clogging or damage during use.
Quick rule: Keep your consumables organized and easily accessible for a smooth workflow.
Safety, Project Planning, and Cost/Time Implications
Ventilation is key to safe and effective spraying; set up airflow and identify ignition sources. Whenever indoors, use exhaust or work outdoors when possible, and ensure adequate clearance from flames or sparks. Poor ventilation increases risks and affects finish quality.
PPE and safety protocols matter for every coat. Plan multi-coat projects with buffers for drying and curing, and weigh the cost of rushing against the risk of rework. A realistic schedule reduces mistakes and improves long-term results.
Ventilation, fire and health precautions during drying
Spray painting concrete kicks up a lot of fumes. You need good airflow to keep them from building up.
Outdoor painting is best. If you’re indoors, open windows and doors. Use fans to blow the fumes out. Consider using exhaust systems if needed.
Fire’s your biggest risk. Keep ignition sources away – no smoking, sparks, or flames nearby. Follow local disposal rules for paint cans and follow VOC regulations.
Use a respirator and gloves. Change them between coats or projects to keep contaminants out of your system.
Scheduling larger projects and staging items
Big jobs need planning. Build in drying buffers – time between coats or stages to let the paint cure.
Group items by size. Start with the biggest pieces first. Use controlled spaces or drying racks to keep things separate while they dry.
Don’t rush. Rushing leads to mistakes and rework. Line up your items so you can work efficiently without compromising drying time.
Cost and time trade-offs of rushing vs waiting
Rushing through a job might seem like saving time, but it’s not. You’ll likely end up with rework, using more material, and spending more labor.
Waiting for proper drying/curing reduces the chance of issues. It saves you money in the long run. Factor realistic drying/curing windows into your project estimates.
Be patient. Good painting takes time. Rushing just leads to more work later.
Conclusion
Getting spray paint to dry reliably matters for safety, durability, and looks. A proper plan speeds up results and reduces the risk of smudges, runs, or coating failure.
Check the surface and air conditions, follow the product label, run a quick test on a hidden spot, and stage the project with the right ventilation and temperatures. If you’re not sure, test small areas first, then proceed in clear, measured steps—never work past the point of no return on a visible surface.
Common mistakes to avoid are rushing the process, painting on a damp or dirty surface, and skipping ventilation or safety gear. Don’t ignore the tag on the can or bottle, and don’t skip a real dry test before applying a second coat or finishing touches.
If you’re dealing with a large project, unfamiliar materials, or persistent problems like peeling, cracking, or uneven adhesion, it’s wise to bring in a pro instead of pushing on. Stay deliberate, respect the surface, and you’ll finish strong and avoid costly fixes—or a repaint that never looks right.
FAQ
What ambient conditions most affect spray paint drying, and how can I set them up safely?
Keep the area around the project in a moderate temperature range and away from drafts that blast the finish. Check the product label for the recommended range and avoid extreme heat or cold. Use basic ventilation and a steady airflow to help moisture escape without blowing dust onto the wet coat.
How do I test if spray paint is dry enough to handle or re-coat?
Do a light finger check only after the surface feels dry to the touch and isn’t tacky. Gently press with a gloved finger in an inconspicuous spot; if it leaves a mark or sticks, it isn’t ready. A simple scratch test can help, but follow the label’s guidance and wait longer if in doubt.
What are common mistakes that slow drying or ruin the finish?
Applying coats that are too thick, spraying too closely, or failing to prep the surface properly slows drying and causes runs. Skipping proper drying time between coats or using incompatible products also hurts the result. Always read and follow the instructions on the can label and datasheet.
What safety steps and brand considerations should I follow for DIY spray painting?
Wear a respirator, gloves, and eye protection; work in a well-ventilated area. Check the label for VOC content and any flammability notes. Choose a reputable brand with clear instructions and use the nozzle and technique recommended by the manufacturer.