
Introduction
Yes, you can paint vinyl windows, but you must prep properly and use paint made for vinyl. This intro walks you through what to do and where to stop. Think of it as a project you do in stages, not a quick cover-up.
Start with a thorough clean and light scuffing, then mask the edges you don’t want coated. Use a compatible primer if the product label recommends it, then apply the vinyl-friendly paint in thin, even coats. Always check the manufacturer instructions and local rules, and test on a small area before committing to the whole window.
Key takeaways
- Evaluate window frame material and existing coatings before painting to determine compatibility and prep needs.
- Clean and degrease surfaces thoroughly; dust, oils, and irrigation sprays hinder adhesion.
- Mask edges and hardware; seal with painter’s tape to prevent drips.
- Prime vinyl only if compatible with topcoat; follow label recommendations.
- Stop if blistering, peeling, or moisture appears under film; reassess coating.
- Maintain ventilation and protect indoor spaces; wear PPE during sanding and painting.
Table of Contents
- Introduction
- Key takeaways
- Quick Answer and Overview
- Tools and Materials Checklist
- Material Specs and Warranty Considerations
- Step-by-Step DIY Painting Process
- Stop Points — When to Pause or Abandon the Project
- Visual Checkpoints and Troubleshooting
- Alternatives to Painting and When to Choose Them
- Maintenance, Longevity, and Decision Checklist
- Conclusion
- FAQ
Quick Answer and Overview
Painting vinyl windows can be possible in many cases, but it isn’t always practical or safe. The short answer depends on the window type, the substrate finish, and the manufacturer’s guidance. Check the product label or data sheet to confirm paintability and any warranty notes before starting.
Key factors include the vinyl composition, existing coatings, and the environment you’ll expose the finish to. If there are questions about compatibility or warranty impact, consult the manufacturer instructions or a local pro for clarification. Proceed only after you’ve verified these basics with official guidance.
When painting is appropriate
Painting vinyl windows can be a great way to refresh their look. It’s most suitable when you’re looking for a cosmetic update and your windows are in good structural condition.
Vinyl windows hold paint well, especially if they’re clean and have no damage or defects. The right products – acrylic latex paints designed for vinyl – will stick and last.
Benefits: Painting can change the color of your windows to match your new decor, update their look without replacement costs, and even provide some extra protection against UV rays.
When to avoid painting
While painting can be a good option, there are times when it’s best to avoid it. Here are some scenarios to steer clear of:
- Failing frames: If your window frames are cracked, warped, or otherwise damaged, painting won’t fix the problem and may even make it worse.
- Active warranty restrictions: Check your windows’ warranties. Some manufacturers prohibit painting as it can void their coverage.
- Structural or thermal problems: If your windows have drafts, condensation, or other signs of poor insulation, they need replacement, not just a paint job.
- Incompatible products: Using the wrong type of paint (like oil-based or high-gloss) can cause peeling and other issues down the line.
Instead of painting in these cases, consider replacing your windows to ensure they function properly and maintain their value.
Tools and Materials Checklist
Gather the essentials first: basic hand tools, a suitable primer, and a compatible exterior paint. Include PPE like gloves, eye protection, and a dust mask or respirator as needed. Have drop cloths or plastic sheeting to protect nearby surfaces.
For a better finish, consider specialty brushes or rollers, masking tape, and a high-quality vinyl-safe primer. Optional items may include a small sander with fine grit, a heat gun for edge prep, and clean rags for quick touch-ups. Always verify product compatibility with the vinyl and follow label directions.
Paints, primers, and adhesion promoters
Before you start painting your vinyl windows, make sure to check off this list. It ensures you’re using the right products for a long-lasting finish.
- Paint: Use 100% acrylic latex paint formulated for vinyl. It’s durable and flexible.
- Primer: Apply a primer designed for vinyl to improve adhesion and seal the surface.
- Adhesion promoter (optional): If your windows are old or have been previously painted, use an adhesion promoter before priming. It ensures paint sticks well.
- Paint color: Choose a color that matches your home’s exterior for a cohesive look.
- Sheen: Opt for semi-gloss or high-gloss sheens. They’re durable and easy to clean.
- Avoid oil-based paints: They don’t adhere well to vinyl and can crack over time.
- Check paint condition: Ensure your paint is not lumpy, separated, or expired. Stir it well before use.
- Test patch (optional): Apply a small test patch on an inconspicuous area to check for color and adhesion.
Quick rule: Always follow the manufacturer’s instructions for best results.
Prep and finishing supplies
Before you start painting, prep your work area and windows with these essentials. It ensures a smooth, professional finish.
- Cleaning agent: Use mild detergent or dish soap to clean windows. Avoid harsh chemicals that can damage vinyl.
- Abrasive (optional): For tough dirt, use a soft-bristle brush or Scotch-Brite pad for gentle scrubbing.
- Rinse thoroughly: Ensure no residue is left behind to prevent paint from peeling.
- Masking tape: Apply painter’s tape around the window frame to protect adjacent surfaces.
- Drop cloths: Cover the ground and nearby plants to keep them clean.
- Paintbrushes/rollers/sprayers: Use high-quality tools for even application. Synthetic bristles work well with latex paint.
- Respirator (optional): Wear a respirator when sanding or using spray paint to protect your lungs from dust and fumes.
- Gloves: Wear gloves to protect your hands from chemicals and paint.
Quick rule: Always work from top to bottom, and maintain a ‘wet edge’ for smooth transitions.
Safety and environmental considerations
Before you start painting, consider these safety and environmental factors. They ensure your project is safe and eco-friendly.
- Ventilation: Ensure your work area is well-ventilated to prevent the buildup of harmful fumes.
- Disposal of solvents: Dispose of paint and cleaning solvent waste according to local regulations. Never pour them down drains.
- Safe handling of primers/paints: Keep primers and paints out of reach of children and pets. Store them in a cool, dry place.
- Check VOC/local regulations: Ensure your paint has low or zero volatile organic compounds (VOCs) to minimize environmental impact. Check local regulations for painting guidelines.
- Wear appropriate PPE: Use gloves, goggles, and a respirator when sanding or using spray paint to protect yourself from dust and fumes.
- Avoid painting in extreme temperatures: Paint won’t adhere well if it’s too hot or cold. Ideal temperature is between 50-90°F (10-32°C).
Quick rule: Always prioritize safety and follow environmental guidelines for a responsible DIY project.
Material Specs and Warranty Considerations
Understand the vinyl composition and any surface treatment before choosing paint. Some vinyl finishes require specific primers or coatings to adhere properly. Manufacturer instructions generally spell out approved products and procedures that won’t void warranties.
If you’re unsure about compatibility, check the warranty language or contact the manufacturer or supplier. Local rules or building codes may also influence acceptable finishes, so review those guidelines as part of your planning. Do not skip the official sources when assessing paintability.
How vinyl type affects adhesion
The type of vinyl used in your window frames can impact how well paint adheres. Here’s what to check:
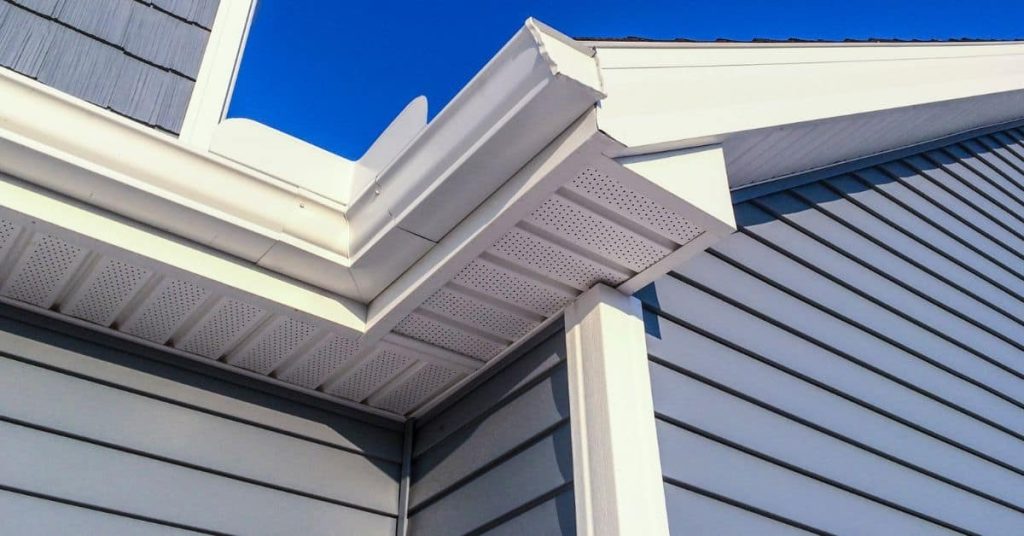
Rigid PVC: This is the most common type. It’s durable and takes paint well, but it might need a primer to ensure good adhesion.
uPVC (Unplasticized Polyvinyl Chloride): Similar to rigid PVC, uPVC also takes paint well. It’s strong and doesn’t contain plasticizers that could interfere with paint adhesion.
Vinyl-clad frames: These have a vinyl exterior over wood or metal. The vinyl can take paint, but the key is ensuring the vinyl layer is solidly attached to the underlying material.
Manufacturer warranty and label guidance
Before you grab your paintbrush, check your window manufacturer’s documentation. Here’s why:
Many manufacturers void warranties if you paint their windows. This could leave you responsible for any issues that arise.
Look for labels on the frame or in your original paperwork. They might say something like ‘Do not paint’ or ‘Painting may void warranty’.
If you decide to proceed, document everything – before and after photos, paint type, etc. This could protect you if a warranty issue arises.
Step-by-Step DIY Painting Process
Start with a visual inspection and clean the window surfaces to remove dirt and oils. Prepare edges and frames with masking where you don’t want paint. Apply a compatible primer if required by the product instructions.
Follow the recommended brush or roller technique for a smooth finish, and apply the first coat evenly. Allow proper drying between coats as specified by the product label, then apply a second coat if needed. Include a final inspection to catch runs or missed spots and correct them promptly.
Step-by-Step Process
Follow these practical steps to paint your vinyl windows like a pro. Safety first, then prep, paint, and finish.
- Inspect windows for damage. Repair if needed.
Reason: Ensure a smooth surface for painting.
Quick check: Visually inspect for cracks or gaps. - Wear safety gear – gloves, goggles, and a mask.
Reason: Protect yourself from paint fumes and splashes.
Quick check: Double-check your gear before starting. - Clean windows with mild soap and water. Rinse and dry.
Reason: Remove dirt and grease for better adhesion.
Quick check: Windows should be clean and streak-free. - Lightly sand windows using 220-grit sandpaper. Wipe off dust.
Reason: Improves paint adhesion.
Quick check: Feel for any rough spots; they’re gone if you can’t feel them. - Apply painter’s tape around edges to protect areas you don’t want painted.
Reason: Keeps paint where it should be.
Quick check: Tape is secure and straight. - Apply primer or adhesion promoter using a brush or roller. Follow product instructions for coverage.
Reason: Helps paint stick and provides a consistent base color.
Quick check: Primer is applied evenly, no missed spots. - Let primer dry as instructed on the can. Sand lightly with 220-grit paper to remove any raised grain. Wipe off dust.
Reason: Smooths out the surface for painting.
Quick check: Surface feels smooth and even. - Apply paint using a brush or roller, following the overlap technique for even coverage. Follow product instructions for drying times between coats.
Reason: Ensures consistent color and coverage.
Quick check: Paint is applied evenly, no missed spots or drips. - Let final coat dry completely as instructed on the can. Remove painter’s tape while paint is still wet if possible.
Reason: Prevents paint from peeling off with the tape.
Quick check: Tape comes off cleanly without pulling off any paint.
Surface preparation
Before you start painting, prepare your vinyl windows for a smooth finish. Cleaning and light sanding are key.
Clean windows thoroughly using mild soap and water. Rinse and dry completely to remove any residue that could interfere with paint adhesion.
Use 220-grit sandpaper to lightly sand the window frames. This helps paint stick better. Wipe off dust with a damp cloth after sanding.
Remove hardware like screws and hinges, and any old caulk or sealant using a utility knife. Be careful not to damage weatherstripping.
Priming and paint application
Choose the right primer or adhesion promoter for your vinyl windows. This ensures your paint sticks well and dries evenly.
Apply primer using a brush or roller, following the manufacturer’s instructions for coverage. Use even strokes, overlapping each pass slightly to ensure full coverage.
Once primed, let it dry as instructed on the can. Then apply paint using the same method – brush, roller, or sprayer – ensuring you overlap each stroke for even coverage. Follow product instructions for drying times between coats.
Curing, reassembly, and safe re-use
After the final coat of paint is dry, follow the product’s curing instructions. This ensures your paint has fully set and won’t be damaged by moisture or temperature changes.
Once cured, reinstall any hardware you removed during prep – screws, hinges, etc. Replace weatherstripping if necessary, ensuring it’s properly seated and functioning correctly.
Before using the windows regularly, perform a simple check: open and close them several times to ensure they operate smoothly. Check for any signs of paint flaking or peeling. If all looks good, your painted vinyl windows are ready for safe use.

Stop Points — When to Pause or Abandon the Project
Pause if you notice poor adhesion, bubbling, or unusual peeling during prep or first coat. If environmental conditions fall outside the product’s guidance, stop and revisit timing before proceeding. A warranty red flag or conflicting manufacturer instructions should halt work until clarified.
If you’re unsure about the window’s compatibility with paint, pause and verify with the label or data sheet. Don’t proceed with sanding or priming if proper guidance isn’t available. Reassess before continuing to avoid wasted time and potential damage.
Weather and Environmental Limits
Painting vinyl windows isn’t a job you can do in just any weather. You need to watch out for temperature, humidity, and direct sunlight.
Temperature: It’s best to paint when the temp is between 50°F (10°C) and 90°F (32°C). Too cold or too hot can mess up adhesion and drying.
Humidity: Keep an eye on humidity levels. If it’s too high, wait for a drier day. Painting in high humidity can lead to poor adhesion and mildew growth.
Sunlight: Direct sunlight can speed up drying too much, causing the paint to crack or peel. Paint in shaded areas or on cloudy days.
Early Signs Paint Won’t Bond
Sometimes, you’ll know pretty quick if your paint isn’t gonna stick. Keep an eye out for these red flags:
Flaking: If the old paint or primer starts flaking off before you even start painting, stop right there. That means it’s not adhering.
Powdery Surface After Prep: If you see a powdery residue after you’ve prepped your windows, that’s a sign the surface isn’t ready for paint. It might be too dusty or have a film on it that needs to be removed.
Blistering: If blisters start forming during painting, stop immediately. That means the paint is lifting off the surface and not bonding properly.
Visual Checkpoints and Troubleshooting
Inspect edges and corners for crisp lines and even coverage after each coat. Look for runs, sags, or brush marks and correct them promptly. Check for flash-off resistance and tackiness before applying the next layer.
If adhesion looks poor, revisit surface prep, cleaners, or primer compatibility. If color or sheen differs between coats, consider re-cleaning the surface or applying an additional light coat in the affected areas. Document issues to guide future touch-ups.
Inspecting adhesion and finish quality
Check your work after painting to ensure the paint has adhered properly and the finish is as expected.
- Tackiness: Gently touch the surface. It should feel dry, not sticky.
- Cross-hatch adhesion check: Use a utility knife to score an ‘X’ in the paint. Pull off a piece of painter’s tape. The paint should stay on the frame.
- Bubbles or blisters: These indicate moisture underneath or poor surface preparation.
- Cracking: This could be due to improper curing, temperature changes, or using the wrong paint.
- Uneven coverage: Check for missed spots or areas with too much paint.
- Color consistency: Ensure the color is even and matches your desired shade.
- Dry time: The paint should be dry to touch within recommended time (usually 1-2 hours).
- Washability test: Lightly clean a small area with mild soap and water. The paint should not come off.
Quick rule: If you find any issues, address them promptly to prevent further damage or deterioration in appearance.
Fixing runs, peeling, and uneven coverage
Address these common problems to ensure a smooth, even finish.
- Runs: Lightly sand the area with fine-grit sandpaper. Wipe clean with a damp cloth. Spot prime and recoat.
- Peeling: If small areas, spot prime and recoat. If large, you may need to repaint the entire frame due to underlying issues.
- Uneven coverage: Lightly sand any raised edges or missed spots. Wipe clean. Spot prime and recoat.
- Cissing (thin paint film): This often happens with poor surface preparation. Sand, clean, and repaint the area.
- Orange peel texture: This is usually due to applying too much paint or painting in hot, humid conditions. Lightly sand, wipe clean, and recoat.
Quick rule: Always address problems promptly. Small issues can become big ones if left untreated.
Alternatives to Painting and When to Choose Them
Non-paint options like vinyl-safe film, vinyl wraps, or trim overlays can protect and refresh the look without changing the substrate. Replacement sashes are an option when the vinyl itself is beyond cosmetic restoration. Choose based on cost, extent of damage, and the desired longevity.
Consider the scope of the project and whether the finish needs to be removable in the future. If you’re aiming for a quick update or to preserve warranties, non-paint options may be preferable. Review product instructions and warranty implications before deciding.
Pros and cons of wraps and films
Vinyl window wraps and films offer quick, easy alternatives to painting. They can transform your windows’ look without the mess or time commitment of painting.
Pros
- Easy installation – no priming or sanding needed.
- Inexpensive compared to painting or replacement.
- Reversible – won’t damage your windows.
- Available in various colors and patterns.
- Can hide minor scratches and dents.
- Quick application, instant results.
Cons
- Limited durability – can peel or bubble over time.
- Not suitable for all window types or conditions.
- May not match the aesthetics of your home as well as paint.
- Can’t be painted over once applied.
- May not last as long as a quality paint job.
Wraps and films are great for quick updates, rentals, or when you want to try out a new look. But they’re not a permanent solution like painting or replacement.
When replacement is the better option
Sometimes, painting or wrapping your vinyl windows isn’t enough. If your windows are old, damaged, or inefficient, it might be time for a full replacement.
Frame damage: Cracked or warped frames can’t be fixed with paint or wraps. Replacement ensures structural integrity and longevity.
Insulation loss: If your windows are drafty, it’s likely due to worn-out seals. New windows will provide better insulation and energy efficiency.
Long-term value: While replacement is more expensive upfront, new windows can increase your home’s value and save you money on energy bills in the long run. Plus, they come with manufacturer warranties that paint or wraps can’t match.
Maintenance, Longevity, and Decision Checklist
Establish a routine cleaning plan and monitor the surface for wear or chipping. Plan for touch-ups as needed and evaluate the finish for UV or weather-induced fading. Use the checklist to decide whether to repaint again or pursue replacement.
Use a concise decision sheet to weigh maintenance costs, potential downtime, and compatibility with existing windows. If signs point to ongoing deterioration, consider replacement or alternative finishes per the manufacturer’s guidance. Always verify longevity expectations with official documentation.
Cleaning and touch-up best practices
Use this checklist to maintain your painted vinyl windows’ finish life.
- Regular cleaning: Wash with mild soap and water every 6 months. Harsh chemicals can damage the paint.
- Touch-ups: Inspect for chips or scratches annually. Touch up immediately to prevent further damage.
- Avoid high pressure: When cleaning, use low-pressure washing to avoid stripping off paint.
- Dry thoroughly: After cleaning, ensure windows are completely dry to prevent water spots and potential peeling.
- Trim care: Clean window frames gently. Harsh scrubbing can damage the paint.
- Glass care: Be careful not to scratch glass while cleaning. Use a soft cloth or sponge.
- Inspect caulking: Check caulk around windows annually. Reapply if necessary to prevent water intrusion.
- Check weep holes: Ensure they’re clear of debris to allow proper drainage.
Quick rule: Regular maintenance extends your painted vinyl windows’ life and keeps them looking great.
Decision checklist and next steps
Use this practical checklist to finalize your choice and plan your project.
- Window condition: Inspect for cracks, warping, or drafts. Paint won’t fix these issues.
- Cost vs benefit: Consider the cost of painting versus replacement. Sometimes replacing is cheaper in the long run.
- Warranty: Check if your windows are still under warranty. Painting may void it.
- Time commitment: Painting takes time. Consider if you have the time to invest.
- Environmental factors: Consider weather conditions and how they might affect your paint job.
- Energy efficiency: Check if painting will improve insulation or if replacement is needed.
- Color scheme: Ensure the color you choose matches your home’s exterior.
- Prep time: Consider how much prep work (like scraping old paint) is needed.
Quick rule: A well-informed decision ensures a successful project and happy results.
Conclusion
Painting vinyl windows can extend a look and protection, but it only pays off if you respect prep, materials, and safety. Do the work right and you get a durable finish that looks good for years, not months.
Do a practical, stepwise check as you go: confirm warranty rules, pick compatible exterior paint, test a small hidden area first, clean and dry the surface, lightly sand to key the vinyl, apply a compatible primer if required, apply thin, even coats with proper drying time, ensure good ventilation and eye/hand protection, and stop immediately if you notice peeling, bubbles, or moisture behind the sash.
Common mistakes kill the project fast. Skipping prep or using the wrong paint or temperature range; applying heavy coats or skipping primer where one is needed; and neglecting edge sealing or ventilation. Safety first: wear eye protection and a respirator or mask when sanding or painting, keep children and pets away, and work in dry conditions with steady ladders and good lighting.
If the window frame is damaged, the sealants are degraded, or you’re unsure about the coating’s compatibility with your window type, it’s wise to call a pro instead of pushing on. When in doubt, cut your losses early and get a professional opinion. Stay focused, pace yourself, and you’ll finish with a solid result that looks good and lasts.
FAQ
Do I need to remove window hardware before painting vinyl windows?
Yes. Remove interior handles, catches, and trim if possible. It helps you get a cleaner edge and reduces the chance of masking errors.
Should I sand or rough up the vinyl surface before painting?
Lightly scuff the surface with a fine grit pad to improve adhesion. Do not sand so hard you create visible gouges or expose raw material.
Is primer required on vinyl, and what kind should I use?
Most vinyl paints are designed to bond without heavy priming. If you use a dedicated vinyl-wood hybrid or a topcoat that requires primer, follow the manufacturer’s label. Check the product instructions for whether a primer is suggested for your exact product and surface.
How can I test adhesion before committing to the whole pane?
Try a small, inconspicuous spot first. Apply a thin coat, let it cure as directed, and gently test with a fingernail or tape pull. If it peels or lifts, stop and choose a different approach or product per the label.