
Introduction
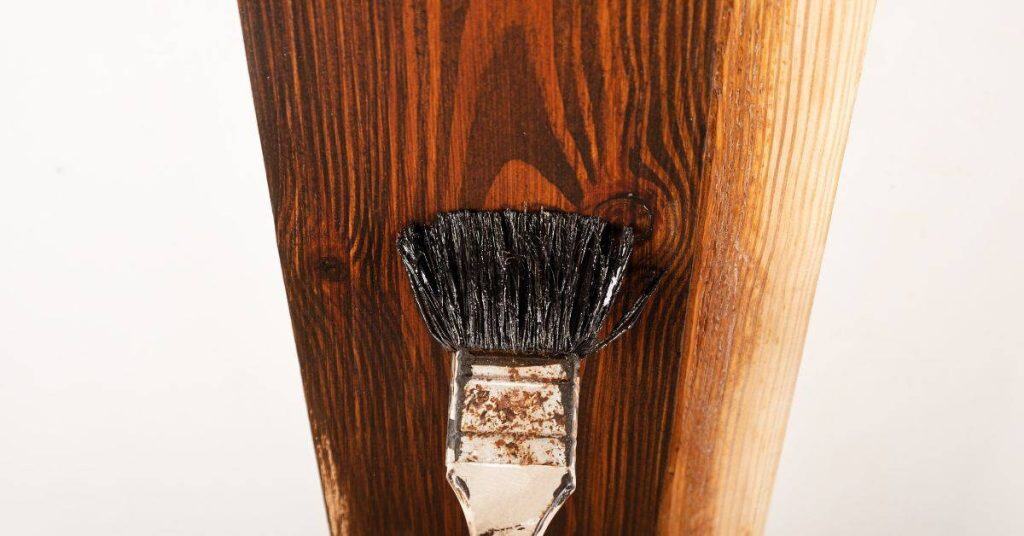
Thinning latex paint means adding a little water to reduce thickness so it goes on smoothly. This helps with brushing or rolling on large areas without leaving heavy coats. Always check the paint label and local rules before thinning, and follow the manufacturer’s instructions.
You will need the paint, clean water, a stirring stick, and a clean container. Begin by adding a small amount of water and stirring well, then assess the consistency and how it lays down. For ratios, always check the label or manufacturer instructions and avoid thinning beyond what they recommend; if in doubt, test on a small area.
Key takeaways
- Assess whether thinning is appropriate for your latex paint and finish outcome.
- Have clean water, a suitable mixing container, and a breathable stir stick ready.
- Add small amounts of water gradually while monitoring viscosity and spreadability.
- Do not thin indoors without proper ventilation and appropriate personal protection.
- Test thinned paint on a sample board before committing to walls.
- Check manufacturer guidance to ensure thinning complies with product instructions.
Table of Contents
- Introduction
- Key takeaways
- Quick Overview: What Thinning Latex Paint Means and Why You Might Do It
- Tools and Materials Checklist
- Planning: Assess Paint, Tools, and Desired Result Before You Thin
- Step-by-Step Thinning Process (DIY)
- Stop Points and Visual/Feel Checkpoints
- Common Mistakes and How to Avoid Them
- Application Tips After Thinning and Finishing Touches
- Safety, Cleanup, and Cost Implications
- Conclusion
- FAQ
Quick Overview: What Thinning Latex Paint Means and Why You Might Do It
Thinning latex paint means lowering its thickness so it flows more easily. This is done to improve sprayability, leveling, and spread on brushes or rollers. It can change how the finish looks and how strong the film is if used the wrong way, so read labels and test first.
The main reasons to thin are to enable spray application, to improve leveling and flow for rollers or brushes, and to rework old or clumpy paint into a workable consistency. Typical methods involve water or an approved paint conditioner, always following the manufacturer’s guidance. Do a small test on a sample area before tackling the whole project to avoid surprises.
Why thin latex paint
Thinning latex paint serves three main purposes. First, it helps achieve a finer spray pattern when using airless or HVLP sprayers. Thinner paint atomizes better, creating smaller droplets that provide even coverage.
Secondly, thinning improves leveling and flow for rollers and brushes. It makes the paint easier to spread, reducing streaks and ensuring a smoother finish.
Lastly, thinning can revive old or clumpy paint by restoring its workable consistency. This is especially useful when reusing leftover paint from previous projects.
When you should not thin
There are situations where thinning latex paint is not recommended or can even be detrimental. New paint formulated for application as-is should not be thinned, as it may compromise its intended performance.
High-gloss finishes are another exception. Thinning these paints can cause them to lose their sheen and alter the desired finish.
Severely separated or contaminated paint should also not be thinned. If a paint has separated into layers or contains contaminants, thinning will not resolve these issues and may even exacerbate them.
Always check the label first before deciding to thin any paint. Manufacturers provide specific guidelines on whether their product can be thinned safely and effectively.
Tools and Materials Checklist
Core thinning toolkit includes measuring cups or spoons, clean mixing containers, stir sticks, and a drill with a mixing paddle if needed. Add protective gear like gloves, goggles, and a respirator or mask, plus a spill kit. Plan for both small batches and larger volumes as your project scales.
Check compatible materials and additives by reading label guidance for your interior or exterior latex paints. Understand water versus additive thinning options and avoid mixing incompatible products. Keep a simple log of what you used and why to ensure consistency.
Mixing and Measuring Tools
Before you start thinning, gather these tools to ensure accurate mixing and measuring.
- Graduated measuring cups: Essential for precise water or additive measurement. Skipping this can lead to over-thinning or under-thinning your paint.
- Clean mixing containers: Use dedicated, clean containers to avoid contamination from other paints or substances.
- Stir sticks: Stir gently and gradually to prevent aeration. Too much air can affect the paint’s consistency.
- Drill-mounted paint mixer (optional): For larger batches, a drill with a mixing paddle ensures thorough blending without fatigue.
- Calibrated spoons: Useful for small-batch work or when precise measurement is crucial.
- Timer (optional): Keep track of mixing time to ensure consistent results.
- Thermometer (optional): Monitor temperature to maintain consistency in your thinning process.
- pH test strips (optional): Check pH levels to ensure compatibility with additives or to troubleshoot issues.
Quick rule: Always use clean, dedicated tools to prevent contamination and maintain accuracy.
Thinning Agents and Alternatives
Choose the right thinning agent for your latex paint type. Check product labels for compatibility.
- Water: Suitable for most interior and exterior latex paints. Use warm water (around 70°F/21°C) for better absorption.
- Latex paint conditioners: Commercially available additives that can improve flow, leveling, and adhesion. Always check compatibility with your specific paint type.
- Retarders: Slow down drying time to allow for better application and leveling. Use sparingly as they can affect final finish.
- Thinners (solvents): Avoid using thinners like mineral spirits or turpentine with latex paints, as they are incompatible and can damage paint film.
- Manufacturer-recommended additives: Some paints require specific additives for thinning. Always follow manufacturer guidelines.
Quick rule: Never mix incompatible products. Always check product labels and SDS sheets for guidance.
Prep and Safety Supplies
Safety first! Gather these supplies to protect yourself and your workspace during thinning.
- Gloves: Protect your hands from paint and chemicals. Use nitrile or latex gloves for better grip and protection.
- Eye protection (goggles): Shield your eyes from splashes and drips. Safety glasses alone may not provide adequate protection.
- Respirator or mask: Protect yourself from paint fumes, especially when working in enclosed spaces. Use a respirator for better protection.
- Drop cloths: Cover work surfaces to protect them from spills and drips. Old sheets or canvas cloths work well.
- Strainers or filters: Use fine mesh strainers or paint filters to remove impurities and ensure a smooth finish.
- Labels for mixed containers: Clearly label mixed paint batches with thinning ratio, date, and any relevant notes to prevent cross-contamination.
Quick rule: Always prioritize safety. Use appropriate PPE and maintain a clean, well-ventilated workspace.
Planning: Assess Paint, Tools, and Desired Result Before You Thin
Start by confirming paint type and compatibility, especially whether thinning with water is appropriate for latex. Note any additives and follow manufacturer guidance on thinning. Look for label notes or data sheets before you begin.
Assess the current finish, age, and intended application to guide your thinning level. Align your approach with the tool you plan to use, and set a plan for coverage and opacity. Keep the plan reversible if you need to back off the thinning.
Check the paint can and condition
Before you start thinning, grab that paint can. Turn it over and read the label. You’re looking for recommendations on thinning.
Pro tip: If it says ‘ready to use’, don’t thin it unless you really need to.
Now, give the paint a gentle stir with a clean stick. Check for any lumps or clumps. If there are, strain the paint through a mesh filter before thinning.
Lastly, take a whiff. If it smells off, don’t use it. It might be spoiled.
Match thinning to application method
Different tools need different paint flow. Here’s what you need to know:
For brushes and rollers, you want a consistency that flows easily but isn’t too watery.
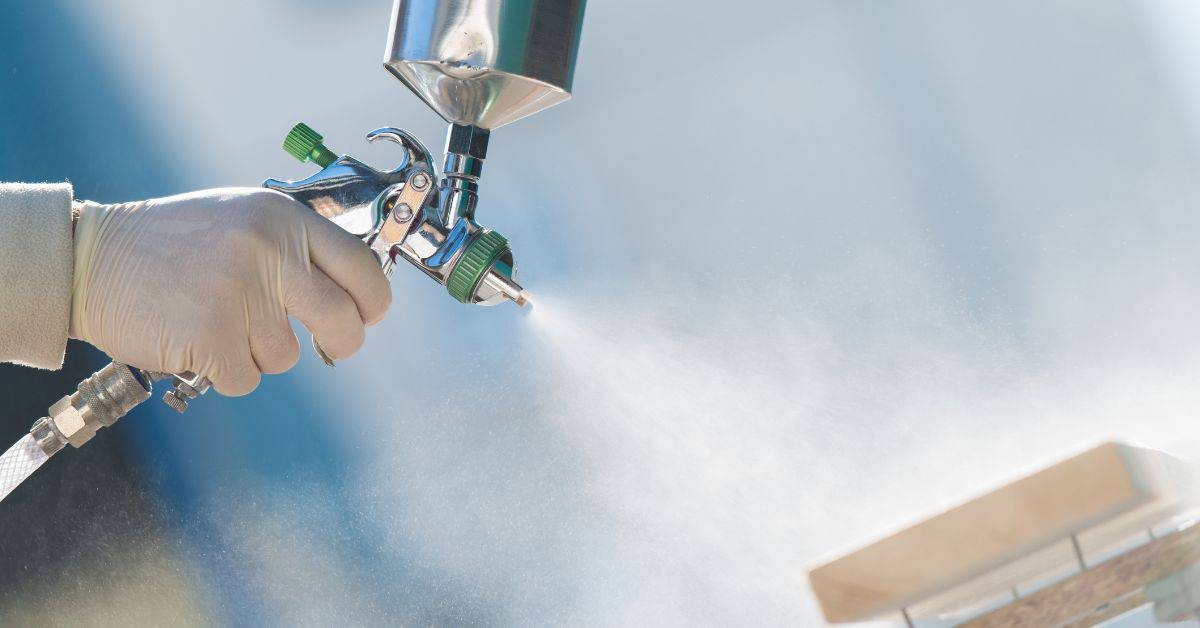
HVLP sprayers like it thinner. Aim for a creamy, yogurt-like consistency.
Airless sprayers can handle thicker paint. But remember, too thick can clog the nozzle.
Decide how much to thin and plan a test
Start small. You don’t want to ruin your whole batch.
For latex paint, a good starting point is 10-15% water by volume. That’s about 1 part water to 6 or 7 parts paint.
Pro tip: If you’re unsure, check the manufacturer’s guidelines first. They know their paint best.
Plan a test patch. Apply your thinned paint to a small, hidden area. Let it dry. Then check the coverage and flow. Adjust as needed.
Step-by-Step Thinning Process (DIY)
Define scope and safety first, including which paints are suitable and the precautions you’ll take. Set up the area with ventilation and PPE, and test on scraps before applying to the project surface.
Follow a stepwise addition protocol, starting with small increments and thoroughly mixing before re-checking viscosity and performance. After each addition, evaluate how the paint feels on the brush or roller and how it flows on a test panel.
Step-by-Step Process
Follow these practical steps to thin latex paint safely and effectively.
- Preparation: Check your paint, tools, and desired result. Ensure the paint is in good condition and suitable for thinning (see Planning). Gather your materials including thinner, mixing tools, safety gear, and test surfaces.
- Safety first: Ventilate your workspace, wear appropriate PPE, and perform surface testing before full use to ensure compatibility.
- Main work: Start with small increments of thinner (5-10% by volume). Mix thoroughly using a paint stirrer or drill attachment. Pause after each addition to evaluate viscosity and brush/roller performance.
- Test application: Apply the thinned paint to a scrap board or inconspicuous wall using your intended method (brush, roller, sprayer). Observe the laydown or spray pattern to assess flow and adjust as needed.
- Final checks: Once you’ve achieved the desired consistency, strain the mixed paint through a fine mesh to remove any debris. Label the container with date, thinning ratio, and intended use for easy reference. Use the mixed paint promptly (see Storage). If at any point you encounter issues like color settling or light separation, stop and reassess your process.
Add in small increments and mix thoroughly
Adding thinner in small amounts ensures you maintain control over the thinning process. Start with a tiny, measured amount to avoid over-thinning.
After adding each increment, mix the paint thoroughly using your mixing tool. Ensure it reaches all edges of the container and incorporates fully into the paint.
Patience is key. Wait a few minutes between additions to allow the paint to fully integrate with the thinner before deciding whether to add more.
This method helps you maintain consistent viscosity, prevents over-thinning, and ensures your mixed paint performs as expected when applied.
Test application and adjust
Before applying the thinned paint to your project surface, test it on a scrap board or inconspicuous wall. This allows you to observe the spray pattern or brush/roller laydown and make adjustments as needed.
Look for signs of proper flow: the paint should slow the brush but still level without clumping. If it’s too thick, add more thinner in small increments and remix. Too thin? Allow it to sit briefly to check for separation before adding a touch of thicker paint or less thinner.
Repeat testing and adjustment until you achieve the desired flow. This step ensures your thinned paint applies evenly and consistently, giving you the best possible finish.
Strain, label, and store mixed paint
Once you’ve achieved the desired consistency, strain your mixed paint through a fine mesh or cheesecloth to remove any debris or lumps that may have formed during mixing.
Labeling is crucial for keeping track of your thinned paints. Include the date, thinning ratio (e.g., ‘10% water added’), and intended use on the container. This helps you maintain organization and ensures you’re using the right paint for each job.
Use mixed paint promptly. Thinned latex paint has a shorter shelf life than unthinned paint. Store it in an airtight container at room temperature, away from direct sunlight and heat sources. If stored properly, your mixed paint should remain usable for several weeks.
Stop Points and Visual/Feel Checkpoints
Identify practical stop points where thinning begins to compromise hiding power or film integrity. If you notice a decline in leveling, stop thinning and reassess with a fresh can or batch.
Watch visual cues like streaks, patchiness, or color changes. Feel cues matter too: resistance, drag, or poor flow signal it’s time to stop and test again on a scrap area.
Brush and Roller Checkpoints
Use this checklist while applying your thinned paint with a brush or roller to ensure you haven’t gone too thin.
- Paint flow: The paint should lay out smoothly without running. If it’s too thin, it’ll drip and sag.
- Opacity: Check if the paint maintains its opacity. If it looks watery or translucent, you’ve thinned too much.
- Brush/roller resistance: The tool should glide smoothly. Too much drag indicates a need to thin more.
- Lap marks: Check for visible lap marks where two strokes meet. If they’re prominent, you might be too thin.
- Coverage: Ensure the paint covers evenly. Inconsistent coverage could mean you’ve thinned too much or not enough.
- Sheen uniformity: Check if the sheen is consistent across the surface. If it’s overly glossy in spots, you may have over-thinned.
- Texture: Keep an eye on any texture or tool marks becoming more visible. This can happen if you thin too much.
- Roller absorption: The roller should absorb paint evenly. If it’s soaking up too much, you might be too thin.
Quick rule: If your paint is behaving erratically or not as expected, stop thinning and re-evaluate your mixture.
Sprayer Checkpoints
Use this checklist when applying thinned paint with a sprayer to ensure you’re at the right consistency.
- Atomization: The paint should atomize evenly into fine droplets. If it’s misting excessively, you’ve thinned too much.
- Orange peel: Check for orange peel texture. Too much can indicate over-thinning.
- Coverage: Ensure the spray pattern provides even coverage. Inconsistencies could mean you’re too thin or not thin enough.
- Sheen consistency: The sheen should be consistent across the sprayed area. If it’s overly glossy in spots, you may have over-thinned.
- Runoff: Check for runoff or drips. This can happen if your paint is too thin.
- Spray tip clogging: If your spray tip is clogging frequently, you might be too thick. However, if it’s not clogging at all, you could be too thin.
- Paint build-up: Check for paint build-up in corners or edges. This can happen if your paint is too thick but can also occur if it’s too thin and not leveling properly.
Quick rule: If you’re experiencing any of these issues, stop spraying and adjust your mixture accordingly.
Visual and Viscosity Cues
Pay attention to these look-and-feel cues while thinning your paint to avoid over-thinning.
- Gloss/opacity drop: If the gloss or opacity starts to decrease significantly, you’re likely too thin.
- Watery appearance: The paint should have a consistent viscosity. If it looks watery, you’ve thinned too much.
- Runoff: Check if the paint is running off the surface instead of leveling out. This can happen if your paint is too thin.
- Milky patches: If you start seeing milky or patchy areas, you’ve likely over-thinned your paint.
- Excessive gloss: While some sheen is normal, overly glossy spots can indicate over-thinning.
- Viscosity change: The paint should maintain a consistent viscosity. If it starts to feel watery or runny, stop thinning.
Quick rule: If you notice any of these cues, pause your thinning process and re-evaluate your mixture.
Common Mistakes and How to Avoid Them
Common errors include over-thinning, under-thinning, using the wrong water or solvent, and skipping a conditioning step. Each mistake can hurt adhesion, coverage, and dry time, so verify your approach with product guidance.
Pre-application checks and surface prep help prevent failures after thinning. Clean, repair, and lightly abrade surfaces as needed, then proceed with measured, repeatable steps to stay consistent.
Over-thinning and poor coverage
Adding too much water to latex paint reduces its hiding power. This means it takes more coats to cover the surface, wasting time and paint.
Prevent over-thinning: Always test your paint first. Start with a small batch, add water incrementally, and mix thoroughly. Apply a thin layer on a scrap piece of material or an inconspicuous area to check coverage.
If it’s too thin, you’ll see the surface through the paint. If this happens, don’t panic. Just let it dry, then re-stir and add more paint, not water. Remember, it’s easier to add than to take away.
Using the wrong thinner or additives
Solvents intended for oil-based paints can damage latex paint. They may cause it to peel, crack, or not adhere properly.
Use water only: Latex paint is water-based. Stick to using clean, room temperature water as your thinner. Anything else could ruin your paint job.
Be cautious with commercial conditioners too. Some may not be compatible with latex paint. Always check the label before use.
Skipping testing, straining, or labeling
Failing to test your thinned paint can lead to finish issues. You might end up with an uneven coat or one that doesn’t adhere properly.
Always test: Apply a small amount of your thinned paint on a scrap piece of material before starting the job. This helps you check for any issues before committing to the entire surface.
Straining is also crucial. It removes lumps and ensures an even finish. And labeling prevents mixing incompatible batches later, saving you from potential disasters.
Application Tips After Thinning and Finishing Touches
After thinning, focus on maintaining even coverage and minimizing lap marks with the right tool forces and technique. Choose brushes or rollers that suit the thinned consistency for a smooth finish.
Drying and recoat windows depend on temperature, humidity, and airflow. Check adhesion compatibility with primers or sealers if the thinning changes how the finish sits on the substrate.
Adjusting technique and equipment settings
Thinning your latex paint changes how it applies. Here’s how to adjust your technique and gear:
- Slower passes: Thinned paint covers faster, so go slower to avoid drips.
- Correct tip/nozzle size (sprayers): Use a larger tip for better control. Rentable tips start at around $5 each.
- Different nap rollers: Lower nap rollers (3/8″ or 1/2″) work best with thinned paint. New ones cost about $5-$10.
- Brush technique: Use long, smooth strokes to avoid streaks. Synthetic brushes around $10 are ideal for latex.
- Avoid overloading: Too much paint at once can drip or create lap marks. Keep your tools about half-full.
Drying time and recoat recommendations
Thinning changes drying times. Here’s what to expect:
Test first: Always test dry times on a small area before full application.
Thinned paint dries faster, but it may take longer to cure fully. Wait at least 4 hours between coats in ideal conditions (70-85°F, low humidity).
Recommended recoat windows vary by product and conditions. Check your paint’s label for specific guidelines.
Touch-ups and blending
Blending thinned paint with surrounding areas minimizes lap marks:
Work in sections: Apply touch-ups in small, manageable sections to avoid overworking the paint.
Use a brush or roller with the same nap as your original application. Work from one side of the section to the other, blending into the existing paint.
Avoid heavy pressure: Too much pressure can cause streaks or alter the sheen. Light, even strokes are key.
Safety, Cleanup, and Cost Implications
Safety basics for thinning latex include PPE, ventilation, and avoiding unnecessary solvents since water-based thinning is standard. Follow project-specific guidance and stop if you see signs of poor adhesion or prolonged tack.
Cleanup and disposal cover brushes, rollers, and thinned paint waste, along with local rules for paint materials. Consider how thinning affects coverage and potential extra coats when estimating project cost and time.
Safety and ventilation
Always work with latex paint in a well-ventilated area. Open windows, use fans, or work outdoors if possible.
Wear gloves to protect your hands from skin irritation and goggles to shield your eyes from splashes. Avoid contact with skin or ingestion at all costs.
If you’re using solvents for thinning – which is rare in latex paints – ensure there are no ignition sources nearby, like open flames or sparks. Keep a fire extinguisher handy just in case.
Cleanup and proper disposal
After thinning, clean your brushes and rollers thoroughly with water. Rinse them until the water runs clear to remove any paint residue.
Filter wash water before disposing of it down the drain according to local regulations. Some areas may require you to take it to a hazardous waste facility.
Store leftover thinned paint in airtight containers, clearly labeled with the date and mixture ratio. Use within 30 days for best results; longer storage can lead to spoilage.
Cost, waste, and longevity considerations
Thinning latex paint stretches your material, reducing the amount needed per project. But it might increase the number of coats required or reduce durability.
Before you thin, estimate your project size accurately. More thinning than necessary wastes material and increases cleanup time and effort.
Consider long-term costs too. While thinning saves on paint, extra coats mean more labor and longer project times. Weigh short-term savings against finish quality and overall project cost.
Conclusion
Getting thinning right matters for a durable, good-looking finish and it keeps you out of trouble. Do it with care and you’ll avoid runs, uneven color, and costly rework, while staying safe on the job.
Test a small patch first and follow your ratio precisely, stir until uniform, check the viscosity with a simple swipe test, thin in small increments only, apply with the right tools, and pause to reassess at each stop point before continuing. Keep tools clean and your workspace ventilated, and always seal and store materials properly when you’re done.
Common mistakes to avoid are over-thinning, skipping the initial test area, and rushing through the stop points. Don’t skip safety steps—protect hands with gloves, wear a mask if dust or fumes are present, and work with good ventilation. If you’re unsure about the substrate, color, or scale of the project, or if you see adhesion or curing problems after thinning, pause and consider a pro for large areas or difficult surfaces.
When in doubt, or for large projects, choose professional help rather than pushing forward with uncertain results. You’ve got the plan—stick to the checks, respect safety, and you’ll finish with a clean, lasting result.
FAQ
What is thinning latex paint and why would you do it?
Thinning latex paint means adding a little water to adjust the viscosity for a smoother flow. You might thin to improve sprayability, level out brush strokes, or match a project’s texture. Always follow the product label for guidance and stop if the paint becomes too thin for coverage.
What tools and materials do you need to thin latex paint?
You’ll need clean water, the paint you’re thinning, a stir stick, a clean container, and a method to mix (a disposable cup or paint mixer). Use a small amount at a time and mix thoroughly to avoid lumps. Check the paint label for any tool or additive warnings from the manufacturer.
How do you mix water with latex paint and what should you check for the proper ratio?
Add water gradually and stir well until you reach the desired consistency. The exact ratio varies by product, so always check the label or datasheet for a recommended range. If in doubt, test a small amount on a surface and observe how it lays down and dries.
When should you stop thinning and what are visual cues to stop?
Stop thinning when the paint loses body and won’t level or cover as intended. Look for thin film issues, excessive runoff, or poor adhesion on a test patch. If you notice those signs, revert to the original viscosity per the manufacturer’s instructions.