
Introduction
Milk paint is a traditional, breathable paint made from milk protein and pigments. It has a simple, hands-on vibe and can work on many wood surfaces. You’ll learn how to mix, apply, and test it as you go.
This guide keeps things practical, focusing on prep, application, and common stop points. Always check the product label and follow manufacturer instructions for mixing, surfaces, and curing. If something feels off, test on a hidden spot and adjust before committing.
Key takeaways
- Read manufacturer instructions before mixing; milk paint varies by batch and base.
- Test a hidden area for adhesion and color before full application.
- Prepare surface by cleaning, sanding lightly, and removing loose finishes.
- Apply thin coats evenly; allow dry time between coats as needed.
- Protect floors and adjoining surfaces; milk paint can stain unintended areas.
- Wear gloves and a respirator when sanding; dust exposure is a risk.
- Store unfinished paint away from heat; reseal lid tightly after use.
Table of Contents
- Introduction
- Key takeaways
- Quick Definition and Traditional Origins
- Composition and Types
- Choosing the Right Milk Paint for Your Project
- Tools, Materials, and Prep Checklist
- Step-by-Step DIY Application Process
- Stop Points and Visual Checkpoints
- Troubleshooting Common Problems
- Safety, Sustainability, and Material Care
- Conclusion
- FAQ
Quick Definition and Traditional Origins
Milk paint is a simple, plant‑based finish made from natural pigments mixed with milk protein. It’s known for a matte, velvety look that ages nicely on wood.
Historically, milk paint has been used in traditional furniture and decorative work for centuries. It differs from modern synthetic paints in composition and feel, which you can confirm by checking the product label or manufacturer instructions.
What milk paint actually is
Milk paint, as the name suggests, is a type of paint that’s made from casein, a protein found in milk. It’s mixed with pigments to create color and has been around for centuries.
What sets milk paint apart is its ability to bond with porous surfaces like wood, plaster, or concrete. It doesn’t just sit on top like latex or oil paints; it penetrates and adheres differently, creating a unique finish.
It’s important to note, though, that milk paint isn’t suitable for non-porous surfaces like metal or glass. It needs something to grab onto.
Brief history and common historical uses
Milk paint has been used since ancient times, with evidence of its use dating back to the Middle Ages in Europe. It was popular due to its availability and ease of production.
Historically, milk paint was commonly used for painting furniture, interior walls (especially on plaster), and exterior surfaces like barns or outbuildings. Its durability and ability to create a rustic, aged look made it a favorite for both practical and aesthetic reasons.
Today, milk paint is still popular among DIY enthusiasts and professionals alike for its eco-friendliness, versatility, and ability to achieve authentic, old-world finishes – especially in restoration projects.
Composition and Types
Milk paint comes in different formats, including powder mixes, pre‑mixed formulas, and contemporary blends. Each type has its own preparation method and handling quirks.
Expect additives to influence drying, adhesion, and finish behavior, but don’t rely on memory alone—verify with the product data sheet or label to understand how it will perform on your surface.
Powdered versus ready-mixed milk paint
Milk paint comes in two main forms: powdered and pre-mixed. Each has its own pros and cons.
Powdered: You mix it yourself, so it’s fresh every time. Shelf life is practically indefinite if kept dry. It’s also cheaper per use. But it takes more effort and you need to get the mix right for consistent results.
Ready-mixed: No mixing required, just open and paint. Great for quick jobs or when you don’t want to mess with ratios. But once opened, it has a shorter shelf life, usually around 2-3 weeks. It’s also pricier.
Pigments and natural vs. synthetic ingredients
The materials in your milk paint – pigments, binders, and additives – all play a role in the final result.
- Natural Pigments: These are made from minerals or plants. They’re often more expensive but offer better colorfastness and opacity. Look for high pigment concentration (like 20-30% by volume). Avoid if you’re sensitive to natural materials like certain plant extracts.
- Synthetic Pigments: These are cheaper, consistent in color, and usually non-toxic. But they may not be as colorfast or opaque as natural ones. Check for lightfastness ratings (like ASTM D4303) to ensure longevity.
- Binders: Casein is traditional, but some modern blends use acrylic or other synthetic binders. These can improve durability and adhesion but may affect the ‘chippy’ distressed look.
- Additives: These can enhance performance (like anti-mold agents) or change the finish (like glazes). Always check what’s added to ensure it suits your project.
Choosing the Right Milk Paint for Your Project
Match the paint type and finish to your project goal, whether it’s furniture, cabinetry, or a decorative surface. Consider how much sheen, texture, and aging you want to see on the final look.
Evaluate durability expectations and surface prep needs, then compare options by reading the manufacturer instructions or label notes before choosing.
Matching to Substrate and Use-Case
Milk paint works best on porous surfaces like wood, plaster, and drywall. It’s not ideal for non-porous surfaces like metal or glass.
Before choosing milk paint:
Check the surface is clean, dry, and free of any sealers or waxes. Sand lightly if needed. Test in an inconspicuous area first.
Color Selection and Custom Tinting
Milk paint comes in a range of colors. You can also mix tints to create your own shade.
To test a color:
Mix milk paint with water, apply it on a spare piece of the substrate you’re using, and let it dry. This way, you’ll see how the color looks in real-life conditions.
For custom tints:
Use universal tints available from manufacturers. Follow their instructions carefully to avoid over-tinting or creating unwanted shades. If unsure, consult the manufacturer before mixing.
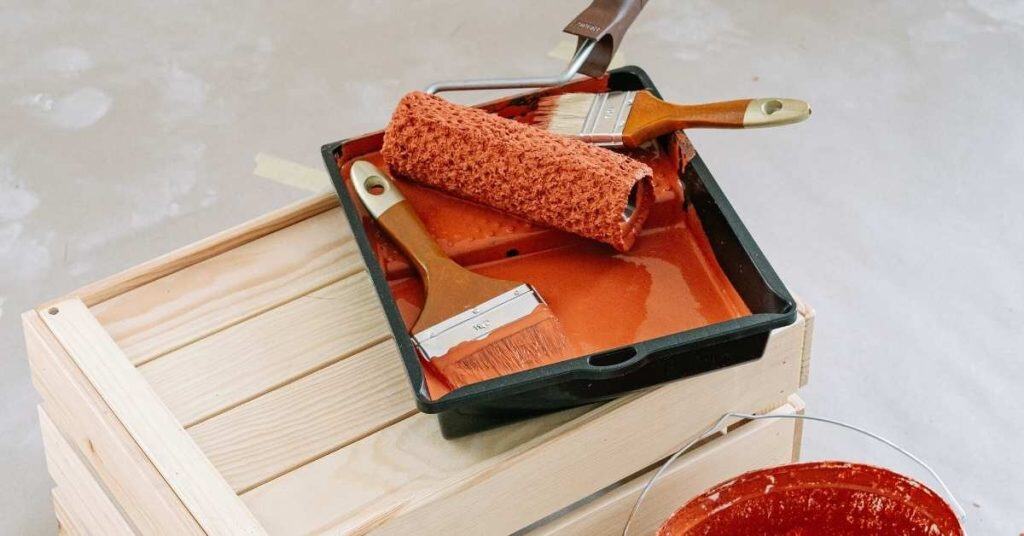
Tools, Materials, and Prep Checklist
Assemble a simple set of essential tools and a few optional extras to speed the job. Include items for mixing, application, and cleanup, plus a small tray or container for batches.
Test your chosen approach with a small sample first and work in batches to avoid surprises. Review the product label or data sheet for specific prep steps and curing notes.
Essential Tools and Optional Extras
Before you start, make sure you have all the necessary tools and materials. This checklist will help you gather everything you need.
- Natural bristle brushes: For applying milk paint. Synthetic won’t work.
- Rollers (optional): For large, flat surfaces. Not suitable for textured or detailed work.
- Mixing containers: One per color to avoid cross-contamination.
- Strainers: To remove lumps and ensure a smooth finish.
- Sanding pads (optional): For light sanding between coats or distressing effects.
- Masking supplies: Painter’s tape, drop cloths to protect surrounding areas.
- Distressing tools (optional): Sandpaper, steel wool for creating aged look.
- Glazing materials (optional): For adding depth and dimension to your finish.
Quick rule: Always test your tools on a small area first. Some brushes may leave streaks or marks that you don’t want in your final product.
Surface Preparation and Adhesion Tests
Proper surface preparation is key to a successful milk paint job. Follow this checklist to ensure your paint adheres well.
- Clean the surface: Remove all dirt, grease, and debris using a degreaser or soap and water.
- Degrease (if necessary): Use a degreaser to remove any remaining oils. Let it dry completely.
- Scuff-sand: Lightly sand the surface with fine-grit sandpaper to help paint adhere better.
- Remove dust: Wipe down the surface with a damp cloth, then let it dry.
- Perform adhesion test (optional but recommended): Apply a small patch of milk paint. Let it dry, then scratch at it with a fingernail or coin to check for adhesion.
- Prime if needed: If the paint doesn’t adhere well, use a bonding primer before painting.
Quick rule: Always perform an adhesion test on a small, hidden area first. This helps you avoid costly mistakes.
Step-by-Step DIY Application Process
Plan your workflow from mixing to the final coat, keeping a close eye on workability and pot life. Apply an even, thin coat with attention to grain and edges.
Allow for recoat timing and surface adjustment as you go, and rely on small tests to confirm how the finish is developing. Check the manufacturer instructions or label if you’re unsure about a step.
Step-by-Step Process
The following steps guide you through applying milk paint like a pro, from prep to finish.
- Prep your workspace and gather tools. Safety first – wear gloves, goggles, and a mask if needed.
- Mix the paint according to package instructions. Remember, less is more with milk paint; start thin and build up.
- Test the paint on a scrap piece for color and coverage. Make adjustments as necessary.
- Apply the first coat using your chosen method (brush, roller, sprayer, or cloth). Work in manageable sections.
- Let it dry – milk paint dries fast, but be patient. Inspect for any missed spots or unevenness.
- Sand lightly between coats with fine-grit sandpaper to smooth out any raised grain or imperfections.
- Apply the second coat, following the same technique as the first. Remember, thin layers are key to a smooth finish.
- Let it dry and cure fully before applying any topcoat or finishing touches. This could take up to 30 days.
Mixing and consistency checks
Proper mixing is crucial for a smooth, even finish. Here’s how to get it right:
Start by adding the recommended amount of water to your powdered milk paint. Stir gently but thoroughly to combine.
Tip: Less is more with water. Start with less and add more as needed to reach the desired consistency.
Strain the mixture through a fine-mesh sieve or cheesecloth to remove any lumps or impurities. This ensures an even application.
Test the paint on a scrap piece of your substrate. The consistency should be smooth, with no lumps or streaks. Adjust water content if necessary.
Application techniques (brush, roller, sprayer, cloth)
Milk paint can be applied using various methods. Here are some tips for each:
Brush: Use long, even strokes, working in manageable sections. For best results, use a natural bristle brush and work with the grain of the wood.
Roller: Milk paint can be rolled on, but it’s best suited for large, flat surfaces. Use a medium nap roller and apply thin, even coats.
Sprayer: Thinning milk paint with water allows it to be sprayed. Start with a thin coat and build up as needed. Be sure to test your sprayer first to avoid clogs.
Cloth: For a distressed or aged look, apply milk paint with a clean cloth. Work in small sections and wipe off excess paint for a weathered effect.
Recoat timing and when to stop
Knowing when to recoat or stop is crucial for achieving the best results with milk paint:
Milk paint dries quickly, but it takes longer to cure. Recoat only when the surface feels tacky-dry – usually within 20-30 minutes.
Inspect your work after each coat. Look for any missed spots or unevenness. Apply additional coats as needed, but remember that milk paint builds up best in thin layers.
Stop adding layers: Once you’ve achieved the desired coverage and effect, let the final coat cure fully before applying any topcoat or finishing touches. This could take up to 30 days.
Stop Points and Visual Checkpoints
Pause when you see uneven coverage or brush marks that won’t smooth out after a light pass. At each stage, inspect color consistency and surface feel.
Switch techniques or let the surface dry if you notice tackiness, pinholes, or rough texture. Use the product label or instructions to confirm what to look for at each checkpoint.
Visual checkpoints during mixing and application
Before you start applying, make sure your milk paint is mixed and ready. Here’s a quick checklist to ensure everything looks right.
- Mix consistency: Stir until smooth with no lumps or clumps. It should have the consistency of heavy cream.
- Sheen level: Check for any glossy spots, which indicate improper mixing or pigment settlement.
- Color uniformity: Ensure the color is even throughout the mixture. If it’s not, keep stirring.
- Coverage test: Do a quick test on a scrap piece to see if coverage is as expected.
- Drying time: Check the drying time on your test patch. It should match what you expect for your project.
- Surface absorption: Watch how quickly the paint absorbs into the surface. If it’s too slow or fast, adjust your application technique.
- Sheen after drying: Once dry, check if the sheen matches what you want. If not, consider adding a topcoat.
- No bubbles or brush marks: Inspect for any bubbles or visible brush strokes. If present, adjust your application technique.
Quick rule: If something doesn’t look right, stop and troubleshoot before proceeding.
When to sand, distress, or seal
After each coat, you’ll need to decide whether to sand, distress, or move straight to sealing. Here’s how to tell.
- Smooth surface: If the surface feels smooth and even after drying, it’s ready for the next coat without sanding.
- Raised grain: If the wood has raised grain, lightly sand with fine-grit sandpaper before the next coat.
- Distressing desired: If you want an aged look, consider distressing now. Sand through the paint to reveal the wood beneath.
- Sealing time: Once you’ve reached your desired number of coats and there are no imperfections, it’s time to seal.
- Color consistency: Check that each coat has covered evenly. If not, sand lightly and reapply.
- Drying time: Ensure the previous coat is completely dry before proceeding. This could take up to 24 hours.
Quick rule: Only seal when you’re sure the last coat has dried and there are no imperfections.
Troubleshooting Common Problems
Address adhesion issues by revisiting surface prep and ensuring the product is compatible with the substrate. If flaking occurs, assess prep history and compatibility before continuing.
For streaking or color shifts, adjust application technique and batch consistency, then test a small area. Rely on the product data sheet or label for specific remediation steps and tests.
Fixes for adhesion and chipping
First, figure out if your problem’s with the surface or your application. Check for dust, grease, or moisture – they can stop paint from sticking.
If it’s a small area, spot-sand to remove any loose paint and create fresh surfaces. Vacuum up dust, then apply a bonding primer before repainting.
For larger areas, strip off the failed paint, prep the surface again as you did initially (refer back to Surface preparation…), and reapply your milk paint.
Solving texture, color, and coverage problems
For brush marks or rough surfaces, lightly sand the area with fine-grit paper after the paint’s dry. Wipe off dust, then apply a second coat.
If coverage is uneven, it might be your paint consistency or application technique. Retest your mixing and application process on a small scrap before trying again.
For unexpected color outcomes, mix up another small batch using the same formula. Apply it to a test patch – if it’s still off, adjust your tints slightly and retest until you get the right shade.
Safety, Sustainability, and Material Care
Handle pigments and finishes with basic ventilation and protective gear, and follow local disposal rules for leftover materials. Keep finishes away from heat sources and food contact surfaces until cured.
Milk paint can be the greener choice, but always verify label claims and disposal guidance. Compare environmental notes by checking the manufacturer’s instructions and local regulations.
Personal Protective Measures and Cleanup
Milk paint is generally non-toxic, but it’s still a good idea to take some safety precautions. Wear old clothes and gloves when working with milk paint.
Eye protection is crucial. Milk paint can cause irritation if it gets in your eyes. Safety glasses or goggles should do the trick.
For cleanup, rinse tools thoroughly with water after use. Milk paint cleans up easily with soap and water, but don’t let it dry on your tools. Spills can be wiped up with a damp cloth.
Environmental and Sustainability Considerations
Milk paint is a great choice for those concerned about the environment. It’s biodegradable, so it won’t harm the soil or water if disposed of properly.
When you’re done with your milk paint, you can compost any leftover powder or liquid. Just make sure to keep it away from pets and children until it’s fully broken down.
As for disposal, pour any remaining liquid down the drain with plenty of water to rinse. For powder, wrap it in newspaper and throw it in the trash. It won’t harm landfills.
When choosing milk paint, look for non-toxic pigments. Some suppliers offer options made from natural or recycled materials. Every little bit helps!
Conclusion
The right milk paint job gives you durable color that looks honest and aged, without risking a mess or damage to the surface. Safety and careful prep matter most, so you stay in control and avoid costly mistakes.
Before you start, connect the dots in your head: pick the right paint type, prep with the checklist, apply in thin coats, and stop at the visual checkpoints. Begin with a clean, dry surface, do a small patch test, mix and match as the label directs, and work in the right temperature and humidity range. Check your work at each stop point, and keep a steady pace to prevent drips and uneven finish.
Common mistakes bite back when you rush or skip steps: skipping the test patch can hide how the paint reacts on your surface, applying thick coats invites runs and peeling, and ignoring safety gear or ventilation invites health risks. Safety first means ventilation, gloves, eye protection, and keeping kids and pets away; read the label and work deliberately rather than guessing.
If the job feels beyond your setup or you hit a stubborn problem you can’t fix with a recoat, don’t push on. A pro can save you time and avoid irreversible damage. Otherwise, stay steady, follow the plan, and finish with a finish you’ll be proud to show. You’ve got this—shape the work, protect the project, and make it last.
FAQ
Can I apply milk paint over a previously finished surface?
Milk paint can be used on bare wood or properly prepared surfaces. If the surface has old paint, clean and lightly sand and check adhesion before applying. If in doubt, test a small area first and follow the manufacturer’s prep instructions.
Will milk paint crackle or distress, and how do I control that look?
Crackle or distress happens naturally with some milk paints as they dry. You can control the effect by selecting a finish that encourages movement and by applying in thin coats. If you want a smooth finish, use multiple thin layers and follow the product’s drying guidelines.
How long should milk paint stay workable after mixing?
Workable time varies by product and weather, but you should plan to coat within the window specified by the manufacturer. If you’re unsure, don’t mix more than you can use in one session and keep the container closed when not actively painting.
What should I do if the paint dries unevenly or shows brush marks?
Uneven drying or brush marks usually means surface prep or application needs adjustment. Lightly sand between coats, wipe away dust, and follow the product’s guidance on brush type and weather conditions. If problems persist, consult the label for recommended corrective steps.