

Introduction
Painting wicker furniture is applying paint to the woven surface after preparation to improve durability and appearance. The job starts with cleaning, drying, and choosing the right primer and paint for wicker. Expect to spend time on coats and drying between steps.
Common problems include flaky finish, uneven coverage, and paint peeling at the edges. Fixes include scraping away loose bits, using a bonding primer, applying thin, even coats, and letting each coat dry fully before the next. If you see stiffness in the weave or brush marks, adjust technique or product type and check the label for specific guidance.
Key takeaways
- Check for loose joints and broken weaves; repair before cleaning and painting.
- Clean with mild detergent; rinse and dry completely to avoid paint trapping.
- Lightly sand surfaces to remove slick coatings; wipe dust before priming.
- Apply an exterior-grade primer suitable for wicker and resin coatings.
- Use thin, even coats; brush or wipe with the grain to avoid drips.
- Safety: work in a ventilated area and wear a mask when sanding and painting.
Table of Contents
- Introduction
- Key takeaways
- Quick Overview and Project Planning
- Assessing the Wicker Material and Condition
- Tools and Materials Checklist (Material Specs and Standards Explained)
- Prep Work: Cleaning, Sanding, and Repairs
- Painting Methods and Techniques for Optimal Coverage
- Common Problems to Expect and How to Fix Them
- Finishing, Sealing, and Curing for Durability
- Visual Checkpoints and Quality Inspection List
- Conclusion
- FAQ
Quick Overview and Project Planning
This guide helps you decide if painting wicker is the right move for your piece. You’ll learn what to expect and how to map the work from start to finish. It outlines the main stages so you can estimate time, effort, and whether to hire a pro.
Think through the furniture’s use, exposure, and current condition to gauge practicality. We’ll cover material types, prep needs, and finish options. By the end, you should have a realistic plan and a path to follow.
When to Paint Versus Replace or Reweave
Before you grab that paintbrush, step back and assess your wicker piece. Painting’s great for a quick cosmetic refresh when your furniture’s still in good shape but doesn’t match your new decor.
But, if you’re dealing with rotting wood or missing strands, it’s time to replace or reweave, not paint. Paint won’t fix structural damage. It’ll just hide it temporarily.
Another thing to consider is the type of wicker. Natural wicker and resin wicker have different lifespans and maintenance needs. If your piece is falling apart, it might be better to invest in a new one rather than trying to paint an old, worn-out chair.
Scope and Realistic Outcomes
Painting wicker furniture can give it a whole new look, but let’s be real about what you’re getting into. First off, longevity. A well-prepped piece in a protected area might last 5 years or more. Out in the elements? You’re looking at 1-2 years before touch-ups are needed.
As for the finish, expect some texture. Wicker’s not smooth like wood. It’ll show brush strokes and may have a slightly uneven look. That’s okay – it’s part of wicker’s charm!
The material matters too. Natural wicker soaks up paint like a sponge. Resin wicker takes paint better but can crack over time. Prep work – cleaning, sanding, priming – is key to making your paint job last.
Assessing the Wicker Material and Condition
Identify whether you’re dealing with natural or synthetic wicker. Check for a metal frame or visible joins as part of the assessment. Note how many layers of finish or old paint are present and how they look.
Material type affects adhesion, flexibility, and repair needs. Some issues are specific to natural wicker, others to synthetic. This check helps you choose the right preparation and coatings.
Identifying material type (natural, rattan, reed, resin)
The wicker’s material affects how it takes paint. Here’s what to look for:
- Natural Rattan: Light brown, rough texture. Avoids cracking but stains easily.
- Reed/Wood Wicker: Darker, smoother. Holds paint well but can crack if dry.
- Resin/Polyester Wicker: Plastic-like, smooth. Takes paint fine but can fade over time.
Inspecting structural and cosmetic damage
Before painting, check for damage:
Loose joints: Tighten with glue or replace if necessary. Paint won’t stick to loose pieces.
Broken strands: Repair or reweave before painting. Broken wicker shows through paint.
Rot/Rust: Replace affected parts. Rot weakens structure, rust ruins metal frames. Both cause paint to peel.
Tools and Materials Checklist (Material Specs and Standards Explained)
Put together primers, paints or sealers, brushes, rollers, and a spray option if you’ll use it. Add cleaners, degreasers, fillers, and PPE like gloves and a respirator. Include sandpaper or a sanding block suitable for wicker surfaces.
Focus on specs that matter for adhesion, flexibility, and outdoor durability. Look for labels that mention bonding to wicker, UV resistance, and moisture tolerance. Verify with the product data sheet or manufacturer instructions before buying.
Primer and Paint Types Explained
Before you start painting, understand the different primer and paint options to ensure good adhesion and flexibility.
- Bonding Primer: Use for bare wicker or previously painted surfaces. It improves adhesion and seals porous materials.
- Acrylic/Latex Paint: Water-based, easy to clean up, and suitable for outdoor use. Choose 100% acrylic for better durability.
- Oil-Based Paint: Provides better coverage and adhesion but has a longer drying time and strong odor.
- Spray Enamel: Convenient for reaching tight weaves, but may require multiple coats and proper ventilation.
- Primer-Paint Combos: Some products combine primer and paint. They’re convenient but may not provide the best results on all surfaces.
Quick rule: Always match the primer to the topcoat type for optimal results.
Tools and Specialty Supplies
Gather the right tools to make your painting job easier and more efficient.
- Paint Brushes: Use angled sash brushes (1.5-2 inches) for most surfaces, and smaller ones (1/4-1/2 inch) for details.
- Small-Detail Tools: Toothpicks, cotton swabs, or small artist’s brushes help with tight weaves and intricate areas.
- Masking Supplies: Painter’s tape and drop cloths protect surrounding areas from paint drips.
- Sandpaper Alternatives: Sanding sponges or foam sanding blocks provide better control and prevent damage to the wicker.
- Specialty Spray Nozzles: Some spray paints come with adjustable nozzles for better control when painting tight weaves.
- PPE (Personal Protective Equipment): Gloves, safety glasses, and a respirator protect you from paint fumes and splashes.
- Ventilation: Ensure proper ventilation, especially when using oil-based paints or spray enamels. Open windows or use fans to circulate air.
Quick rule: Always prioritize safety with the right PPE and adequate ventilation.
Prep Work: Cleaning, Sanding, and Repairs
Start with a thorough cleaning to remove dust, grime, and oils. Use a mild degreasing step if needed and dry completely. Gently scuff the surface to help primer grip.
Remove loose or peeling finish and repair any loose strands or cracks. Secure strands with appropriate adhesives or stitching as needed. Dry fit and test a small area before full priming.
Cleaning and mildew removal
Start by removing any loose dirt with a soft brush. For natural wicker, use a mild soap solution – dish soap works fine. Synthetic materials can handle stronger cleaners like bleach or vinegar for tougher stains.
To remove mildew: Mix 1 part bleach to 3 parts water. Apply with a spray bottle or brush, let it sit for 5-10 minutes, then scrub and rinse thoroughly. Allow your furniture to dry completely before proceeding – this could take up to 48 hours.
Rinse well with clean water after cleaning. Natural wicker should be allowed to air-dry in a shaded area to prevent sun damage.
Repairing broken strands, loose joints, and rust
For broken strands: Use a matching piece of wicker or rattan to create a splint. Glue it in place with wood glue, then wrap with twine or fishing line for extra support.
For loose joints: Tighten them by wrapping the joint with twine or fishing line, securing it with a dab of wood glue if necessary. If parts are severely damaged, consider consulting a reweaver or replacing them.
For rust on metal frames: Sand off any rust using fine-grit sandpaper. Apply a rust converter to prevent further corrosion, then prime before painting.
Sanding and feathering edges
Use fine-grit sandpaper (120-150 grit) to lightly scuff the surface. This helps paint adhere better. Be gentle – aggressive sanding can damage the weave.
For glossy finishes, use a sanding sponge or fine-grit sandpaper to feather the edges. This blends the old finish with the new one, preventing a harsh line.
Wipe off any dust with a damp cloth after sanding. Allow the furniture to dry completely before priming.
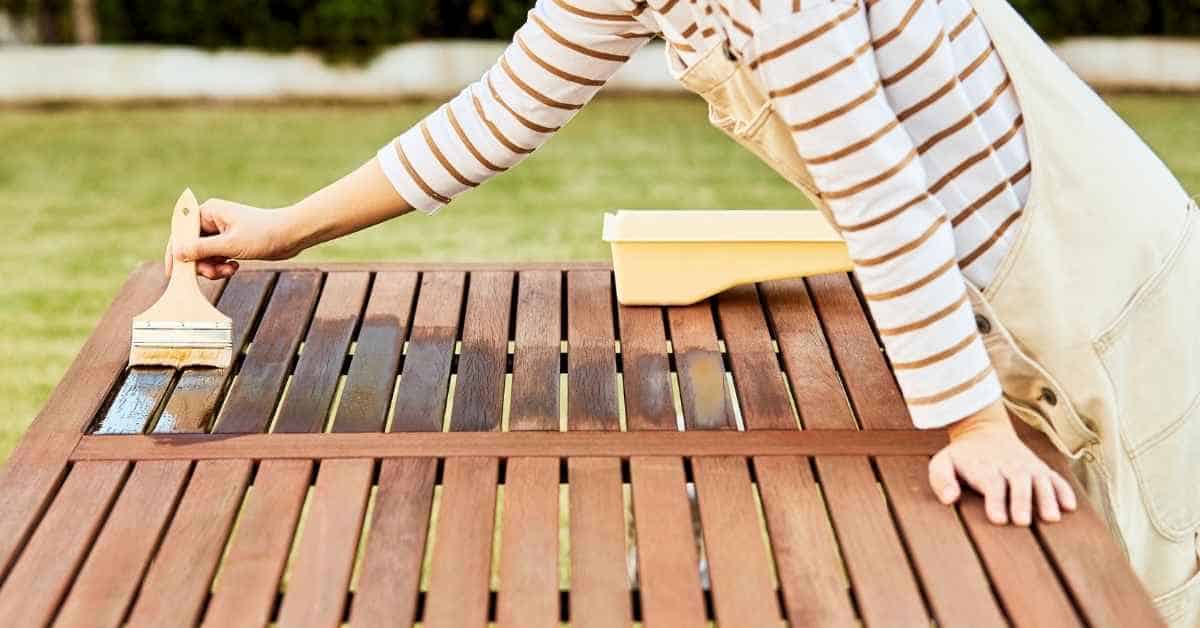
Painting Methods and Techniques for Optimal Coverage
Choose brushing, spraying, or stippling based on your setup and piece. Brushing gives control inside tight weave areas; spraying covers faster but may require masking. Stippling can reduce runs on textured surfaces.
Plan multiple light passes rather than one heavy coat. Work with a consistent cadence to avoid drips and brush marks. Confirm you’re applying an even layer and letting each coat dry per product instructions.
Spray Painting: Setup and Technique
Spray painting is ideal for large, flat surfaces or when you want a quick, even finish. It’s less suitable for intricate details or tight spaces.
Control overspray: Use low-pressure settings and keep the can at least 10-12 inches away from the surface to avoid heavy droplets.
Masking and ventilation: Protect surrounding areas with painter’s tape and drop cloths. Ensure proper ventilation, either outdoors or in a well-ventilated garage with open doors.
Brushing and Brushing Plus Dry Brush Detailing
For detailed work, nothing beats a good brush. Choose natural bristles for oil-based paints, synthetic for latex.
Brush selection: Use an angled sash brush (1-2 inches) for most surfaces and a smaller detail brush (1/4-3/8 inch) for tight spaces.
Stroke technique: Work in long, smooth strokes along the weave’s direction. For dry brushing, use barely any paint on your brush and gently drag it across the surface to create texture.
Working the Weave: Wipes, Air, and Small Tools
Getting paint into tight gaps requires finesse. Here are some tactics to help.
- Thin coats: Apply paint in thin layers to avoid pooling. Let each layer dry before adding another.
- Angled brushes: Use an angled brush to reach deep into the weave. Hold it at a 45-degree angle to the surface.
- Compressed air: After applying paint, use compressed air to blow excess paint out of tight spaces and prevent drips.
- Small tools: For really tight spots, consider using a small artist’s brush or even a toothpick to wipe paint into the weave.
- Optional tools: Consider renting an airless sprayer (<$50/day) for hard-to-reach areas. It provides more control than a regular spray can.
Common Problems to Expect and How to Fix Them
Adhesion failures, cracking, and flaking are common when the surface isn’t prepared properly. Sagging can occur with too thick a coat in certain areas. Color inconsistency may show if layers aren’t even or if the substrate shows through.
Fixes include thorough cleaning, proper scuffing, and re-priming on troubled spots. Use compatible primers and topcoats and allow full curing time before use. Check labels for outdoor suitability and warranty notes.
Paint not adhering or flaking
Flaking paint is a common problem, often caused by contaminants on the surface, using the wrong primer, or trying to paint over a flexible substrate like wicker. First, remove any loose paint with light sanding.
Re-prep the area by cleaning it thoroughly and letting it dry completely. Then, use a suitable bonding primer to ensure good adhesion.
If you’re painting over wicker, consider using a flexible paint designed for outdoor furniture. This will help prevent flaking due to movement of the substrate.
Cracking and paint failure with flex
Wicker furniture moves, so it’s crucial to use flexible paints and primers. If you’re seeing cracks or paint failure, it might be due to using non-flexible products.
To fix this, strip the failed coating completely. Then, prep the surface again and apply a flexible primer followed by a flexible paint.
If there are cracked edges, use light sanding to feather them out before repainting. This will help blend the new coat with the old and prevent further cracking.
Drips, runs, and visible brush marks
Drips and runs happen when you apply paint too thickly. To fix this, lightly sand the area once it’s dry to smooth out the surface.
Re-coat with a thinner layer of paint, making sure your brush is well-loaded but not dripping. Use even strokes, working from top to bottom and side to side.
To prevent runs in the future, make sure your paint is properly thinned according to the manufacturer’s instructions. Also, use the right brush – one that’s not too big or small for the job.
Finishing, Sealing, and Curing for Durability
Choose a topcoat that adds abrasion, UV, and moisture resistance suitable for outdoor exposure. Check compatibility with your primer and paint. Apply as directed and avoid mixing incompatible products.
Ensure the piece is fully cured before regular use or exposure to elements. Cure times vary by product and weather; verify these on the label or data sheet. Protect the finish from heavy use until it is fully set.
Topcoat options and when to use them
Choosing the right topcoat is crucial for protecting your wicker furniture. Here are three common options:
Clear Acrylic Sealers offer UV protection and moisture resistance, making them great for both indoor and outdoor pieces.
Polyurethane Varnishes provide excellent durability and abrasion resistance but can yellow over time when exposed to sunlight. They’re better suited for indoor use.
UV-Resistant Finishes are designed for outdoor furniture, providing superior UV protection to prevent fading and cracking from sun exposure.
Drying and cure considerations
Proper drying and curing is vital for a durable finish. Here’s what you need to know:
First, check the manufacturer’s guidelines for recommended drying and cure times. These can vary depending on the product.
Next, consider your environmental conditions. High humidity and low temperatures can slow down the curing process. Adjust your timeline accordingly.
A piece is adequately cured when it feels completely dry to the touch and doesn’t leave any residue on your fingers. For regular use, this usually takes 24-72 hours, but it’s best to err on the side of caution.
Visual Checkpoints and Quality Inspection List
Do a pre-paint check for loose strands, cracks, and surface cleanliness. Confirm you can see a uniform surface with no dust or oils. Inspect the weave for any hidden gaps you need to fill.
After painting, look for even coverage, no drips, and consistent color. Run a tactile check to ensure the coating isn’t sticky or peeling. Use these checkpoints to decide if the job is ready for final use.
Pre-paint checklist
Before you start painting, use this checklist to ensure your wicker furniture is ready. It’ll save you time and prevent issues down the line.
- Check for dryness: Ensure any existing finish or repairs are completely dry before priming. A quick touch confirms it.
- Test adhesion: Scrape a small area with a screwdriver to check if the old finish lifts off easily. If it does, you’ll need to sand and clean that spot.
- Inspect repairs: Make sure all repaired areas are solid and level. Gently press them; any soft spots need attention.
- Check masking: Ensure all non-paint areas are fully covered with tape and paper. Any gaps here can lead to overspray or drips.
- Feel for rough spots: Run your hand over the surface. If you feel any rough patches, sand them smooth.
- Check weave tightness: Ensure the wicker is taut and not loose. Loose weave can cause paint to pool and crack later.
- Inspect for cracks: Look closely for any hairline cracks that need filling before painting.
- Verify primer suitability: Make sure your chosen primer is compatible with the existing finish and the new paint. Check the label if unsure.
Quick rule: If anything fails these checks, fix it before moving on. It’s easier now than after painting.
Post-paint quality checks
After applying your final coat, use this checklist to ensure a high-quality finish that’ll last.
- Check sheen consistency: Inspect the entire piece. If some areas look duller or glossier than others, you may need to touch up.
- Inspect weave coverage: Look closely at the weave. Any missed spots can be touched up now before they become obvious later.
- Test adhesion: Gently scratch a small area with a nail or coin. If the paint lifts off, it’s not adhering properly.
- Feel for tackiness: Run your hand over the surface. If it feels sticky, let it dry more before handling or moving.
- Check for drips: Inspect all edges and crevices for any missed drips or runs. These can be sanded off now if caught early.
- Inspect corners: Ensure paint coverage is even in all corners and hard-to-reach areas.
- Verify cure time: Make sure the recommended curing time has passed before using or moving your furniture to prevent any damage.
- Check for dust: Inspect for any specks of dust that may have settled on the wet paint. These can be carefully wiped off now.
Quick rule: If anything fails these checks, address it promptly. A thorough inspection now saves touch-ups later.
Conclusion
Finish your project with confidence by sticking to the plan: a safe, durable finish that looks good and lasts. The key is controlled prep, measured coats, and patience to let each step set up before the next work begins.
Start with a simple check list in your head as you move through the work: confirm the wicker is sound and dry, clean and repair any damage, sand lightly to key the surface, mask and protect surrounding areas, test a small patch with your chosen paint, apply thin coats in the correct order, let each coat cure, seal and cure again, then inspect for uniform coverage and adhesion. Do not rush the dry times, and keep ventilation and PPE in mind at all times.
Two or three mistakes to avoid are skipping the cleaning and repair steps, applying paint too thick in one pass, and ignoring the cure times or ventilation. Always test first in a hidden spot, use thin coats and enough ventilation, wear safety gear, and never force a repair that requires invasive methods beyond the planned fixes. If something smells off, or you see bubbling, color bleeding, or loose strands, stop and reassess before proceeding.
If the wicker shows severe separation, loose joints, broken strands, active mold, or finishes that won’t adhere after multiple attempts, it’s wise to bring in a professional for structural repair or refinishing. Stay practical, stay safe, and you’ll end up with furniture that looks good and lasts for years to come. You’ve got this—start now, and finish strong.
FAQ
What prep steps will help paint stick to wicker?
Clean the furniture well and let it dry completely. Lightly sand to scuff the surface, then wipe away dust before you start painting.
How should I choose the right paint for wicker and why?
Look at the label for indoor/outdoor use and compatibility with resin or natural wicker. Check manufacturer instructions and local rules if any, and avoid harsh products that can weaken the fibers.
How do I handle cracking, peeling, or loose fibers before painting?
Fix loose fibers with a minimal, compatible repair method and let it dry. For cracks or peeling, address those areas so the finish isn’t trapping movement or dirt.
What techniques help avoid brush marks and achieve an even finish on curved wicker?
Use even, light layers and a high-quality synthetic brush or a small foam applicator. Work with the weave, don’t fight it, and keep to a steady, overlapping motion for uniform coverage.