

Introduction
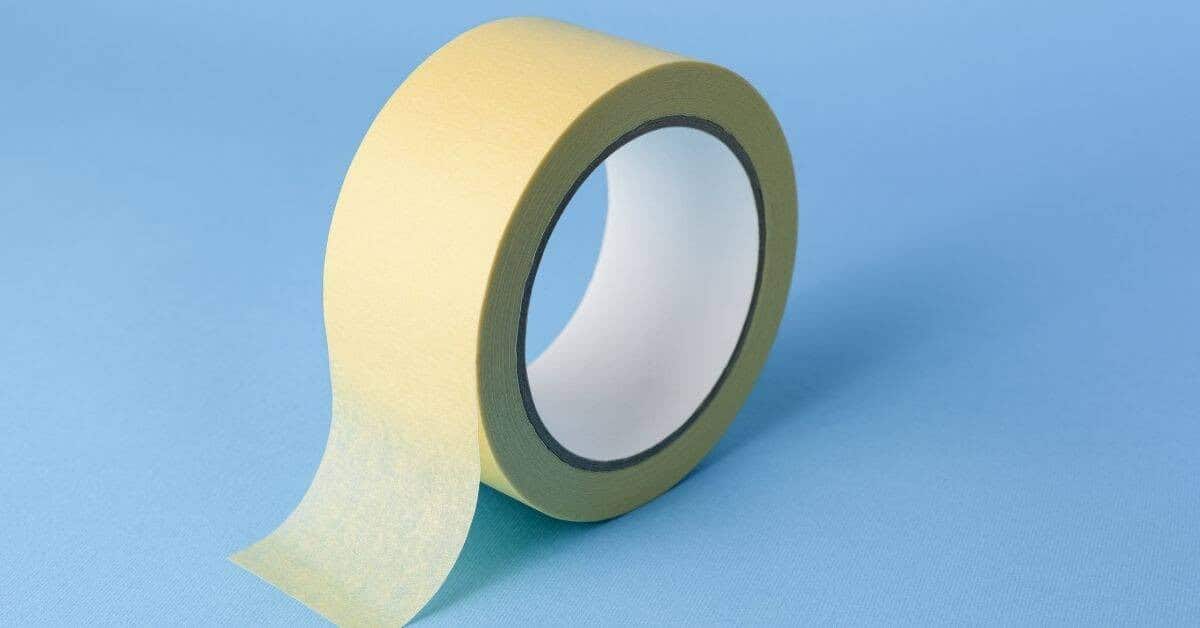
Tackling a DIY painting project? Understanding the timeline for painter’s tape alternatives like liquid mask and edge sealers can save you time and ensure crisp, professional-looking results. Here’s a step-by-step guide to help you plan your project efficiently.
Whether you’re working on tight corners, porous surfaces, or delicate finishes, these alternatives offer a softer approach than traditional painter’s tape. But how long do they take to apply, dry, and remove? Let’s break down the timeline for each method.
For the full guide, see Painter’s Tape Alternatives: Liquid mask, edge sealers, and when they beat tape.
Step-by-Step Timeline: Liquid Mask vs Edge Sealers
Before we dive into the timeline, ensure your surface is clean and free of debris. This initial prep step takes about 15-30 minutes, depending on the size of the area.
- Liquid Mask (Liquid Frisket):
- Application: 10-20 minutes per section (allowing for careful brushing and ensuring even coverage)
- Drying Time: 30 minutes to 2 hours, depending on the brand and humidity levels. Always follow manufacturer guidelines.
- Removal: 5-10 minutes per section, using a razor blade or utility knife to score and peel away
- Edge Sealers and Caulking Techniques:
- Application: 5-15 minutes per section (focusing on creating a thin, even bead along the edge)
- Drying Time: 30 minutes to several hours, depending on the product and environmental conditions. Again, follow manufacturer guidelines.
- Removal: Typically not required, as edge sealers are painted over or remain in place. However, if removal is needed, it may take 5-10 minutes per section with a utility knife or paint stripper.
Now that you have an idea of the time commitment for each method, let’s consider how prep time affects your overall schedule.
Key takeaways
Proper preparation is key to achieving crisp edges with liquid mask and edge sealers. This initial step can take anywhere from 15-30 minutes, depending on the size of the area you’re working on. Be sure to factor this into your project timeline.
- Evaluate surface cleanliness and edge avoidance before choosing tape, liquid mask, or edge sealer.
- Liquid masks require proper drying times and ventilation to prevent solvent fumes.
- Edge sealers create crisp lines on textured surfaces when tape would fail.
- Test paint compatibility on a hidden area to avoid color transfer.
- Guard eyes and skin; follow product directions and local ventilation rules.
- Plan workflows to minimize tape removal damage and preserve sharp edge.
Table of Contents
- Introduction
- Key takeaways
- Painter’s Tape Vs Alternatives — Quick Comparison
- Liquid Mask Explained — Types and How They Work
- Edge Sealers and Seal Coats — What They Do Differently
- Tools and Materials Checklist for Each Method
- Surface and Paint Compatibility — What to Check First
- Step-by-Step Workflows and Best Practices
- When Liquid Masks and Edge Sealers Beat Painter’s Tape
- Troubleshooting, Removal, and Visual Checkpoints for Crisp Edges
- Conclusion
- FAQ
Painter’s Tape Vs Alternatives — Quick Comparison
Painter’s tape, liquid masking, and edge sealers each control paint differently: tape provides a physical barrier, liquid masks form a peelable film, and sealers fill gaps at the edge. This paragraph gives a snapshot so you can match method to the job without diving into the details yet.
Each option has distinct pros and cons for ease, speed, and surface fit—tape is simple but can lift, liquid masks conform to curves, and sealers prevent bleed when adhesion or texture is an issue. Use this summary to pick which sections to read next based on whether you need conformity, speed, or the cleanest edge.
What painter’s tape does well and its limitations
Painter’s tape is a staple on any jobsite due to its ease of use. It’s quick to apply, easy to remove, and predictable in its performance.
Pros: Easy application, clean removal, predictable results.
Cons: Can bleed on textured surfaces or delicate walls, adhesion issues may arise over time.
What liquid masks and edge sealers offer instead
Liquid masking and edge-seal products bring unique advantages to the table. They conform to irregular shapes and provide a robust seal.
Pros: Conformity to complex shapes, superior sealing capability.
However, they require more time for application and drying compared to tape.
Decision framework at a glance
When choosing between painter’s tape and its alternatives, consider these factors:
Surface type: Tape works best on smooth surfaces. Liquid masks are better for textured or complex shapes.
Edge complexity: Simple edges? Use tape. Complex edges? Consider liquid masking.
Paint type: Latex paints play nice with tape. Oil-based paints may require liquid sealers to prevent bleeding.
Time: Tape is quick. Liquid masks take longer but offer superior results in certain situations.
Liquid Mask Explained — Types and How They Work
Liquid masking products range from peelable, latex-like formulations to water-based polymer coatings that dry into a removable film. These materials are designed to form a continuous barrier over the substrate and paint, so they peel away without carrying paint off the surface.
Different chemistries behave differently on porous or painted surfaces and during removal, so check the product label or data sheet for compatibility and recommended dry times. If you need to confirm chemical or substrate limits, follow the manufacturer instructions to avoid surface damage or difficult removal.
Types of liquid mask and their typical uses
Liquid masks come in various formulations, each suited to different tasks. Here are the common ones:
Peelable Latex-like: These are water-based and resemble latex paint. They’re great for detail work and fine edges. Apply with a brush or small roller.
Water-based Polymers: Thicker, these are ideal for large-area protection. Apply with a wide roller or sprayer. They provide better coverage but may not be as precise for details.
How liquid mask bonds, dries, and peels
Liquid masks bond to surfaces as they dry. Here’s what happens:
The liquid forms a film that adheres to the surface. As it cures, it becomes more solid but remains flexible. This allows for easy peeling later.
Peelability depends on several factors: drying time, temperature, humidity. Test adhesion before starting your job by applying a small amount and letting it cure fully.
Safety, storage, and shelf-life considerations
Safety: Wear gloves when handling. Avoid contact with eyes and skin. If contact occurs, rinse immediately.
Storage: Keep liquid masks in a cool, dry place away from heat sources and direct sunlight. Follow manufacturer’s guidelines for storage temperature ranges.
Shelf-life: Most liquid masks have a shelf life of 1-2 years when stored properly. Check the label or contact the manufacturer if unsure about your specific product’s usable life.
Edge Sealers and Seal Coats — What They Do Differently
Edge sealers and seal coats are applied along a tape edge or directly to a painted junction to fill gaps and lock down fibers, creating a thin barrier against bleed-through. They are typically a low-viscosity liquid that penetrates gaps and cures to form a paint-compatible seal.
These products differ from liquid masks because they are intended to bond at the edge rather than form a peelable film over a large area; check the technical sheet to confirm adhesion and overpaint windows. When in doubt, follow the product directions for cure and overcoat limits to ensure the seal works as intended.
Common types of edge sealers and use cases
Edge sealers come in various types, each suited to different surfaces and conditions. Here are the common ones:
Acrylic Sealers are water-based, making them ideal for indoor use on porous surfaces like drywall or wood. They’re easy to clean up and have low VOCs.
Silicone Sealers are great for non-porous surfaces and outdoor use. They resist moisture and mold, but they can be harder to clean up and have higher VOCs.
Specialty seal-coat products may contain additives like primers or mildewcides. Choose based on your surface’s porosity, location (indoor/outdoor), and specific needs.
Application techniques for a reliable seal
Applying edge sealers correctly ensures a crisp line. Here’s how:
Apply a thin bead along the edge using a brush or caulking gun. Too much sealer can cause drips and make it harder to paint.
Use a feathering motion to spread the sealer slightly onto the surface, creating a seal but not leaving excess material.
Allow the sealer to cure as directed. This ensures it’s dry and ready for painting. Always test on a small area first to check compatibility with your paint.
When to pair an edge sealer with tape
While edge sealers can be used alone, combining them with painter’s tape gives superior results in certain situations:
For fresh trim, use tape first to protect the surface. Then apply sealer along the edge for added protection against bleed-through.
On textured walls or surfaces with imperfections, tape provides a smooth edge while the sealer reinforces it, preventing paint from seeping into cracks or crevices.
Tools and Materials Checklist for Each Method
Each method needs a focused set of tools: tape requires clean applicators and a good razor or burnishing tool, liquid masks need brushes or applicator bottles, and sealers need fine brushes or squeeze tips. Include consumables like drop cloths, mixing sticks, and appropriate cleaners for surface prep and tool cleanup.
Also list PPE: gloves, eye protection, and respiratory protection when product labels or data sheets recommend it—different chemistries call for different precautions. If you’re unsure which protective rating to use, consult the product label or manufacturer guidance before starting.
Tape jobs — essentials and recommended extras
Before you start taping, make sure you have the right tools to get a clean edge. Here’s your checklist:
- Painter’s tape (1.5″ or 2″ width): For most jobs. Check it’s not too old; it loses stickiness over time.
- Masking paper: For wide areas, use this instead of multiple tapes.
- Scissors or utility knife: To cut tape cleanly. Dull blades cause fraying.
- Smoothing tool (e.g., putty knife): Press down firmly to remove wrinkles and gaps.
- Level: Ensure straight lines on walls, ceilings. Tape won’t save a crooked line.
- Measuring tape: Mark out where you’ll place your tape. Improves accuracy.
- Edge sealer (optional): For extra protection against paint bleeding. Use with compatible tape.
- Safety glasses: Protect eyes from debris when cutting tape.
Quick rule: Always check your tape’s stickiness before use. Old tape won’t hold, causing gaps and lift.
Liquid mask workflows — supplies and cleanup gear
Liquid masks need specific tools for application and removal. Here’s what you’ll need:
- Liquid mask (e.g., latex, shellac): Choose based on your project’s needs.
- Paintbrush or roller: For applying liquid mask. Use a good quality one for even coverage.
- Mixing cup and stirrer: Ensure your liquid mask is well mixed before use.
- Sandpaper (fine grit): Lightly sand the area after drying to remove any raised grain.
- Tack cloth or damp sponge: Remove dust from sanding. Wet sponges should be just damp, not dripping.
- Solvent/cleaner (e.g., mineral spirits, denatured alcohol): For removing liquid mask. Check compatibility with your specific product.
- Rags or paper towels: For cleaning up excess liquid mask and residue.
- Safety gloves: Protect hands from chemicals in the liquid mask and solvents.
Quick rule: Always test your liquid mask and solvent on a small, hidden area first. Some combinations don’t play nice together.
Edge sealer setup — applicators and finishing tools
Edge sealers require specific tools for application and touch-up. Here’s your list:
- Edge sealer (e.g., shellac, primer): Choose one that complements your paint type.
- Small paintbrush (1/2″ to 3/4″ width): For applying edge sealer. A good quality brush ensures even application.
- Dispenser or bottle with applicator tip: Some sealers come in bottles with tips for easy, controlled application.
- Fine-grit sandpaper (e.g., 220 or 320): Lightly sand the sealed edge after drying to remove any raised grain.
- Tack cloth or damp sponge: Remove dust from sanding. Wet sponges should be just damp, not dripping.
- Touch-up paint (matching your wall color): For fixing any missed spots or drips.
- Safety glasses: Protect eyes from debris when sanding and from drips during application.
Quick rule: Always apply edge sealer in thin, even coats. Thick layers can drip or run, ruining your crisp lines.
Surface and Paint Compatibility — What to Check First
Before choosing tape or an alternative, identify the substrate (wood, drywall, metal, plastic, wallpaper) and the condition of the existing paint or finish, including gloss level and elasticity. Some products bond poorly to flexible coatings or delicate wallpapers and can remove finishes on peel-sensitive surfaces.
Check the product’s compatibility statements, preparation steps, and recommended adhesion tests on the technical data sheet or label. When in doubt, test the chosen method on a small, inconspicuous area and let the product fully cure before evaluating results.
Porous versus non-porous surfaces
Before you start masking, check your surface’s porosity. This affects how well liquid mask or tape sticks and performs.
- Wood: Check for knots or rough patches. Sand if necessary to ensure even adhesion.
- Drywall: Feel for any texture or imperfections. Smooth surfaces work best.
- Metal: Look for rust, dents, or scratches. Clean and prep as needed.
- Plastic: Check for any warping or unevenness. Sand lightly if required.
- Wallpaper: Ensure it’s securely attached with no bubbles or peeling.
- Fresh paint: Wait until fully cured (at least 24 hours) before masking to avoid lifting.
- Exterior surfaces: Check for moisture. Liquid mask may not adhere well if surface is wet.
- Existing caulk or sealant: Ensure it’s completely dry and clean before applying liquid mask.
Quick rule: If in doubt, test a small area first to see how your chosen product behaves.
Paint types and finish considerations
Consider your paint’s type and finish when choosing a masking method.
- Gloss level: Higher gloss paints show imperfections more. Use edge sealers or liquid mask for best results.
- Curing time: Latex paints cure faster than oil-based. Wait at least 4 hours before masking to avoid lifting.
- Alkyd vs water-based: Alkyd (oil) paints take longer to dry and may require a different approach than water-based paints.
- Specialty paints: Check manufacturer’s guidelines for masking. Some may require specific methods.
- Primer used: Ensure it’s compatible with your chosen masking product.
- Paint color: Dark colors show mask lines more. Consider this when choosing a method.
- New paint application: Wait until the surface is completely dry (at least 24 hours) before masking.
- Existing paint: Check for any flaking or peeling. Sand and prep as needed.
Quick rule: Always test a small area first to ensure your chosen method doesn’t affect the paint’s finish.
Sensitive substrates and delicate finishes
Some surfaces require extra care when masking. Here are special considerations.
- Fresh caulk: Wait until completely dry (at least 24 hours) before applying liquid mask or tape.
- Softwoods: Be gentle when applying and removing masks to avoid damaging the wood.
- Wallpaper: Test a small area first. Liquid mask may lift wallpaper if not applied carefully.
- Textured surfaces: Lightly sand for better adhesion. Test in an inconspicuous area first.
- Delicate finishes (e.g., lacquer, varnish): Use edge sealers instead of liquid mask or tape to avoid damaging the finish.
- Existing damage: Repair any cracks, holes, or other damage before masking.
- Outdoor surfaces: Check for extreme temperatures. High heat can affect how well masks adhere and perform.
- Moisture-prone areas: Ensure surfaces are completely dry before applying liquid mask or tape.
Quick rule: Always test a small, hidden area first to ensure your chosen method doesn’t damage the surface.
Step-by-Step Workflows and Best Practices
Each workflow starts with cleaning and drying the surface, followed by precise edge placement: apply tape and burnish for tape-only jobs, brush or spray liquid mask across the area for masks, and carefully apply sealers along the junction for edge sealing. Work in logical stages—prep, apply, allow proper drying or cure, paint, then remove or reveal.
Follow manufacturer guidelines for drying and overcoat windows and avoid forcing removal before the product is ready, which can cause lifting or tearing. If you need specific dwell or cure times, check the product instructions or technical data sheet rather than assuming a timeframe.
Step-by-Step Process
This workflow guides you through preparing, painting, and cleaning up using alternative methods to painter’s tape.
- Preparation: Check surface compatibility (refer to earlier section) and gather tools (checklist).
- Safety first: Put on gloves, goggles, and a mask. Cover the floor with drop cloths.
- Apply liquid mask or edge sealer: Follow the manufacturer’s instructions for application. Use a steady hand and maintain a consistent width.
- Let it cure: Allow the product to dry as per the package instructions. This step is crucial for proper adhesion and prevention of bleed-through.
- Paint: Apply paint evenly, working in manageable sections. Inspect edges for any drips or missed spots.
- Check tack-free: Before removing the mask or sealer, ensure the paint is completely dry to avoid lifting or peeling.
- Remove mask/sealer: Carefully peel off the liquid mask or edge sealer at a 45-degree angle. If using an edge sealer, wipe away any excess with a damp cloth.
- Final check: Inspect your work for any missed spots or imperfections. Touch up as needed.
Workflow for precise trim and detail work
For small-scale painting jobs where crisp edges are crucial, follow this detailed workflow to achieve professional results.
Preparation: Ensure surfaces are clean, dry, and free of dust. Use a fine-grit sandpaper (220-grit) to lightly smooth any rough spots. Wipe off with a damp cloth and let it dry.
Application: Apply liquid mask or edge sealer using a small paintbrush for precise control. Work in manageable sections, maintaining a consistent width.
Sealing and Painting: Allow the product to cure as instructed. Paint your first coat, focusing on edges. Let it dry, then apply subsequent coats if needed. Inspect edges closely for any imperfections.
Workflow for large-area or fast turnaround jobs
For quick and efficient painting of large areas, follow this scaled-up approach while maintaining acceptable edge quality.
Preparation: Ensure surfaces are clean and dry. Use a larger grit sandpaper (120-grit) to quickly smooth any rough spots. Wipe off with a damp cloth and let it dry.
Application: Apply liquid mask or edge sealer using a wide paintbrush or roller for speedy coverage. Work in larger sections, maintaining a consistent width but prioritizing quick application over perfect precision.
Sealing and Painting: Allow the product to cure as instructed. Paint your first coat, focusing on edges where possible. Let it dry, then apply subsequent coats if needed. Inspect edges for any obvious imperfections during drying times.
Quality-control checkpoints during the job
Regularly inspect your work to catch issues early and maintain a high-quality finish throughout the project.
- After application: Check for any missed spots, thin areas, or product buildup. Address these immediately to prevent issues later on.
- After paint tack-free: Inspect edges closely for any drips, missed spots, or lifting of the mask/sealer. Touch up as needed.
- Before removal: Ensure the paint is completely dry and the mask/sealer can be removed cleanly without lifting the paint.
- After removal: Inspect your work for any missed spots, imperfections, or bleed-through. Touch up as needed.
Quick rule: Regular inspection is key to maintaining a high-quality finish and catching issues early before they become bigger problems.
When Liquid Masks and Edge Sealers Beat Painter’s Tape
Liquid masks are often better for complex curves, tight radii, or textured surfaces where tape won’t conform without gaps, while edge sealers excel where a thin filler at the edge is needed to prevent bleed. Alternatives also help when long runs of masking would be time-consuming or when tape adhesion risks damaging a delicate finish.
Decide based on surface profile, expected exposure duration, and the paint system; consult product compatibility notes to ensure the chosen method will remove cleanly or accept overcoating. If you’re uncertain about long-term outdoor exposure or compatibility with a specialty coating, check the manufacturer instructions before committing.
Curved, irregular, and highly textured surfaces
Painter’s tape struggles on surfaces that aren’t flat. It can’t conform to curves or texture, leading to gaps where paint seeps through.
Liquid masks, however, are your friend here. They flow into every nook and cranny, creating a seamless barrier. Apply them with a brush or sprayer, let dry, then sand if needed for a smooth edge.
Pro tip: For highly textured surfaces, use a foam roller to apply liquid mask. It’ll hold more product and give you better control.
Long runs, exterior exposure, and UV/weather concerns
Tape can lift over time, especially on long exterior runs or in harsh weather conditions. Sunlight, rain, and temperature changes can cause it to lose its stick.
Edge sealers and liquid masks hold up better outdoors. They form a durable barrier that resists UV damage and won’t peel off like tape can. Apply them as you would paint, following the manufacturer’s instructions for drying times.
Pro tip: For exterior jobs, use an edge sealer with built-in UV protection to safeguard against sun damage.
Trade-offs: speed, cost, and finish quality
Liquid masks and edge sealers take more prep time than tape. You’ve got to apply, let dry, maybe sand. But the extra effort can pay off in better results.
Tape can leave adhesive residue or pull off paint when removed. Liquid masks and sealers don’t have this issue. They create cleaner lines and reduce rework, saving you time (and money) in the long run.
As for cost, liquid masks and edge sealers are usually more expensive than tape. But if you’re working on a job with tight tolerances or high-end finishes, the investment might be worth it to avoid costly mistakes.
Troubleshooting, Removal, and Visual Checkpoints for Crisp Edges
Common failures include bleed under the barrier, lifting at the edge, or residue after removal; evaluate edges immediately after reveal and before final cleanup to catch issues while materials are manageable. Removal technique matters: peel liquid masks in a single, steady motion per the product guidance and remove tape at the correct angle to minimize edge pull.
If residue or adhesion remains, consult the product label for safe cleaning solvents or removal procedures and perform a localized test first. When in doubt about solvent compatibility or mechanical removal, follow the manufacturer instructions or test on a hidden area to avoid unintended damage.
Diagnosing common problems and fixes
Use this checklist to troubleshoot issues while painting. Catching problems early prevents rework.
-
- Bleeding lines: Check for paint seeping under the mask. If found, stop painting immediately, remove the mask, and clean the area with a damp cloth.
- Wrinkled paint: Inspect masked edges. Wrinkles mean the paint is too thick or drying too fast. Thin the paint or slow down drying time.
- Adhesion failures: Check if the mask is peeling off. If so, stop painting, remove the mask, and clean the area before reapplying a new piece.
Quick rule: If you spot any of these issues, stop painting immediately to prevent further damage.
Safe removal and residue cleanup
Use this checklist to remove masks safely and clean up any residue. Timing is key to avoid tearing paint or leaving marks.
-
- Wait for drying: Let the paint dry completely before removing the mask. Patience prevents tears.
- Test a small area: Before removing the entire mask, test a small, hidden spot to ensure the paint is fully dried and won’t peel off with the mask.
Quick rule: Always wait for the paint to dry completely before removing the mask. This ensures a clean edge and prevents residue.
Visual checkpoints for a professional reveal
Use this checklist to inspect your work before calling the job done. A thorough visual inspection ensures a high-quality finish.
-
- Clean edge: Check that the masked edge is clean and free of paint residue or buildup. Wipe with a damp cloth if necessary.
- Feathering: Inspect for any harsh lines where the painted area meets the masked edge. Touch up with a small brush if needed.
Quick rule: A thorough visual inspection ensures you catch and correct any issues before the job is complete, saving time and effort in the long run.
Conclusion
Choose the method that fits your project and your confidence. The right approach protects surfaces, saves time, and yields crisper edges if you test and follow the steps carefully.
When you’re ready, proceed in practical order: select the method you’ll use, verify surface compatibility, gather the correct tools and materials, test your setup on a small hidden area, apply in clean, dry conditions, pace your work to avoid overworking edges, and remove or seal as soon as the paint is dry to prevent pull-off or bleeding. Test first on a hidden area and protect your surfaces and eyes as you go, then inspect the edge after each stage to catch trouble before it becomes a mistake.
Avoid these traps: never rush the masking steps, don’t skip surface prep, and don’t apply liquids or sealers over a dusty or damp surface. Stay within the safety rules: ventilate, wear eye protection, and work in clean, dry conditions. If a project demands unusual materials, or you’re dealing with a high-stakes finish like furniture or cabinetry, consider bringing in a professional before you risk costly damage. Stay methodical, stay safe, and you’ll finish with edges that look as sharp as you want. You’ve got this.
FAQ
When should I switch from painter’s tape to liquid mask or edge sealer?
Use liquid mask or edge sealer when edges are highly textured, curves, or you need a near-perfect edge for delicate surfaces. Check the finish you want and the manufacturer’s guidance for your product. If you’re unsure, test on a scrap area first.
How do I prep surfaces before applying liquid mask or edge sealer?
Clean the surface to remove dust and oils. Let it dry completely before applying. For best results, follow the product label and manufacturer instructions on prep steps and compatibility with the surface.
How do I remove liquid mask or edge sealer without damaging paint or surfaces?
Peel or wipe according to the product directions while the mask is still workable or within the stated removal window. Use the recommended remover if needed and avoid brute force. If in doubt, test on a hidden area first and follow the label.
What signs mean a liquid mask or edge sealer isn’t working as intended?
Look for edge bleed, curling, or paint seeping under the mask. If edges aren’t crisp after removal, recheck product instructions and surface prep. Stop and reapply per label guidance if you’re unsure.