
Introduction
You will learn how to prepare, select the right tools, and use a brush effectively for clean, confident painting.
The article explains practical prep steps, tool choices, and pro tips so you can apply techniques across common surfaces and styles.
You’ll gain a practical framework for starting projects, maintaining control, and improving results over time.
Key takeaways
- Plan the job by surface type, trim edges, and set drying times.
- Clean and degloss surfaces; damp wipe dust before brush work begins.
- Choose brush size, shape, and bristle material matching paint and surface.
- Load evenly, remove excess along edge, and maintain a steady, partial load.
- Use short, even strokes; overlap passes to minimize streaking and lap marks.
- Clean brushes promptly; rinse solvents compatible, then air dry in shape.
Table of Contents
- Introduction
- Key takeaways
- Quick overview and planning your paint job
- Preparing the brush and surfaces
- Choosing the right brush for the job
- How to load a brush and control paint flow
- Brush techniques for best coverage and finish
- Common brushing problems and troubleshooting
- Cleaning, maintenance, and storage for long-lasting brushes
- Conclusion
- FAQ
Quick overview and planning your paint job
This section helps you plan a paint job by clarifying the goal, the expected results, and the right tool for the job. You’ll see when a brush is the best choice versus rollers or a sprayer, and how to decide between a small touch-up, patch work, or a full room project. Quick planning checklist: surface type (new or old, concrete, drywall, wood), paint type (gloss, satin, matte; latex or oil-based), need for primer, and the overall time you should expect for the work.
Why it matters: solid prep saves time and yields a durable finish. It covers adhesion considerations, cleaning and degreasing, minor repairs, sanding or smoothing, and the essential tools at a glance, plus timing tips for multi-coat projects and cautions about humidity and cure times—plus the need to check local rules for disposal.
Decide project scope and timeline
Before you start painting, take a moment to assess the size of your project. Whether it’s touching up small areas or tackling an entire room, knowing the extent of your work is crucial for planning.
To estimate how much paint you’ll need, measure the area you plan to cover and calculate the number of coats required based on the surface type and condition. For instance, a fresh coat might only need one pass, but patch repairs or heavily stained areas may require two or three.
Also factor in drying times between coats. Paint typically needs at least 4 hours to dry before another layer can be applied. This means that if you’re doing multiple coats, your project will take longer than just the painting time itself.
Finally, set realistic goals for each day. Break up large projects into manageable sections and give yourself enough time to complete them without rushing.
Safety and workspace setup
Before you start painting, ensure your safety by wearing protective gear such as gloves and eye protection. Proper ventilation is also key—open windows or use fans to keep the air moving.
To protect floors and furniture from paint spills, lay down drop cloths or plastic sheets. This will save you a lot of cleanup time later on. Also, cover any areas that don’t need painting with painter’s tape or plastic sheeting.
Good lighting is essential for seeing the details in your work area. If natural light isn’t sufficient, use lamps or work lights to illuminate corners and hard-to-reach spots.
Tools and materials checklist
Before you begin painting, review this quick checklist to ensure you have everything you need:
- Paint brushes: Select the right size for your project. Larger areas may require bigger brushes.
- Paint trays: Use these to hold and mix paint efficiently.
- Painter’s tape: Essential for protecting edges and lines from overspray or brush marks.
- Drop cloths: Lay them down to protect floors and furniture from spills.
- Cleaners: Have rags, soap, and water ready for cleanup.
- Sandpaper: For smoothing out rough spots or preparing surfaces before painting.
- Primer: Important if you’re covering a dark color with light paint or patching bare wood.
- Masking tape: Useful for protecting trim and other areas from paint splatters.
Quick rule: Always check your tools before starting to avoid mid-project delays.

Preparing the brush and surfaces
Proper brushing prep matters because it prevents streaks, uneven absorption, and bristle damage that ruin the finish. Start with the brush: pick synthetic for stiffness and durability or natural for a softer feel, then wash to remove manufacturing oils and trim any frayed bristles. Prep the surface by cleaning the concrete of dust, dirt, and oil, degreasing spots, and repairing patches or mortar joints so the base is dry and ready.
A thorough prep makes the application smoother, faster, and more predictable, saving you rework later. Soak or condition the brush as needed per manufacturer instructions, use water or solvent as appropriate, and dry thoroughly before the next step; keep extras handy and mask edges for clean lines. Finish with a small test patch on a hidden area to confirm adhesion and finish before committing to the full surface; follow your label or datasheet for any product-specific drying times and steps.
Washing and soaking new or stored brushes
Before you start painting, give your brush a good wash to remove any manufacturing oils. These oils can cause streaks and affect the paint’s adhesion on concrete surfaces. Use warm water and mild soap for synthetic brushes; natural bristles need a longer soak in solvent.
For natural bristle brushes, soak them overnight in mineral spirits or turpentine to soften the fibers and remove oils. Synthetic brushes can be washed under running water, but avoid soaking too long as it weakens the bristles. Rinse thoroughly until the water runs clear.
If you’re unsure about a brush’s care instructions, check with the manufacturer. Proper washing ensures your brush is ready for smooth application without damaging the concrete surface or leaving streaks behind.
Surface Prep Basics (Clean, Sand, Prime)
Clean the concrete surface thoroughly to remove dust, dirt, and any oils. Use a shop vac or damp cloth for this step. For stubborn grease spots, apply degreaser and scrub until clean.
Sand rough patches or repair mortar joints with patching compound before painting. This ensures an even base that won’t cause texture issues in your final coat. Sand lightly to smooth out any imperfections after applying the patch.
Prime the surface if necessary, especially when dealing with porous concrete or areas prone to moisture. Primer helps improve adhesion and provides a uniform base for better paint coverage. Let it dry completely before painting.
Preventing Brush Drying During Breaks
To keep your brush in top condition, cover the bristles with plastic wrap or aluminum foil when taking short breaks. This prevents them from drying out and becoming stiff.
If you need a longer break, store the brush upright in a container filled with water for synthetic brushes or solvent for natural bristles. Seal it tightly to keep air out. When resuming work, rinse off any accumulated liquid before continuing your painting.
Proper storage during breaks ensures that your brush remains flexible and ready for use without damaging its integrity or affecting the paint job’s quality on concrete surfaces.
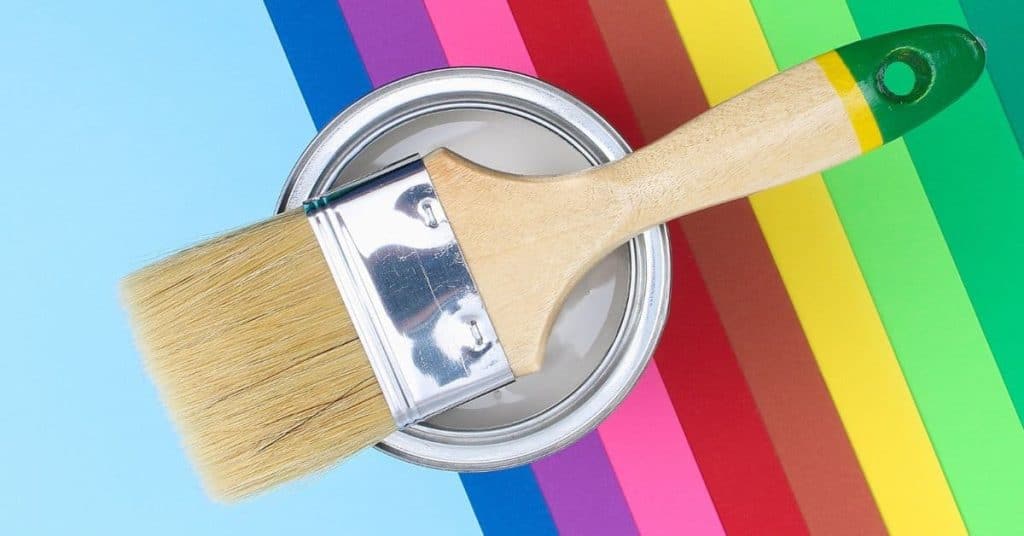
Choosing the right brush for the job
Choosing the right brush starts with understanding its parts: ferrule, bristle material, spine, and grip. Those parts affect control, edge quality, and how evenly you lay on paint. For concrete, pick the shape and size you need, and decide between angled (sash/trim) and straight brushes, and between synthetic and natural bristles based on the coating.
Match the brush to the coating and surface to get even coverage and clean edges. For concrete projects, synthetic bristles are common with water-based paints, while natural bristles are tied to certain oils or specialty coatings. Always check the product label or manufacturer instructions for intended use, and test on a small area to check shedding and finish.
Bristle materials: synthetic vs. natural
The choice between synthetic or natural bristles can make a big difference in how your paint job turns out, especially on concrete.
- Water-based paints: Synthetic (nylon/polyester) works best for water-based paints. Look for high-density bristles to avoid spritzing and ensure smooth coverage. Avoid using natural bristles as they can absorb too much paint and leave streaks.
- Oil-based paints: Natural bristle brushes are better suited for oil-based paints due to their durability against solvents. Check the stiffness rating; softer bristles work well for smoother finishes, while stiffer ones handle rougher textures better.
- Durability and finish: Synthetic brushes last longer but can leave a less natural look compared to natural bristle brushes which provide a more traditional finish. Avoid synthetic brushes on oil-based paints as they may crack or deteriorate over time.
- Absorption issues: Natural bristles absorb paint, so use them sparingly and clean thoroughly after each coat to prevent staining the concrete surface. Synthetic brushes resist absorption but can shed if not properly cared for.
Brush shapes and sizes explained
The right brush shape and size can make your painting job go faster and look better, especially on concrete surfaces. Angled brushes are great for corners and edges, while straight brushes work well for large flat areas.
For tight corners and intricate details, a smaller angled brush is essential to avoid overbrushing and ensure crisp lines. A larger straight brush can cover broad sections quickly without leaving noticeable strokes or streaks.
When choosing the size of your brush, consider the surface area you need to paint. For instance, a 2-inch brush works well for trim and edges, while a 4-inch brush is better suited for large flat surfaces.
When to use specialty brushes and tools
Specialty brushes like sash/angle brushes, offset brushes, and mini rollers can save time and improve the finish of your concrete painting project.
- Sash angle brush: Ideal for cutting in around trim or edges. Use a 2-inch size for tight corners and a 3-inch for wider areas. Tip: Keep the bristles clean to avoid paint buildup.
- Offset brush: Great for detailed work, especially on vertical surfaces like walls. Look for brushes with adjustable angles for better control. Warning: Avoid overloading the brush as it can cause drips and uneven coverage.
- Mini roller: Perfect for small areas or tight corners where a full-size roller won’t fit. Use foam rollers for smoother finishes on concrete. Tip: Rent these tools if you only need them once to save money.
How to load a brush and control paint flow
Start by choosing the right brush for the concrete finish and the correct load size, based on your paint type and the surface texture you’re working with. For latex, use a polyester/nylon synthetic; for oil-based, choose natural bristle, and pick wide or narrow according to the broadness of the area and the desired stroke quality. Dip only the tip (or a short portion) of the bristles and wipe excess on the can edge, keeping a light, even bead on the brush to prevent drips and guide smooth, consistent strokes.
Test flow on a scrap area, apply steady pressure and a consistent angle, and use short, overlapping strokes to avoid puddling and to maintain even color distribution along the bead. Guard edges by lifting the brush slightly from the surface, and consider a final smoothing pass with a light roll if needed to tame gravity on vertical concrete. Between coats, keep the brush clean, store it properly so it maintains shape and bristles, and watch for signs of overloading or under-loading to adjust on the fly rather than starting over.
Step-by-Step Process
This sequence ensures you load your brush correctly and control paint flow for a smooth, even finish.
- Prepare the workspace: Lay down drop cloths, wear gloves, and ensure good ventilation. Why: Safety first.
- Select the right brush size based on surface area and type of concrete. Why: Efficiency and coverage.
- Dip the brush tip into paint; tap off excess on rim or tray edge to avoid drips. Why: Control flow for even application.
- Begin painting with short, overlapping strokes in a consistent direction. Why: Prevent streaks and ensure coverage.
- Test the brush’s paint load on scrap material before applying it to your project surface. Why: Adjust as needed for optimal results.
- For vertical surfaces, start from top to bottom and use short strokes to avoid drips. Why: Gravity works against you; manage it carefully.
Proper loading: dip, tap, and wipe methods
To load your brush correctly, start by dipping the bristles into paint just enough to cover about one-third of their length. This prevents overloading.
Next, gently tap the brush against the rim or edge of the can to remove excess paint. Wipe the brush lightly on a rag if needed for finer control.
This method ensures you have an even bead of paint without drips or sags, leading to smoother strokes and better coverage. Why: Proper loading is key to professional results.
Managing paint consistency and thinning
For some paints, especially oil-based varieties, thinning may be necessary for better flow. Check the label or manufacturer’s guidelines first.
If unsure about thinning, test a small amount on scrap material to see how it applies before using on your project surface. Why: Proper consistency prevents issues like sags and runs.
Avoiding drips and runs
Maintaining control over paint flow is crucial to avoid common mistakes like drips and runs. Here’s how:
- Hold brush at angle: Keep the brush slightly tilted against the surface for better control.
- Use short strokes: Short, overlapping strokes prevent excess paint from pooling.
- Manage gravity: Start painting vertical surfaces from top to bottom to let paint flow naturally without dripping.
- Remove excess before vertical: Tap or wipe the brush on a rag before applying to vertical surfaces for better control.
By following these tips, you can maintain an even bead of paint and avoid common pitfalls like drips and runs.
Brush techniques for best coverage and finish
Brush techniques for best coverage and finish boil down to three core patterns on concrete—single-direction strokes, cross-hatching, and feathering—used in the right sequence to build even coats without dragging or streaks. Keep a consistent wet edge by reloading before the edge starts to dry and by working in smooth, overlapping passes that maintain paint thickness but avoid piling up in one spot. Aim for uniform coverage with minimal lap marks, and adjust your direction to follow the surface texture so the finish reads smooth rather than visibly brushed.
Choose tools wisely for concrete: nylon or polyester brushes, the right size for the work, and a cut-in method to lock in edges and corners before broad strokes. Load the brush properly, control pressure to avoid forcing too much pigment into the pores, and test patches to gauge absorption and sheen, then adapt your technique as the coating dries. If brush marks appear or absorption looks uneven, fix them by light, still passes in the same direction—not by overworking—checking label or datasheet for any specific guidance and using a deliberate speed-to-finish approach to keep the look uniform across the textured surface.
Achieving full coverage with fewer strokes
To cover a concrete surface evenly and efficiently, start by loading your brush properly. Dip it into the paint, tap off excess on the rim of the can, then wipe lightly against the side to control flow. Aim for long, sweeping strokes, covering about two feet at a time.
Maintain consistent pressure as you stroke; too much will cause drips and runs, while too little won’t cover well enough. Reload your brush every few inches to keep paint thickness even and avoid lap marks where the wet edge dries before being covered.
Feather out edges by lightly brushing over them in a circular motion once the main strokes are complete. This helps blend any visible lines from overlapping strokes, giving you a smooth finish with fewer passes.
Cutting-in and edging like a pro
For clean edges at corners, ceilings, or around trim, use a smaller brush to cut in first. Hold the brush at a 45-degree angle against the surface for crisp lines. Move slowly with smooth, steady strokes.
When cutting into corners, tilt the brush so bristles face inward and sweep along the edge. Keep your hand calm and controlled; jerky movements can leave marks or uneven edges. Use light pressure to avoid overloading paint in tight spots.
Avoid overworking one area by moving on once you’ve got a clean line. Let it dry before applying broader strokes with a larger brush for full coverage. This technique saves time and ensures professional-looking results without the hassle of touch-ups later.
Blending and feathering between coats
To achieve seamless transitions between paint layers, start by blending new paint into wet edges. Use long strokes to merge fresh paint with the drying edge of previous coats for a smooth transition.
If you need to sand or lightly scuff before applying another coat, do so gently to avoid damaging the surface. Focus on areas where the paint is slightly raised or uneven; this helps ensure good adhesion and a uniform finish.
Feathering involves brushing over edges in a circular motion once the main strokes are complete. This technique blends any visible lines from overlapping strokes, giving you a smooth, professional look without harsh demarcations between coats.
Common brushing problems and troubleshooting
Common brushing problems show up quickly: streaks, bristle loss, visible brush marks, sagging, and dragging or skipping. Quick fixes come from using the right brush (synthetic vs natural), avoiding overload, and adjusting your passes and brushing direction to minimize drag. Check the product label or datasheet for brush recommendations and keep loads light to prevent repeats.
This matters because small mistakes turn into visible flaws and rework. Proper prep and brushing discipline—clean surface, compatible finish, correct viscosity and working conditions—prevent many issues. After brushing, clean the brushes immediately and store them with minimal solvent exposure to spot wear or bristle splaying before reuse.
Fixing brush marks, streaks, and bubbles
Brush marks and streaks can happen when you don’t get the concrete surface smooth enough. Bubbles might pop up if air gets trapped during mixing or placing. To fix these issues:
For brush marks and streaks, go over the area with a tip-smoothing tool right after brushing to even out any rough spots. If it’s too late, wait until the concrete is dry and lightly sand the surface to smooth things out.
If you see bubbles on the surface, they usually won’t cause problems but can look unsightly. Once the concrete sets, use a float or trowel to press them down if they bother you. If bubbles are widespread and deep, it might be worth checking your mix ratios and base compaction.
Dealing with lost bristles and contamination
If you find stray bristles in wet paint, use a fine comb or tweezers to carefully remove them. Don’t risk brushing these into the surface; it can lead to lumps and texture issues down the line.
To prevent contamination, always clean your brush thoroughly between colors or products. Rinse with water for acrylics and oil-based paints separately. If you’re switching from one type of paint to another, use a solvent like mineral spirits to ensure no residue remains.
When bristles start falling out in large numbers or the brush becomes stiff and hard to work with, it’s time to replace it. A good rule is if your brush isn’t performing as well as when you first bought it, it’s probably past its prime.
Preventing lap marks and uneven sheen
To avoid lap marks—those visible lines where wet concrete meets dry—you need to maintain a wet edge. This means brushing continuously so the concrete doesn’t start to set before you get back to it. Check how fast your mix sets by timing when it starts to stiffen after mixing.
Consistent pressure is key too. If you’re pressing harder in some spots than others, you’ll end up with an uneven sheen. Keep the brush at a steady angle and apply even strokes across the surface.
If lap marks still show or you have areas that look different after drying, sanding between coats can help smooth things out for a uniform finish. But check your product’s instructions first to see if this is okay for your specific concrete mix.
Cleaning, maintenance, and storage for long-lasting brushes
Clean brushes right after you finish to keep the bristles from hardening. For water-based paints use mild soap and water; for solvent-based paints use the cleaners recommended on the product label, and always rinse in the proper order to protect the bristles. Use a brush comb to lift stuck paint and a spinner to remove excess water without bending the ferrule.
Let the brush dry in a well-ventilated, dust-free area, reshaping the bristles as they dry and avoiding shortcuts that trap moisture. When storing, keep brushes in a proper container or wrap, avoid crushing the ferrule, and consider occasional conditioning for natural bristles to extend life and save money over time.
Step-by-step cleaning after use
This sequence ensures your brush is thoroughly cleaned and ready for the next project.
- Rinse out excess paint with water or solvent, depending on type. Use mild soap and water for latex paints; mineral spirits or paint thinner for oil-based ones.
- Use a brush comb to lift bristles and remove stubborn residue near the ferrule without damaging it.
- Rinse thoroughly under running water until no more paint comes out. For solvent-based brushes, use a spinner or rinse in clean solvent several times.
- Squeeze excess moisture from the bristles using a brush press or by gently squeezing between your fingers. Ensure no paint residue remains.
- Reshape bristles while still damp to maintain shape and functionality.
Reshaping, drying, and storing brushes
After cleaning, reshape the bristles by hand while they are still slightly wet. This helps maintain their shape for future use.
Lay your brush flat on a clean surface or hang it with the handle up to dry completely. Avoid letting water pool in the ferrule area as this can cause rust and damage.
Store brushes bristles-up in proper containers or wrap them individually if they are not being used for extended periods. Keep them away from dust and direct sunlight to prevent deterioration.
Long-term care and when to replace brushes
Maintaining your brushes properly can extend their lifespan significantly, saving you money in the long run. Regularly clean them after each use and condition natural bristles occasionally.
If a brush shows signs of wear like frayed or broken bristles, it’s time for replacement. Also replace if the ferrule is damaged or rusted.
Keep brushes organized by project type to avoid contamination between different paint types. This simple habit can save you from costly mistakes and wasted materials.

Conclusion
Takeaway: a good brush and proper technique save time and money by delivering durable, smooth coats when you follow the plan and put safety first.
Check it through as you finish: inspect the surface and repair any flaws, clean and dry it thoroughly, choose the right brush for the job, load and test the brush on a scrap area, cut in edges carefully then roll or brush with steady, controlled strokes, work in small sections in the correct order, protect floors and furnishings, and finally clean, dry, and store the brush properly for long life.
Common mistakes to avoid and rules to follow: don’t skip prep or use a dirty, waxy, or damaged brush; don’t overload the brush or work too wet with messy, drippy paint; don’t rush or press too hard and don’t skip ventilation or eye protection. Keep your work area neat, keep the brush clean as you go, and always test a small area first to confirm adhesion and finish before committing to the whole job.
If the job is large, or you’re dealing with lead paint, high ceilings, or risky elevations, it makes sense to bring in a pro. For most DIY projects, stick to the plan, stay patient, and you’ll end up with a durable finish that looks good and lasts. You’ve got this—finish strong and learn from every coat.
FAQ
What should I do to prep the work area?
Clear the space and cover floors and furniture with drop cloths. Tape off edges and remove items that could get paint on them. A dry, uncluttered area saves you cleanup time later.
What basic tools do I need?
Have a good brush with clean bristles, a paint tray, and rags or paper towels. Keep a small brush for cutting in and a larger one for broad strokes. If the job needs it, have a solvent or cleaner that’s compatible with your paint.
How do I load the brush and start painting?
Dip the brush at the edge of the tray and wipe off the excess on the rim. Start with steady, even strokes and keep a light touch near corners. Don’t overload the brush or you’ll slop paint where you don’t want it.
Pro tips: what bad practices should I avoid?
Avoid rushing and messy back-and-forth. Do not skip cleaning brushes when you’re done or you’ll waste time later. Read paint labels for safety and cleanup rules before you begin.