

Introduction
You can successfully paint wicker furniture by following a proper prep, priming, and painting process.
You’ll learn how to prep the surface, choose suitable finishes, apply paint smoothly, and avoid common mistakes with practical steps and tips to help you achieve a durable, refreshed look.
Key takeaways
- Clean wicker thoroughly to remove dust, oils, and previous paint residues.
- Sand rough spots lightly to create even surface for primer adhesion.
- Choose a water-based acrylic primer suitable for outdoor wicker and polyurethane finish.
- Apply thin, even coats with brushing or light spraying for consistency.
- Seal with weatherproof topcoat and perform touch-ups after first rain.
- Avoid painting in extreme heat or direct sun to prevent cracking.
Table of Contents
- Introduction
- Key takeaways
- Tools and Materials Checklist
- Prep Work: Cleaning, Repairing, and Sanding Wicker
- Painting Techniques — Brushes, Sprays, and Layering
- Finishing and Protection: Sealants, Touch-ups, and Weatherproofing
- Common Mistakes and How to Avoid Them
- Project Walkthroughs: Step-by-Step Examples
- Cost, Time Estimates, and Where to Buy Supplies
- Conclusion
- FAQ
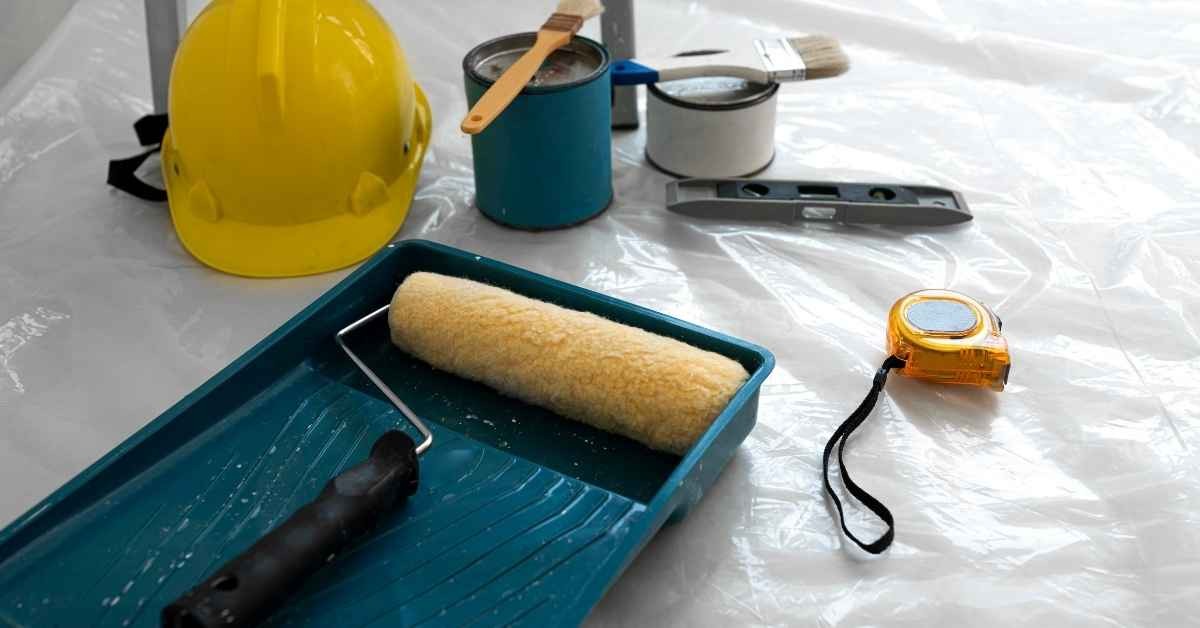
Tools and Materials Checklist
This section gives you a clear, DIY-friendly checklist of the tools and materials you’ll need to get the job done, plus safe alternatives. It separates essentials from extras and explains briefly why each item is needed. Stick to what’s in the plan and check labels for specifics.
Knowing what to gather ahead of time saves trips back to the hardware store and prevents mistakes. Having the right tools and materials helps you do clean work, stay safe, and finish with decent results. If you’re unsure about a tool or material, read the label or datasheet and ask for guidance.
Essential tools
Before you start painting, make sure your tool kit is ready to go.
- Sandpaper 120-220 grit: Use for rough surfaces; check by running fingers over the surface. Skipping can lead to poor paint adhesion.
- Angled and small brushes: For detailed work; confirm by testing on a scrap piece of wicker. Missing this step leaves unpainted areas.
- Spray equipment options: Ideal for large surfaces; test by spraying water onto paper to check even coverage. Skipping can result in uneven paint application.
- Drop cloths and tarps: Protect the work area from spills; confirm by laying them out before starting. Without these, you’ll have a mess to clean up.
- PPE: gloves, mask, goggles: For safety during prep and painting; check by wearing them properly. Not using PPE can lead to injuries or health issues.
- Toothbrush and foam brushes: Great for tight spaces; test on a small area of wicker. Missing this step leaves hard-to-reach spots unpainted.
Quick rule: Always have the right tools at hand to ensure smooth painting without any hitches.
Paints, primers and finishes — what to choose
Selecting the right paint is crucial for a long-lasting finish on your wicker furniture.
- Oil-based primer: For tough surfaces; confirm by testing adhesion. Skipping can result in poor paint adherence.
- Latex primer: Ideal for smoother surfaces; check by applying and observing coverage. Missing this step leaves the surface vulnerable to wear.
- Spray enamel: Quick-drying option; test by spraying on a scrap piece of wicker. Skipping can lead to uneven paint application.
- Acrylic outdoor paint: Weather-resistant finish; confirm by checking drying time and coverage. Without this, the furniture will fade quickly.
- Matt finish: For a subtle look; check by observing sheen after painting. Missing this step leaves a glossy surface that may not be desired.
- Satin finish: Provides a smooth but slightly textured appearance; confirm by testing on a small area. Skipping can result in an overly shiny or dull finish.
Quick rule: Choose the right primer and paint based on your wicker’s condition and desired look for durability.
Optional materials for durability and weatherproofing
Incorporating these items can enhance the longevity of your painted wicker furniture.
- Sealants: Protect against moisture; confirm by applying a thin layer. Skipping this step leaves the paint vulnerable to water damage.
- UV protectants: Prevent fading from sunlight; test by applying and observing color retention. Missing this can cause your furniture to lose its vibrant look.
- Rust inhibitors for metal frames: Essential if your wicker has metal parts; confirm by applying and checking coverage. Skipping leads to rust formation, weakening the frame.
- Adhesives for minor repairs: Fix cracks or splits in the wicker; test on a small area before full application. Missing this step leaves structural weaknesses unaddressed.
Quick rule: Use optional materials to ensure your painted furniture stays protected and looking great over time.
Prep Work: Cleaning, Repairing, and Sanding Wicker
Prep is everything. Cleaning, small repairs, and careful sanding set the stage for a long-lasting wicker finish. If you skip this, you’ll pay later with peeling and touch-ups.
Doing a thorough prep prevents finish failure and makes your labor pay off. It also helps when you sand; smooth edges hold finishes better and feel nicer to the touch. If you need exact cleaning products or repair materials, check the label or manufacturer instructions for guidance.
Cleaning methods for natural and synthetic wicker
To clean your wicker furniture, start with a gentle approach. For natural wicker, use a solution of mild dish soap mixed with water. Dip a soft-bristled brush into the soapy water and gently scrub any dirt or grime off the surface. Rinse thoroughly with clear water to remove all traces of soap.
For synthetic wicker, avoid using high-pressure washers as they can damage the material’s integrity. Instead, use a damp cloth or sponge for cleaning. If you encounter tough stains, try a mixture of baking soda and vinegar applied directly to the stain before wiping clean with water. After washing, make sure your furniture dries completely to prevent mold growth.
When drying wicker after cleaning, place it in a well-ventilated area away from direct sunlight or heat sources that could cause warping. If you notice any signs of moisture retention, such as dampness or mildew smell, address these issues immediately by thoroughly drying the furniture and applying a protective sealant if necessary.
Repairing damage before painting
Before you start painting your wicker furniture, inspect it for any loose strands or gaps. For minor repairs like loose strands, use a small amount of wood glue and carefully reattach the strand back into place. Press firmly until the glue sets.
To repair larger gaps, you might need to reweave new strands in. This requires some skill but can be done with patience and practice. Use thin strips of wicker or rattan that match your furniture’s material as closely as possible.
In areas where weaving isn’t practical, like joints or corners, use wood filler or epoxy for a strong bond. Apply the filler or epoxy carefully to avoid excess buildup which could interfere with painting later on.
If you encounter extensive damage beyond basic repairs, it’s best to consult a professional wicker repair specialist who can ensure your furniture is restored properly before painting.
Sanding and scuffing for paint adhesion
To prepare the surface of natural wicker for painting, sand it lightly with a fine-grit sandpaper (around 220 grit). This helps create a smooth base that allows paint to adhere better. Sand in the direction of the weave to avoid damaging the fibers.
For synthetic wicker, check if sanding is necessary at all. Some materials are already primed for painting and won’t require additional preparation beyond cleaning. If you do need to sand synthetic wicker, use a very fine-grit paper (240 grit or higher) to avoid damaging the surface.
After sanding, wipe down the furniture with a tack cloth to remove any dust particles left behind by the sandpaper. This ensures that your paint job will be smooth and free of imperfections.
Sanding is not recommended for all synthetic materials as it can lead to wear or damage. Always test an inconspicuous area first before proceeding over larger sections of furniture.
Painting Techniques — Brushes, Sprays, and Layering
Painting techniques cover hand brushing, spray painting, and dipping where applicable. You’ll learn step-by-step methods, how to pick the right brush, and how to keep drips and clogs from crevices. Use this to choose the best method for your project.
Knowing the method matters because it affects finish, waste, and cleanup. It helps you save time and avoid wasted coats by choosing the right tool and technique. If products have specific instructions, check the label and manufacturer notes for your situation.
Brush painting: tips for weave and crevices
To paint wicker furniture with a brush, start by thinning your paint slightly to help it flow into the tight spaces. Use a small angled brush for the larger areas of the weave and switch to a toothbrush or fine detail brush for those tricky corners and crevices.
When brushing, work in long strokes along the grain of the wicker. This helps avoid drips and ensures even coverage. For the tightest spots, dip your toothbrush into the paint and gently dab it into place. Be patient; take your time to get every nook covered without overloading the brush.
Remember, less is more when painting wicker with a brush. Too much paint can lead to drips and uneven coverage. Keep your strokes light but consistent for best results.
Spray painting: setup and best practices
To set up for spray painting, make sure you have proper ventilation or work outside to avoid inhaling fumes. Mask off any areas of the furniture that don’t need paint with painter’s tape.
When spraying, hold your sprayer about 6 inches from the surface and move it in smooth, even strokes. Overlap each pass by half to ensure full coverage without over-spraying. Start at one end of the piece and work systematically across.
Aerosol cans are great for small projects but can be messy if not used carefully. For larger pieces or more professional results, consider using an HVLP (high volume low pressure) sprayer. It gives better control and less overspray.
Layering, drying times, and sanding between coats
For a durable finish on your wicker furniture, apply two to three thin layers of paint. Each layer should be allowed to dry completely before applying the next one. Check the manufacturer’s instructions for specific drying times based on the type of paint you’re using.
A light sanding between coats helps promote adhesion and a smooth finish. Use fine-grit sandpaper or a light-duty orbital sander with 220-320 grit paper to lightly scuff the surface before applying each new coat.
Patience is key here; rushing can lead to uneven layers and poor durability. Take your time, let it dry, then sand gently for best results.
Finishing and Protection: Sealants, Touch-ups, and Weatherproofing
Finishing and protection means choosing the right sealant and topcoat for indoor versus outdoor wicker, applying it properly, and planning for maintenance. The goal is to keep moisture out, prevent cracking, and make repairs easy later.
Different environments need different products, and the way you apply matters as much as the product you buy. Following label directions and performing regular touch-ups will extend finish life and save you from bigger repairs down the line.
Best sealants and when to use them
For indoor wicker, go with a water-based sealer. It’s easy to apply and dries quickly without that strong smell. Just make sure the room is well-ventilated.
Outdoors, you’ll want something tougher like a solvent-based sealant or an outdoor varnish. These hold up better against rain and UV rays but take longer to dry and might need more prep work before application.
If your wicker sees direct sunlight often, consider adding a UV stabilizer to protect the finish from fading over time. This is especially important for synthetic materials that can degrade faster under harsh conditions.
Routine maintenance and seasonal care
To keep your painted wicker looking fresh, give it a light cleaning every few months with mild soap and water. Rinse thoroughly and let dry completely before applying any touch-ups.
For minor chips or worn spots, just sand the area lightly to roughen up the surface for better adhesion. Then apply a thin coat of paint followed by your chosen sealant to match the rest of the piece.
In winter, store outdoor wicker in a dry place if possible. Cover it with a breathable fabric to protect from dust and moisture while allowing air circulation to prevent mold growth.

Common Mistakes and How to Avoid Them
Common mistakes in DIY projects include skipping proper prep, choosing the wrong paint, applying heavy coats, and ignoring ventilation. These missteps cause problems you’ll regret later. The fix is simple: prep well, pick the right product, apply thin coats, and ventilate as recommended.
Taking time to prep and follow product guidance saves you time and money. It reduces touch-ups, odors, and failures that waste weekends. If you’re unsure, check the label or datasheet for the product you choose and always follow local disposal rules for household waste.
Mistake: Painting without proper prep
This mistake can lead to peeling and flaking, ruining your paint job.
- Clean first: Dust and dirt prevent adhesion. Use a damp cloth for synthetic wicker, mild soap for natural.
- Repair damage: Fill cracks with wood filler or spackle to ensure smooth painting.
- Sand thoroughly: Lightly sand the surface to create texture for paint to grip onto.
- Prime if needed: Use a primer on bare wicker or when changing colors for better coverage and durability.
If you notice peeling, strip back to bare wood and start over with proper prep steps.
Mistake: Using the wrong paint or finish
This mistake can cause cracking on flexible wicker and poor adhesion, leading to a failed project.
- Choose right type: Use acrylic enamel for indoor use, exterior latex for outdoor pieces. Check compatibility with your material.
- Avoid oil-based paints: They can crack over time on flexible wicker due to expansion and contraction.
- Test before full paint job: Apply a small test patch to ensure the finish adheres well without cracking or peeling.
Selecting the right paint ensures your furniture stays looking great for years.
Mistake: Overbuilding paint layers and obscuring weave detail
This mistake can make your wicker look heavy and dull, losing its natural charm.
- Apply thin coats: Thin layers dry faster and maintain the texture of the wicker. Thick coats will obscure details.
- Dry between coats: Wait until each coat is fully dry before applying another to avoid sagging or unevenness.
- Sand lightly after drying: Light sanding helps blend layers smoothly without removing too much paint.
Maintaining the weave detail keeps your wicker looking light and airy, preserving its beauty.
Project Walkthroughs: Step-by-Step Examples
This section lays out two complete, timed project plans you can follow end to end: a small accent chair and a larger outdoor seating set. Each plan lists what to do, when to do it, and the materials you’ll need, with a clear step-by-step sequence to keep you on track.
Following these plans helps you stay organized, avoid backtracking, and spot potential problems before they derail the job. It matters because a solid plan saves time, reduces waste, and keeps your project safe and predictable on a real jobsite.
Step-by-Step Process
This sequence outlines the practical steps to paint wicker furniture, ensuring a smooth process from prep to finish.
- Clear workspace and lay down drop cloths for protection. Check: No flammable materials nearby.
- Sand lightly with fine-grit sandpaper, then wipe clean. Reason: Prep surface for better adhesion. Check: Smooth, no dust.
- Prime furniture if needed, especially on bare wood or metal parts. Reason: Prevent rust and seal porous surfaces. Check: Even coat, no drips.
- Paint using brushes for detail work or sprays for large areas. Reason: Cover all weave patterns evenly. Check: No missed spots.
- Apply second coat after first is dry to the touch. Reason: Build up coverage and hide imperfections. Check: Smooth, no streaks.
- Sand lightly between coats if needed for a smooth finish. Reason: Prevent bumps or ridges in paint. Check: Even surface.
- Seal with an indoor-safe sealer after final coat dries completely. Reason: Protect the painted surface from wear and tear. Check: Clear, no residue.
Example A — Painting an indoor accent chair
Clean the chair thoroughly with soap and water to remove dirt and oils. Sand: Lightly sand any rough spots or edges for a smooth base.
Prime the chair if it’s unfinished wood, especially around joints where paint can chip easily. Two coats of your chosen paint will give you a solid finish. Let each coat dry completely before applying the next.
Finish with an indoor-safe sealant to protect against wear and tear. This step is crucial for maintaining the look over time.
Example B — Painting an outdoor porch set for durability
Clean the furniture thoroughly with a mild detergent to remove dirt and grime. Rust-proof: Apply rust-inhibiting primer on metal parts before painting.
Paint using exterior-grade paint, which is more durable against weather elements. Two coats will provide better coverage and longevity. Let each coat dry completely before applying the next.
Seal with an outdoor-safe sealant to protect from UV rays and moisture. This step ensures your furniture stays looking good for years.
Cost, Time Estimates, and Where to Buy Supplies
Costs and time vary with project size. Check local prices and read the product label to estimate what you’ll spend and how long it’ll take. For small jobs, expect shorter trips and smaller quantities; for large jobs, plan more time and bigger buys.
Compare hardware stores, specialty paint shops, and online options to find the best mix of price and service. It matters because stock, advice, and delivery speeds vary by source. Always check the label for guidance and follow local household hazardous waste rules when disposing of paint and solvents.
Budgeting and time planning
To figure out how much paint you need, measure the surface area of your wicker furniture. A small chair might use a quart or less, while an outdoor set could take up to two gallons. Add 10-20% extra for touch-ups.
Time-wise, prep work like sanding and cleaning takes about half the total project time. Painting itself usually goes quicker but let each coat dry fully before applying another—this can add days depending on your climate.
Plan to spend a weekend or two if you’re tackling an outdoor set. For smaller indoor items, one long day should do it. Remember, rushing through prep and drying times will lead to mistakes down the line.
Choosing suppliers and product quality cues
When shopping for paint, look at labels for durability ratings—especially important if you’re painting outdoor furniture. Brands like Rust-Oleum or Krylon offer good options.
Check warranties on products; a longer warranty often means better quality materials that will last longer in harsh conditions. Don’t be afraid to spend more upfront for high-quality paint and primer, especially for pieces exposed to the elements.
Hardware stores are great for getting everything you need at once, but specialty paint shops can offer expert advice and higher-end products. Online retailers like Amazon or Home Depot also have a wide selection and competitive pricing.

Conclusion
Finish that wicker the right way and it will look good longer and stay safe to use. Proper prep, careful painting, and a solid sealer are what keep your outdoor furniture from peeling, cracking, or weathering in place.
Start now with a simple approach: clean and repair as needed, sand lightly, test your chosen primer and topcoat in a hidden spot, apply thin even coats with the right tool, let each layer dry fully, then seal or weatherproof. Work in a well-ventilated area, wear a mask and gloves, clean tools after, and follow manufacturer directions for drying times.
Common mistakes to avoid are skipping the cleaning and repair step, rushing coats or skipping thin layers, and using the wrong product for wicker or for your climate. Stand by a safe rule of thumb: test first, apply thin coats, and never paint over dirty or damaged weave. Protect yourself and your investment by taking the time to do it right.
If the piece has deep corrosion, loose joints, or if you’re unsure about the finish for your climate, consider professional help. Otherwise, stay focused on the steps you’ve learned, stay patient, and your wicker will look solid and perform well for years to come.
FAQ
Do I need to remove the old finish before painting wicker?
Yes. Scrape off loose paint and sand rough spots. Clean away dust so the new paint sticks well.
What type of paint should I use on wicker?
Choose a paint labeled for wicker or rattan, preferably a satin or semi-gloss. Spray or brush-on options work, but make sure the finish is durable and flexible.
How should I prepare the wicker for painting?
Lightly sand to smooth fibers, then wipe with a damp cloth. Let it dry completely before applying primer.
How many coats are needed and how long between them?
Two coats usually do it. Let the first coat dry fully, then lightly sand and apply the second coat.