

Introduction
Ever wondered how long it takes to reuse old paint safely and effectively? Time is of the essence when working on DIY projects, so let’s break down the process into a clear timeline. From initial assessment to final disposal, we’ll guide you through each step, ensuring you don’t waste time or compromise safety.
Whether you’re tackling a quick weekend project or planning a larger-scale renovation, understanding the duration of each task will help you manage your time efficiently and achieve professional results.
Reusing Old Paint Safely: A Step-by-Step Timeline
The process of reusing old paint safely can be broken down into several key steps, each with its own duration. By following this timeline, you’ll ensure that your paint is safe to use and will perform reliably in your project.
- Quick Assessment (5-10 minutes): Begin by inspecting the paint’s seal, odor, separation, and signs of mold or contamination. If any obvious spoilage is present, discard the paint immediately.
- Straining (10-20 minutes per can): Using cheesecloth or a fine mesh strainer, slowly pour the paint through to remove lumps and contaminants. The time taken will depend on the size of the can and the amount of debris present.
- Mixing and Restoring Consistency (5-10 minutes per can): Gently mix the strained paint using a paint mixer or stirrer to restore its consistency. Be careful not to agitate the paint too severely, as this can trap air and affect its performance.
- Performance Tests (30 minutes – 24 hours): Before committing to a project, perform tests on a small patch to confirm the paint’s color, flow, and overall performance. Allow the test area to cure and check it under natural daylight before proceeding with your project.
- Storage and Disposal (10-15 minutes per can): Properly store reusable paint in a sealed container away from heat sources, kids, and pets. Label each container clearly with the date, contents, and intended reuse plan to prevent waste. For discarded paint, follow local regulations for proper disposal.
The total time required for reusing old paint safely can vary depending on the number of cans you’re working with and their condition. However, by following this step-by-step timeline, you’ll be able to efficiently prepare your paint for use in your project while ensuring safety and quality.
Key takeaways
Proper timing during the preparation phase is crucial as it directly impacts the overall schedule of your project. Allocating sufficient time for each step will help ensure that your reused paint performs reliably, providing a durable and good-looking finish without any unexpected surprises or delays.
- Quick assessment focus on seal, odor, separation, and mold—discard if obvious spoilage.
- Straining benefits: use cheesecloth or fine mesh, pour slowly to avoid lumps.
- Restoring consistency by gentle mixing, avoid severe agitation that traps air.
- Test before commitment: patch, cure, daylight check; wear PPE when handling paint.
- Storage label clearly with date, contents, and reuse plan to prevent waste.
- When to toss: foul odor, mold growth, separated solids, or changed viscosity mean discard.
Table of Contents
- Introduction
- Key takeaways
- Quick Assessment: Is This Paint Worth Saving?
- Tools and Materials Checklist
- How to Strain Old Paint Step-by-Step
- Safe Mixing and Restoring Consistency
- Tests to Confirm Performance Before Committing to a Project
- When to Toss It: Clear Signs You Should Discard Paint
- Repurposing and Alternative Uses for Old Paint
- Proper Storage, Labeling, and Disposal Logistics
- Conclusion
- FAQ
Quick Assessment: Is This Paint Worth Saving?
Start by checking the can for the product name, sheen, and any date or batch info; if that’s missing, inspect the paint’s surface and smell for obvious spoilage.
Look for separation that mixes back to a uniform color, hard skins, or a rotten odor; if you’re unsure about age or stability, run the simple tests below before deciding.
Identify paint type and source
First, figure out what you’re working with. Paint types fall into two main categories: latex (water-based) and oil-based.
Latex: These are water-based paints that clean up easily with soap and water. They typically have a milky appearance when fresh and dry to a semi-gloss or matte finish.
Oil-based: These use petroleum solvents as the carrier, so they take longer to dry and require mineral spirits for cleanup. They usually have a shiny, durable finish.
Visual, smell, and texture checkpoints
Before diving in, use this checklist to spot any obvious issues that might make your paint unsalvageable.
- Separation: Shake the can gently. If the paint doesn’t mix back together easily, it’s likely separated and may not be usable.
- Skinning: Check for a dry, skin-like layer on top of the paint. This is a sign of age or exposure to air.
- Lumps: Stir the paint gently. If you feel lumps or clumps that don’t dissolve easily, the paint might be spoiled.
- Smell: Give the paint a sniff. A rotten egg smell indicates bacterial growth, which means toss it.
- Color change: Check if the color has faded or changed. This could indicate age or contamination.
- Thickening: If the paint is thicker than you remember, it might have started to dry out.
- Settling: Look for a layer of sediment at the bottom of the can. This indicates separation and possible spoilage.
- Mold or mildew: Check for any signs of mold or mildew growth, which would make the paint unsuitable for use.
Quick rule: If you spot any of these issues, it’s time to perform further tests or consider tossing the paint.
When a simple home test is enough
If your paint passes the visual and smell checks but you’re still unsure, try this quick test before committing to restoration.
First, pour a small amount of paint into a clean jar. Shake it vigorously for about 1 minute. If the paint mixes back together easily and maintains its consistency, it’s likely salvageable.
Next, apply a small sample of the paint to a hidden area or test patch. Let it dry completely. If it dries smoothly with no lumps or inconsistencies, you can proceed with restoration. But if it leaves behind any issues, it’s best to toss the paint and start fresh.
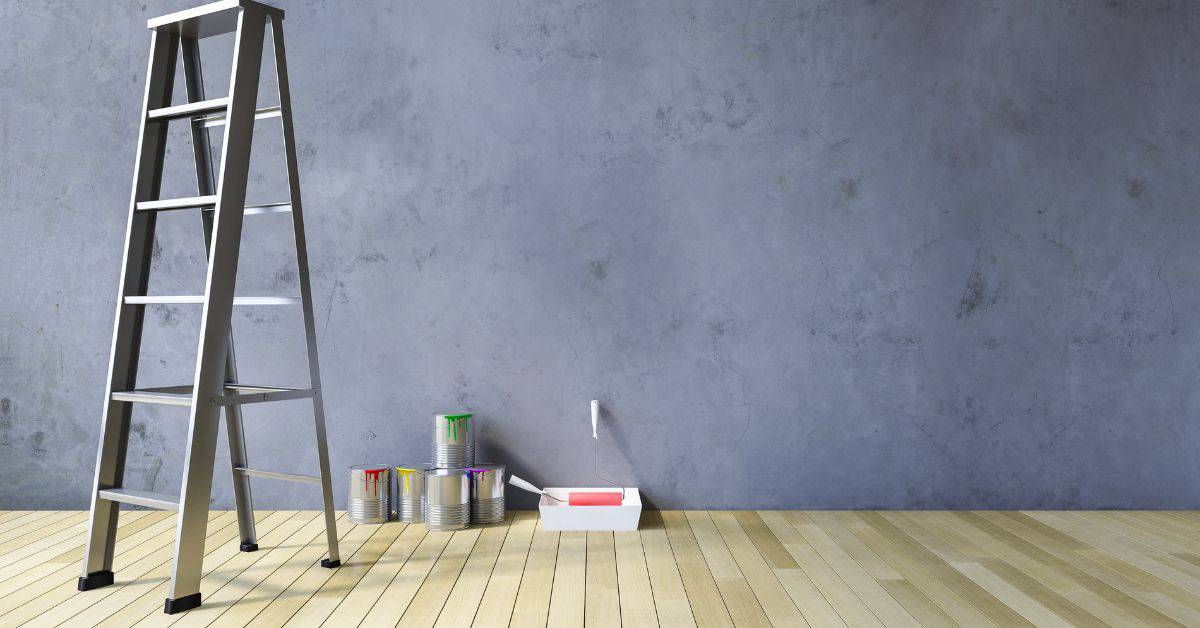
Tools and Materials Checklist
Gather a few basic items: sturdy strainers or old nylon stockings, a drill with a mixer paddle or a stir stick, clean buckets, gloves, and eye protection.
Include disposable rags, masking tape and labels, and optional items like a fine mesh sieve or paint conditioner; when in doubt about a product additive, check the manufacturer instructions or product data sheet.
Essential Straining and Mixing Tools
Before you start, gather these tools to ensure a smooth process.
- Strainer: A fine mesh or paint filter helps remove lumps and debris. For one-off jobs, use an old window screen or cheesecloth as a DIY substitute.
- Buckets: Use clean, empty buckets to strain and mix your paint. One for each color is ideal.
- Stir sticks: Wooden or plastic stir sticks help blend the paint thoroughly.
- Mechanical mixer: An electric drill with a paint mixing attachment speeds up the process, especially for large quantities.
- Paint filter bags (optional): For extra fine straining, use these disposable bags designed to fit standard paint cans and buckets.
- Trash bags: Have some on hand to dispose of strained material and used filters.
- Gloves: Protect your hands with rubber or latex gloves during the process.
- Drop cloths: Cover your work surface to make cleanup easier.
Quick rule: Always strain and mix paint in a well-ventilated area, preferably outdoors if possible.
PPE and Safety Gear
Protect yourself from harmful chemicals with the right personal protective equipment (PPE).
- Gloves: Wear rubber or latex gloves to protect your hands from paint and solvents.
- Safety glasses: Shield your eyes from splashes and debris. Consider goggles for extra protection.
- Respirator: Use a NIOSH-rated respirator, such as an N95 or P100, to protect against harmful fumes and VOCs.
- Long sleeves and pants: Wear long clothing to minimize skin exposure to paint and solvents.
- Apron or coveralls: Protect your clothes with a disposable apron or coveralls.
- Work boots: Wear sturdy, non-slip footwear for safety on the job site.
Quick rule: Always prioritize your safety and comfort when handling old paint. If you’re unsure about any aspect of PPE, consult a professional or the product’s safety data sheet.
Material Specs and Standards Explained
Understand your paint’s specifications to ensure compatibility and proper disposal.
- VOC content: Look for the volatile organic compounds (VOC) content on the label. This affects how you dispose of the paint and may impact your local regulations.
- Base type: Identify if the paint is oil-based, latex, or another type. This determines which thinners or solvents you can use for mixing and disposal.
- Recommended thinners: Check the label for suggested thinners to use with this specific paint. Using incorrect thinners can ruin the paint or create harmful fumes.
- Disposal instructions: Some paints may have specific disposal guidelines on the label, such as ‘do not pour down the drain.’
- Manufacturer’s name and address: Keep this information for reference in case you need to contact them regarding the product.
Quick rule: Always follow local regulations when disposing of old paint. If you’re unsure, consult your local waste management department or a hazardous materials specialist.
How to Strain Old Paint Step-by-Step
Work over a clean container and remove loose skins or clumps by hand before pouring paint through progressively finer strainers to catch solids.
Use different techniques for water- and oil-based paints—refer to the label for compatibility—and repeat straining until the flow is smooth and free of debris.
Step-by-Step Process
Follow this clear, numbered sequence to safely strain old paint like a pro.
- Prepare your workspace and gear. Put on gloves, goggles, and a respirator. Set up a level work surface away from heat sources.
- Decant or stir the paint gently. Pour the paint into a clean container. Stir it slowly to redistribute any settled solids.
- Choose the right strainer. For latex paints, use a fine mesh or cheesecloth. For oil-based paints, consider multiple-stage straining with progressively finer filters.
- Strain the paint. Pour the paint through the strainer into another clean container. Be patient; don’t rush to avoid clogging.
- Check and clean up. Inspect the strained paint for any remaining solids or lumps. Clean your workspace, dispose of used materials responsibly, and store the strained paint properly.
Preparing the Workspace and Paint
Set up a clean, level workspace to prevent spills and ensure efficient straining. Start by clearing your work area of any clutter or debris.
Use a large, flat surface, like a table or a drop cloth on the floor, to provide ample space for your materials and containers.
Before straining, decant or stir the paint gently. Pour the paint into a clean container. This helps redistribute any settled solids, ensuring they pass through the strainer more easily. Be careful not to introduce air bubbles or create excessive foam.
Safety first: Wear gloves, goggles, and a respirator when handling old paint. Keep your workspace well-ventilated, and avoid working near heat sources or open flames.
Straining Methods and Homemade Options
Use commercial paint strainers or homemade alternatives to capture different particle sizes effectively.
For latex paints, use a fine mesh or cheesecloth as your primary strainer. These materials can capture most solids and skins, providing a smooth finish. For oil-based paints, consider using multiple-stage straining with progressively finer filters to remove smaller particles.
If you’re using homemade options, test the fabric or material first. Pour some paint through it to ensure it doesn’t disintegrate or release fibers into your paint. Never use materials that leave residue behind.
For very thick or heavily contaminated paints, consider using a paint strainer bucket. These buckets have built-in strainers and make the process more manageable. However, they may not be necessary for most DIY projects.
Visual Checkpoints During Straining
Use this checklist to monitor your straining progress and ensure you’re achieving the desired results.
- Clear flow: The paint should flow smoothly through the strainer. If it slows significantly, check for clogs or blockages.
- Fewer lumps: As you strain more paint, the strained product should become smoother and lump-free. If lumps persist, consider using a finer strainer or stirring the paint more thoroughly before straining.
- Consistent color: The strained paint should maintain a consistent color throughout the process. Any sudden changes in color may indicate contamination or improper straining.
- No visible solids: Inspect the strained paint closely for any remaining solids or skins. If you see particles, adjust your straining method or consider using a finer filter.
- Strainer condition: Keep an eye on your strainer. If it becomes clogged or tears, replace it to prevent contamination.
Quick rule: If you’re unsure about the quality of your strained paint, perform a simple home test before using it. This can help you identify any issues that may not be apparent during straining alone.
Safe Mixing and Restoring Consistency
Slowly reblend dried or separated paint using a mechanical mixer or a stir stick, taking care to mix until uniform without whipping air into the material.
If thinning is needed, add only manufacturer-approved thinners a little at a time and consult the product label to avoid ruining adhesion or sheen.
Proper stirring and mechanical mixing techniques
Stirring old paint is crucial to reincorporate separated components. Start by using a wooden stirrer, moving it in an ‘S’ or ‘N’ pattern from one side of the can to the other.
Never use a drill with a wire whisk attachment, as this introduces air and causes shearing that alters the finish.
For larger quantities, use a mechanical stirrer. Run it at medium speed for about 5 minutes, then slow down to avoid splashing for another 2-3 minutes.
Always ensure you’ve broken up any lumps and that the paint is well mixed before using.
Thinners, conditioners, and additives — when to use them
If your paint is too thick, you might need a thinner or conditioner. Always choose one compatible with your paint type.
Add thinners sparingly, mixing well after each addition. Never rely on set ratios; always test on a small sample first.
Additives can enhance adhesion, flow, or leveling. Again, ensure they’re compatible and follow manufacturer guidelines for usage.
Remember, adding too much of any of these can ruin your paint’s finish. So, be conservative and patient.
Avoiding color and sheen problems when mixing cans
Mixing multiple cans of the same paint seems simple, but mistakes can lead to inconsistent results.
- Don’t mix different brands or types without testing first. They may not blend well, leading to uneven color or sheen.
- Always check the age and condition of each can before mixing. Older paint may have degraded differently than newer ones.
- Shake or stir each can separately before combining to ensure they’re well mixed.
- Pour slowly and mix carefully to avoid introducing air and causing shearing.
- Do a small test patch on an inconspicuous area before painting your entire surface.
If you follow these steps, you should achieve a uniform color and sheen across your project.
Tests to Confirm Performance Before Committing to a Project
Do a small application on a scrap board or inconspicuous wall patch to check coverage, adhesion, and final appearance after the paint fully cures per product guidance.
Observe drying behavior and any surface defects; if performance differs from expectations, consult the product data sheet or perform an additional adhesion test before proceeding.
Adhesion and coverage test
Before you dive into your project, do a simple patch test to ensure your restored paint sticks and covers well. Here’s how:
1. Prepare the surface: Clean and sand a small area (about 6″ x 6″) of your substrate, just like you would for the full job.
2. Apply the paint: Using a brush or roller, apply a thin layer of your restored paint to this test patch. Let it dry according to the manufacturer’s guidelines.
3. Check adhesion and coverage: Once dry, gently scratch at the painted area with a coin or a nail. If the paint comes off easily, or if you can see the substrate through the paint, your restoration might not be working. Try adjusting your mixing process or consult our earlier section on safe mixing.
Drying and curing checks
Understanding how your restored paint dries and cures is crucial. Here’s what to check:
1. Drying speed: Apply a thin layer of paint on a spare piece of wood or cardboard. Time how long it takes to dry to the touch. Compare this with the original paint’s drying time, if possible.
2. Tackiness: Check for tackiness by lightly touching the painted surface after it’s seemingly dry. If your finger leaves marks or feels sticky, it’s not fully cured yet.
3. Curing behavior: Observe how the paint behaves over time. Does it remain smooth and even? Or does it crack, peel, or change color? Curing can take days to weeks, so be patient and keep an eye on your test patch.
Color, sheen, and compatibility checks
Matching the original paint’s color and sheen is crucial for a seamless finish. Here’s how to test:
1. Color shift: Paint small swatches of your restored paint on white paper or cardboard. Let them dry, then compare side by side with the original paint. Look for any shifts in hue or tone.
2. Sheen mismatch: Apply your restored paint to a spare piece of wood or wall, let it dry, then check if the sheen matches the original. If not, you might need to adjust your mixing process or use additives (see our section on thinners, conditioners, and additives).
3. Compatibility: Before painting over existing finishes, do a small test patch. Let it dry, then apply a thin layer of your restored paint. Check for any reactions like bubbling, peeling, or discoloration.
When to Toss It: Clear Signs You Should Discard Paint
Discard paint that emits a foul, rotten odor, has mold growth, or contains hard, irretrievable clumps that won’t break down with mixing and straining.
Also dispose of products that fail adhesion or safety checks, or that contain regulated contaminants; check local disposal rules and product labeling for proper handling.
Biological contamination and strong odors
If you spot visible mold growth on your paint, it’s time to toss it. Mold can cause allergic reactions and respiratory issues.
Persistent rotten smells or fermentation-like odors are also signs of biological contamination. These indicate that the paint has started to break down due to bacteria or fungi growth.
Even if you can’t see any mold, a strong, unpleasant smell could mean there’s hidden contamination. Don’t risk it – discard the paint.
Irrevisble separation and poor test performance
Paint that won’t re-emulsify, even after mixing with additives or conditioners, should be discarded. This indicates a breakdown in the paint’s chemical structure.
Large insoluble particles, like lumps or clumps, also mean it’s time to toss the paint. These can’t be broken down and will ruin your finished project.
If your adhesion tests fail – if the paint doesn’t stick to the surface – or if the curing process is severely delayed, these are signs of poor performance that warrant disposal.
Legal, health, and safety conditions requiring disposal
Paints with banned additives, like lead or asbestos, must be handled according to specific disposal regulations. These substances are hazardous to your health and the environment.
If you suspect your paint contains lead, do not attempt to reuse it. Lead exposure can cause serious health problems, especially for children and pregnant women.
Also, check local rules and regulations regarding paint disposal. Some areas have specific guidelines for disposing of old paint. Always follow these rules to keep yourself and others safe.
Repurposing and Alternative Uses for Old Paint
Use unusable finish paint for non-critical tasks like priming rough surfaces, creating color samples, or low-traffic craft projects where finish durability is not critical.
Consider donating usable leftovers to community groups or accepting centers; verify any acceptance criteria with the organization before transporting materials.
Non-critical and utility applications
Old paint that’s not quite good enough for finish coats can still be put to work. Here are a few ideas:
First, consider using it as a primer layer. A primer helps paint adhere better and covers up old colors. It doesn’t need to look perfect.
Another option is to use it for blocking coats. This is when you apply a coat of paint to protect an area while you’re working on something else nearby. You don’t want this paint to be too nice, as it’ll likely get messed up.
Lastly, think about using it for contractor-grade undercoats. These are the layers that go down before the final finish. They just need to provide good coverage and adhesion.
Craft, upcycling, and textured finishes
Got a little paint left over? Don’t let it go to waste. Here are some creative ways to use small amounts:
Try using it in craft projects. A bit of old paint can liven up an old piece of furniture, or create a unique piece of art.
How about creating a mural? If you’ve got enough for a few coats, you could transform a wall with a design that complements your space.
Another idea is to use it in mixed-media textured finishes. Combine it with other materials like sand or glitter to create a unique look on a feature wall.
Donation, community swaps, and recycling programs
If you’ve got more paint than you can use, consider giving it to someone who could. Here’s how:
First, make sure your paint is safe for donation. It should be well-sealed, not frozen or separated, and with no signs of mold.
Look for local donation centers. Many charities accept paint donations. Check online or ask around at local stores like hardware or paint shops.
Also consider community swaps or recycling programs. Some cities have paint exchange programs where you can drop off old paint and pick up something new (or just as good as new) for free. Check your city’s website or ask around at local community centers.
Proper Storage, Labeling, and Disposal Logistics
Store leftover paint in a cool, dry place with lids sealed and a clear label showing color, sheen, and date; use airtight plastic wrap under the lid for a tighter seal if recommended by the manufacturer.
For disposal or recycling, contact local waste authorities or a household hazardous waste facility to learn acceptable drop-off procedures and packaging requirements.
Best storage practices and labeling tips
Seal your paint cans tightly after each use. This keeps out air and moisture, preventing contamination.
Store them upright in a cool, dry place. Basements or garages are usually good spots. Avoid direct sunlight and heat sources.
Label each can with its contents, date opened, and any project notes. This helps you keep track of what you have and when to toss it.
Use a permanent marker and write on the side or top of the can. You could also use painter’s tape and a pen if you prefer.
Safe transport and taking paint to drop-off sites
Before moving your paint, make sure the cans are secure. Tighten lids and wrap each can in a plastic bag to prevent leaks.
Transport them in a sturdy box or on a flat surface in your vehicle to keep them stable. Never leave them unattended while transporting.
When you arrive at the drop-off site, follow their instructions. They may require you to unload the paint yourself or have staff do it for you.
Always check their hours of operation and any specific guidelines they have for paint disposal before heading out.
Where to check regulations and find local options
Start by contacting your municipal waste authority. They can provide information on local hazardous-waste disposal sites and their hours of operation.
Check with your city or county’s website. Many have online resources for waste management, including paint recycling programs.
Also, look at the back of your paint can or check the manufacturer’s website. They often provide guidance on proper disposal methods and may even offer recycling programs.
Some hardware stores and paint retailers also participate in paint recycling initiatives. It’s worth checking with them as well.
Conclusion
Reusing old paint is practical when you respect safety, verify it’s workable, and test before committing to a big project. The goal is a durable, good-looking finish without surprises or damage to what you build.
First, check the condition in plain terms: smell, consistency, and separation; strain through the right filter, stir well, and label what you’re keeping. Do a small test on an unobtrusive patch to confirm color and flow, then store the remainder in a sealed container away from heat, kids, and pets. If you can’t confirm reliability at any step, dispose of it and move on.
Common mistakes trip people up: skipping the strain and test, applying old paint where failure would show quickly, and ignoring safe storage or ventilation. Always wear gloves and a respirator where required, work in a clean area, ventilate well, and follow disposal guidelines for what you decide to toss. If a paint sample smells sour, curdles, or contains obvious mold or debris, do not use it.
If you’re uncertain about integrity, or the project is critical or exterior, call a pro rather than guessing. Otherwise, move ahead with a clear plan, limited testing, and measured steps. Stay practical, stay safe, and you’ll finish with results that look solid and hold up over time.
FAQ
Can I mix different brands or types of old paint together?
Only mix paints that are the same base (both latex, or both oil-based). If you’re unsure, don’t risk a bad finish. Check the label or manufacturer instructions before combining.
How do I tell if old paint is still good after straining?
Look for a smooth, evenly colored result with no foul odor. If it remains lumpy, separates badly, or has a strong/off smell, don’t use it for a project.
Is it ever safe to use old paint for exterior touch-ups?
Only after it passes a simple test and looks and feels right. If there’s any doubt, skip the exterior work and use fresh paint instead.
What should I do with leftover strained paint?
Label it with contents and date, then store in a cool, dry place sealed tightly. Follow local disposal rules for any paint you can’t reuse or keep.