
Introduction
Paint additives are substances mixed into paint to adjust how it behaves. They can help with spread, drying time, and finish, but they aren’t always right for every job. Check the label and follow manufacturer guidance to know if a product is appropriate for your project.
Different types include conditioners, extenders, and retarders, and each serves different surfaces and conditions. For rough or porous surfaces, test on a small area and watch for runs, sticking, or poor coverage before committing to the whole job. Weather, substrate, and previous coatings all affect results, so plan for dry and mild conditions and be prepared to adjust.
Key takeaways
- Test conditioner compatibility on small area before wide application to avoid surfacing issues.
- Choose conditioners appropriate for interior latex or exterior acrylic paints and surfaces.
- Apply with standard brushing or rolling methods, avoiding excessive thinning or overwork.
- Weather conditions impact performance; avoid additives in extreme heat, cold, or humidity.
- Safety: use proper ventilation, follow label directions, and wear protective gear.
- Cost planning: test small projects first to gauge benefits before larger coatings.
Table of Contents
- Introduction
- Key takeaways
- What Paint Additives and Conditioners Are
- Common Types of Paint Additives and What They Do
- When Paint Conditioners Help — Practical Scenarios
- When Additives Hurt — Risks, Limits, and Common Failure Modes
- Compatibility and Testing: How to Avoid Problems
- Tools, Materials Checklist, and Mixing Best Practices
- Safety, Handling, and Environmental Considerations
- Cost, Planning, and Decision Guide for DIY and Large Projects
- Conclusion
- FAQ
What Paint Additives and Conditioners Are
Additives and conditioners are separate from the base paint formulation. They aren’t the binder, pigment, or solvent, but supplements that alter performance. This distinction helps set expectations for how they interact with different paints and substrates.
Common roles include improving leveling, flow, drying time, UV protection, mildew resistance, and thixotropy. They come in forms such as liquids, pastes, or concentrates and can be used with latex, oil-based, or specialty coatings. Practical use depends on the project, conditions, and manufacturer guidance.
Core definitions and common categories
Paint additives and conditioners are extra ingredients mixed into your base paint to enhance its performance. Unlike binders, pigments, and solvents that make up the base paint, these are added just before application.
There are several types:
- Flow agents: Improve leveling and flow.
- Dryers: Speed up drying time.
- Biocides: Prevent mildew and mold growth.
- Retarders: Slow down drying to allow more working time.
- Thickeners: Increase paint viscosity for better coverage or spraying.
How additives differ from solvents and thinners
Additives are performance modifiers. They change how your paint behaves, not just its consistency like solvents or thinners do.
Solvents/thinners reduce viscosity for easier application or cleanup. But they don’t improve paint performance the way additives do.
Use additives when you want to enhance a specific aspect of your paint’s performance, like leveling, drying time, or mildew resistance. Use solvents/thinners when you need to adjust paint consistency or clean up tools.
Common Types of Paint Additives and What They Do
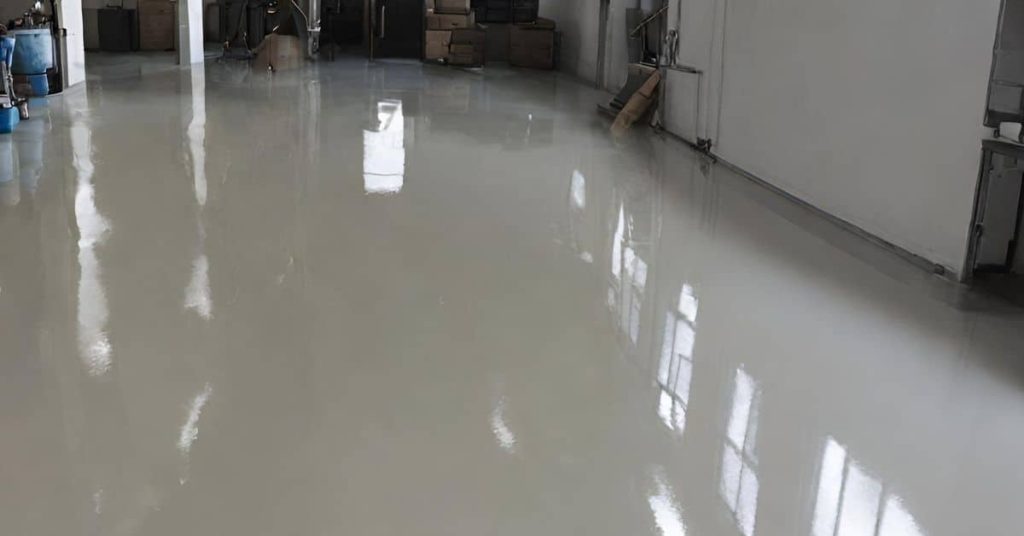
Identify major categories relevant to concrete projects: resin or binder modifiers, thinners or compatibilizers, drying or curing aids, UV stabilizers, stain blockers, and mildew inhibitors. Each type changes finish appearance, leveling, and resistance to cracking or peeling. The practical outcome is a smoother coat with fewer brush marks and better color uniformity.
Mixing order, timing, and recommended quantities matter. Consider pore-filling behavior on new concrete, potential hazing, and touch-up implications. Always check primer compatibility, perform test patches, and follow a quick DIY checklist before full application.
Flow, leveling, and conditioner products
These additives are your friends when it comes to getting a smooth, even coat on your concrete. They do three main things:
Improve wet-edge: This means they help keep the paint from drying too fast while you’re still working on it. No more patchy, uneven coverage.
Reduce brush/roller marks: By making the paint flow better, these additives help minimize those visible strokes and roller patterns, giving you a smoother finish.
Affect sag and leveling: They slow down how much the paint sags or runs after application, helping it to level out nicely on its own. No more drip marks or uneven surfaces.
Drying agents, anti-skinning, and rheology modifiers
These additives control how fast your paint dries and how thick it stays while wet. Here’s what they do:
Accelerators or retarders: Drying accelerators speed up the drying process, handy when you’re in a hurry to get that second coat on. Retarders slow it down, giving you more time to work with the paint before it starts to skin over.
Thickeners (rheology modifiers): These keep your paint from sagging too much or running off vertical surfaces. They also help maintain a consistent viscosity, making it easier to apply an even coat.
Use them wisely: Accelerators are great for touch-ups where you want quick drying, while retarders and thickeners are ideal for large areas or when working in hot, humid conditions.
Mildewcides, corrosion inhibitors, and UV stabilizers
These additives extend the life of your paint job by protecting it from various enemies:
Mildewcides: They prevent mold and mildew growth on your painted concrete. Use them in damp areas like basements or outdoor surfaces exposed to moisture.
Corrosion inhibitors: These protect against rust, especially useful when painting metal-reinforced concrete or surfaces near saltwater.
UV stabilizers: They shield your paint from sun damage, preventing fading and chalking. Ideal for outdoor surfaces exposed to direct sunlight.
Remember, prevention is key: Add these additives during the mixing process to ensure even distribution and maximum protection.
When Paint Conditioners Help — Practical Scenarios
Conditioners can improve results on latex or acrylic paints when finishing porous or rough concrete. They may aid leveling on chalky or dusty surfaces and help with adhesion on previously painted substrates. Assess the paint type and compatibility with the conditioner before proceeding.
Prep surfaces carefully and follow environmental guidelines. Temperature, humidity, and airflow influence performance, so plan accordingly. Use a quick before-you-dry rubric and small patches to confirm results before committing to larger areas.
High-viscosity paints and difficult application methods
Thick paints can be a challenge to apply, especially with traditional brushing or rolling. Conditioners can help here.
Conditioners like flow improvers or leveling agents can reduce the paint’s viscosity, making it easier to spread and lay down smoothly. This is particularly useful when working with high-solids or oil-based paints that naturally have a higher viscosity.
Remember: A little goes a long way. Over-conditioning can lead to sagging or poor film formation.
Challenging weather: hot, cold, and low-humidity jobs
Extreme temperatures and low humidity can play havoc with paint application. Conditioners can help control open time and flow.
In hot conditions, paints can dry too quickly, leading to poor film formation. A slow-evaporating solvent or a flow improver can extend the open time. In cold weather, paints may not level out properly. A rheology modifier can help maintain flow and leveling at lower temperatures.
In low-humidity conditions, paints can dry too quickly, leading to poor adhesion. A humectant conditioner can slow down drying and improve adhesion. Always check the paint manufacturer’s recommendations for environmental conditions.
Large or multi-coat projects and finish-critical surfaces
For large projects, long runs, or complex joinery, maintaining a uniform sheen and minimizing touch-ups can be challenging. Conditioners can help ensure consistent results.
Conditioners like flow improvers, leveling agents, or anti-settling additives can help maintain a consistent paint viscosity throughout the project, reducing the risk of variations in sheen or finish. They can also help prevent pigments from settling out during storage or application, ensuring uniform color.
Tip: For critical surfaces, consider testing on a small patch first to ensure the conditioner doesn’t alter the desired finish.
When Additives Hurt — Risks, Limits, and Common Failure Modes
Harm can show up as gloss loss, orange-peel texture, or color drift, and some issues only appear after curing. Link each defect to a probable cause to help diagnose problems later. Always consider whether the additive may be unnecessary for the job.
Common failure modes include over-adding, over-thinning, or incompatibility with primers or sealers. Understand how moisture, heat, or substrate condition can trigger problems. Use documented testing and manufacturer guidelines to minimize risk.
Overuse and impaired curing or adhesion
Too much of a good thing can be bad. Additives are no exception. Overusing them can mess with film formation and adhesion.
Check manufacturer warnings. They’ll tell you the safe limit for each additive. Go overboard, and you might end up with a paint job that won’t cure properly or sticks like glue to itself but not your surface.
Test panels are your friend here. Slap on some extra additive and see how it behaves. If it’s not curing right or peeling off, you know you’ve gone too far.
Finish defects: blush, fisheyes, poor hardness, or soft film
Additives can cause some ugly surface problems. Blush is when your paint looks dull and chalky. Fisheyes are those little circular imperfections that pop up on your otherwise smooth finish.
Poor hardness means your paint feels soft to the touch, like it’s not fully cured. And a soft film can’t handle wear and tear, leading to early chipping or peeling.
These defects usually show up right after application, so keep an eye out. If you see any of these issues, it might be time to adjust your additive usage or switch products.
Long-term durability and compatibility failures
Additives can change how your paint holds up over time. They can affect chemical resistance, flexibility, and even how well it handles UV rays.
But here’s the kicker: some problems don’t show up until years later. You might think you’ve got a great paint job, but then suddenly, it starts to peel or fade.
Compatibility is another issue. Some additives just don’t play nice with certain primers or topcoats. This can lead to all sorts of long-term problems. Always check compatibility charts and manufacturer guidelines before mixing products.

Compatibility and Testing: How to Avoid Problems
Compatibility means how well additives work with your specific paint system, substrate, and environment. It affects adhesion, curing, and the finish you’ll see. Always cross-check with the base product and conditions you’re applying in.
Rely on manufacturer technical data sheets and safety data sheets for guidance. Locate brand compatibility charts or product pages, and consider reaching out to technical support if needed. Use a small test panel to verify adhesion, cure rate, and finish before full-scale work.
Reading Technical Data Sheets and Manufacturer Guidance
First things first, you gotta understand what ‘compatibility’ means here. It’s about making sure your paint and additives play nice together, so they stick well, cure right, and don’t mess up the finish.
The key to this is understanding your manufacturer’s technical data sheets (TDS) and safety data sheets (SDS). You can find these online or with the product. They’re like the paint’s resume – telling you what it can do and where it’s been.
Here’s what to look for:
Recommended additives: Check if your chosen additive is on this list.
Temperature/Humidity limits: Make sure your job site conditions fit the bill.
Cure times: Know how long you gotta wait before you can touch it.
If something’s unclear, don’t hesitate to call up their tech support. They’re there to help.
Practical On-Site Tests and Test Panels
Before you slap that additive into your whole paint batch, do a little test run. It’s like trying on clothes before buying – makes sure it fits right.
Here’s how:
1. Mix a small batch: Follow the TDS mixing ratios.
2. Apply to a test panel: Use a piece of concrete that matches your job site. This is your ‘test dummy’.
3. Let it cure: Wait for the time listed on the TDS.
4. Check adhesion and hardness: Scratch at it, see if it’s stuck good. Poke it with a nail to check hardness.
Also, keep an eye out for any visual issues – like blushing (that weird white haze) or fisheyes (little craters). If everything looks good, you’re probably in the clear. But remember, every job’s different, so always do your tests.
Tools, Materials Checklist, and Mixing Best Practices
Gather essential tools: graduated cups or spoons, a digital scale or measuring cylinder, stir sticks, a mixing paddle, clean pails with lids, and labeled containers. Include PPE and confirm cleanliness or calibration before use. This reduces cross-contamination and measurement errors.
Prepare a concise materials list and note compatibility cautions. Follow proper measuring practices, keep a tidy work area, and document batch details. A clear mixing workflow helps ensure consistent results project to project.
Recommended tools and measuring methods
Before you start mixing, ensure you have the right tools to maintain consistency and accuracy.
- Clean Containers: Use dedicated, clean pails for each project. Old residues can contaminate your mix.
- Graduated Stirring Tools: Use graduated cups or spoons for measuring additives. A digital scale ensures precise dosing by weight.
- Disposable Pumps/Syringes: For liquid additives, use disposable pumps or syringes to avoid cross-contamination and maintain accuracy.
- Stir Sticks: Use clean stir sticks for each project. Old paint on a stick can ruin your mix.
- Mixing Paddle: Ensure your paddle is clean and the right size for your pail to avoid aeration or under-mixing.
- PPE: Wear gloves, safety glasses, and a respirator when handling chemicals. Safety first!
- Calibrated Tools: Regularly check and calibrate your tools to maintain accuracy. A few grams off can ruin a batch.
- Labeling: Label all containers with the project name and date to avoid mix-ups.
Quick rule: Always use clean, calibrated tools dedicated to each project.
Mixing order, dilution approach, and visual checkpoints
Follow this mixing sequence for consistent results. Always follow the product label for exact ratios.
- Pre-wipe: Wipe down your pail with a damp cloth to remove any dust or residue before adding paint.
- Pre-mix Paint: If using high-viscosity paint, pre-mix it first to ensure even distribution of additives.
- Add Additive Incrementally: Start with a small amount of additive, mix well, then add more if needed. This helps prevent overuse.
- Stir Sequence and Duration: Stir in one direction for the recommended time (usually 5-10 minutes) to ensure thorough mixing.
- Check Flow: Test your mixture on a spare piece of wood or test panel. It should flow easily but not be too runny.
- Check Film Build: Apply a light coat and check for even coverage. If it’s too thick, thin it out; if too thin, add more paint.
- Compatibility Check: After mixing, let your paint sit for 15-30 minutes. If it separates or changes color, there’s an incompatibility issue.
Quick rule: Always follow the product label and perform visual checks to ensure a consistent, compatible mix.
Safety, Handling, and Environmental Considerations
Wear appropriate PPE and practice good hygiene to avoid skin or eye contact. Read the SDS for specific product requirements and ventilation hints. Use respirators or extra ventilation where needed for solvent-based additives.
Ensure safe storage, labeling, and segregation of incompatible products. Be mindful of fire safety, spills, and proper disposal. Look up general VOC guidelines and local disposal rules, and read SDS and labels for compliance.
Personal protective equipment and ventilation
Safety first, mate. When working with paint additives, you need the right gear to protect yourself and your work environment.
- Gloves: Protect your hands from chemicals. Disposable gloves are cheap and easy to find.
- Eye protection: Safety glasses or goggles keep your eyes safe from splashes. If you’re using aerosols, consider a face shield too.
- Respirator (optional): For solvent-based additives, use a respirator with a particulate filter to protect against fumes. Rentals available, around $50/day.
- Ventilation: Work outdoors or in well-ventilated areas. If you’re indoors, use fans to increase airflow. Fume extraction systems can be rented for around $100/day.
- Avoid skin/eye contact: Be careful when handling additives. If you get some on you, wash it off immediately with plenty of water.
Disposal, spill response, and regulatory notes
Knowing how to handle spills and dispose of additives safely is crucial. Here’s what you need to know:
Spill response: Have absorbent materials like kitty litter or oil-dry on hand for quick cleanup. Sweep up the spill, then vacuum if possible. Dispose of contaminated gear properly.
As for disposal, never pour additives down drains. Check local regulations – some areas require hazardous waste to be taken to a designated facility. Always follow your product’s SDS for specific disposal instructions.
Regulations: VOCs are regulated in many areas. Check local rules before using additives, especially if you’re working indoors. Always read and follow the manufacturer’s guidelines on labels and SDS.
Cost, Planning, and Decision Guide for DIY and Large Projects
Understand cost drivers such as additive price, coverage efficiency, and needed equipment. Consider any prep or testing materials that might be required. Budgeting for trial runs helps manage surprises.
Weigh potential time savings against material and labor costs. Use a simple decision framework to decide when additives are worth it, and when it’s better to skip. Include a testing plan and contingency in your project budget to cover contingencies.
Cost factors and when additives are cost-effective
The first thing to consider is the price of the additive itself. Some can be quite expensive, so you’ll need to weigh that against the potential savings.
Additives can save time by speeding up drying or curing times. This means less waiting around for paint to dry before you can apply another coat or move on to other tasks. If you’re hiring a crew, faster drying times mean lower labor costs.
Rework is when you have to go back and fix mistakes or touch up areas that didn’t turn out right. Additives can reduce rework by improving adhesion, leveling, and overall finish quality. Less rework means less material waste and lower labor costs.
Project planning checklist for large or multi-day jobs
When you’re tackling a big project, it’s crucial to plan ahead. This is especially true when using additives, as they can introduce extra steps and considerations.
- Schedule your work: Plan out each day’s tasks, including time for additive application and drying/curing.
- Stage your materials: Have everything you need for each day’s work ready to go. This includes additives, paints, tools, and safety gear.
- Prepare test panels: Always test additives on a small area first to ensure compatibility and desired results.
- Order materials in advance: Make sure you have enough additive for the entire project. Ordering too little can lead to delays while you wait for more to arrive.
- Check weather forecast: Some additives are sensitive to temperature and humidity. Plan your work around these factors if necessary.
- Gather required tools: You’ll need specific equipment for applying some additives, like sprayers or rollers with certain coverages.
- Plan for contingencies: Have a backup plan in case something goes wrong. This could be extra materials, alternative methods, or even a Plan B if the additive doesn’t work as expected.
- Communicate with your team: If you’re working with others, make sure everyone knows their tasks and when to start/stop work each day.
Quick rule: Always prioritize safety and quality over speed. Rushing through steps can lead to mistakes that cost more time and money in the long run.
Conclusion
Paragraph 1: When you use paint additives, the goal is safer, longer-lasting finish with the look you expect. Test small, follow the labels, and respect mixing limits to avoid dulling, cracking, or adhesion problems.
Paragraph 2: Start with a small test area, check compatibility with your base paint, measure the exact amount recommended, mix thoroughly, and keep conditions steady during application; apply only after you’re sure the result looks right and remains within the product’s guidelines.
Paragraph 3: Common mistakes to avoid are adding too much or mixing incompatible products, skipping the small-test step, and ignoring safety or ventilation rules; always wear proper PPE, mix in a clean container, and never rush curing or cleaning up.
Paragraph 4: If a project is large, complex, or involves substrates or environments that demand strict durability, call in a professional instead of pushing on alone, and stay focused on the basics: test first, follow compatibility guidance, and plan for safety, control, and a finish you won’t regret. Stay steady, and you’ll finish right the first time.
FAQ
What are the different types of paint conditioners and when should I use them?
Conditioners come in several forms that affect drying, flow, and film strength. Use them only when the manufacturer’s instructions match your project surface and climate. If in doubt, read the label or datasheet and compare it to your needs before mixing.
How do I apply conditioners on different surfaces like wood, metal, or concrete?
Follow the product directions for surface prep and application. Some surfaces need primer or a sealer first, while others can accept conditioner directly. Always test a small area first to see how it affects adhesion and finish.
Will paint conditioners help in hot, humid, or wet conditions?
Conditioners can improve leveling and reduce skinning in some conditions, but they aren’t a cure for bad weather. Check the label for weather guidance and stop if conditions exceed what the product allows. If the forecast is uncertain, don’t rely on additives to overcome it.
What are common DIY projects where additives are worth it, and what should I budget for?
Additives are often useful on small interior projects or surfaces with tricky texture. Plan for the cost of the conditioner plus any extra prep or testing. Don’t push additives into a job that already needs a more robust solution like primer, stain block, or a different coating system.