
Introduction
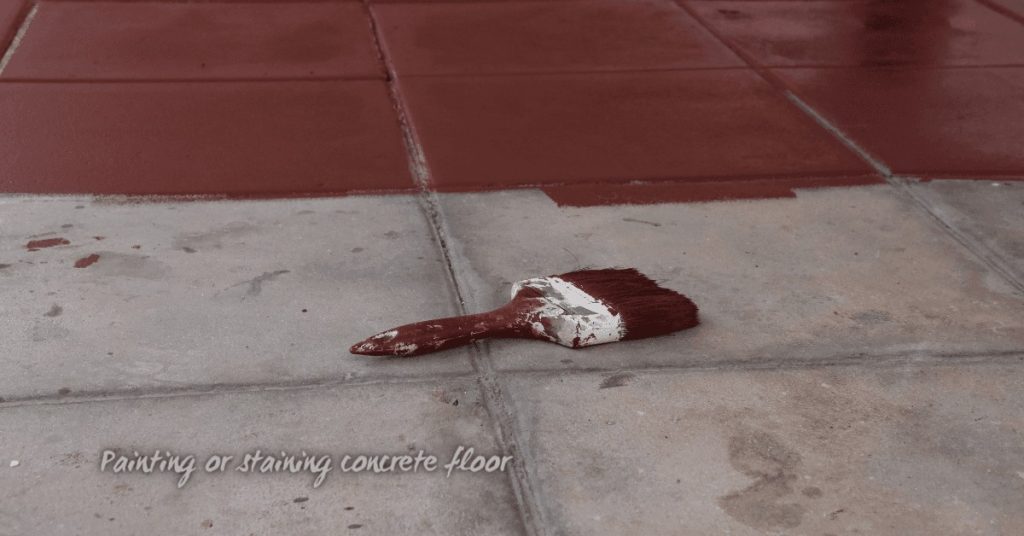
Painting concrete block basements is applying a coat of paint designed to bind to masonry and protect from moisture and wear.
A good job starts with prep to stop flaky paint and chalky residues from coming back. Check your local rules and product instructions for compatible primers and finishes.
Begin with a clean, dry surface and repair any cracks or rough spots. Use a masonry primer recommended for concrete blocks, and follow the product label for curing times and application methods. If you’re unsure about moisture or movement, check the manufacturer instructions and local rules before painting.
Key takeaways
- Inspect for moisture and efflorescence before choosing primers and paints.
- Remove loose material and dust; a solid surface improves adhesion.
- Use masonry-specific primers; avoid coatings not rated for complex block surfaces.
- Seal cracks and control moisture sources to prevent future flaking.
- Apply thin, even coats; let cure fully between steps per label.
- Wear safety gear and ventilate; protect floors and nearby finishes.
Table of Contents
- Introduction
- Key takeaways
- Understanding Flaking and Chalking on Concrete Block
- Inspecting and Testing Your Basement Walls
- Preparing Block Walls for Long-Lasting Paint Adhesion
- Choosing Primers and Paints for Masonry That Resist Chalking and Flaking
- Tools, Materials, and Safety Checklist
- Application Techniques and Best Practices to Prevent Failures
- Fixing Existing Flaking and Chalking Issues
- Preventing Recurrence and Ongoing Maintenance
- Conclusion
- FAQ
Understanding Flaking and Chalking on Concrete Block
Flaking is when the surface peels away in chunks from the concrete. Chalking is a powdery residue that rubs off on your hand. For painted basement walls, both signs tell you the coating won’t bond properly and moisture or age are at work.
Typically, moisture moving through the block, freeze-thaw cycling, and binder breakdown cause these failures. Check the surface for damp spots, soft edges, or chalky dust before repainting, and plan to fix the underlying moisture or substrate if needed. Always read the product label and local rules for cleanup and disposal.
Causes: moisture, salts, alkali, and adhesion failure
Flaking and chalking on painted concrete block basements are usually caused by a combination of factors. Let’s dive into the main culprits:
Moisture Intrusion: Water seeping through cracks or gaps can weaken the bond between the paint and the concrete, leading to flaking.
Efflorescence/Salts: When moisture brings dissolved salts to the surface, they crystallize and form a white, powdery deposit called efflorescence. This can cause chalking and make the paint peel off in sheets.
High Alkalinity: Concrete is naturally alkaline. If your basement has high alkalinity, it can break down certain types of paint, causing them to flake or chalk.
Poor Surface Profile & Incompatible Coatings: A rough surface profile helps paint adhere better. If the concrete surface is smooth or contaminated with dirt, grease, or previous coatings, the new paint won’t stick well and will eventually flake off. Using incompatible paints can also lead to adhesion failure.
How to recognize flaking vs chalking vs other issues
Before you start painting, it’s crucial to identify the problem correctly. Here’s how to tell flaking and chalking apart from other paint issues:
Flaking: Flaking appears as large, loose pieces of paint that curl up at the edges and can be easily peeled off with a fingernail or scraper. It often happens in patches, leaving areas of bare concrete.
Chalking: Chalking looks like a fine, white powder that rubs off on your hands when you touch the painted surface. It’s caused by the breakdown of the paint film into tiny particles. Unlike flaking, chalking is usually uniform across the entire surface.
Other issues to look out for include:
Blistering: Blisters are small, raised areas of paint with a bubble-like appearance. They form when moisture gets trapped under the paint and expands as it evaporates.
Peeling: Peeling is similar to flaking but occurs in long strips or sheets rather than large pieces. It’s often caused by poor preparation or incompatible paints.
Inspecting and Testing Your Basement Walls
Inspecting and testing your basement walls means looking for damp areas, cracking, efflorescence, and other signs that moisture or salt are active before you paint. Do a simple, step-by-step check: look, feel, and test small spots, and pause if anything worries you. If you see active leaks, crumbling concrete, or salt stains that won’t dry, pause and get professional help.
This helps you head off paint failure and hidden damage that can ruin your work. Doing the checks now saves you time and money by catching problems early and telling you what to fix or what to ask a pro. Always follow safety, shut off power when near wet walls, and check labels or datasheets for any product you plan to use.
Visual checkpoints and surface mapping
Before you start painting, walk your basement walls with this checklist. It helps spot trouble spots and plan repairs.
- Discoloration: Dark or light patches can signal moisture or salt issues.
- Powdery residue: Chalking paint or efflorescence (salt deposits) looks like white powder. Brush it off gently, but don’t rub hard.
- Loose paint: Flaking or peeling paint needs to be removed before painting.
- Efflorescence streaks: White, crusty streaks mean salts are migrating through the concrete. They won’t go away with painting.
- Cracks: Hairline cracks are normal, but wide ones need repair to prevent water intrusion.
- Mold or mildew: Dark spots or musty smells could mean moisture and mold growth. This needs professional attention.
- Previous repairs: Check if old repairs are holding up. If not, they’ll need to be redone.
- Wall irregularities: Note any bumps, dips, or other imperfections that might affect painting.
Quick rule: Map out problem areas so you know where to focus repairs and which paint products to use.
Moisture testing methods
Excess moisture can ruin your paint job. Use these non-destructive tests to check for it.
Moisture meters: These devices measure the moisture content in concrete. readings above 4% may require remediation or a delay in painting.
Hygrometer: This measures relative humidity on the wall surface. Readings over 75% could indicate a moisture problem.
Plastic sheet test: Tape a clear plastic sheet to the wall, leave it for 24 hours, then check if condensation forms. If so, there’s excess moisture behind the wall.
Always check product datasheets for allowable substrate moisture levels before painting.
Salt and pH testing for alkali problems
Efflorescence – those white salt deposits – can cause paint to fail. Here’s how to detect it and test alkalinity.
Detecting efflorescence: Look for white, powdery residue on the walls. If it brushes off easily, it’s likely efflorescence. If not, it might be chalking paint.
Testing pH levels: Use pH strips to test wall surface alkalinity. High readings (above 8.5) mean you’ll need a compatible primer and paint that can handle high alkalinity. Consult product tech data for pH resistance.
If efflorescence is present, remove it with a solution of muriatic acid diluted in water (1 part acid to 4 parts water). Rinse thoroughly afterwards.
Preparing Block Walls for Long-Lasting Paint Adhesion
Clean and repair the wall before you paint. Thoroughly remove dirt, oils, and salts from the surface. Patch cracks and damaged masonry so the paint has a solid base to grab onto.
Skipping these steps invites peeling, chalking, and a short-lived finish. A properly prepped wall holds paint better and lasts longer, with fewer touchups. Check the paint label and manufacturer instructions for any prep notes, and follow local disposal rules for waste water and materials.
Cleaning and efflorescence removal techniques
Before you start painting, you need to clean your concrete block walls. This removes chalky deposits and salt stains that can cause flaking and chalking later on.
Here are a few methods:
Dry brushing: Use a stiff-bristled brush to scrub the surface gently. This works well for light efflorescence.
Pressure washing: For tougher stains, use a pressure washer with a wide-angle nozzle. Keep the wand moving to avoid damaging the blocks.
Detergent washing: Mix a mild detergent with water and scrub the walls. Rinse thoroughly afterwards.
Mild acid rinse: For heavy efflorescence, use a solution of white vinegar or muriatic acid (follow safety guidelines). Rinse well after application.
Repairing cracks, spalls, and mortar joints
Inspect your walls for any damage. Cracks, spalls (chipped or missing pieces), and crumbling mortar joints need to be repaired before painting.
For hairline cracks: Use a concrete crack filler. Apply with a putty knife, let it dry, then sand smooth.
For spalls: Remove any loose material, brush out dust, apply a bonding agent, and fill with a patching compound. Let it cure before sanding.
For mortar joints (tuckpointing): Remove old mortar, brush out the joint, mix new mortar, and tool it into place. Let it cure before painting.
Creating the right surface profile and dry substrate
The surface of your blocks needs to be clean, porous, and free from salts for paint to adhere properly. Here’s how:
Mechanical abrasion: If necessary, use a wire brush or sandblasting to roughen the surface. This increases paint adhesion.
Etching: For severe cases, use an etcher solution (follow safety guidelines) to remove a thin layer of concrete and expose fresh material.
Drying: Ensure your walls are completely dry before painting. Use fans or dehumidifiers if necessary. Test for moisture using methods mentioned earlier in the article.
Salt removal: If tests show high salt content, use a salt remover product (follow instructions) to prevent efflorescence after painting.
Choosing Primers and Paints for Masonry That Resist Chalking and Flaking
Choose primers and topcoats that are formulated for concrete block, with attention to breathability, alkali resistance, and moisture compatibility. Always check the product technical specifications on the label or datasheet.
This matters because moisture and alkali exposure can make coatings chalk or peel. Using the right system helps the finish last longer and reduces failed jobs.
Primer options and what to look for
A good primer is your first line of defense against chalking and flaking. Here are three types to consider:
Masonry/Bonding Primers: These promote adhesion, sealing pores, and improving paint bond.
Alkali-Blocking Primers: If your block has high alkali content (check with a pH test), use these to prevent chemical reactions that can cause flaking.
Breathable Masonry Primers: These allow moisture vapor to escape, preventing trapped moisture from causing issues later. When choosing, look for:
Adhesion: Ensure it sticks well to concrete block.
Vapor Permeability: Check the perm rating (higher is better).
Alkali Resistance: Confirm it can handle your block’s pH level.
Topcoat choices: breathable mineral, acrylic, and elastomeric considerations
Your topcoat should protect and beautify. Here are three options:
Breathable Mineral Paints: These allow moisture vapor to escape, preventing trapped moisture from causing issues later. They’re great for high-moisture areas.
Masonry Acrylics: These offer good adhesion and flexibility. They can be used in moderate moisture conditions but may trap excess moisture if applied to wet surfaces.
Elastomeric Coatings: These stretch and move with the substrate, great for hiding cracks. However, they can trap moisture if not properly prepared.
Choose based on your substrate’s moisture status:
High moisture: Breathable mineral paints.
Moderate moisture: Masonry acrylics (with proper preparation).
Low moisture: Elastomeric coatings.
Ensuring coating system compatibility
Using the right combo of primer and paint is crucial. Here’s how to ensure they play nice together:
First, match chemistries. Water-based primers with water-based paints, oil-based with oil-based.
Second, follow manufacturer system recommendations. They’ve tested their products together and know what works best.
Lastly, test before you commit. Apply a small patch of your chosen primer and paint combo to ensure no adverse reactions (like chalking or flaking) occur.
Tools, Materials, and Safety Checklist
This section gives the essential tools, materials, and PPE you need to prep and paint a concrete block basement. It also flags optional rental items if your project grows beyond the basics. For each item, check the label or datasheet for specifics and follow the manufacturer’s instructions.
Having the right gear keeps you safe and makes the job go smoothly. Rentals can help with bigger jobs, but you still need good ventilation, proper PPE, and solid surface prep. Disposal rules vary—check local household hazardous waste rules and never dump paint or cleaners into drains or soil.
Essential tools and consumables
Before you start your concrete project, use this checklist to ensure you have all the necessary tools and materials. This will help you work efficiently and avoid costly mistakes.
- Masonry brushes: Check for stiff bristles suitable for concrete surfaces. Soft bristles won’t remove dirt effectively.
- Scrapers: Ensure they are sturdy with sharp edges to remove old paint, rust, or loose concrete.
- Patching products: Verify you have the right type for your surface – interior/exterior, new/old concrete. Check expiration dates and mix ratios.
- Rollers (9″ nap): For applying patching compounds. Check for even nap length to ensure consistent coverage.
- Extension poles: Measure to ensure they’re long enough to reach all areas without ladders or unsafe stretching.
- Masonry coating sprayer/roller gear: Confirm you have the right size tips/nozzles for your sprayer and suitable roller covers for smooth application.
- Tape measure: Check it’s in good working order to ensure accurate measurements for mixing and application.
- Safety glasses/goggles: Ensure they provide adequate eye protection from debris and chemicals.
Quick rule: Always check product labels and manufacturer instructions before starting any task. This ensures you’re using the right tools and materials for your specific project, saving time and money in the long run.
Safety, ventilation, and moisture-control equipment
Before starting any concrete work, use this checklist to ensure a safe, well-ventilated, and dry working environment.
- Respirator: Check it’s rated for concrete dust (P100 or higher). Ensure the seal is tight by performing a user seal check.
- Gloves: Inspect for tears and ensure they’re rated for chemical resistance. Try on to confirm a good fit.
- Eye Protection: Check for ANSI Z87.1 rating. Ensure they protect against both impact and dust.
- Ventilation: If using power tools, check they have adequate ventilation or exhaust ports. Consider using a dust extractor if possible.
- Dehumidifier: For indoor work, ensure it’s rated for the space (check manufacturer guidelines). Test it runs properly before starting.
- Moisture Barrier: If pouring on damp surfaces, check the barrier is intact and rated for the job. Test adhesion with a quick tug.
- Fire Extinguisher: Ensure it’s easily accessible and rated for chemical fires (check ABC or BC rating).
- Emergency Contact Numbers: Have local emergency services numbers readily available on site.
Quick rule: Always prioritize safety first. If you’re unsure about any equipment, check the manufacturer’s instructions or consult a professional before proceeding.
Application Techniques and Best Practices to Prevent Failures
Good adhesion starts with clean, dry surfaces and the right coat order. Follow the manufacturer’s instructions for priming, bonding, and finishing coats, and work in the right sequence. Use proper technique to keep moisture and salts from getting trapped and causing flaking.
Skipping steps or rushing can lock in moisture and ruin the job. Taking time to observe surface conditions and apply products in the recommended way saves you time later and reduces repairs.
Primer application and film-building guidance
Apply primer evenly, using a brush for edges and a roller for wider areas. Work in manageable sections to ensure even coverage.
Pro tip: Use a 3/8″ or 1/2″ nap roller cover for better penetration into block pores.
Follow manufacturer’s instructions for full cure time before topcoating. Scrape off any dried primer from the surface with a utility knife to check adhesion.
Topcoat application: rolling, brushing, and spraying tips
Rolling is best for wide areas; spraying can be faster but requires more prep. Maintain a uniform film thickness to avoid lap marks.
Wet-edge technique: Keep a ‘wet edge’ by overlapping previously painted areas before the paint dries, ensuring smooth transitions.
Avoid painting on damp or very cold/humid days. Let block temperature reach at least 50°F (10°C) for best results.
Curing, drying, and recoat windows
Follow manufacturer’s drying and recoat guidance. Keep the area well-ventilated but avoid drafts that could disrupt curing.
Improper curing can trap moisture, leading to failures like flaking or chalking later on. Be patient; it might take longer than you think.
Tip: Use a damp meter to check for residual moisture before recoating.
Fixing Existing Flaking and Chalking Issues
This section shows how to fix flaking and chalking before repaint. Start with a clear, prioritized repair workflow that targets the root problems and prepares a sound, clean surface. Don’t just skim the symptoms—remove loose material, seal and prime, then repaint.
Doing it right now saves you trouble down the road. It helps the new paint bond and last longer, so you won’t be chasing peeling again. If you’re unsure about products or steps, check the label or datasheet and follow local rules for disposal.
When to remove paint vs when to clean and spot-treat
Before you start, decide if you need to remove all the old paint or just clean and treat problem areas. Here’s how:
Remove paint if:
- The existing paint is peeling, flaking, or chalking heavily.
- You want a fresh start with new paint.
Clean and spot-treat if:
- Only small areas are affected.
- Power washing won’t damage the surface.
- You’re happy with the current color and just want to fix issues.
Repainting over problem areas
If you’ve decided to repaint without removing all the old paint, follow these steps:
First, address residual chalking. Use a wire brush or scraper to gently remove loose material. Then, clean the area with a degreaser or TSP.
Next, neutralize any salts. Apply a solution of muriatic acid (1 part acid to 5 parts water) to problem areas. Rinse thoroughly and let dry.
Now, spot-prime with an alkali-resistant primer. This seals the surface and prevents further chalking or salt migration. Finally, feather in your topcoat to blend repairs and ensure long-term adhesion.
Preventing Recurrence and Ongoing Maintenance
Preventing recurrence starts with a practical routine: manage moisture, fix exterior issues, and maintain the finish. Keep the basement dry by controlling humidity and addressing leaks. Re-apply or refresh coatings as advised on the product label.
Regular checks help you catch trouble before it shows up as flaking or chalking. This matters because small problems now save bigger repairs later and it keeps the space usable. Always follow the manufacturer instructions and local disposal rules for paint and cleanup.
Controlling moisture and exterior sources
To keep your painted concrete block basement from flaking and chalking, you’ve got to control the moisture. Here’s how:
Interior dehumidification: Use a dehumidifier to keep humidity levels below 50%. Too much moisture in the air can cause paint to peel.
Check drainage and grading: Ensure water flows away from your foundation. If it’s not, you might need to regrade or install a French drain. Water against the foundation can seep through cracks and cause problems.
Gutter maintenance: Keep gutters clean and in good repair. Clogged or damaged gutters can lead to water pooling around your foundation.
Exterior waterproofing: If you’re still having moisture issues, consider exterior waterproofing. This might mean applying a sealant or installing an interior drainage system.
Inspection schedule and simple upkeep
Regular check-ups are key to keeping your painted basement in tip-top shape. Here’s a quick checklist:
- Every 6 months: Inspect paint for signs of chalking or peeling.
- Annually: Check for cracks in the concrete blocks and any water stains on walls or floors.
- After heavy rain: Look for water intrusion, especially around windows and doors.
- When cleaning: Use a mild detergent and soft brush. Harsh cleaners can damage paint.
- If touch-ups are needed: Do them promptly to prevent small issues from becoming big ones.
- Keep an eye on humidity levels: Use a hygrometer to monitor indoor humidity.
- Check your dehumidifier: Ensure it’s working properly and empty the water bucket regularly.
- Gutter check: Make sure they’re clean and directing water away from your foundation.
Quick rule: If you notice any issues, address them promptly. Small problems can become big ones if left untreated.
When to consult a professional
While many moisture and paint issues can be handled by the homeowner, some problems require professional help. Here’s when to call in the experts:
Persistent dampness: If you’re constantly battling moisture in your basement, it might be a sign of a bigger problem like a cracked foundation or poor drainage.
Repeated coating failure: If you’ve repainted multiple times and the paint keeps peeling or chalking, there’s likely an underlying issue that needs to be addressed.
Large-scale deterioration: If you notice large cracks in your concrete blocks, significant water damage, or other major issues, it’s time to call a professional. These problems could indicate structural issues that require immediate attention.
Mold growth: If you see signs of mold, do not attempt to remove it yourself. Mold can be harmful to your health and requires professional removal.
Conclusion
The bottom line: proper prep, the right primers, and smart application keep paint from peeling, chalking, or flaking, so your basement stays dry, looking clean, and easy to maintain.
First, test a small area, clean and roughen as needed, choose a masonry primer that resists chalking, then apply in the order the plan calls for, following product directions and your plan for moisture control; finish with a compatible masonry paint and seal any high-traffic or damp zones, inspecting after each stage for adhesion and cure before moving on.
Common mistakes to avoid are skipping the test patch, using the wrong primer or paint for masonry, and skipping surface preparation or safety steps; always wear eye protection and a respirator when sanding or using chemical cleaners, and work with a clean, dry wall surface. If you see active moisture, loose blocks, or peeling that won’t quit, pause and fix moisture sources or call in a pro—composition and timing matter as much as the coating itself.
When you need it, know when to call a professional, especially for serious moisture issues or structural concerns; with careful prep, proper products, and steady, small steps, you can finish confidently and protect the investment for years to come.
FAQ
What are the first signs that flaking or chalking is starting on my basement block walls?
Look for powdery residue on the surface or small flaky bits lifting off the wall. You may also see dull or faded paint that rubs away when touched. If water is actively seeping, that can worsen the problem.
Before painting, how should I handle moisture and dampness in the basement?
Fix active leaks and reduce humidity as much as possible before coating. Use a dehumidifier and proper drainage to keep walls relatively dry during the work. Check the wall for condensation or wet spots after a rain and only proceed once it stays dry.
How can I test if new paint will stick to my block walls?
Do a small adhesion test on an inconspicuous area following the product’s directions. If the paint chips or rubs off easily, prep it again or choose a different product. Use the manufacturer’s guidance and local rules for test methods.
What should I look for when choosing primers and paints to resist chalking and flaking?
Pick products labeled for masonry or concrete and that mention breathability and vapor resistance. Read the label for application temps, surface prep, and recoat windows. If unsure, compare options and check the manufacturer instructions or local guidelines.