
Introduction
Lap marks on walls are uneven streaks or ridges left by overlapping coats of paint or plaster. They happen when tool pressure, drying, or surface prep varies as you work. That makes walls look uneven until you fix the cause.
To prevent lap marks, work in consistent sections with a slightly damp roller and a fresh, even coat. Keep a wet edge, feather the edge where you stop, and avoid overworking the same spot. If you see ridges forming, check the product instructions for recommended application thickness and drying time, and adjust your technique or prep accordingly.
Key takeaways
- Recognize lap marks: look for flat, dull bands where paint overlapped edges.
- Core causes: overlapping during wet edge, improper roller technique, drying under air flow.
- Diagnosing root cause: check roller naps, sheen mismatch, substrate texture.
- Preventive prep before you paint: clean surface, patch repairs, prime the surface after patching to even porosity.
- Application techniques That Prevent Lap Marks: maintain a wet edge, don’t overwork, use appropriate nap/cover.
- Safety warning: wear eye protection and respirator when sanding or applying solvents, keep area ventilated.
Table of Contents
- Introduction
- Key takeaways
- What Lap Marks Are and How to Recognize Them
- Core Causes of Lap Marks
- Diagnosing the Root Cause in Your Space
- Preventive Prep Before You Paint
- Application Techniques That Prevent Lap Marks
- How to Fix Lap Marks After They Appear
- Special Cases: Textures, Trims, and Challenging Environments
- Long-Term Maintenance and Record-Keeping to Prevent Recurrence
- Conclusion
- FAQ
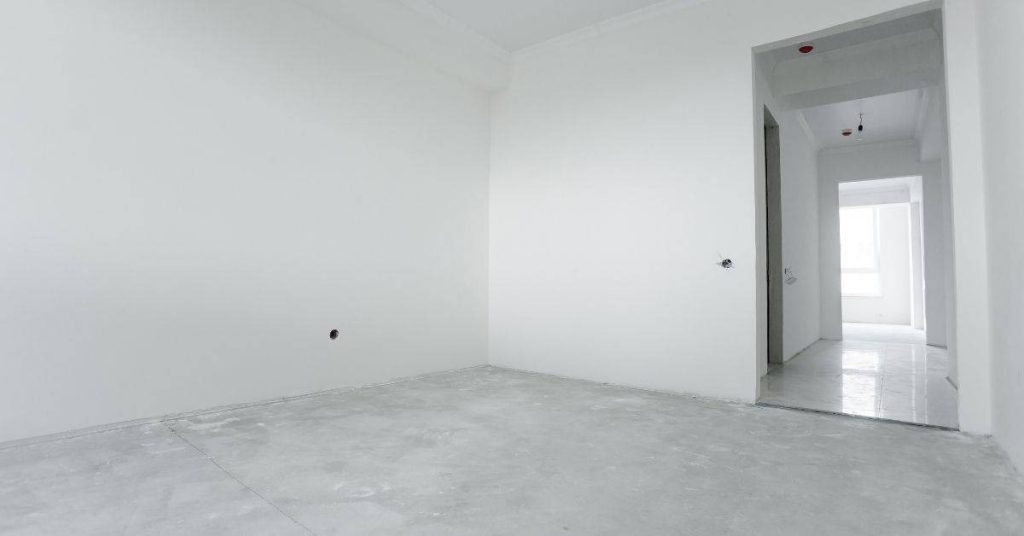
What Lap Marks Are and How to Recognize Them
Laps are horizontal seams that show up on a freshly painted wall. They look different from brush strokes and roller marks because they form from the edge of a previously painted pass. Timely recognition helps you plan a clean repair and prevent the issue from spreading.
Check the overall wall for uneven sheen and visible line breaks where new paint sits on top of dry paint. Compare with neighboring areas to confirm it isn’t a texture or sheen change. If you’re unsure, review the product label or manufacturer instructions for dry times and recoat guidelines.
Visual characteristics to look for
Lap marks aren’t always obvious. But with a keen eye and the right lighting, you can spot them. Here’s what to look for:
First off, uneven sheen. Lap marks often show up as strips with different levels of gloss or matte finish.
Next, check for banding. This is when you see darker or lighter stripes running vertically. It’s like a bad paint job on a wall.
Lastly, overlapped strips. If you notice darker or lighter strips that overlap each other, it’s likely lap marks. Tilt your head and change the lighting angle to make them pop out.
Common misidentifications and troubleshooting
Before you start sanding or painting, ensure what you’re seeing is indeed lap marks. Here’s how to tell:
Lap marks aren’t dirt. Dirt leaves a rough texture and can be wiped off with a damp cloth.
They’re not water stains either. Water stains are usually random, not in straight lines like lap marks.
And they’re different from texture differences. Textures are intentional, while lap marks are unwanted and can be felt with your hand.
Core Causes of Lap Marks
Paint behavior plays a big role, especially how fast it dries and how much it spreads. Application error, like stopping mid-pass or lifting the roller, can leave a visible edge. Environmental influences such as temperature and airflow also contribute to uneven drying and lap formation.
Think through each factor as you inspect: did the paint skin over too quickly, or was a new pass started before the previous one set? Verifying with product data sheets or label instructions can help you pinpoint the likely culprit. Make a note to adjust technique or conditions accordingly.
Paint properties and sheen effects
The type of paint, its sheen level, and pigment load all play a role in lap mark formation. Thicker paints or those with higher pigment loads may not flow out as smoothly, leading to visible lines.
Sheen levels also matter. Higher gloss paints tend to show imperfections more than flat or matte finishes. Always check the manufacturer’s guidance for your specific paint.
Tip: For critical areas, consider using a paint with better leveling agents or add them yourself (if compatible).
Application timing and technique failures
Reworking partially dried areas can cause lap marks. Paint that’s not fully dry doesn’t flow evenly, leading to visible lines where you’ve overlapped.
Inconsistent pressure while applying paint also contributes. Too much or too little pressure can result in uneven coverage and laps.
Improper overlap – either too much or too little – is another common cause. Aim for a ‘V’ or ‘W’ pattern, overlapping about 50% of the previous stroke.
Environmental factors (temperature, humidity, ventilation)
Temperature and humidity affect drying time. Warmer temperatures speed up drying, while high humidity slows it down. Both can lead to lap marks if the paint doesn’t have enough time to flow out evenly.
Proper ventilation is crucial too. Stagnant air can trap moisture and slow drying, contributing to laps.
Tip: Always follow the paint manufacturer’s recommendations for optimal temperature and humidity conditions. Ensure adequate ventilation in your workspace.
Diagnosing the Root Cause in Your Space
Start with a careful wall-by-wall inspection and note where laps appear most often. Look for patterns that align with the direction of rolling or brushing. Gather clues about the room conditions at the time of painting, like temp, humidity, and ventilation.
Use your observations to separate material issues from method or environment. If you’re unsure, check the manufacturer recommendations or local rules for recoat windows and drying times. This helps you decide whether you need a spot fix or a full recoat plan.
Visual checkpoints and photographic documentation
Before you start digging into the cause of those lap marks, grab your camera. A thorough visual inspection and photographic record will help you understand what you’re dealing with.
- Light angles: Inspect under different light sources (natural, artificial) to see how shadows highlight the laps.
- Pattern: Check if laps are consistent or vary across the wall. This can hint at application issues or environmental factors.
- Sheen variation: Look for areas where sheen is noticeably different, indicating possible uneven application.
- Damage extent: Photograph the entire affected area to see how far the laps go and if they’re isolated or widespread.
- Close-ups: Get detailed shots of individual lap marks to see their exact shape and size.
- Wall edges: Check corners, edges, and around obstacles for any telltale signs of improper technique or coverage.
- Color variation: Look for areas where the color seems off, indicating possible incompatibilities in paint or application issues.
- Texture changes: Feel the wall to see if there are any textural differences that might indicate underlying problems.
Quick rule: The more you document now, the clearer your path to diagnosis will be later on.
Questions to ask about the recent paint job
Gather information about the painting process. This can help you pinpoint where things might have gone wrong.
Who painted? Was it a professional, a friend, or did you do it yourself? Their experience level can impact application quality.
Paint brand and sheen: What was used? Different paints have different properties that can affect how they apply and dry. Sheen also plays a role in lap mark visibility.
Tools and technique: What rollers, brushes, and techniques were used? Incorrect tools or methods can lead to laps.
Weather and ventilation: How was the weather during application? Was there proper ventilation? Both can impact paint drying and adhesion.
Small-area testing and trial fixes
Before you embark on a full remediation, it’s wise to conduct some small-scale tests. This can help confirm the cause of your lap marks and provide insight into how to fix them.
Feather touch-ups: Try feathering a touch-up in an inconspicuous area. If the lap mark disappears or changes, you might be dealing with application issues rather than paint incompatibility.
Check manufacturer guidelines: Look up your specific paint brand’s touch-up instructions. They often provide guidance tailored to their products.
Test new techniques: If you suspect technique was the issue, try a different approach in a small area. For example, if you think laps are due to heavy application, try using less paint and see if that helps.
Preventive Prep Before You Paint
Clean the surface to remove dust, grease, and chalk. Lightly sand glossy spots to give the primer something to grab onto. Apply a primer or sealer if the spec calls for it, especially on new drywall or stained areas.
Plan your approach with the room’s lighting and air flow in mind. Having materials ready and a clear sequence reduces the chance of overlapping lines. If in doubt, verify prep steps against the product instructions or label for your specific system.
Surface Preparation and Priming Best Practices
Before you start painting, it’s crucial to prepare your surface properly. This means cleaning, filling, sanding, and using primer to create a uniform substrate that minimizes lap marks.
Clean the surface: Remove all dirt, dust, and grease with a suitable cleaner or soap and water solution. Let it dry completely.
Fill holes and cracks: Use spackling compound or joint compound to fill any imperfections. Allow it to dry, then sand smooth.
Sand the surface: Lightly sand the entire area with fine-grit sandpaper (120-220 grit) to create a ‘tooth’ for paint to adhere to. Wipe off dust with a damp cloth and let it dry.
Use primer: Apply a coat of primer, especially on new surfaces or when changing colors drastically. It seals the surface, promotes even paint absorption, and helps prevent lap marks.
Tools and Materials Checklist
Before you start painting, ensure you have all the necessary tools and materials. This list will help you gather everything you need.
- Rollers: Choose rollers with dense, uniform nap for smooth surfaces; longer nap for textured ones. Size depends on your wall height.
- Brushes: Use angled sash brushes (1.5-2.5 inches) for cutting in edges and corners.
- Poles: Extendable poles help reach high areas without ladders.
- Trays: Deep trays (3-4 inches) are better for rollers; shallow ones for brushes.
- Drop cloths: Use canvas or plastic drop cloths to protect floors from spills and drips.
- Masking materials: Blue painter’s tape, plastic sheets, and old rags are essential for protecting areas you don’t want painted.
- Safety gear: Don’t forget gloves, safety glasses, and a respirator when needed.
- Sandpaper: Fine-grit sandpaper (120-220 grit) for smoothing surfaces before painting.
- Primer: Choose a primer suitable for your surface type and paint color.
Quick rule: Quality matters more than brand. Invest in good tools to get the best results.
Material Specs and Standards Explained
Paint manufacturers provide detailed specifications for their products. Following these ensures you’re using the right paint for your job, reducing the risk of lap marks.
- Coverage: Check the coverage rating to ensure you buy enough paint. A higher number means better coverage.
- Recommended tools: Manufacturers suggest specific rollers, brushes, and techniques for their paints. Follow these guidelines.
- Environmental limits: Pay attention to temperature and humidity ranges for application and drying. Going outside these can cause lap marks or weak adhesion.
- Drying time: Check the recommended drying time between coats and before recoating. Too short a wait can lead to lap marks.
- Sheen levels: Different sheens have varying hiding abilities and durability. Choose the right one for your surface.
- Paint type: Some paints are designed for specific surfaces (e.g., trim, walls, ceilings). Use the correct one to avoid issues.
- Color matching: If you’re touching up or repainting a large area, ensure you get an exact color match to prevent visible differences.
- Cleanup: Check if the paint is water-based (latex) or oil-based. This affects cleanup methods and drying times.

Application Techniques That Prevent Lap Marks
Use steady rolling patterns that keep a continuous wet edge. Maintain even pressure and avoid pressing down hard at the ends of a pass. Work in sections and finish each section before moving on to prevent opposing edges from drying unevenly.
Brush work should blend with long, smooth strokes rather than stopping and starting in mid area. For specialty paints, follow the manufacturer’s guidance on compatibility and application methods. If you’re unsure, consult the instructions or ask for the product data sheet before proceeding.
Rolling and Brushing Methods
When applying paint, keep your pressure consistent. Too much can cause drips, too little won’t cover evenly.
Load your roller or brush properly. For rollers, aim for about 50% coverage with paint. For brushes, dip about two-thirds of the bristles into the paint.
For a smooth finish, use a criss-cross rolling pattern. Start in one corner and roll up and down until you reach the other side. Then, start at that same corner and roll side to side. This helps distribute the paint evenly.
Maintaining a Wet Edge and Section Strategy
A ‘wet edge’ means keeping your work area damp with fresh paint so you can blend new strokes into old ones without leaving marks.
Plan your sections wisely. A typical room might be divided into four sections: two walls, the ceiling, and the trim. Work on one section at a time before moving on to the next.
Follow manufacturer recoat times. This is usually 4-8 hours, but it can vary. Recoating too soon can cause lap marks.
Spray Application and Overlap Guidance
Spraying is different from rolling or brushing. It’s about consistent overlap, not complete coverage in one pass. Aim for about 60-70% coverage per pass.
Keep your distance consistent. Too close can cause drips, too far won’t give even coverage. A good rule of thumb is to hold the sprayer about 12 inches from the surface.
Spraying is preferable when you want a very uniform finish, like on ceilings or large, flat surfaces. But it’s more technique-sensitive than rolling or brushing.
How to Fix Lap Marks After They Appear
Decide whether the problem warrants a spot touch-up or a full recoat of the affected area. For small laps, you can feather the edges with a light pass and matching technique. For broader issues, a fresh coat over the entire section often yields the most uniform result.
Test a small area first to confirm color and sheen match before committing. Use manufacturer tech notes or product labels to confirm recoat intervals and compatible primers. Proceed with caution, and document what you did for future reference.
Step-by-Step Repair Process
Follow these practical steps to fix lap marks after they appear, ensuring a professional finish.
- Preparation: Safety first! Tape off the area and lay down drop cloths. Gather your tools – sandpaper (120-grit), primer, touch-up paint, and brushes or rollers.
- Inspect and prep: Lightly sand the lap marks using a fine-grit sandpaper to smooth out any rough edges. Wipe off dust with a damp cloth.
- Prime: Apply a thin coat of primer to seal the area and help paint adhere better. Let it dry according to manufacturer’s instructions.
- Paint: Using a brush or roller, apply touch-up paint in the direction of the original strokes. Work from one end of the lap mark towards the other, maintaining a ‘wet edge’ to blend the new paint with the existing wall.
- Final checks and cleanup: Once dry, inspect your work under natural light. If satisfied, remove tape and drop cloths. Clean tools and dispose of materials properly.
Spot touch-up and blending techniques
For small lap marks, use these touch-up methods to blend the repair seamlessly into the existing wall.
Start by testing your technique in an inconspicuous area. Never dive straight into a visible spot!
Feathering involves lightly brushing the edges of the touch-up area with a dry brush to soften the line between new and old paint. Blending requires applying a small amount of touch-up paint just beyond the lap mark, then gently blending it in using a damp cloth or sponge.
Always use identical paint and materials for the best match. If you’re unsure about your technique, consider watching online tutorials or consulting with a professional painter.
Recoating and full-area repaint strategies
When lap marks are extensive, a full recoat may be necessary. Follow these steps to ensure a smooth finish.
First, lightly sand the entire area using 120-grit sandpaper. Wipe off dust with a damp cloth. Apply a coat of primer, following manufacturer’s instructions for drying time.
When painting, maintain a ‘wet edge’ and work in sections to avoid creating new lap marks. Always follow paint recoat guidance from the manufacturer to ensure proper adhesion and coverage.
If lap marks persist after recoating, consider consulting with a professional painter. They may recommend different tools or techniques to achieve the best results.
When to hire a professional
While DIY touch-ups can often solve lap mark issues, there are times when hiring a professional is warranted.
Large areas or textured surfaces may require specialized equipment and techniques that are best left to the pros. Additionally, if you’ve tried multiple DIY approaches without success, it might be time to call in an expert.
When interviewing contractors, ask about their methods for avoiding lap marks. A reputable painter will have strategies in place to ensure a smooth, even finish. Don’t hesitate to ask for references or examples of their work.
Remember, prevention is key! Always follow best practices for surface preparation and painting techniques to minimize the risk of lap marks in the future.
Special Cases: Textures, Trims, and Challenging Environments
Textured walls behave differently than smooth ones; apply paint in a way that respects the texture without overloading. Trim areas require careful edge control to avoid drag lines or lap edges along the joint. In high humidity or direct sun, drying can be uneven and invite laps if not managed.
Adapt your technique by choosing appropriate tools and following the product label. For textured or contrast finishes, verify compatibility and application guidance from the manufacturer. If you’re unsure, review the data sheet or instructions for your exact product and surface type.
Textured and Specialty Finishes
Texture can be a challenge when painting. It affects your tool choice and overlap technique.
Use specialized rollers or spraying for best results. Match the texture of your roller to the wall’s finish.
Spraying might be needed for complex textures. But remember, it requires more skill and cleanup.
Always test in an inconspicuous area first. This helps you see how your chosen method works with the texture.
Trims, Doors, and Transition Edges
Blending between different sheens/materials at edges can be tricky. But it’s crucial to avoid lap lines where wall meets trim.
Use a small roller or brush for these areas. This gives you more control over the paint application.
For best results, cut in first with a brush. Then use your roller to blend into the wall. This helps create a seamless look.
Remember, patience is key here. Take your time and don’t rush through these areas.
Bathrooms, Kitchens, and Other High-Humidity Zones
Moist environments like bathrooms and kitchens need special attention. Ventilation is key here.
Open windows or use fans to keep the area well-ventilated. This helps your paint dry evenly.
Choose a high-quality, moisture-resistant paint. These paints are designed to handle humid conditions better.
Time your painting for when humidity is lowest. Early morning or late evening are usually best. But always check the weather forecast first.
Long-Term Maintenance and Record-Keeping to Prevent Recurrence
Set up a simple habit of inspecting walls regularly and cleaning as needed to prevent buildup that affects finish. Keep a paint log with room, product, and date details for touch-ups. This helps you reproduce the original finish when repairs are necessary.
Document any issues you notice and how you addressed them, so future projects follow the same successful approach. Check that your current products and tools are still within spec by reviewing labels or manufacturer instructions before starting anew. When in doubt, verify guidelines with the product data sheet or local regulations.
Cleaning and minor upkeep to extend finish life
Regular cleaning is key to keeping your paint job looking fresh. Use a soft, damp cloth with mild soap for most surfaces.
Never use abrasive materials or harsh chemicals that can damage the paint film.
For tougher spots, consider using a pressure washer on a low setting. But remember, too much pressure can strip off the paint.
Regularly check for and address minor issues like small chips or scratches to prevent them from growing bigger over time.
Monitoring, scheduling repainting, and touch-up planning
Inspect your walls regularly for signs of wear. This includes fading, peeling, or chipping paint.
Plan ahead for touch-ups and full repaints. Don’t wait until the last minute when the job becomes urgent.
Before starting any touch-up or repaint, prepare your surfaces properly. Clean them thoroughly to ensure good adhesion of new paint.
Consider the weather too. Paint dries best in warm, dry conditions. So, plan your work accordingly.
Paint labels, batch numbers, and logs for consistent future repairs
Save leftover paint cans from your original job. They’ll come in handy for touch-ups.
Make sure to note down the sheen, color, and batch number of the paint used. This ensures you get an exact match if you need more paint later.
Keep a simple record of when and how you painted. Include details like weather conditions, surface preparation methods, and any special techniques used.
This log will help you replicate your original work in the future, making touch-ups seamless and unnoticeable.
Conclusion
Prevention and proper technique matter for durability, safe finishes, and a clean look you can live with. Start with solid diagnosis, smart prep, and controlled application so lap marks don’t come back.
In practical steps you can follow now: inspect the space and the causes, prep the surface and repair defects, mask and protect areas, mix and load materials correctly, test on a small patch first, maintain a wet edge as you work, apply with steady, even strokes or passes, and finish with a light, compatible top coat. Keep notes on room conditions, product brands, and any tweaks so you can repeat success in the future.
Common mistakes to avoid are rushing the job, painting with the wrong conditions or inconsistent thickness, and skipping a small-area test before committing to the full wall. Don’t ignore humidity, temperature, or surface texture, and never overwork a single spot or overload the roller or brush. Use proper PPE, ventilate well, and double-check that repairs and coatings are compatible with trims and textures.
If you’re dealing with tricky textures, ornate trims, or challenging environments, or if you uncover signs of deeper issues like water intrusion or lead paint, it’s wise to bring in a professional. When in doubt, stagger the work, document steps, and progress safely. Stay deliberate, stay patient, and you’ll keep walls smooth and durable for the long haul.
FAQ
What finishing steps help prevent lap marks when you start painting a wall?
Tan every section you’ll paint next and keep a wet edge. Use a consistent technique, and don’t let the previous stroke dry before you blend another pass. Plan for a long, smooth pull from ceiling to baseboard.
How should I handle edges and corners to avoid visible lap marks?
Cut-in with a brush first, then roll the field. Keep your roller loaded but not dripping, and overlap edges slightly as you move. Don’t stop mid-wall in the same spot.
What should I check if lap marks keep appearing despite good technique?
Check for inconsistent paint film thickness or underlying dampness. Look at the surface for texture or repairs that might hold more paint in spots. Read the paint label and manufacturer guidance for any special prep.
What practical steps can I take during cleanup to prevent reintroduction of lap marks?
Clean your tools regularly so they don’t shed lint or dried paint. Don’t leave a used roller sitting on a tray where it dries unevenly. Keep touch-up work limited to fresh, lightly loaded passes with the same tool.