

Introduction
Mold-resistant bathroom ceiling paint with a low-gloss finish resists mold without creating glare. Choose a product labeled for bathroom use and mold resistance, and prep the ceiling first. Always verify the manufacturer’s instructions and local rules for surface prep and drying times.
Prepare the ceiling by cleaning, repairing cracks, and letting it dry before painting. Use a roller suitable for ceilings and apply thin, even coats, letting each coat dry as directed. If you’re unsure about any spec, check the product label or local guidelines to ensure proper ventilation and curing.
Key takeaways
- Choose a mold-resistant bathroom paint with a durable, low-sheen or satin finish.
- Prepare surface thoroughly: remove mold, clean, dry, and repair any leaks first.
- Prime with a stain-blocking or mold-sealing primer to reduce moisture intrusion.
- Use non-gloss or satin sheens to balance cleanability and moisture resistance.
- Ventilate during and after painting, and avoid bathroom sealing until cured.
- Inspect periodically for mildew, touch up promptly to prevent adherence.
Table of Contents
- Introduction
- Key takeaways
- How Paint Sheen Affects Mold Resistance
- Non-High-Gloss Paint Types That Resist Mold
- Surface Prep and Mold Remediation Before Painting
- Primers and Sealers That Improve Mold Resistance Without Gloss
- Application Techniques to Maximize Durability and Mold Resistance
- Tools and Materials Checklist
- Material Specs and Standards Explained
- Maintenance, Cleaning, and Troubleshooting Long-Term Problems
- Conclusion
- FAQ
How Paint Sheen Affects Mold Resistance
Sheen level matters for surface washability and cleaning, which affects mold control on ceilings. A shinier finish often resists staining and moisture intrusion better than flat coatings, but it isn’t a magic fix for hidden moisture. The key is to pair the right sheen with proper prep and ventilation for durable results.
Think of gloss as part of the equation, not the entire solution. Check product data sheets and manufacturer instructions to confirm washability, mold claims, and recommended uses. If in doubt, verify label wording or speak with the supplier about your ceiling conditions.
Sheen terms decoded (flat, eggshell, satin, semi-gloss)
When choosing paint for your bathroom ceiling, you’ll come across different sheen levels. Let’s break down the most common ones:
Flat or matte paints have a non-reflective surface. They hide imperfections well but are harder to clean.
Eggshell, satin, and semi-gloss paints increase in sheen level and washability. Eggshell is the most subtle, while semi-gloss has a noticeable shine.
Why high gloss is often recommended—and why you might avoid it
High-gloss paint is often suggested for bathrooms due to its moisture resistance and easy-to-clean surface. However, it’s not always the best choice.
- High visibility of imperfections: High gloss shows every bump and crack, which might not be ideal in an older home.
- Reflective surface: It can create glare, especially in smaller bathrooms with limited natural light.
- Harsh aesthetic: High-gloss ceilings can feel too clinical or institutional for some tastes.
- Difficult application: High-gloss paint can be tricky to apply evenly and requires careful preparation.
Consider these factors when deciding on the sheen level for your bathroom ceiling. It’s okay to prefer a lower-sheen option if it suits your needs and style.
Non-High-Gloss Paint Types That Resist Mold
Look for bathroom or moisture-rated paints that claim mildew resistance without requiring a high gloss finish. These typically rely on resin chemistry that resists moisture buildup while still staying in a low sheen. Practical ceilings benefit from formulations designed to bond well to prepared surfaces and resist staining.
Consider finishes such as satin or eggshell that are labeled for bathrooms, and read the label for mold resistance claims. Always verify the product label, technical data sheet, or manufacturer instructions to confirm suitability for ceilings and moisture exposure. If needed, check with the retailer or manufacturer about compatibility with your substrate.
Acrylic Latex and Waterborne Formulations
Water-based acrylic latex paints are a top choice for bathrooms due to their durability, ease of application, and low VOCs. They’re also effective against mold growth.
Look for labels claiming ‘mildew resistant’ or ‘mold resistant’. These usually mean the paint has been formulated with additives that inhibit mold growth. Some common ones include:
Triclosan, Tebuconazole, and other biocides. Check the label for these ingredients, but remember, more isn’t always better – too much can affect paint performance.
Antimicrobial Additives and Factory-Treated Paints
Some paints come with built-in antimicrobial ingredients, while others rely on surface properties to resist mold. Here’s how to tell the difference:
Factory-treated paints have antimicrobial agents mixed in during production. These paints often claim ‘microbial resistance’ or ‘antibacterial’. They’re effective right out of the can and maintain their protection over time.
Paints relying on surface properties, like certain primers, create a barrier that inhibits mold growth. However, this protection may decrease with wear and tear. Always check the label for specific claims about mold/mildew resistance and reapplication guidelines.
Surface Prep and Mold Remediation Before Painting
Start by identifying any sources of moisture or leaks and address those issues first. Clean the surface to remove loose material and loose mold using a non-ammonia cleaner, then rinse and dry thoroughly. If there are visible stains, plan for proper cleaning and possible mold remediation before painting.
Decide if the ceiling needs treatment or patching before repainting. If mold is extensive, or you’re unsure of the extent, consult a qualified professional or follow local guidelines for remediation. Verify guidance from product labels and data sheets on compatible cleaners and prep steps.
Cleaning and safe mold removal methods
Before you start, gear up: gloves, goggles, long sleeves, and a mask. Non-structural mold can be tackled with soap and water or a bleach solution (1 cup bleach per gallon of water).
Never mix bleach with ammonia or other cleaners.
For serious growth, test first using a mold testing kit. If it’s extensive (< 10 sq ft), hire a pro. They’ve got the gear and know-how for big jobs.
After cleaning, let surfaces dry completely. Mold loves moisture, so keep things dry to prevent regrowth.
Repairing damage and sealing stains
First, fix any damaged drywall or tape. Use joint compound, let it dry, then sand smooth.
Don’t just paint over damage; it’ll show through.
Next, seal those stains with a stain-blocking primer. It’s your first line of defense against mold and mildew.
Use a primer with antimicrobial properties for added protection.
If material is beyond repair (like severely damaged drywall), replace it before painting.
Primers and Sealers That Improve Mold Resistance Without Gloss
Choose primers that block stains and resist mold growth, and pair them with sealers that improve adhesion and reduce bleed-through. These should work with a low-sheen topcoat and not trap moisture under the finish. Read the label for recommended surfaces and compatibility with bathroom ceilings.
Apply primers and sealers as directed, paying attention to coverage and dry times on the label. Confirm that the selected products are suitable for mold resistance, substrate type, and your chosen topcoat by checking the manufacturer instructions or technical data sheets. If in doubt, ask for guidance from the supplier.
Choosing the right primer for bathrooms
When selecting a primer for your bathroom ceiling, look for labels that mention mildew resistance and high-humidity areas. These primers are designed to create a barrier against moisture and prevent mold growth.
Stain-blocking primers can also be beneficial in bathrooms. They seal the surface, preventing any existing stains or discolorations from bleeding through your new paint job.
Key ingredients to look for include zinc, titanium dioxide, and other fungicides that inhibit mold growth.
When to use specialty mold-blocking products
Standard primers are usually sufficient for preventing mold in bathrooms with normal moisture levels. However, if your bathroom has a history of mold problems or is particularly prone to excess moisture, consider using a specialty mold-killing or mold-blocking primer.
These primers contain powerful fungicides that not only prevent new mold growth but also kill any existing mold on the surface. They’re ideal for problem areas or when you want an extra layer of protection.
Remember, while these specialty primers can help control mold, they’re not a substitute for proper ventilation and moisture management in your bathroom.
Application Techniques to Maximize Durability and Mold Resistance
Follow practical painting methods such as consistent coat application and appropriate drying intervals. Maintain a controlled environment with reasonable ventilation and moderate temperatures, avoiding work in high humidity. Use even strokes to promote uniform adherence across the ceiling surface.
Plan coat timing and drying considerations around your local conditions, and verify recoat times on the product label or data sheet. Use a low-sheen topcoat that matches the primer and sealer, and avoid heavy builds that could trap moisture. If you’re unsure about timing, check the manufacturer instructions for the exact guidance.
Ventilation, drying time, and temperature control
Air needs to move around your concrete to keep it strong and mold-free. Here’s how:
Ventilation: Make sure there are no barriers blocking air from circulating around the edges of your slab or walls. Check local rules, but usually, you want at least a 2-inch gap between the concrete and any permanent structures.
Drying time: Follow your concrete mix’s label for drying times. It’s usually 3-7 days before you can walk on it, and 28 days before it reaches full strength. Patience here pays off big time in durability.
Temperature control: Keep the temperature between 50°F (10°C) and 90°F (32°C) during setting. Too hot or cold can mess with curing and invite cracks or mold. Check manufacturer instructions for specific product limits.
Tools, coverage, and avoiding texture that traps moisture
When applying your concrete sealant, choose the right tools to ensure even coverage and minimize trapped moisture.
Roller nap: Use a medium-nap roller (3/8″ to 1/2″) for smooth surfaces. This will give you good coverage without leaving deep grooves that can trap moisture.
Brush use: For edges and hard-to-reach areas, use a good quality brush. Don’t skimp on the bristles; they should be stiff enough to hold their shape but not so hard they leave marks.
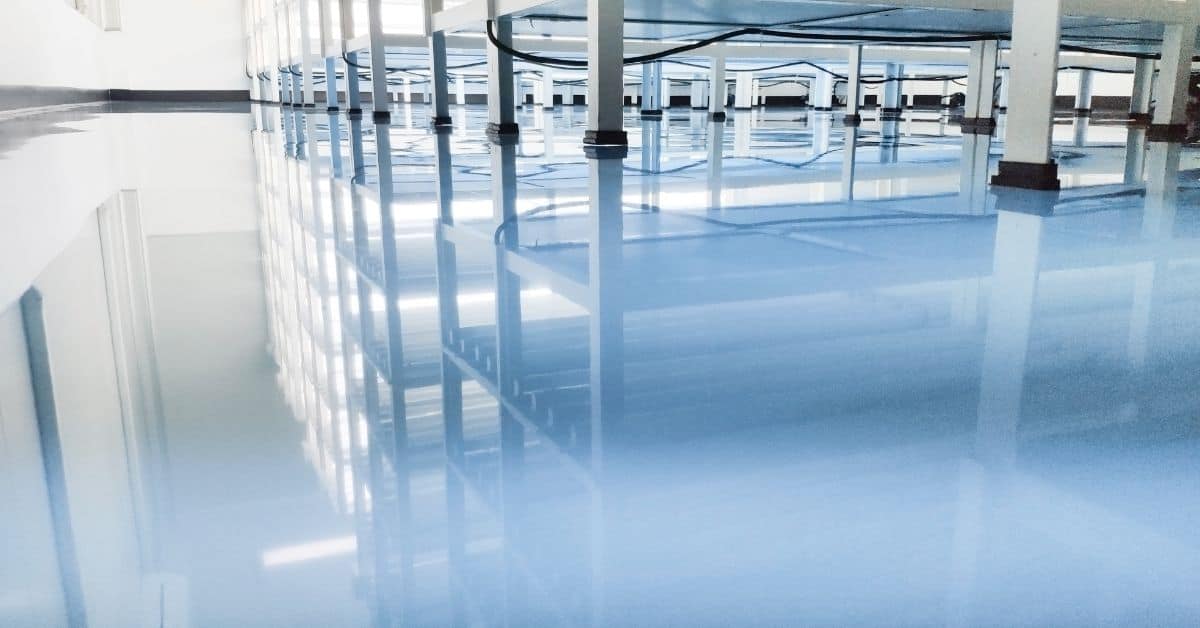
As for technique, remember: less is more. You’re not painting a masterpiece here, you’re sealing concrete. Apply a thin, even coat and let it dry according to the manufacturer’s instructions. Don’t rush it; trapped moisture breeds mold.
Tools and Materials Checklist
Gather essentials such as a cleanable sponge, non-ammonia cleaner, masks, eye protection, drop cloths, and proper ventilation. Include a mold-resistant primer, a mold-resistant topcoat in a low-sheen finish, and compatible sealers. Have a sturdy roller and brush set suitable for ceilings.
Keep a scraper, putty knife, and sanding supplies for prep, plus a painter’s spare can and stirring sticks. Verify that tools and materials are labeled for bathroom moisture use and compatible with your selected products by checking the labels or data sheets. If you’re unsure about any item, consult the supplier before buying.
Painting tools and surface-prep materials
Before you start your bathroom ceiling paint job, make sure you have all the necessary tools and materials for a smooth and safe process.
- Extension ladder: Ensure it’s tall enough to reach the ceiling safely. Check stability with leveling feet.
- Step ladder: For shorter ceilings, ensure it’s sturdy and can extend high enough.
- 9-inch roller cover: Ideal for ceilings. Check nap length (3/8 inch to 1/2 inch) for smooth surfaces.
- Roller frame: Ensure it’s sturdy and has an extension pole for reach.
- Paint brushes (2-inch): For cutting in edges. Synthetic bristles work best with latex paints.
- Drop cloths: Protect floors from drips. Tape them down if needed.
- Safety glasses: Protect eyes from paint splatter and debris.
- Dust mask or respirator: Essential for sanding and cleaning to prevent mold spore inhalation.
- Sandpaper (120-grit): For smoothing surfaces before painting. Check for rough patches.
- Tack cloth: Removes dust after sanding. Essential for a smooth finish.
- Cleaning supplies: Bleach, detergent, and scrub brush for mold removal (refer to ‘Surface Prep’ section).
Quick rule: Always check your tools before starting. Faulty equipment can lead to accidents or poor results.
Personal protective equipment and ventilation gear
Protecting yourself during the cleaning and painting process is crucial, especially in a bathroom where mold can be present.
- Disposable gloves: Protect hands from chemicals and paint. Check for tears or holes.
- Long sleeves and long pants: Cover skin to protect against paint splatter and mold spores.
- Goggles or safety glasses: Shield eyes from paint and debris. Ensure they fit well and provide full coverage.
- Respirator or dust mask: Essential for cleaning to prevent inhaling mold spores. Check filter type and replace if needed.
- Ventilation fan: Run it during cleaning and painting to remove moisture and fumes. Ensure it’s working properly.
- Open windows: If possible, open them for additional ventilation. Be mindful of drafts that could disrupt paint application.
- Ventilation tent or box fan: For areas without windows or fans. Set up to blow air out of the room.
Quick rule: Always prioritize safety first. Proper PPE and ventilation can prevent health issues down the line.
Material Specs and Standards Explained
On labels and data sheets, look for explicit mold or mildew resistance claims, the intended use, scrubbability, and VOC information. Do not assume; verify what the manufacturer recommends for moisture-prone ceilings. Check whether the product is suitable for bathrooms or high humidity environments.
Learn how to compare by reading the data sheet carefully for surface prep, cure times, and compatibility with primers and sealers. Always confirm the exact use case, application methods, and maintenance expectations with the label, product sheet, or manufacturer instructions. If anything is unclear, ask the retailer or manufacturer for clarification.
How to read mold-resistance claims and warranties
When you’re shopping for paint, don’t get swayed by fancy marketing language. Look for the technical datasheet.
Mold resistance claims should be backed up with lab test results or certifications. Check if the product meets ASTM D6340 standards for mold and mildew resistance.
Warranties are important, but they’re only as good as the company behind them. Make sure it’s a reputable brand with a history of honoring warranties.
VOCs, scrub ratings, and durability indicators to check
Before you buy, check the VOC levels. Lower VOCs mean less odor and fewer emissions. Look for products with VOC levels below 50 g/L.
Scrub ratings tell you how well a paint can withstand cleaning. Higher scrub ratings mean better durability. Check if it’s suitable for your bathroom’s traffic.
Durability indicators like washability, stain resistance, and scrubbability should be clearly stated. These features are crucial in high-moisture areas like bathrooms.
Maintenance, Cleaning, and Troubleshooting Long-Term Problems
Establish a simple maintenance plan that includes regular cleaning and moisture control. Watch for signs of moisture intrusion or peeling, and address them early to prevent mold regrowth. Keep a routine to inspect ceilings after heavy humidity or leaks.
When mold reappears or the finish fails, verify whether the substrate has been properly remediated and whether the paint system is still appropriate. Determine next steps by checking product guidance and, if needed, re-evaluating primers, sealers, and topcoat compatibility. If problems persist, consult a pro for further assessment.
Routine cleaning and moisture-management habits
Maintaining your bathroom ceiling’s mold resistance starts with regular cleaning. Aim for every 2-4 weeks, depending on usage.
Ventilation is key. Run the exhaust fan during showers and leave it on for 15-30 minutes afterward to dry out the room.
Control humidity. Keep indoor humidity below 60% using fans, dehumidifiers, or air conditioning as needed.
Avoid overloading your bathroom with plants or drying clothes indoors. Both can increase moisture levels.
When to repaint versus replace or call a pro
If mold reappears after cleaning, it’s time to reassess. Recurring mold could indicate a moisture problem that paint alone can’t fix.
Check for structural damage. If you find cracks, water stains, or soft spots in the ceiling, there might be a leak. Repainting won’t solve this issue.
Persistent moisture issues? Consider hiring a professional to diagnose and repair the problem before repainting.
If mold covers more than 10 square feet, it’s best to call a certified mold remediation specialist. They have the tools and training to handle large-scale mold problems safely.
Conclusion
The key to a durable, mold-resistant bathroom ceiling without gloss is solid preparation and careful material choice. When you pair the right non-high-gloss paint with proper surface prep, primers, and calm, steady application, you get a finish that resists moisture and stays looking good longer.
Start with a clean, dry surface and address any mold or moisture issues first. Fix leaks, remove loose material, and test a small area to confirm adhesion. Use a proven non-high-gloss mold-resistant paint, apply a compatible primer or sealer, and follow each coat’s dry time. Maintain good ventilation during and after painting, and keep the area dry while curing. Check your work as you go and document product lot numbers and specs for future touchups.
A few mistakes to avoid: skip or rush surface prep and mold remediation, pick a glossy finish or a finish that isn’t rated for mold resistance, and skip sealing penetrations or joints. Do not paint over active mold or damp surfaces; fix moisture sources first and use proper PPE. Work in a well-ventilated space, clean tools promptly, and store materials as the specs require to prevent moisture uptake.
If you’re dealing with large mold areas, ongoing moisture, or structural water intrusion, call a professional. Otherwise, follow the rules of thumb above, test before full application, and proceed step by step. With discipline and the right materials, you can finish with confidence and avoid costly mistakes.
FAQ
What matte or low-sheen finishes work best for mold resistance on bathroom ceilings?
Look for paints labeled as bathroom or moisture-resistant and choose matte or low-sheen options. Check the label for any mold resistance claims from the manufacturer. Avoid high-gloss finishes for ceilings in humid baths.
How can I verify mold resistance in a ceiling paint before buying?
Read the product label and the data sheet for moisture and mold resistance notes. Make sure the product is suitable for ceilings and bathroom environments. If in doubt, ask the store or check the manufacturer’s instructions.
Can I switch to flat or matte paint on the ceiling without primer?
Primers often help with adhesion and longevity, especially over bare drywall or existing coatings. If the surface is clean, dry, and sound, you may not need a specialized primer, but follow the paint label’s guidance. For spots with stains or peeling, use the recommended primer first.
What maintenance steps help keep mold from returning with non-gloss paint?
Control humidity and good ventilation in the bathroom. Clean any spots with a mild cleaner and dry the surface promptly. Repaint when you notice discoloration or coating failure, using the manufacturer’s instructions.