
Introduction
Painting over gloss paint means applying a new coat after surface prep to improve adhesion and prevent peeling. Begin by cleaning the surface and roughening the gloss with a light scuff sand. Wipe away dust and inspect for peeling spots before you prime.
Choose a compatible primer and follow its instructions, especially for glossy surfaces. Prime the areas you sanded, edges, and any spots that show bare material, then let it dry per the product label. If in doubt, check the primer’s guidance or local rules and test a small spot first.
Key takeaways
- Test adhesion on a hidden spot before full repaint; peel failure follows.
- Clean and degrease glossy surfaces thoroughly to improve new coat grip.
- Sand or scuff gloss lightly to create a mechanical key without deep gouges.
- Choose compatible primer designed for glossy finishes and follow label directions.
- Inspect for peeling areas and repair with appropriate patching before painting.
- Ventilate work area, wear PPE, and dispose of chemical degreaser safely.
Table of Contents
- Introduction
- Key takeaways
- Why Glossy Finishes Cause Peeling and What Adhesion Really Requires
- Assessing the Existing Finish: Tests to Do Before You Start
- Tools and Materials Checklist
- Mechanical Prep: Sanding and Scuffing Techniques That Work
- Chemical Deglossing: When and How to Use Liquid Deglossers Safely
- Primer and Paint Selection for Gloss-over Projects
- Step-by-Step Prep and Painting Workflow with Visual Checkpoints
- Troubleshooting and Fixes for Problem Areas
- Conclusion
- FAQ
Why Glossy Finishes Cause Peeling and What Adhesion Really Requires
Glossy finishes resist bonding because they form a very smooth, non-porous surface. Adhesion is about good contact between layers, while cohesion is about the paint sticking to itself. On a slick panel, contaminants and poor surface texture can break that contact, so coating fails over time.
Two main failure modes drive peeling: contamination and surface smoothness. Contamination includes oils, waxes, or cleaners left behind that act like a barrier. A perfectly clean, roughened surface gives the new coat something to grab onto and stay put.
Gloss Surface Characteristics
High sheen glossy surfaces are smooth and reflective, which makes it tough for new paint to stick. Think of it like trying to glue two mirrors together – they won’t bond because there’s nothing for the adhesive to grab onto.
Contaminants like dirt, grease, or old wax buildup on your glossy surface can also stop new paint from adhering properly. It’s like trying to paint a wall that’s covered in dust – the paint won’t stick well.
Existing coatings, especially if they’re not compatible with the new paint type, can cause issues too. For instance, oil-based paints and latex paints don’t play nice together. So, it’s crucial to prep your glossy surface right to ensure a strong bond.
Common Failure Mechanisms (Peel, Flake, Blister)
When paint fails on a glossy surface, it usually shows up in one of three ways:
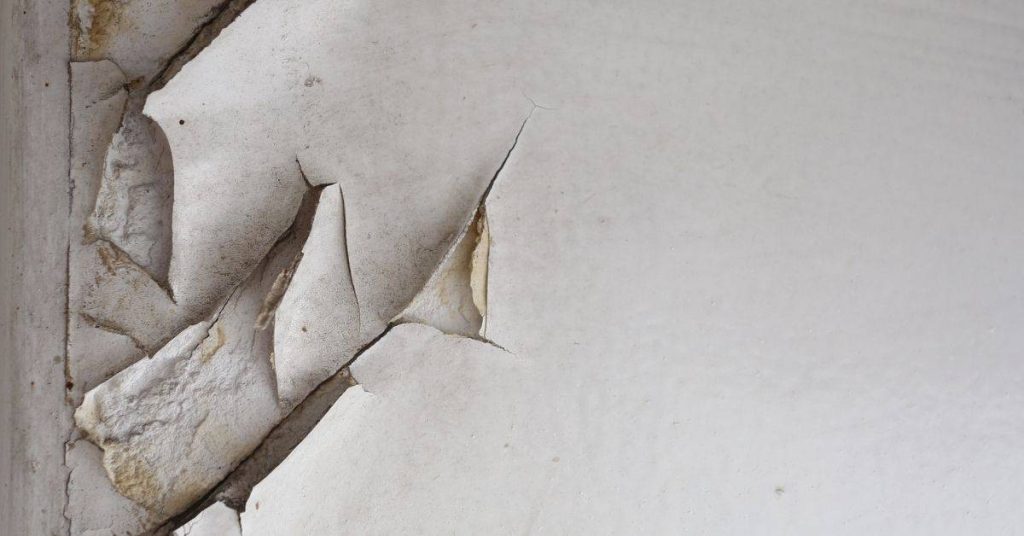
Peeling: This happens when the new paint pulls away from the surface in large sheets. It’s like when you peel off a sticker – it comes off in one piece. This indicates that the paint didn’t bond well with the glossy surface.
Flaking: Here, the paint chips or flakes off in small pieces. Imagine chipping nail polish – it breaks off into tiny bits. This suggests that there were weak points in the paint film where it couldn’t hold together.
Blistering: Blisters are raised areas on the paint surface that look like bubbles under the skin. They form when moisture gets trapped between the new paint and the glossy surface. This is often due to improper preparation, like not cleaning or deglossing the surface before painting.
Assessing the Existing Finish: Tests to Do Before You Start
Do a simple adhesion check by pressing a small piece of tape onto an inconspicuous area and pulling it off briskly. If it lifts the finish, you may need more prep or surface scratch to improve bonding. If the tape sticks cleanly, it’s a sign to go ahead with your chosen prep path.
Test for contamination by wiping a bare area with a cleaner compatible with the surface and inspecting for leftover residue. Consider the possibility of hazardous coatings and call a pro or have the coating tested if you suspect things like old lead paint or unknown coatings. Read manufacturer instructions or local rules before proceeding.
Adhesion test (thumb-tack or tape method)
The first step is to check if the old gloss paint will hold a new coat. Here’s how:
1. Thumb-tack test: Press a thumb-tack into the surface. If the paint peels, it won’t hold a new coat.
2. Tape test: Stick a piece of painter’s tape on the surface, press down firmly, then pull it off quickly. If paint comes off with it, the adhesion is poor.
Contamination check (grease, wax, silicone)
Next, you need to check for contaminants that can block paint adhesion. Here’s how:
1. Visual and tactile check: Look and feel for any greasy or waxy spots. Silicone can leave a smooth, slippery feeling.
2. Solvent wipe test: Use a rag dampened with mineral spirits to wipe the surface. If it turns dark or leaves residue, there’s contamination.
Before you start, check for hazards. Older properties might have lead or PCB paint:
1. Ask: When was the house built? What’s known about its painting history?
2. Test: If it’s an older home (built before 1978), use a certified lead test kit or hire a professional for a thorough inspection. Don’t take chances with your health.
Tools and Materials Checklist
Have cleaning supplies, a deglossing option, sanding tools, primers, and paints ready by task. Use PPE like gloves and eye protection and ensure proper ventilation for each step. Use quality cues like a comfortable tool feel, consistent abrasion, and compatible product labels.
Keep a simple layout of each stage’s needs: cleaning, deglossing, sanding, priming, and topcoat. Check labels and data sheets for surface suitability and warranty language before buying or mixing anything.
Cleaning and deglossing supplies
Before you start, gather these cleaning and deglossing supplies. They’ll help you prep your glossy surface for painting.
- TSP (Tri-Sodium Phosphate) or a similar heavy-duty cleaner: To remove dirt, grease, and grime. Skip this and you might end up with paint that peels later on.
- Deglosser or liquid sandpaper: To dull the glossy finish and improve paint adhesion. Don’t skip this step; it’s crucial for a lasting bond.
- Rags or sponges: For applying cleaners and deglossers, and wiping surfaces dry.
- Scrub brush: To help you scrub tough spots with TSP.
- Safety glasses: Protect your eyes from splashes during cleaning.
- Gloves: To protect your hands from chemicals and grease.
- Drop cloths or plastic sheets: To cover the floor and protect it from drips and spills.
- Painter’s tape: To mask off areas you don’t want to paint. It’ll save you time and touch-ups later.
Quick rule: Always test cleaners and deglossers on a small, hidden area first. This helps you avoid damaging the surface or causing discoloration.
Sanding and abrading tools
These sanding tools will help you prepare your glossy surface for painting by creating a better grip for the new paint.
- Sandpaper (120-grit or 150-grit): For hand-sanding. It’ll help you remove the gloss and create a smooth, paint-ready surface.
- Sanding block: To use with sandpaper for even pressure and better control when sanding flat surfaces.
- Palm sander (optional): For larger, flat areas. It’ll save you time and effort compared to hand-sanding.
- Detail sander or sanding sponge: To tackle corners, edges, and hard-to-reach spots where a regular sander won’t fit.
- Power drill with sanding attachment (optional): For sanding curves and contours. It’s great for rounding over edges and creating a smooth finish.
- Vacuum or tack cloth: To remove dust after sanding. This step is crucial to prevent dust from getting into your paint and causing imperfections.
- Safety gear: Include safety glasses, gloves, and a dust mask to protect yourself during sanding.
Quick rule: Always sand with the grain of the surface. Sanding against the grain can cause damage and make the surface uneven.
Primers, adhesion promoters, and paints
These products will help your new paint stick to the glossy surface and create a durable, long-lasting finish.
- Tack cloth or damp rag: To wipe away any remaining dust after sanding. This ensures good adhesion for your primer.
- Primer (shellac-based, oil-based, or water-based): Choose one that’s compatible with your surface and the paint you’ll be using. Read the label to make sure it’s suitable for your specific substrate.
- Adhesion promoter (optional): If you’re having trouble getting paint to stick, consider an adhesion promoter. It creates a strong bond between the old finish and the new primer or paint.
- Paint (latex, oil-based, or other): Choose one that’s compatible with your primer and suitable for your surface. Again, read the label to ensure it’s the right choice for your project.
- Paintbrushes, rollers, and trays: For applying your primer and paint. Make sure they’re clean and in good condition for a smooth finish.
- Painter’s tape: To mask off areas you don’t want to paint. It’ll help you create crisp lines and avoid over-painting.
- Drop cloths or plastic sheets: To protect the floor and surrounding area from drips, spills, and splatters during painting.
Quick rule: Always follow the manufacturer’s instructions on product labels. This will help you ensure that you’re using each product correctly and safely.
Mechanical Prep: Sanding and Scuffing Techniques That Work
Apply a careful touch to create enough tooth without cutting into underlying layers. Avoid aggressive passes that burn through gloss and expose substrate. Keep your motion steady and consistent across the surface.
Aim for a uniform dull finish rather than bright gloss. Use progressively finer textures as you approach the final prime stage and stop when the surface looks matte and feels slightly rough to the touch.
Hand sanding vs. power sanding
When tackling glossy surfaces, choose your sanding method wisely to avoid visible marks or gouges.
Hand sanding is best for small areas and intricate details where power tools might be too aggressive. Use light, even pressure with a smooth, steady motion. Start with a medium grit (120-150) and finish with a fine grit (220-320).
Power sanding, like orbital or random orbit sanders, are faster for large flat areas but can leave swirl marks if not used correctly. Keep the sander moving at all times to avoid over-sanding and maintain even pressure.
Recommended grit ranges and visual checkpoints
Before you start sanding, know your grits. Start with medium, then fine, to create ‘tooth’ without damaging the surface.
- Start with 120-150 grit: Removes gloss and creates a ‘scuffed’ look. Stop when the surface feels uniformly rough under your fingertips.
- Follow up with 180-220 grit: Refines the surface, smoothing out any remaining roughness. The finish should feel slightly textured but even.
- Avoid going too fine (320+): Over-sanding can remove too much material and damage the substrate.
Quick rule: If it feels smooth to your touch, you’ve likely gone too far or not far enough. Recheck your grits and technique.
Dust control and cleanup after sanding
Removing dust completely is crucial for paint adhesion. Here’s how to do it right:
Vacuum first: Use a vacuum with a soft brush attachment to remove loose dust from the surface and crevices.
Then use a tack cloth: Wipe the entire surface with a tack cloth, which picks up fine dust particles that vacuuming might miss. Keep turning the cloth to expose clean areas as it gets saturated.
Avoid using compressed air: It blows dust around and can force it into crevices, making it harder to remove.
Chemical Deglossing: When and How to Use Liquid Deglossers Safely
Liquid deglossers can break the slick surface without aggressive sanding. They work best when the finish is relatively intact and the substrate is sound. Follow the product instructions for application and dwell time.
Rinse thoroughly after use and allow to dry completely. If the coating reacts or lifts, reassess with a deeper mechanical prep or consider a different method, and verify substrate suitability with the product label and manufacturer guidance.
Choosing the right deglosser
The first step is choosing the right liquid deglosser for your job. There are two main types: solvent-based and water-based.
Solvent-based deglossers are tough on glossy surfaces but can be harsh on the environment and your health. They’re best for heavy-duty jobs where you need to strip paint or varnish. Always use in a well-ventilated area with proper PPE.
Water-based deglossers are gentler, safer, and easier to clean up. They work well on most surfaces but may not be as effective on very glossy or tough finishes. They’re great for general prep work and touch-ups.
Application, dwell time, and neutralizing
Apply the deglosser using a paintbrush or roller, working in small sections at a time. This helps prevent the product from drying out before you can neutralize it.
The dwell time is crucial. It’s the time the deglosser needs to sit on the surface to do its job. Check the product label for the recommended dwell time, usually around 15-30 minutes.
After the dwell time, use a clean, damp cloth or sponge to neutralize the deglosser. This step is vital to remove any residue that could interfere with paint adhesion. Always follow the product’s instructions for proper cleanup and disposal.
Primer and Paint Selection for Gloss-over Projects
Choose primers that promote adhesion to glossy surfaces, including bonding primers when needed. In some cases, switching to an oil-based system can improve grip, but check compatibility with the topcoat.
Always read label compatibility and warranty language to confirm the pairing of primer and paint. If unsure, consult the product data sheet or manufacturer instructions before applying.
Bonding Primers and Adhesion Promoters Explained
When painting over gloss paint, you’re dealing with a smooth, non-porous surface. This makes it tough for new paint to stick. That’s where bonding primers and adhesion promoters come in.
Bonding Primers: These are special primers designed to promote adhesion on slick surfaces like gloss paint or metal. They create tiny ‘teeth’ that the new paint can grab onto, ensuring a strong bond.
Adhesion Promoters: These are liquid additives you mix into your primer or paint. They work similarly to bonding primers but offer more flexibility in application. Use them when you need extra adhesion power, like on tough-to-stick surfaces or when humidity is high.
Waterborne vs. Solventborne Topcoats: Compatibility Checklist
Before you start painting, make sure your primer and topcoat are compatible. This ensures the best results and prevents peeling or other issues down the line.
- Check for: The word ‘waterborne’ on the label. If it’s there, it’s safe to use with a waterborne primer.
- Look out for: ‘Solventborne’ or ‘oil-based’. These need a solventborne primer to stick properly.
- Verify: The drying time matches your conditions. Too fast or slow can cause problems.
- Avoid mixing: Waterborne and solventborne products. They don’t play nice together.
- Check the pH: For waterborne paints, ensure it’s between 6-8 for best results with your primer.
- Confirm the finish: Make sure both primer and topcoat have the same sheen level (e.g., eggshell to eggshell).
- Match the manufacturer: Using products from the same brand can ensure compatibility.
- Read the warranty: Some paints require specific primers or application methods for their warranties to apply.
Quick rule: If in doubt, always check with the paint store or manufacturer. They know their products best.
Step-by-Step Prep and Painting Workflow with Visual Checkpoints
Start with a thorough cleaning and drying before any deglossing or sanding. After each step, perform a quick visual touchpoint to confirm readiness to move forward. Use safe cure or dry times as a guide and avoid rushing between stages.
Keep an eye out for uniform texture and absence of sticky or glossy patches before applying the next layer. If a step doesn’t meet the checkpoint, address the issue before continuing to prevent future failures.
Step-by-Step Process
Use this checklist to guide your prep and painting workflow, from start to finish.
- Preparation: Check weather forecast. Paint in 50-90°F (10-32°C), low humidity.
- Safety first: Wear gloves, goggles, and a mask when sanding or using chemicals.
- Gather tools: Sandpaper, deglosser, primer, paint, brushes/rollers, drop cloths.
- Inspect surface: Look for cracks, holes. Fill if necessary.
- Sand and degloss: Lightly sand (120-grit), wipe dust, apply deglosser. Let dry.
- Prime: Apply bonding primer. Let dry per manufacturer’s instructions.
- Inspect adhesion: Lightly scratch primed surface with a nail. No flaking means it’s ready for topcoat.
- Paint: Apply first coat, let dry as instructed. Sand lightly (220-grit), wipe dust. Paint second coat.
- Final check: Inspect for missed spots or runs. Touch up if needed.
Quick rule: Always follow manufacturer’s drying times to avoid peeling and ensure proper adhesion.
Cleaning and contaminant removal
Before prep, clean your surface to remove grease, dirt, and contaminants.
- Wipe down: Use a damp cloth with mild detergent. Rinse and dry.
- Check for grease: Apply a few drops of water. If it beads up, clean again.
- Test for silicone: Apply rubbing alcohol. If it doesn’t bead or wipe off easily, remove with silicone remover.
- Remove mildew: Use a solution of bleach and water (1:8). Rinse and dry.
Quick rule: A clean surface ensures better adhesion and prevents peeling.
Scuff, prime, and inspect
Before topcoating, scuff-sand, prime, and inspect your surface.
- Scuff-sand: Lightly sand (120-grit) to create ‘tooth’ for primer adhesion. Wipe dust.
- Apply primer: Use a bonding primer suitable for gloss-over projects. Let dry.
- Inspect adhesion: Lightly scratch primed surface with a nail. No flaking means it’s ready for topcoat.
Quick rule: Proper priming ensures better paint adhesion and prevents peeling.
Topcoat application and light inspection stages
Apply your topcoat carefully, checking for runs, sags, or missed spots.
- Paint application: Use even strokes. Avoid overbrushing to prevent runs.
- Avoid sags: Work quickly and evenly. Don’t let paint pool in low spots.
- Light inspection: After first coat, lightly sand (220-grit), wipe dust. Inspect for missed spots.
- Final adhesion test: Before full coverage, scratch surface with a nail. No flaking means it’s ready for touch-ups.
Quick rule: Regular inspection ensures a smooth, even finish and prevents peeling.
Troubleshooting and Fixes for Problem Areas
If peeling appears after painting, trace it to root causes such as inadequate surface prep or contamination. Correct the underlying issue before re-coating. Focus on eliminating the cause rather than masking symptoms.
For texture differences or bubbles, adjust sanding aggressiveness and ensure the surface is clean and dry before the next coat. Document the steps you take so you don’t repeat the same mistake on the next section.
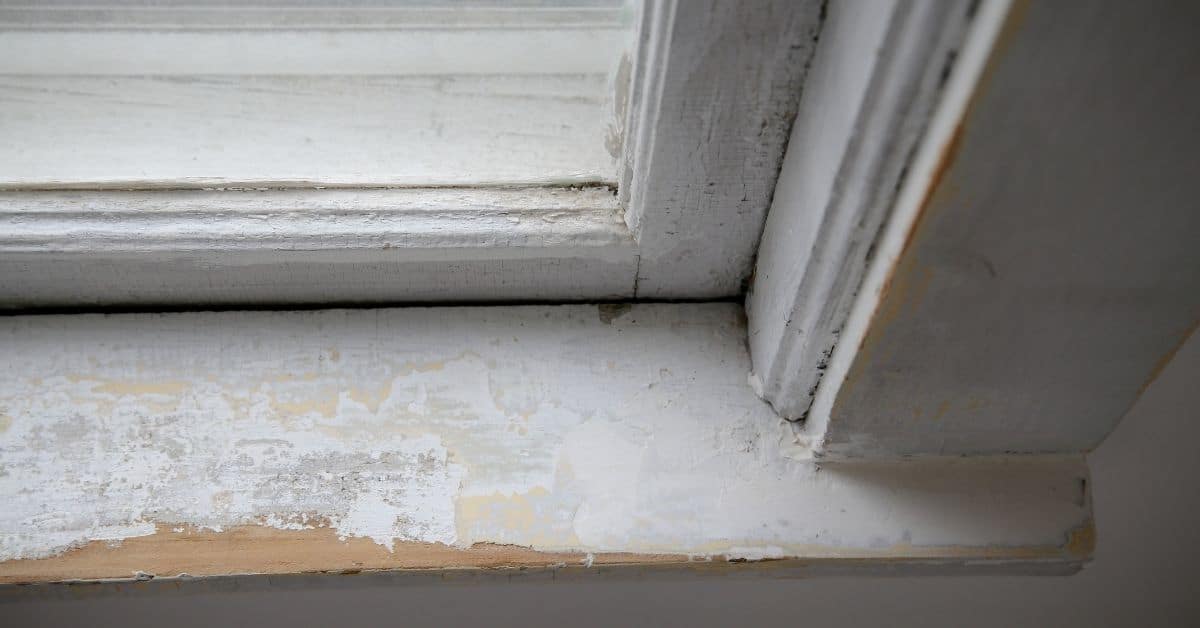
Dealing with localized peeling after painting
If you’re seeing spot peeling after painting over gloss paint, it’s time to address those areas properly. Peeling happens when the new paint doesn’t stick well to the old surface.
First, carefully remove the loose paint using a scraper or putty knife. Be gentle to avoid damaging the surrounding area.
Next, clean the affected spot with a damp cloth and mild soap to remove any dirt or residue. Let it dry completely.
Now, apply a primer designed for gloss paint adhesion (like an oil-based primer). This will give your new topcoat something to grip onto. After the primer dries, lightly sand with fine-grit sandpaper and wipe off dust before repainting.
Uneven sheen or texture after repainting
If your newly painted surface has visible texture differences or an uneven sheen, it’s usually due to issues in prep or application. Here’s how to diagnose and fix:
First, check if the problem lies with the primer. If you see inconsistencies only where you primed, re-prime those areas using a compatible primer.
If the issue is widespread, it might be due to application. Ensure you’re using the right roller or brush for your paint type and surface. Also, maintain even strokes and pressure while painting.
For texture issues, lightly sand the area with fine-grit sandpaper after the paint dries. Wipe off dust and apply a thin coat of primer before repainting. This should help even out the texture.
When to strip back to substrate or call a pro
Sometimes, DIY fixes aren’t enough. Here are signs that indicate you should strip back to the substrate or consider hiring a professional:
Widespread peeling: If more than 20% of your surface is peeling, it’s best to strip off all the old paint and start fresh.
Mold or mildew growth: If you see signs of mold or mildew, it’s time to call a pro. They have specialized equipment and knowledge to handle these issues safely.
Lead paint: If your home was built before 1978, there’s a chance you’re dealing with lead paint. This is dangerous to handle without proper training and equipment. Always hire a certified professional for lead paint removal.
Conclusion
Getting a durable, long-lasting finish comes down to solid prep, smart choices, and watching for red flags before you paint. If you do the tests, pick the right tools, and follow a careful workflow, you’ll avoid peeling and keep the gloss under control.
To move forward, think of the work in this order: confirm the current finish with quick tests, assemble the exact tools and materials, remove the shine safely with sanding or chemical deglossing, clean and dry the surface, apply a compatible primer, and then coat with the right paint. Do a small test area first, then scale up once the look and adhesion pass your checks.
Common mistakes to avoid are skipping the tests or deglossing, over-sanding or under-sanding, and using the wrong primer or paint for a gloss-over job. Follow safety guards, ventilate the space, and don’t rush dry times. If you’re seeing deep peeling, moisture intrusion, or large damaged areas, don’t push ahead—call a pro for a proper assessment and keep the project from turning costly.
FAQ
Do I need to remove all gloss before painting over it?
No. You should dull the shine and roughen the surface so the new coat sticks. Follow the gloss you’re dealing with and the primer’s instructions, and check the label for the recommended prep.
Can I skip sanding and just use a bonding primer on glossy surfaces?
You can use a bonding primer, but you still need proper surface prep. Sand or scuff the area to ensure the primer can bite, and always follow the primer manufacturer’s directions.
How can I tell if there’s still gloss left after my prep?
Use a simple test like a light scrub or wipe with a deglosser if the product allows. If the surface doesn’t feel rough or look dull after prep, it may still have gloss. Check the product label for test methods or instructions.
What should I do if the paint starts peeling after the first coat?
Stop and reassess. Sand or scuff the area again, clean it, re-prime, and recoat following the product instructions. If you’re unsure, verify steps on the label or with the manufacturer.