
Introduction
A tape measure eraser is a simple method to clean and restore the sticky or dirty area on a tape measure blade.
This article covers practical, hands-on steps you can try without special tools, plus what to look for when choosing a cleaner or cloth. You’ll learn how to use it, why it helps, and how to avoid injuring the blade or the markings.
Key takeaways
- Identify residue type to choose eraser method without scratching the blade.
- Use light, even strokes along the blade; avoid aggressive rubbing.
- Choose erasers labeled for metal or coated tapes; avoid abrasive pads.
- Test eraser on a concealed section before cleaning visible marks.
- Wear eye protection and work in a ventilated area when solvents are nearby.
- Regular maintenance: wipe, dry, and recheck markings to prevent buildup.
Table of Contents
- Introduction
- Key takeaways
- Quick Overview — What “Tape Measure Eraser” Means and Why Markings Get Marred
- Tools and Materials Checklist
- Identify Marking Type and Assess Damage Before Erasing
- How to Test Eraser Cleaning — Controlled, Repeatable Tests
- Step-by-Step Eraser Techniques for Common Residues
- Alternatives and Comparisons — Eraser Vs Solvents, Abrasives, and Repair
- Common Mistakes, Safety Precautions, and Environmental Impact
- Long-Term Effects, Maintenance Plan, and Cost Comparison
- Conclusion
- FAQ
Quick Overview — What “Tape Measure Eraser” Means and Why Markings Get Marred
Tape measure eraser refers to the condition where markings become obscured or transfer from one surface to another, not just normal wear. It helps readers distinguish between genuine damage and routine aging of a tape. Different impacts show up on metal, plastic, and cloth tapes, depending on coating and printing methods.
Common culprits include oils, fingerprints, ink or paint transfer, adhesive residues, and surface wear. Printed scales and etched scales react differently to these effects. Knowing why legibility matters helps with accuracy, project timing, and the need for re-measuring or replacement decisions.
Common categories of marking problems
The ‘Tape Measure Eraser’ phenomenon isn’t one-size-fits-all. Here are the usual suspects:
Graphite/Pencil: Leaves smudges and smears, especially on metal tapes.
Ink/Marker: Can stain and bleed into markings, affecting both printed and etched scales.
Paint Transfer: Dries onto the tape, often requiring harsh solvents to remove without damaging the scale.
Adhesive Residue: Sticks tenaciously, clogging up markings on all types of tapes.
Corrosion: Eats away at metal tapes’ coatings and markings, causing permanent damage.
When erasing is an appropriate fix vs replacement
Not every ‘Tape Measure Eraser’ situation can be salvaged with a simple wipe. Here’s when to try erasing and when to call it quits:
Erase if: You’ve got surface smudges, minor ink/paint transfer, or adhesive residue. A good cleaning might do the trick.
Replace if: There are deep abrasions, missing printed numerals, severe corrosion, or extensive paint transfer. These issues can’t be erased and may affect measurement accuracy.
Remember, it’s better to spend a few bucks on a new tape than risk costly mistakes due to illegible markings.
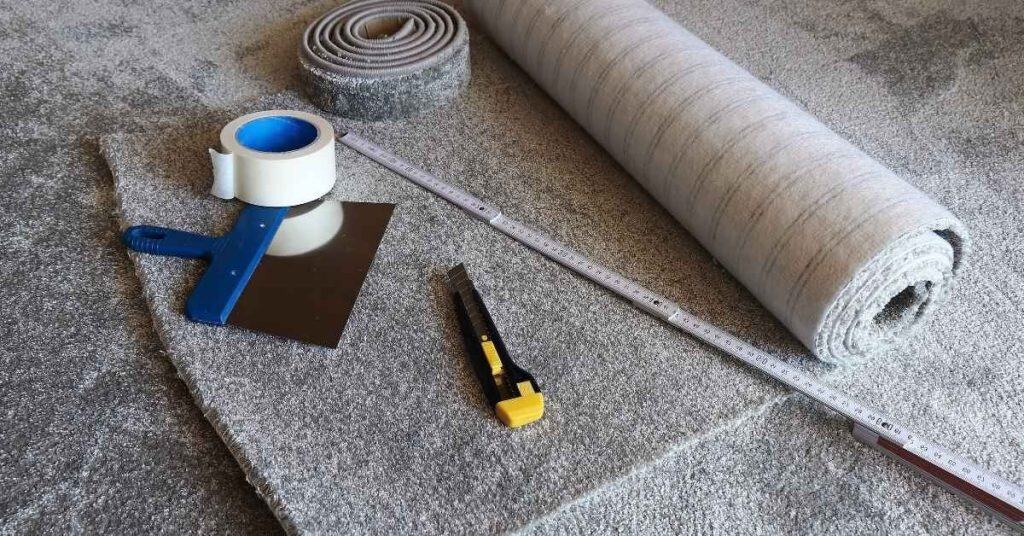
Tools and Materials Checklist
This checklist prepares you for fixes on concrete surfaces and sets expectations for what to gather before tackling eraser work. It covers both erasers and supporting supplies. The goal is a safe, careful start that minimizes further damage.
Try different eraser options first: rubber, vinyl, and soft kneaded erasers, noting texture and potential residue. Add microfiber cloths, cotton swabs, mild cleaners, water for rinsing, and a non-abrasive pad or brush for light scrubbing. Always verify tape material and surface porosity before proceeding.
Types of erasers and surface suitability
Before you start, check your tape measure’s markings. Some are printed, others painted.
- Soft vinyl/plastic erasers: Gentle on printed scales. Won’t smudge or smear.
- Gum erasers: Good for painted scales. Can leave residue if not cleaned properly.
- Kneaded erasers: Soft, moldable. Great for both types of scales but may leave marks if too hard.
- Texture: Smooth surfaces need smooth erasers. Rough surfaces, use textured ones.
- Tackiness: Less tacky erasers are gentler on delicate markings.
- Avoid: Hard erasers can scratch or damage scales.
Quick rule: Match eraser type to your tape’s marking style. Test first to avoid mistakes.
Supporting cleaning aids and safe solvents
After erasing, clean up. Here’s what you need.
- Microfiber cloths: Gentle on surfaces. Won’t scratch or leave lint.
- Cotton swabs: Reach tight spaces. Perfect for precision cleaning.
- Mild solvents/cleaners: Like isopropyl alcohol or mild dish soap. Test first to avoid damage.
- Water: Rinse off residue after erasing and cleaning.
- Non-abrasive pad/brush (optional): Gently scrub tough spots without damaging surfaces.
- Avoid strong solvents: They can remove markings or damage coatings.
Quick rule: Always test cleaners on a small, hidden area first. Ventilate when using solvents.
Tools and chemicals to avoid
Some tools and chemicals can harm your tape measure or surfaces.
- Coarse abrasives: Like steel wool. Can scratch or remove markings.
- Metal scrapers: Can gouge or scrape off markings.
- Strong caustic solvents: Like bleach or harsh chemicals. Can damage coatings or markings.
- Avoid high-pressure water: It can force residue into tiny crevices, causing damage over time.
Quick rule: Be gentle. Harsh tools and chemicals can cause more harm than good.
Identify Marking Type and Assess Damage Before Erasing
Markings come in rubberized ink, paint, graphite, or etched numbers, and each type responds to erasing differently. Understanding the composition helps choose a removal strategy. Assess the coating and finish to gauge risk before any action.
Look for ink depth, gloss loss, roughness, and any raised or recessed features. A safe spot-test protocol on a discreet area helps confirm compatibility. The goal is to avoid bleed-through or coating damage while removing the marking.
Visual and Tactile Inspection Checklist
Before you start erasing, give your tape measure a once-over with these checks. It’ll help you understand what you’re dealing with.
- Raised residue: Feel for any bumps or lumps. If present, they might not erase easily and could damage the scale.
- Smearing: Check if marks are smeared across the surface. This indicates ink has penetrated deep into the coating.
- Flaking paint: Look for any flakes or chips. Removing marks here might cause more damage.
- Printed ink penetration: See if ink has seeped into the printed numbers. If so, erasing could remove them too.
- Gloss finish: Shiny surfaces usually have a protective coating. Be gentle to avoid removing it.
- Rough texture: A rough surface might indicate etched or deep-set marks that won’t erase easily.
- Recessed markings: If marks are sunken, they’re likely etched and not erasable.
- Wear on the coating: Check for signs of wear. This could affect how well you can erase marks.
Quick rule: If you spot any of these issues, consider re-labeling or replacing your tape measure instead of erasing.
Quick Spot Test Protocol
Before you go to town on those marks, do a quick test. It’ll save you from making things worse.
Choose an inconspicuous area, like the end hook or a spot near the case. Use a soft eraser and gentle strokes. Observe for any smearing or removal of printed paint.
Duration: Leave the test area alone for about 30 seconds to see if there’s any reaction.
Neutralize immediately: After testing, use a damp cloth to wipe away any residue. This prevents damage from prolonged contact with the eraser or solvent.
Signs That Indicate You Should Stop
While erasing, keep an eye out for these red flags. If you see any, halt the process immediately to avoid further damage.
Paint lifting: If marks start lifting off with the eraser, stop. You’re removing protective coatings and exposing raw substrate.
Permanent smearing of scale numbers: If erasing causes scale numbers to smear or fade permanently, it’s time to stop. You don’t want to compromise accuracy.
Exposure of raw substrate: If you see bare metal or wood under the markings, stop. Removing more could cause serious damage.
How to Test Eraser Cleaning — Controlled, Repeatable Tests
Define what you will test: eraser type, surface type (concrete or painted), current condition, and how much pressure to simulate typical DIY use. Keep the scope limited to a small area. Repeat the test to compare results fairly.
Document starting condition, choose an inconspicuous spot, and control stroke count and speed. Rotate eraser orientation to check uniformity. Use before/after photos to assess residue removal and potential surface changes.
Step-by-Step Cleaning Process
The following steps guide you through testing eraser cleaning in a controlled, repeatable manner to ensure consistent results and minimize damage.
- Preparation: Gather your materials (eraser, tape measure, surface cleaner, etc.) and ensure the area is well-lit and safe for testing.
- Document starting condition: Take a photo of the test area before you start to record its initial state.
- Choose test spot: Select an inconspicuous area on your surface, away from visible edges or corners.
- Apply eraser: Use gentle, consistent pressure and stroke count. Rotate the eraser orientation after each stroke to assess uniformity.
- Inspect and record outcome: After completing the test strokes, inspect the area for any changes in appearance or texture. Take an ‘after’ photo and note your observations.
- Cleanup: If using a surface cleaner, apply it now to remove any residue from the test area. Wipe clean with a damp cloth.
- Final check: Inspect the area one last time after cleaning to ensure no visible marks or damage remain.
Standard micro-test steps
To perform a controlled test, follow these concise steps:
Document: Photograph the area before starting to record its initial condition.
Choose test spot: Select an inconspicuous area on your surface for testing. Ensure it’s representative of the rest of the surface and free from major imperfections.
Apply eraser with light pressure: Use consistent, gentle strokes, applying only enough pressure to erase the marking. Rotate the eraser orientation after each stroke to assess its uniformity in removing marks.
Inspect: After completing the test strokes, examine the area closely for any changes in appearance or texture. Look for signs of residue transfer, surface dulling, or etching.
Record outcome: Take an ‘after’ photo and note your observations, including any visible changes to the surface and the overall effectiveness of the eraser in removing the mark without causing damage.
Documenting and evaluating results
Proper documentation helps you track progress, compare test results, and make informed decisions about which eraser to use on your surface. Here’s how:
Photograph before/after: Take clear, well-lit photos of the test area before and after each test. Use a fixed distance and lighting to ensure consistency between tests.
Note pressure used and stroke count: Record the amount of pressure applied during testing and the total number of strokes taken. This helps you replicate successful results in the future or adjust your technique if necessary.
Categorize outcomes: After each test, categorize the outcome based on the following scale: ‘Cleaned’ (mark removed with no visible damage), ‘Smeared’ (mark still visible or partially removed with residue left behind), or ‘Damaged’ (surface shows signs of dulling, etching, pitting, or other adverse effects).
When to escalate testing to solvent or professional methods
If your initial eraser tests don’t yield satisfactory results, you may need to consider alternative methods. Here’s when to proceed:
Solvent testing: If the eraser doesn’t remove the mark completely and leaves residue behind, try a gentle surface cleaner or solvent designed for your specific surface type (concrete, paint, etc.). Always test solvents in an inconspicuous area first to ensure they won’t cause damage.
Professional service: If multiple erasers and cleaning methods have failed to remove the mark without causing damage, it may be time to call a professional. Deeply embedded marks or those caused by harsh chemicals may require specialized equipment or techniques that a DIY homeowner can’t safely replicate.
Stopping criteria: If any test results in visible pitting, deep scratch marks, edge fraying, or other signs of significant damage, stop testing immediately. Continuing could cause further harm to your surface and potentially lead to costly repairs.
Step-by-Step Eraser Techniques for Common Residues
Identify residue types such as rubber marks, concrete dust, paint splatters, graphite, and adhesive gunk. Verify compatibility with a quick test spot first. This helps tailor the erasing approach to the surface.
Proceed with an eraser-first workflow: dry, controlled motions with steady pressure, and careful inspection as you go. If residues persist, a tiny amount of solvent on a cloth can be applied and re-erased. Stop if you see any adverse effects on the scale.
Step-by-Step Process
Follow these practical steps to effectively remove common residues from your tape measure using an eraser-first approach. This sequence ensures safety, efficiency, and minimal damage.
- Preparation: Put on eye protection, work in a well-ventilated area, and protect nearby surfaces with a cloth or paper.
- Choose the right eraser: Select a rubber or vinyl eraser based on your residue type (refer to earlier sections).
- Main Work: Use dry, controlled motions – circular or back-and-forth – with consistent pressure. Gradually remove buildup and frequently inspect progress.
- Optional Solvent: If residues persist, apply a tiny amount of isopropyl alcohol or citrus-based cleaner on a cloth, let it sit briefly (max 30 seconds), then re-erase and wipe down.
- Finishing Checks: Recheck tape measure for smooth retract and accurate markings. Re-clean the blade edge if needed. If residue remains or damage is suspected, consult a professional.
Removing pencil, graphite, and carbon marks
Lightly erase these marks using unidirectional strokes with a soft eraser. Brush away eraser debris gently with a soft brush or cloth.
Note: Be gentle to avoid lifting scale paint. Repeat only if necessary.
Tackling ink and marker smears
First, test a soft eraser on an inconspicuous spot to ensure it doesn’t dissolve printed markings. If needed, use a small amount of solvent on a swab, apply briefly, then immediately test again.
Caution: Avoid excessive solvent as it can damage the tape measure’s finish or calibration.
Removing adhesive, tar, and paint transfer
Use a pliable eraser to lift surface residue gently. If safe for the tape finish (test first), apply a targeted solvent to stubborn spots, then clean away residues that collect in eraser debris.
Tip: Work in small sections and inspect frequently to avoid over-saturation or damage.
Alternatives and Comparisons — Eraser Vs Solvents, Abrasives, and Repair
Use this framework to decide when to use an eraser, solvents, abrasives, or replacement. Consider damage type and tape material to guide the choice. This helps prevent overdoing any method.
Compare effectiveness and limitations: erasers remove graphite or residue while solvents soften adhesives; abrasives can risk scoring; replacement remains an option when other methods fail. Weigh safety and long-term effects on calibration and durability when choosing.
Solvent methods — pros and cons
Solvents can tackle tough residues that erasers can’t handle. But they’re not without risks.
Pros
- Effectively remove stubborn residues like tar, paint, or adhesive.
- Can soften and lift off dried-on marks.
- Work well on both plastic blades and metal hooks.
- Quick action, often providing instant results.
Cons
- May damage printed scales if left too long or used incorrectly.
- Can cause discoloration or warping of the blade material.
- Chemical exposure risks; ensure proper ventilation and use gloves.
- Potential for off-gassing, which can affect measurement accuracy over time.
Use solvents when residues are too stubborn for erasers. Always test on a small area first to check compatibility.
Abrasive approaches — pros and cons
Abrasives can restore shine, but they’re harsh and should be used sparingly.
Pros
- Restore metal hook’s shine and remove deep scratches.
- Can help with minor pitting on metal surfaces.
- Work well for unprinted metal parts or custom-made tools.
- Quick action, providing immediate results.
Cons
- Remove printed markings and scales, making the tape measure useless.
- Can create new scratches or damage the blade’s surface.
- Risk of embedding particles into the blade, affecting measurement accuracy.
- Not suitable for plastic blades; can cause damage or warping.
Abrasives are a last resort. Use only on unprinted metal parts and with extreme caution.
Replacement and professional restoration
Sometimes, cleaning isn’t enough. It’s time to consider replacement or professional help.
Replace: when the tape measure is old, damaged beyond repair, or has lost accuracy despite your best efforts.
Consider professional restoration for high-end tools with sentimental value or specialized features. They can often restore functionality and accuracy.
Always remember: safety first. If a tool is too damaged to clean safely, it’s time for a new one.
Common Mistakes, Safety Precautions, and Environmental Impact
Three focus areas guide the discussion: mistakes, safety, and environmental impact on DIY concrete projects. Keep tasks aligned with repairing or preserving markings. Use this as a preventative checklist for field use.
Avoid common errors like aggressive rubbing or skipping spot tests. Follow PPE guidance and ensure adequate ventilation when solvents are involved. Consider disposal choices to minimize environmental impact and comply with local rules.
Safety and handling tips
When working with tape measure erasers, especially when using solvents, safety should be your top priority. Always wear gloves to protect your hands from harsh chemicals and potential cuts.
Ventilation is key when dealing with solvents. Ensure you’re in a well-ventilated area or use a respirator to avoid inhaling harmful fumes.
Never use open flames near solvents. Keep them away from heat sources and sparks to prevent fires. Always store solvents safely, labeling them properly for easy identification.
Mistakes that lead to permanent damage
Some common mistakes when using tape measure erasers can cause irreversible damage. Here are a few to avoid:
- Overly aggressive rubbing: Using too much pressure can abrade the printed scales, making them illegible.
- Using scrapers: Gouging metal with a scraper can damage the tape measure’s casing and internal mechanisms.
- Leaving solvent puddles on paint: Allowing solvents to sit on painted surfaces can cause discoloration or damage.
- Neglecting tool maintenance: Failing to clean your eraser regularly can lead to buildup, making it less effective and potentially damaging the tape measure.
- Skipping spot tests: Always test cleaning methods on a small, hidden area first to avoid unexpected damage.
Regular care and gentle use will extend the life of your tape measure and prevent costly repairs or replacements.
Environmental and disposal considerations
Proper disposal of eraser debris and solvent waste is crucial to minimize environmental impact. Collect eraser crumbs and used swabs in a sealed container for safe disposal.
When choosing cleaners, opt for biodegradable or less-toxic options when possible. This can help reduce the environmental footprint of your project.
Always dispose of solvents according to local regulations. Never pour them down drains, as they can contaminate waterways and harm aquatic life. Instead, take them to a hazardous waste facility for proper disposal.
Long-Term Effects, Maintenance Plan, and Cost Comparison
Assess how repeated erasing might affect readability, coating life, and calibration over time. Look for signs of wear on both enamel and plastic coatings. Plan for ongoing maintenance that preserves legibility.
Outline a practical maintenance routine with non-abrasive cleaning methods and safe storage. Include a rough cost comparison by estimating labor time and consumables versus replacement needs. Use quick field tests to track legibility and coating integrity over time.
Preventive practices to reduce future buildup
Keep your tape measure clean and protected to minimize buildup. Store it in a cool, dry place, away from heat sources and direct sunlight.
Use a protective sheath or case when not in use. This shields the tape from dust, debris, and accidental marks.
Avoid contact with paints, adhesives, and other substances that can stick to the tape and cause buildup. If contact occurs, clean it immediately.
Regularly clean your tape measure using a soft, dry cloth or a slightly damp cloth with mild soap. Wipe gently along the length of the tape to remove any dirt or residue.
Monitoring accuracy and when to replace
Regularly check your tape measure’s accuracy to ensure reliable readings. Inspect the scale markings for legibility and any signs of wear or fading.
Test the tape’s functionality by measuring known distances. If the measurements are consistently off, it’s time to replace the tape or tool.
Check the zero point – if it doesn’t return to zero after each use, the spring mechanism may be worn out and needs replacement.
If you notice any of these issues, replace the tape measure as soon as possible. Using an inaccurate tool can lead to costly mistakes on your project.
Simple cost checklist to compare methods
Use this checklist when deciding between cleaning methods or replacement. It helps you consider all factors and make an informed decision.
- Materials: What are the costs of cleaners, cloths, and other supplies needed for each method?
- Time: How long does each method take? Consider your time as a cost.
- Risk of damage: Does the method pose any risk to the tape measure’s coating or functionality?
- Loss of accuracy: Could the method affect the tape measure’s accuracy if not done correctly?
- Ease of use: How simple is the method to perform? Consider your skill level.
- Environmental impact: What are the environmental implications of each method?
- Long-term effects: Will the method cause any long-term damage or buildup that could require further cleaning or replacement in the future?
- Cost comparison: How does the cost of maintaining the tape measure compare to replacing it?
Quick rule: If the total cost (time + materials + potential damages) of maintaining your tape measure exceeds the cost of a new one, consider replacement.
Conclusion
Keep the tape measure readable and long-lasting by sticking to careful testing, controlled cleaning, and honest assessment. The goal is to restore markings without hurting the blade, the finish, or your process, so safety and predictability stay in front.
First, identify the marking type and the residue, then plan a controlled cleaning pass. test small areas first, document what you used and the result, wipe clean with a dry cloth, and recheck the markings under good light. If anything changes color, grit appears, or the print starts to smear, stop and reassess instead of pushing ahead.
Avoid common mistakes that wreck accuracy or skin and tool safety. Don’t rush with solvents or abrasives, don’t apply heavy pressure, and don’t skip the initial test or misread the damage after each step. Wear eye protection and gloves, work in a ventilated space, and work short, deliberate strokes while keeping the blade moving away from finished surfaces.
If the marks are deep, if the tape measure carries critical measurements, or if you’re unsure about the residue type, consider bringing in a pro rather than risking irreversible damage. With careful steps and steady practice, you’ll keep your tools accurate and looking sharp, and you’ll finish strong. Stay methodical, stay safe, and measure twice before you commit to a fix.
FAQ
What are common uses for a tape measure eraser beyond just removing grime?
It helps restore legibility when markings rub off or smear. It can also be handy for light touch-ups if the tape surface has minor residue from glue, paint, or adhesives that won’t budge with basic cleaning.
How do I apply an eraser on a tape measure without damaging the markings?
Gently work the eraser along the marked area with even pressure. Keep the tape straight and avoid twisting it. If you feel resistance, stop and switch to a lighter touch to prevent fading or rubbing off the numbers.
What types of erasers are suitable for cleaning tape measures?
Choose a soft, non-abrasive eraser designed for plastic or coated surfaces. Look for instructions on the label or package that mention tape measures, rulers, or plastic tools. If in doubt, test on a small, inconspicuous spot first and consult manufacturer guidance.
How often should I clean my tape measure?
Clean when markings start to look dull or when dirt and adhesive buildup interfere with reading. Do not wait until the tape is severely marred; regular light cleanings are safer for long-term legibility.