
Introduction
Polyaspartic floor coatings are fast-curing two-part coatings used to protect and finish concrete, and for a DIYer that means short working time, noticeable odor, and careful surface prep. Think like a tradesperson: plan your mixing and application in short, deliberate steps and check the product label for working time, recommended respirators, and substrate requirements. Expect a job that rewards tidy prep—mechanical profiling, cleaning, and moisture checks are typical—so confirm exact prep steps with the manufacturer for your product.
On the jobsite you’ll be juggling pot life, ventilation, and timing more than with slow epoxies, so stage the work area, tools, and helpers before you open the parts. If you’re unsure about ventilation needs, odor intensity, or how to test the slab, check the product instructions and local safety guidance and consider doing a small test patch first.
Key takeaways
- Assess concrete condition and moisture before coating; prep varies by substrate type.
- Follow manufacturer instructions for pot life, mixing, and recoat intervals.
- Wear PPE, ensure ventilation, and avoid odor exposure during application.
- Thorough surface grinding or profiling yields best adhesion to coatings.
- Test moisture sensitivity and perform adhesion checks on difficult patches.
- Prepare primers or adhesion promoters per substrate and compatibility guidance.
- Plan sections, protect adjacent areas, and schedule cure work within allowed time.
Table of Contents
- Introduction
- Key takeaways
- Quick Overview: What Polyaspartic Coatings Are and DIY Suitability
- Working Time and Pot Life Explained
- Odor, Vocs, and Ventilation for Diyers
- Surface Preparation Requirements and Assessment
- Primers, Adhesion Promoters, and Compatibility
- Tools, Materials Checklist, and Mixing Procedures
- Application Techniques, Section Planning, and Timing
- Curing, Recoat Windows, and Long-Term Performance
- Conclusion
- FAQ
Quick Overview: What Polyaspartic Coatings Are and DIY Suitability
Polyaspartic coatings are fast-curing, aliphatic polyurea-type coatings formulated for floor protection; they differ from epoxies in cure speed and from conventional polyurethanes in chemical composition and UV stability. Read the product data sheet to confirm intended uses and substrate recommendations.
For DIYers, they can be a good fit for garage and utility floors when you can work within the manufacturer’s timing and mixing limits and have solid surface prep skills. Check the label or technical bulletin for recommended project size and any skill or equipment notes before starting.
Core chemistry and performance traits
Polyaspartic coatings are a type of polymer that combines the best properties of epoxy and polyurethane. They’re made by reacting polyaspartic esters with isocyanates, creating a tough, durable finish.
Fast cure time is one of their key benefits. While epoxies can take days to fully cure, polyaspartics can be ready for light traffic in as little as 1-2 hours and full curing in 5-7 days.
They also offer excellent abrasion resistance, making them ideal for high-traffic areas like garages or workshops. Plus, they provide a clear, glossy finish that doesn’t yellow over time like some epoxies do.
Is this a realistic DIY project?
Polyaspartic coatings can be applied by homeowners, but it’s important to consider the scope of your project. For small areas like a basement or laundry room floor, it’s very doable.
However, for larger spaces like a two-car garage, you’ll need to assess your skill level. If you’re comfortable with painting and basic prep work, you should be fine. But if you’re new to DIY projects, you might want to start small.
Also consider the time sensitivity of your project. While polyaspartics cure quickly, the application process itself isn’t fast. You’ll need a full day for prep work and application, plus time for curing before you can use the space again.
Working Time and Pot Life Explained
Working time is how long mixed material remains usable on the surface; pot life is how long the material stays workable in the container after components are combined. These are different but related limits—verify both on the product data sheet because they determine how much you can mix at once and how fast you must apply it.
Poor planning around these windows leads to cold seams, missed areas, or wasted material, so plan section sizes and crew roles around the stated times. If uncertain, consult the manufacturer instructions for guidance on batch sizes and temperature effects.
How manufacturers phrase pot life and working time
Manufacturers often use terms like ‘pot life’ and ‘working time’ on their technical data sheets (TDS). Let’s break down what these mean in practical terms.
Pot Life: This is the time a mixed product remains usable before it starts to thicken or set. It’s measured from when you start mixing until the material becomes too thick to apply properly.
Working Time: This is the time frame during which you can effectively work with the applied coating before it cures and hardens. It’s measured from when you start applying the product until it reaches a certain level of cure, usually 50% or ‘tack-free’.
Environmental and job-site factors that shorten working time
Several factors can reduce the pot life of your polyaspartic coating, making it set faster than expected. Here’s what to watch out for:
Temperature: Warmer conditions speed up chemical reactions. In hot weather or on heated surfaces, your working time may be cut in half.
Humidity: High humidity can also reduce pot life. It promotes faster evaporation of solvents, causing the coating to thicken quicker.
Substrate Temperature: If the surface you’re applying to is hot (like a concrete slab that’s been in direct sunlight), it can accelerate curing.
Mix Ratio Variability and Batch Size: Small batches or varying mix ratios can lead to inconsistent working times. Always follow the manufacturer’s instructions precisely.
Practical strategies for managing fast set compounds
Polyaspartic coatings cure quickly, so small crews need to be organized and efficient. Here are some tips:
Batch Sizing: Mix only what you can apply within the working time. It’s better to mix smaller batches more often than risk wasting material.
Staging Areas: Set up a staging area near your work zone for mixed materials. This reduces travel time and helps maintain a steady workflow.
Helpers: Enlist extra hands if possible. One person can mix, another apply, and a third clean tools and prepare the next area.
Pre-marking Sections: Divide your work area into sections based on your working time. This helps you keep track of where you are in the application process and prevents runs or missed spots.
Odor, Vocs, and Ventilation for Diyers
Odor during polyaspartic application mainly comes from reactive components and solvents; VOC levels and odor intensity vary by formulation. Check the product label or safety data sheet for VOC information and any respiratory protection recommendations before starting work indoors or in attached garages.
Good ventilation and planned air exchange are essential to dilute odors and remove fumes—use fans, open doors, and consider mechanical ventilation if instructed by the manufacturer. If you have concerns about occupants with sensitivities, follow the SDS and consider temporary relocation until the space reaches recommended air quality levels.
What causes the smell and what the TDS/MSDS will tell you
The odor from polyaspartic coatings comes from volatile organic compounds (VOCs). These are chemicals that easily become vapors or gases. The strength of the smell varies depending on the specific formulation.
Always check your product’s Technical Data Sheet (TDS) or Material Safety Data Sheet (MSDS) for VOC values and hazard communication. This will give you a clear idea of what to expect.
Note: Lower VOC levels mean less odor, but also potentially slower curing times.
Ventilation setups and air flow best practices
Good ventilation is crucial when working with polyaspartics indoors or in attached garages. Here are some practical options:
– Fans: Use oscillating fans to create a cross-breeze. Place them near open windows or doors to push air out.
– Exhaust to outdoors: If possible, set up an exhaust fan that blows air directly outside. This helps remove fumes quickly and safely.
– Avoid dust: Keep your workspace clean. Dust can interfere with ventilation efforts and affect the coating’s performance.
PPE and worker protection recommendations
Protecting yourself is key when working with polyaspartic coatings. Here’s what you need:
– Respiratory protection: Use a respirator or dust mask rated for organic vapors. Check your product’s safety guidance for specifics.
– Gloves: Wear chemical-resistant gloves to protect your hands from the coating and any solvents used.
– Eye protection: Safety glasses with side shields or goggles will keep your eyes safe from splashes. Consider using a face shield for added protection.
Surface Preparation Requirements and Assessment
Proper surface preparation is the single most important factor for adhesion and long-term performance; coatings will only perform as well as the substrate allows. Inspect the concrete for contaminants, laitance, moisture, and soundness, and follow manufacturer guidance for acceptable surface profiles and moisture limits.
Create an assessment checklist: clean contamination, check pH and moisture if required, repair cracks and spalls, and achieve the specified profile (often by mechanical methods). When in doubt about moisture or bonding conditions, verify acceptable methods and limits with the product technical data sheet or manufacturer tech support.
Evaluating concrete: contaminants, pH, and moisture risks
Before you start prepping your concrete for a polyaspartic coating, you need to know what you’re dealing with. Here’s how to check:
Contaminants: Use a simple test kit or swab to detect oil, grease, curing compounds, or laitance (a weak cement paste layer). If present, remove them using appropriate cleaners.
pH level: Concrete should have a pH between 6-9.5 for good adhesion. Test with a pH indicator and adjust if needed.
Moisture risks: Check for excessive moisture using a calcium chloride test or a moisture meter. High moisture can cause delamination. Always confirm acceptable conditions in the product’s Technical Data Sheet (TDS).
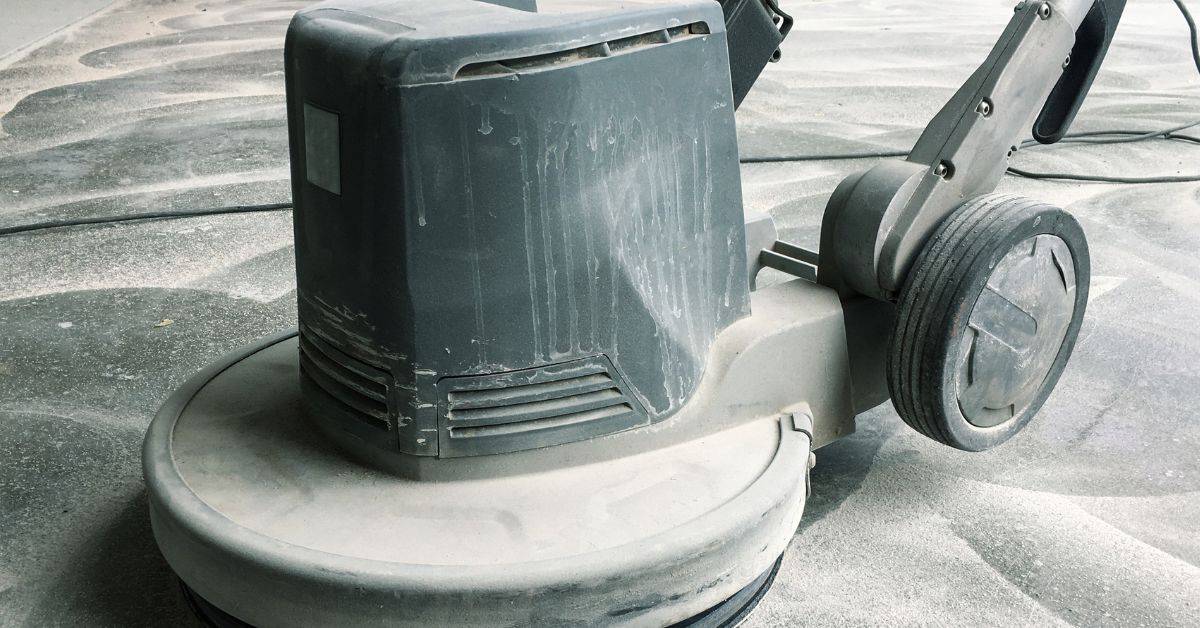
Mechanical profiling methods and DIY alternatives
Concrete needs to be properly profiled for good adhesion. Here are your options:
Professional methods: Diamond grinding or shot blasting remove laitance, provide a consistent profile, but require specialized equipment.
DIY alternatives: Sanding can work on small areas, but it’s labor-intensive. Acid etching is cheaper but can be dangerous if not done right. Use these for minor touch-ups, but consider professional prep for larger jobs or complex surfaces.
Remember, proper profiling is crucial. If you’re unsure, consult a pro before starting.
Repairing cracks, spalls, and control joints
Cracks, spalls (chipped or broken pieces), and control joints need attention before coating:
Cracks: Clean them out, fill with a suitable repair material (like an epoxy crack filler), let it cure, then grind flush with the surface.
Spalls: Remove loose material, prepare the area, and apply a concrete patch or repair mortar. Let it cure before grinding smooth.
Control joints: Clean them out, fill with a flexible joint sealer, let it cure, then grind flush with the surface. Always ensure all repairs are fully cured (at least 72 hours) and clean before applying your polyaspartic coating.
Primers, Adhesion Promoters, and Compatibility
Primers and adhesion promoters improve bond to porous, contaminated, or difficult substrates and can seal concrete to prevent pinholes and outgassing; they are not always optional. Consult the product technical data sheet to determine whether a primer is required for your substrate type or environmental conditions.
If using a primer or an adhesion promoter, follow the manufacturer’s compatibility and recoat window instructions to avoid adhesion failures. When compatibility is unclear—such as over sealers, moisture mitigation systems, or existing coatings—check the manufacturer’s guidance or test a small area before committing to a full application.
How to choose the right primer
A good primer can make or break your polyaspartic floor coating job. Here’s how to pick the right one:
1. Substrate condition: Inspect your concrete surface. If it’s porous, dusty, or has a high pH, you’ll need a primer that seals and stabilizes.
2. Coating system compatibility: Always follow the manufacturer’s recommendations for primers. They’ve tested their products together to ensure they work well.
3. Application method: Some primers are designed for rolling, others for spraying. Choose one that matches your application method.
Issues with existing coatings, sealers, and paints
Existing coatings can cause adhesion issues. Here’s how to deal with them:
First, test for compatibility using a small, hidden area. If the coating peels or bubbles, it’s incompatible.
If testing confirms incompatibility, remove the existing coating. This might involve scraping, sanding, or using a paint stripper.
Always do a pull-off adhesion test before applying your primer and coating. This involves applying a piece of tape to the surface, letting it sit for 24 hours, then pulling it off. If any coating comes with it, you’ll need to remove it completely.
Small-scale adhesion tests and acceptance criteria
Before committing to a full application, do some small-scale adhesion tests:
1. Pull test: Apply your primer and coating to a small area (about 2′ x 2′). Let it dry according to the manufacturer’s instructions. Then, use an adhesion pull tester or a piece of tape to check for adhesion.
2. Tape test: Similar to the pull test, but you apply and remove the tape immediately after applying your coating. If any coating comes off with the tape, it’s not adhering properly.
Acceptance criteria are simple: no peeling, flaking, or coming off with the tape or pull tester. If you see any of these issues, troubleshoot and try again before proceeding with a full application.
Tools, Materials Checklist, and Mixing Procedures
Gather all tools and consumables before starting: mixing buckets, accurate measuring devices, mixing drills and paddles, squeegees, rollers, personal protective equipment, and surface repair materials. Confirm the manufacturer’s recommended mixing tools and clean-up solvents on the product label or technical data sheet.
Accurate measuring and thorough mixing are critical—follow specified ratios and mixing times to avoid off-ratio cures and weak spots. If uncertain about ratio control or batch sizes, check the product data sheet for guidance and plan smaller, manageable batches within the stated pot life.
Essential tools and consumables
Before you start your concrete project, use this checklist to ensure you have all the necessary tools and materials. This will save you time, money, and prevent costly mistakes.
- Concrete Mixer: Check it’s in good working condition with no visible damage. Ensure it can handle your mix volume (check manufacturer guidelines).
- Shovel: A sturdy, flat-edged shovel is essential for mixing and moving concrete. Inspect for any bends or cracks.
- Wheelbarrow: Ensure it’s in good condition with no wobbly wheels or leaks. It should be able to handle your mix volume without tipping over.
- Concrete Mixing Hoe: This tool helps break up clumps and ensures even mixing. Check for any broken handles or worn-out heads.
- Squeegee: A long-handled, sturdy squeegee is crucial for finishing and leveling concrete. Inspect the blade for any nicks or bends.
- Concrete Float: This tool helps smooth and finish the surface. Check it’s in good condition with no missing teeth or bent handles.
- Spiked Shoes: Wear these to prevent slipping on wet concrete. Ensure they’re securely fastened and provide good grip.
- Respirator: Protect yourself from concrete dust. Check the filter is clean and in good condition (follow manufacturer guidelines).
- Tape Measure: Accurate measuring prevents costly mistakes. Ensure it’s calibrated correctly.
Quick rule: Always check your tools and materials before starting any task to prevent job site delays and rework.
Accurate measuring and mixing best practices
Use this checklist before you start mixing to ensure your concrete has the right consistency and strength.
- Check mix ratio: Verify the ratio of cement, water, aggregate (sand and gravel), and admixtures. Common ratios are 1:2:4 or 1:3:6 by volume. Always follow the specific product instructions.
- Use calibrated containers: Ensure your measuring buckets are clean and calibrated to avoid inaccuracies. Check them against a straight edge to ensure they’re level.
- Measure water first: Pour water into the mixing area before adding cement and aggregates to maintain consistency in your mix.
- Add cement next: Gradually add cement, ensuring it’s fully saturated with water. This helps prevent dry spots and ensures proper hydration.
- Add aggregates last: Slowly add sand and gravel, mixing well after each addition to ensure even distribution. This helps avoid segregation, where the mix separates into different sizes of aggregate.
- Mix in order: Always follow the same sequence: water first, then cement, followed by aggregates. This ensures a consistent mix every time.
- Scrape sides and bottom: Regularly scrape the sides and bottom of your mixing area to ensure all materials are incorporated into the mix. Unmixed components can lead to weak spots in your concrete.
- Check slump: After mixing, check the consistency by placing a small amount of concrete on a flat surface. The ideal slump is 3-5 inches; adjust water or cement as needed to achieve this.
Quick rule: Always follow the mix ratio exactly and maintain a consistent mixing order to ensure your concrete has the right strength and consistency.
Handling larger batches and using heat/accelerators
Use this checklist when you’re mixing large batches of concrete or considering the use of accelerators or heated components to speed up setting time.
- Check batch size: Ensure your mixing equipment can handle the volume. Overloading can lead to improper mixing and weak concrete.
- Inspect aggregates: Check for consistent size, shape, and moisture content. Inconsistencies can affect mix design and strength.
- Verify cement type: Use the correct type (e.g., Type I, II, III) as specified in your mix design. Wrong types can cause setting issues or reduced durability.
- Measure water accurately: Too much water weakens concrete; too little makes it unworkable. Use a reliable measuring method to avoid rework.
- Pre-warm aggregates (if applicable): Check temperature before mixing. Warm aggregates can help maintain desired slump and workability, but be cautious not to overheat and cause segregation.
- Use accelerators wisely: Consult the Technical Data Sheet (TDS) for safe limits. Overuse can cause excessive heat, rapid setting, and reduced durability.
- Monitor temperature during mixing: Ideal concrete temperature is 50-70°F (10-21°C). Too cold slows setting; too hot speeds it up rapidly, risking poor curing.
- Test slump before placement: Ensure the mix meets required workability. Slump that’s too low or high can cause application issues and affect final strength.
Quick rule: Always consult the TDS for accelerators, and never exceed recommended dosages to avoid compromising concrete quality and durability.
Application Techniques, Section Planning, and Timing
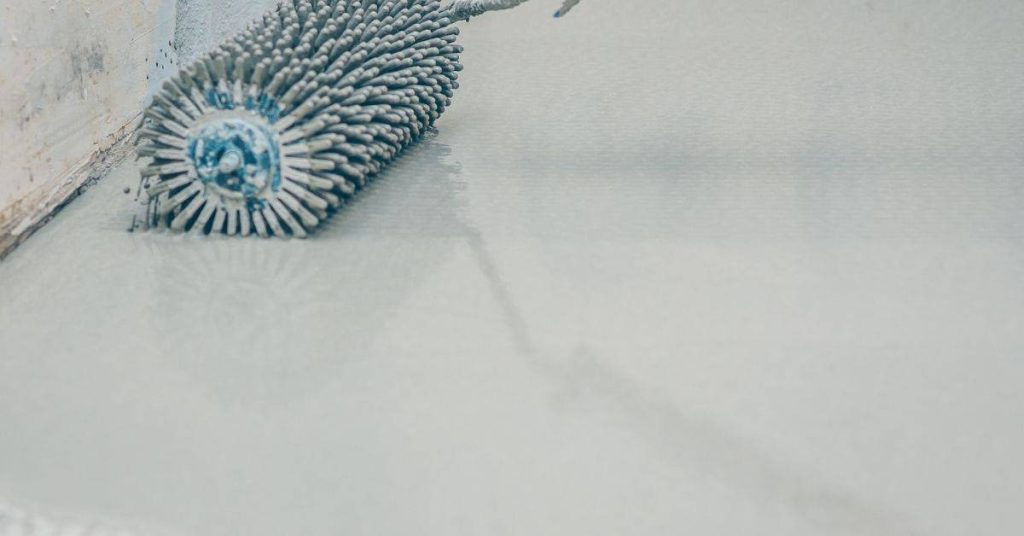
Plan your work in logical sections that match the product’s working time so you can keep wet edges and avoid joint lines; stage materials and tools so nothing delays the flow. Use cut-in techniques for edges and transition zones, and work from the low point to drains if applicable to maintain consistent film thickness.
Control timing between passes and between base and top coats by following the recoat window and surface readiness notes in the technical data sheet. If weather or ambient conditions are near limits, verify recommended adjustments with the manufacturer and consider smaller sections or additional hands to keep pace.
Rolling, squeegeeing, and broadcast techniques
When it comes to applying concrete toppings, you’ve got a few tools at your disposal. Here’s how to use ’em right.
Rollers: They’re great for even coverage on large areas like driveways or patios. Use a 3/8″ nap roller cover for thin toppings, and a 1/2″ for thicker ones. Work in small sections, overlapping about half the width of your roller to avoid lap marks.
Squeegees: These are your best friend when it comes to decorative finishes like exposed aggregate or stamped concrete. Use them after rolling on your base coat to spread the material evenly and expose those decorative chips. But be careful, too much squeegeeing can cause the topcoat to pull off.
Broadcasting decorative chips: After applying your base coat, broadcast those decorative chips while the concrete is still wet. Use a chip spreader or just your hands for smaller areas. Aim for even coverage, but don’t overdo it – you want to see some of that base color peeking through.
Sequencing, team roles, and timing windows
To get the job done right, you need a plan. Here’s how to sequence your work, assign roles, and manage time:
Roles: You’ll need at least three people – one for mixing, one for applying, and one for rolling.
Mixing should start first, giving the applicator enough time to prepare. Once mixed, the concrete has a working time of about 90 minutes, so plan accordingly. The mixer should start preparing the next batch as soon as the previous one is applied.
Timing: Here’s how to coordinate: Mixer starts at T=0, applicator follows at T=15 (giving them time to prep), and roller comes in at T=30. This way, you’re always within the working time window.
Weather, substrate temperature, and humidity considerations
Listen up, DIYers. Weather’s a big deal when you’re pouring concrete. Check your product’s Technical Data Sheet (TDS) for approved limits. Here’s what to watch:
Temperature: Too cold, and your concrete won’t set right. Too hot, and it sets too fast. Aim for 50°F-90°F (10°C-32°C). Check both air and substrate temps.
Humidity: High humidity slows down setting time. If it’s too damp, cover your pour with plastic to keep moisture in. But don’t let rain hit fresh concrete – that’s a no-no!
Curing, Recoat Windows, and Long-Term Performance
Curing milestones include surface tack-free, recoat window, and full chemical cure; each affects when you can walk on, drive on, or expose the surface to chemicals. The product data sheet will list these milestones and any temperature or humidity conditions that affect cure speed and final properties.
Plan traffic staging around those cure milestones and allow extra time if conditions are cooler or humidity is outside recommended ranges. For long-term performance, follow maintenance suggestions from the manufacturer and re-evaluate adhesion if you deviate from the prescribed prep or application steps.
Understanding recoat windows and late recoat risks
Polyaspartic floor coatings need time to cure properly before recoating. Recoating too early can lead to adhesion issues, delamination, or a weak final finish.
Check your product’s documentation for the recommended recoat window. This is usually 24-72 hours after application, depending on humidity and temperature conditions.
Recoating too late (after more than 30 days) can also cause problems. The old layer may have started to ‘cure’ differently from the new one, leading to incompatibility and potential failure.
Stick to the recommended recoat window for best results. If you’re unsure, perform a small-scale adhesion test as mentioned earlier in this guide.
How to test readiness for traffic and service
Before allowing foot or vehicle traffic on your newly coated floor, ensure it’s fully cured. Here’s how:
Tactile check: Gently touch the surface with clean hands. If it feels dry and no residue comes off on your fingers, it’s likely ready.
Visual check: Look for any signs of wetness or tackiness. If the surface looks dry and uniform, it might be ready.
Manufacturer tests: Some products come with simple touch-up cards or test kits to determine readiness. Follow these instructions carefully.
Long-term maintenance and expected wear patterns
Polyaspartic floors are durable, but they still require regular maintenance to keep them looking their best. Here’s what to expect:
Maintenance routines: Regularly clean your floor using a suitable cleaner. Remove any spills promptly. Sweep or vacuum regularly to prevent abrasive particles from scratching the surface.
Monitoring wear: Keep an eye out for signs of wear, such as scuffs, scratches, or chips. These can occur over time with heavy foot or vehicle traffic.
Spot repairs and recoats: If you notice significant wear, perform spot repairs using a touch-up kit (if available) or consider recoating the entire floor when necessary. Most manufacturers recommend recoating every 3-5 years, depending on usage and conditions.
Conclusion
Good coating discipline now pays off with a floor that looks right, lasts, and stays safe to live with. Stay focused on proper surface prep, correct primer and adhesion promoters, and the timing windows so you don’t trap adhesion issues or trap fumes under a thin film.
Start with a practical checklist in plain language: inspect the concrete for cracks and moisture, repair and roughen where needed, pick the right primer or promoter, mix only what you can use in one session and keep to the pot life, ventilate well and wear a respirator, apply in clean, dust-free conditions in planned sections, watch the recoat window and avoid rushing cure, and protect the area from traffic and moisture until full cure.
Common mistakes to avoid are skipping prep, underestimating odor and ventilation needs, and trying to push a coating beyond its cure or recoat window. Safety rules are non‑negotiable: wear eye protection and a respirator, follow product instructions precisely, keep the area well ventilated, and never mix or apply in unsafe temperatures or humidity. If you’re unsure about moisture, substrate compatibility, or the right primer system, slow down and test a small area first.
If the project surface is tricky, or you’re dealing with concrete moisture, high traffic, or complex timing, consider a pro for specific steps, but you can handle the basics with careful prep, good ventilation, and strict adherence to the manufacturer’s data. Stay focused, stay safe, and you’ll get a durable, good‑looking floor you can be proud of. safety first, test a small area, and follow the dry cycle as your guardrails.
FAQ
How do I spot a polyaspartic coating that will work with my surface, and what should I check before applying?
Look at the product label and datasheet for substrate compatibility. Check if your concrete is cured, clean, and dry, and confirm the coating is rated for that surface. If unsure, follow manufacturer instructions and local rules for prep steps.
What should I do about odor and ventilation during DIY application?
Work in a well-ventilated area and limit exposure by using fans and open doors or windows as allowed. Read the product’s odor and ventilation guidance on the label and datasheet, and follow any posted safety recommendations. If you’re sensitive, reconsider doing this project in enclosed spaces.
How important is surface prep after priming or bonding agents, and what can go wrong?
Skip or rush prep and you’ll get poor adhesion or peeling later. Follow the prep steps exactly as listed by the manufacturer, and verify compatibility with any primers or adhesion promoters you plan to use. If you see moisture, oil, or curing residue, address it before applying.
What are practical steps for clean-up, waste, and disposal after working with polyaspartic coatings?
Contain and seal any leftover product per label instructions, and use the recommended solvent or cleanup method. Do not pour leftovers down drains or dispose of it with regular trash until you’ve checked local rules. When in doubt, contact the product manufacturer or local waste authority for guidance.