
Introduction
Calcium chloride can speed up concrete setting, but it is not allowed for every mix or every job. For DIY pours, check product labels and local rules to know if it’s permitted. If you’re unsure, ask the supplier or code authority before using it on your project.
In some cases it’s allowed, but in others it can cause issues with reinforcements or long-term durability. If you’re working with reinforced concrete or sensitive joints, avoid it unless you have explicit approval from the mix supplier and local regulations. Always read the bag instructions and follow any guidance from the manufacturer and your local authority.
Key takeaways
- Calcium chloride can speed early strength but may corrode embedded steel.
- Check project specs and code requirements before using calcium chloride in pours.
- Avoid use in reinforced pours or environments with moisture exposure.
- If allowed, follow approved dosage, mixing, placement, and curing per specs.
- Explore alternatives and mitigation strategies to minimize chloride-related risks and impacts on corrosion potential.
- Use testing, verification, and visual checkpoints to confirm no chloride-related issues.
Table of Contents
- Introduction
- Key takeaways
- How Calcium Chloride Affects Concrete — the Chemistry and Mechanisms
- When Using Calcium Chloride Is Allowed — Appropriate Scenarios
- When Calcium Chloride Is a Bad Idea — Major Risks and Red Flags
- Material Specs, Standards, and What to Check Before Approval
- Dosage, Mixing, Placement, and Curing Best Practices (What to Follow If Allowed)
- Alternatives and Mitigation Strategies to Avoid Chloride Use
- Testing, Verification, Inspection, and Visual Checkpoints
- Decision Framework, Sample Spec Language, and Takeaways for Specifiers and Contractors
- Conclusion
- FAQ
How Calcium Chloride Affects Concrete — the Chemistry and Mechanisms
Calcium chloride interacts with cement paste as the earliest hydration occurs. It can speed up the chemical reactions that form the cement matrix. The result is an accelerated set process and changes to early strength gain that you may feel in the form of quicker initial stiffening.
In fresh concrete, calcium chloride acts as an accelerator, influencing temperature and hydration heat. It can also alter the pore structure and shrinkage behavior during early curing. For a practical read, verify product data and manufacturer guidance before relying on any time-based assumptions.
Acceleration mechanisms
Calcium chloride speeds up hydration reactions in concrete. It does this by providing extra calcium ions that react with the cement’s silicate and aluminate phases.
This acceleration reduces setting time, allowing concrete to reach initial set faster. But remember, we’ve talked about dosage earlier – too much can cause flash set, which is bad for your pour.
Key point: Calcium chloride makes hydration happen quicker, but it’s all about getting the right amount.
Effects on hydration products and microstructure
Calcium chloride affects what forms during hydration. It promotes more C-S-H gel – that’s calcium silicate hydrate, the stuff that gives concrete its strength.
It also reduces porosity in early-age concrete. Fewer pores mean less water can escape, keeping your mix workable longer. But again, too much can lead to excessive bleeding and segregation.
Early-age strength: More C-S-H means more strength, sooner. But be careful – rapid strength gain doesn’t always mean better long-term performance.
Interaction with admixtures and supplementary cementitious materials
Calcium chloride can play nice or not so nice with other stuff in your concrete mix.
- Air-entraining agents: CACl2 reduces air content, which could lead to freeze-thaw issues. Make sure your air content is still where it needs to be.
- Fly ash and slag: These can slow down strength development when used with CACl2. Check compatibility and adjust dosages as needed.
- Silica fume: This can help mitigate the rapid strength gain caused by CACl2, preventing excessive shrinkage. But too much silica fume can cause bleeding issues.
- Water reducers: CACl2 can enhance the effect of these admixtures, reducing water demand further. Just be mindful of the combined dosage to avoid flash set.
- Corrosion inhibitors: CACl2 can interfere with these, making steel reinforcement more susceptible to corrosion. Avoid using them together or consult a specialist.
When Using Calcium Chloride Is Allowed — Appropriate Scenarios
Calcium chloride may be considered in certain cold-weather pours where early strength development can help with form removal and scheduling. The decision should come after confirming compatibility with the cement and reinforcement. Always check the project specifications and supplier instructions before proceeding.
Look for scenarios where the main drivers are speed of set and controlled early strength, and where the mix design has been reviewed. Verify any constraints related to corrosion risk, especially around steel reinforcement or prestressed elements. Use caution and document the approval path in the job records.
Nonreinforced and short-life concrete applications
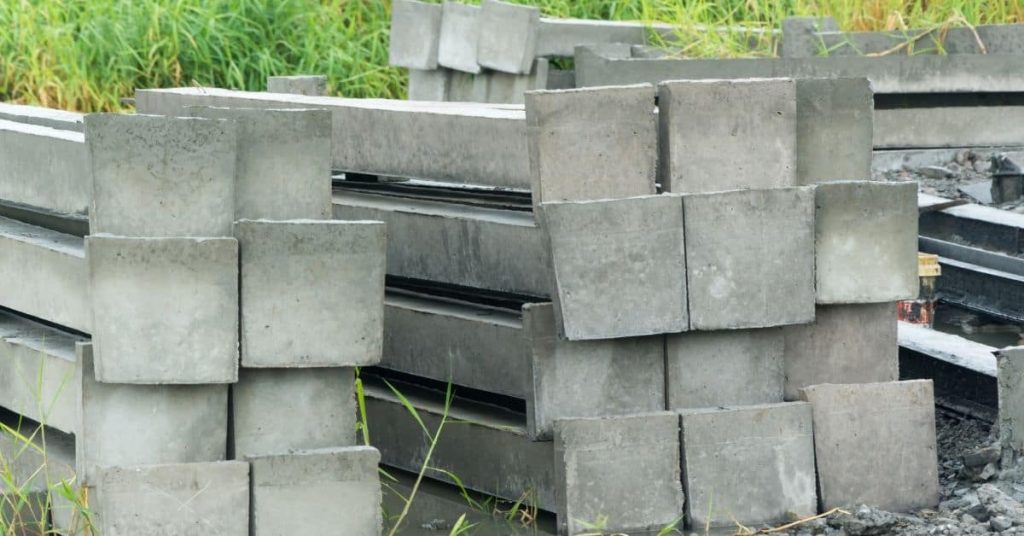
Calcium chloride can be used in unreinforced, nonstructural concrete pours where the risk of corrosion is minimal. These include small projects like garden ornaments, retaining walls, or other decorative elements with a short lifespan.
Unreinforced concrete doesn’t have steel reinforcement to corrode, making it less vulnerable to chloride-induced damage. However, ensure the concrete will not be exposed to harsh conditions that could accelerate deterioration.
Confirm there’s no risk of prolonged exposure to moisture or freezing temperatures before using calcium chloride in these scenarios.
Emergency cold-weather concreting and accelerated repairs
In emergencies, calcium chloride can help accelerate concrete setting times and enable low-temperature placement. This is useful for temporary works or urgent repairs where speed is crucial.
However, project-level approval is a must. Consult with your engineer or architect to ensure it won’t compromise the structure’s long-term integrity. Remember, accelerated curing can lead to reduced concrete strength if not managed properly.
Use calcium chloride sparingly and only when necessary for emergency repairs. Do not rely on it as a standard practice for all cold-weather concreting.
Unreinforced precast and some industrial uses
Certain precast concrete elements, like septic tanks or other nonstructural, unreinforced units, can benefit from calcium chloride’s accelerating properties. Similarly, some industrial applications with minimal corrosion risk may permit its use.
In these cases, the lack of steel reinforcement reduces the likelihood of chloride-induced corrosion. However, always check project-specific guidelines and obtain approval before using calcium chloride.
Some industrial uses might include grouting or other nonstructural applications where accelerated setting is beneficial but corrosion risk is minimal.
When Calcium Chloride Is a Bad Idea — Major Risks and Red Flags
Calcium chloride poses corrosion risks to steel in reinforced concrete, which can compromise long-term durability. It is generally discouraged near prestressing and high-strength strands. Aesthetics like efflorescence and potential dampness issues can also arise with improper use.
Be alert for red flags in specs or drawings that prohibit chlorides or specify alternative accelerators. Do not proceed without clear authorization and a full risk assessment. When in doubt, escalate to the project engineer for a written ruling.
Corrosion risk in reinforced and prestressed concrete
Calcium chloride can cause serious issues with steel reinforcement, especially in load-bearing or prestressed members. Here’s why:
Chlorides from calcium chloride accelerate corrosion of steel by lowering the electrical resistance at the anode. This means more current flows, speeding up the reaction that turns iron into rust.
Prestressed strands are particularly sensitive because they’re under constant tension. Even a small amount of rust can cause significant loss of prestress, weakening the structure and potentially leading to failure.
In reinforced concrete, corrosion can cause cracking and spalling, reducing the concrete’s strength and durability. It’s a silent enemy that can compromise your structure’s safety over time.
Durability and long-term performance concerns
Using calcium chloride in concrete can lead to several durability issues that shorten its service life:
First, it increases permeability. This means water and other harmful substances can more easily penetrate the concrete, leading to further deterioration.
Secondly, it can cause alkali reactions with certain aggregates, leading to expansion and cracking over time. This is known as Alkali-Silica Reaction (ASR).
Accelerated deterioration is another concern. Calcium chloride speeds up the concrete’s hydration process, but this can lead to a more rapid breakdown in the long run.
Compatibility with specialty concretes (high-performance, HPC, and marine)
Calcium chloride is typically not compatible with high-performance mixes or marine structures due to their sensitivity to chlorides:
High-Performance Concrete (HPC) and other specialized mixes are designed for enhanced durability and strength. Adding calcium chloride can compromise these properties by increasing permeability and promoting corrosion.
Marine structures face additional challenges from seawater, which is already rich in chlorides. Using calcium chloride in these applications can significantly increase the risk of corrosion and deterioration.
In fact, many specifications for marine or chloride-sensitive structures explicitly prohibit the use of calcium chloride as an accelerator.
Material Specs, Standards, and What to Check Before Approval
Standards and contract clauses govern how chlorides are used in concrete, including allowable limits and testing requirements. Read the project specification sections that reference chlorides, accelerators, and admixtures. Have the supplier data sheet and manufacturer instructions on hand for quick cross-checks.
Match the product to the mix design and curing regime, and verify any field or lab testing requirements. Look for language about corrosion protection, reinforcement compatibility, and approval workflows. Ensure there is a documented decision path before any placement.
Typical contract and code restrictions to look for
Before you start, check your project’s contracts and local codes. Chloride limits are often set here.
- Contract clauses: Look for phrases like ‘chloride-free’ or ‘no added chlorides’.
- Chloride limits: Check if there are maximum chloride content limits (e.g., 0.15% by weight of cement).
- ASTM C 42: Standard Test Method for Chloride in Hydraulic Cement Mortars and Concretes: This test method might be referenced.
- ACI 201.2R-16: Guide to Concrete at Elevated Temperatures or Low Temperatures: Check if these guidelines are mentioned, as they may restrict chloride use.
- Local codes: Some areas have their own restrictions on chloride use in concrete.
- Specialty concretes: High-performance, marine, and other specialty concretes often prohibit chlorides.
- Reinforced/prestressed structures: Chlorides are usually banned here due to corrosion risk.
- Long-term durability concerns: Some contracts prioritize long-term performance over short-term gains, banning chlorides.
Quick rule: If in doubt, consult your project’s engineer or architect. They know the ins and outs of your specific contract.
Manufacturer data and certification to request
When using admixtures or cement, ask for these documents from the manufacturer. They ensure compatibility and safety.
- Chemical composition: Ask for a detailed breakdown of the product’s chemical makeup.
- Compatibility statements: Request statements confirming the product works well with calcium chloride.
- Safety Data Sheets (SDS): These detail handling, storage, and disposal procedures. They also list potential hazards.
- Certifications: Look for certifications like ASTM C 494 or EN 934-2, which ensure the admixture meets quality standards.
- Product data sheets: These provide general information about the product and its intended uses.
- Performance claims: Ask for evidence supporting the manufacturer’s performance claims.
- Warranties or guarantees: Some manufacturers offer warranties on their products. Make sure to get these in writing.
- Environmental statements: Check if the product has any environmental certifications or labels (e.g., LEED, BREEAM).
Quick rule: Always request and review these documents before using a new admixture or cement. It could save you from costly mistakes.
When to require lab trials and performance testing
Lab trials and performance testing are crucial when the stakes are high. Here’s when to insist on them:
- Structural use: Always test when concrete will bear significant loads or support structures.
- New mix designs: Whenever you’re trying a new mix, test it first.
- Specialty concretes: Test high-performance, HPC, marine, or other specialty concretes to ensure they meet your needs.
- Cold weather concreting: Trials can help optimize set times and strengths in cold conditions.
- Accelerated repairs: Testing helps ensure the repair concrete integrates well with the existing structure.
- Long-term durability concerns: If long-term performance is crucial, test for durability properties like freeze-thaw resistance or sulfate resistance.
- Compatibility with other materials: Test if you’re using new aggregates, admixtures, or supplementary cementitious materials.
- Quality control: Regular testing helps maintain consistent concrete quality throughout the project.
Quick rule: If it’s a critical application, test first. It’s cheaper than fixing problems later.

Dosage, Mixing, Placement, and Curing Best Practices (What to Follow If Allowed)
When approval exists, follow a disciplined workflow for dosing and mixing to keep variables controlled. Document the exact quantity used and the timing of addition in the batch records. Use calibrated equipment and refuse any guesswork on site.
Place and compact promptly after mixing to minimize segregation or premature stiffening. Implement a proper curing plan aligned with the accelerated set to avoid cracking or thermal issues. Always verify compatibility with the rest of the mix and reinforcement materials.
Tools and materials checklist for safe use
Before starting any work with calcium chloride, ensure you have the right tools and materials. This list helps prevent mistakes and keeps your team safe.
- Personal Protective Equipment (PPE): Gloves, safety glasses, and protective clothing to handle chemicals safely.
- Calcium Chloride: Ensure you have the correct type and purity for your project. Check manufacturer’s data sheets to confirm.
- Measuring Equipment: Accurate scales or measuring devices to dose calcium chloride precisely.
- Admixture Chart: Keep a record of dosages, mixing times, and other relevant information specific to your mix design.
- Thermometer: Monitor concrete temperature during mixing and placement to ensure it stays within acceptable ranges.
- Mixing Tools: Clean, functional tools like shovels, hoes, or power mixers for consistent blending.
- Documentation: Keep records of calcium chloride usage, including dates, quantities, and any issues encountered.
- Clean-up Supplies: Have materials ready to clean up spills and dispose of waste responsibly.
Quick rule: Always double-check your tools and materials before starting work. Missing or incorrect items can lead to dosing errors, safety hazards, or project delays.
Mixing and placement procedural controls
Controlling the mixing process is crucial when using calcium chloride. Follow these steps for consistent results:
Start by preparing your concrete mix according to standard procedures. Then, add the calcium chloride as the last ingredient, ensuring it’s evenly distributed throughout the batch.
Monitor the temperature of both the concrete and calcium chloride during mixing. Keep them within 5°F (3°C) of each other to prevent rapid setting or strength loss.
Record-keeping is vital. Document the exact dosage used, mixing time, and any observations during placement. This helps track performance and troubleshoot issues if they arise.
Curing and post-placement monitoring
Proper curing is essential after using calcium chloride to ensure the concrete’s long-term durability. Follow these best practices:
Keep the concrete moist and covered for at least 7 days, following the manufacturer’s recommendations. This allows the calcium chloride to work effectively and prevents excessive moisture loss.
Monitor the concrete’s surface for any signs of cracking, discoloration, or other abnormalities. Address any issues promptly to prevent further deterioration.
Regular inspections: Conduct routine checks on the concrete throughout its service life. This helps identify any durability concerns early and allows for timely repairs if necessary.
Alternatives and Mitigation Strategies to Avoid Chloride Use
Explore non-chloride accelerators or cold-weather strategies like heated forms, enclosure, or warm mixing water to achieve similar outcomes. Consider changing mix design or cement type if early strength is a concern. When chloride use is off the table, document acceptable alternatives in the project plan.
If chlorides were used unintentionally, mitigation options include adjusting curing conditions, focusing on proper consolidation, and performing targeted tests to assess corrosion risk. Record any corrective actions and communicate changes to the crew and inspector.
Non-chloride accelerators and admixture options
If you’re looking to speed up concrete setting time without using calcium chloride, there are several non-chloride alternatives available. These include:
Accelerators: Non-chloride accelerators like calcium formate, calcium acetate, or sodium hexametaphosphate can help reduce initial and final set times.
Admixtures: Certain admixtures can also aid in accelerating concrete setting. These include some types of superplasticizers and certain water-reducing agents. When discussing these options with suppliers, make sure to ask about their specific effects on setting time, strength development, and any potential impact on the concrete’s long-term performance.
Thermal and procedural alternatives (heating, insulating, mix design)
In many cases, you can replace the need for calcium chloride by adjusting your concrete placement procedures. Here’s how:
Heating: Warming the concrete before and during placement can help it set faster in cold weather. You can heat the aggregates, water, or even the entire mix using specialized equipment.
Insulating: Keeping the placed concrete warm with insulated blankets or enclosures can also speed up setting times. This is particularly useful when pouring large slabs or other horizontal surfaces.
Mix design adjustments: Changing your concrete mix design can also help accelerate setting times. For example, using a higher cement content or incorporating supplementary cementitious materials like fly ash or slag can aid in faster strength development.
Mitigation if chloride use has already occurred
If calcium chloride has been used unintentionally in your concrete, it’s crucial to document the incident and assess the damage. Here are the steps you should take:
Documentation: Keep detailed records of when, where, and how the calcium chloride was added. This will be essential for any future assessments or remedial actions.
Testing: Conduct chloride ion concentration tests on the affected concrete to determine the extent of the contamination. This can help you assess the potential risks to the concrete’s durability and reinforcement corrosion.
Consultation with engineers: Based on the test results, consult with a structural engineer or materials specialist to discuss possible remedial actions. These may include additional protective measures for the reinforcement, changes in maintenance procedures, or even partial demolition and replacement of the affected concrete.
Testing, Verification, Inspection, and Visual Checkpoints
Establish a visual checklist for early-age appearance, set time indicators, and surface quality to spot issues fast. Plan field tests and lab analyses as defined in the project specs to verify compliance or detect anomalies. Use the results to decide if adjustments are necessary before continuing with further pours.
On site, look for corrosion cues on exposed rebar, unexpected color changes in hardened concrete, or cracking patterns that signal improper curing. Maintain records of all inspections, test results, and any corrective actions taken. Share findings with the team and stakeholders to keep the project aligned.
Field visual checkpoints during and after placement
Use this checklist while placing concrete with calcium chloride to ensure everything’s going as planned.
- Set time: Check if the concrete is setting within the expected time. Too fast? You might’ve used too much calcium chloride.
- Bleed water: Look for excessive bleed water on the surface. It could indicate a weak mix or too much water.
- Cracking: Keep an eye out for early cracks, especially around edges and joints. This might signal inadequate curing or placement issues.
- Efflorescence: Check for white powdery deposits on the surface after a few days. It’s normal, but excessive amounts could indicate problems with the mix or placement.
- Finishing: Ensure the concrete is finished properly to avoid issues like honeycombing or incomplete consolidation.
- Curing: Monitor the curing process. Too little moisture can cause scaling, while too much can lead to excessive efflorescence.
- Joints: Check that control joints are forming properly and not cracking prematurely.
- Color uniformity: Ensure the concrete has a consistent color throughout. Any variations might indicate issues with the mix or placement.
Quick rule: Regular visual checks help catch problems early, saving you time and money in the long run.
Laboratory verification and periodic quality checks
Regular lab tests ensure your concrete mix is performing as expected and that chloride levels are within safe limits.
- Slump test: Check the consistency of your fresh concrete. Too much water can lead to strength loss and durability issues.
- Air content test: Ensure the required amount of air is entrained in the concrete for proper freeze-thaw resistance.
- Chloride test: Regularly check chloride ion content. Excessive amounts can cause corrosion of reinforcement.
- Compressive strength test: Monitor the concrete’s compressive strength to ensure it meets design requirements.
- Rapid chloride permeability test (RCPT): Check the concrete’s resistance to chloride ion penetration. Low resistance can lead to corrosion of reinforcement.
- Petrographic examination: If problems arise, this test can help identify the cause, such as poor aggregate quality or improper mixing.
- Thermal analysis: Check for excessive heat generation during hydration. Too much heat can lead to cracking and other issues.
Quick rule: If test results are out of spec, consult a materials engineer immediately.
Troubleshooting common problems and FAQ
Here are some quick fixes for common issues you might face when using calcium chloride in concrete.
- Unexpected setting: If the concrete is setting too fast, reduce the dosage of calcium chloride. Too slow? Add more or use a faster-setting type.
- Surface defects: Incomplete finishing can cause honeycombing or other surface issues. Ensure proper consolidation and finishing techniques are used.
- Suspected corrosion: If you suspect reinforcement corrosion, perform a half-cell potential test. If results are positive, consult an engineer for repairs.
- Cracking after placement: If cracks appear soon after placement, it could be due to excessive shrinkage or inadequate curing. Adjust your mix design and curing practices accordingly.
- Excessive efflorescence: This can often be mitigated by reducing the water-cement ratio in the mix and ensuring proper curing.
Quick rule: If you’re unsure about any issue, don’t hesitate to consult a professional. It’s better to be safe than sorry.
Decision Framework, Sample Spec Language, and Takeaways for Specifiers and Contractors
Develop a clear decision framework that steps through approval, compatibility checks, and documentation. Include contract language snippets that define when chlorides are allowed, limits to use, and required approvals. Use straightforward language that helps specifiers and contractors align on intent.
Summarize practical takeaways: always verify with the specs and manufacturer, document every decision, and prioritize durability and corrosion resistance. Keep a simple checklist on site to prevent ad hoc use and to protect the concrete’s long-term performance.
Simple decision checklist for the job site
Before you decide to use calcium chloride, run through this checklist. It’ll help you ensure it’s safe and beneficial for your project.
- Check local codes: Calcium chloride might be restricted in your area due to environmental or structural concerns.
- Evaluate climate: It’s not suitable for hot, dry climates. High temperatures speed up the setting time too much, leading to weak concrete.
- Assess mix design: It works best with low water-cement ratios (0.45 or less). Higher ratios can cause bleeding and segregation.
- Consider reinforcement: Avoid using it if you have closely spaced reinforcing bars. Chlorides can accelerate corrosion.
- Check placement time: It reduces the initial setting time, so ensure your team can place and finish the concrete quickly.
- Evaluate curing conditions: You’ll need to cure the concrete properly. Insufficient curing leads to weak, porous surfaces.
- Consider alternatives: If you’re unsure, explore non-chloride accelerators or thermal alternatives before deciding.
- Review project timeline: It can speed up construction schedules, but only if your team is ready for the faster setting time.
Quick rule: If you’re unsure about any of these points, consider an alternative accelerator or consult with a concrete expert.
Recommended contract/spec phrases to use or avoid
Including the right phrases in your contract can help prevent issues and ensure everyone’s on the same page.
- Avoid: “Use calcium chloride as needed.” This is too vague. It doesn’t specify when or how much to use, leading to potential problems.
- Include: “Calcium chloride shall only be used with prior written approval from the engineer.” This ensures someone knowledgeable reviews its use.
- Specify: “Testing for chloride content will be conducted in accordance with ASTM C1202/C1202M.” This standard test method helps ensure quality control.
- Avoid: “Calcium chloride shall not exceed 2% by weight of cement.” While this is a common limit, it might not be suitable for all projects. Consult with an expert first.
- Include: “The contractor shall provide documentation showing the source and quality of calcium chloride used.” This helps ensure you’re using a reputable product.
These phrases help clarify expectations, prevent misuse, and ensure everyone’s working towards the same goal: durable, high-quality concrete.
Final takeaways and action items
If you’re considering calcium chloride, here are some key actions to manage risk and ensure durable concrete:
Engineers: Review the project’s needs carefully. Consult with a concrete expert if you’re unsure about using calcium chloride. Always specify testing requirements in your contract.
Contractors: Ensure your team is ready for the faster setting time. Have a plan for proper curing and finishing. Keep detailed records of when, where, and how much calcium chloride was used.
Both parties should communicate openly about any concerns or changes in plans. Regularly review and update the project’s needs to ensure calcium chloride remains a beneficial addition, not a liability.
Conclusion
Calcium chloride can speed up setting, but it can also cause corrosion, cracking, or delayed problems if used inappropriately. The bottom line is to protect durability, safety, and appearance by sticking to approved scenarios and verified procedures.
Before you touch a bag or mix, confirm the project needs, check the material specs and standards, performTesting and verification in a small test area, and follow a tight sequence: confirm approval, measure the dosage carefully, mix with the correct water-to-concrete ratio, place and finish promptly, and monitor curing with the required protections.
Common mistakes to avoid are using chloride where it isn’t allowed, oversizing the dosage, and skipping early inspections or curing guidance. Always apply a simple safety rule: if in doubt, test first, document the results, and don’t exceed the approved limits. If you encounter complex conditions or conflicting guidance, take a step back and reassess with the specifier or a pro.
FAQ
Can calcium chloride be used to speed up concrete setting in DIY projects?
It can accelerate early strength in some mixes, but it isn’t right for all jobs. Don’t use it with reinforced concrete or where you have exposed steel. Check the product label and the concrete mix instructions before deciding.
What should I check before deciding to use calcium chloride?
Look at whether your mix is air-entrained, the presence of steel reinforcement, and the exposure conditions. Read the manufacturer’s instructions and any local guidance. If in doubt, skip it and choose a non-chloride option.
What are the risks or red flags with calcium chloride in concrete?
Calcium chloride can promote corrosion of steel and create uneven curing or scaling in some mixes. It may also affect bond between the new concrete and existing surfaces. If you see signs of moisture, exposed steel, or questionable bond, stop and reassess.
What should I do instead or how can I mitigate issues without calcium chloride?
Use admixtures that are designed to accelerate without chlorides, or adjust your pour schedule with proper curing practices. Always follow the product’s instructions and local rules, and talk to the supplier about compatible options for your specific mix and reinforcement. If you’re unsure, stick to plain water curing and standard set practices.