
Introduction
Plaster over cement board can work, but only with the right boards, preparation, and compatible products.
You’ll learn when it’s appropriate, avoid common pitfalls, and follow practical steps for prep, setting, and finishing so you can decide if it’s right for your project.
Key takeaways
- Plastering over cement board is feasible but requires careful planning and preparation.
- Clean the surface thoroughly, ensure it’s dry, and apply a primer for optimal adhesion.
- Select high-quality, cement-based plasters specifically designed for use with cement boards.
- Avoid areas prone to moisture without proper ventilation or protective measures in place.
- Apply plaster in thin layers, gradually reducing the spacing between coats as the height increases.
- Inspect your work regularly to prevent cracks and ensure even drying of each layer.
- Budgeting for costs can vary widely; expect material expenses and labor time ranging from 1-2 days depending on project size and complexity.
Table of Contents
- Introduction
- Key takeaways
- Overview — Can You Plaster over Cement Board?
- Surface Preparation and Planning
- Which Plaster Products Work over Cement Board
- Product Comparison and Real-world Behavior
- Application Techniques and Best Practices
- Performance in Different Climates and Moisture Conditions
- Safety, Tools, and Materials Checklist
- Costs, Time Estimate, and Maintenance
- Visual Checkpoints and Final Inspection
- Conclusion
- FAQ
Overview — Can You Plaster over Cement Board?
Cement board is a moisture-resistant substrate used behind plaster or tile to prevent water damage and maintain structural integrity. For interior projects, it works well on walls in bathrooms, kitchens, and basements; for exterior use, ensure the board provides a stable base with added weather barriers, flashing, and proper assembly.
Proper installation is crucial: tape joints, drive fasteners flush, roughen or prime surfaces to enhance bonding. Check flatness, address any corrosion issues, and follow manufacturer recommendations and local codes before starting your project.
Cement Board Types and Surfaces
Fiber-cement boards offer a rough texture for better adhesion, while cement-backed tile boards may require texturing. Ensure joints are taped to prevent water penetration and prepare the surface by roughening or priming it for plaster application.
For exterior use, add a moisture barrier between the cement board and plaster to protect against weather elements like rain and snow. Proper sealing can prevent issues such as delamination and cracking due to freeze-thaw cycles.
When to Choose Plaster vs. Alternative Finishes
Plaster offers durability and moisture resistance, ideal for bathrooms and kitchens. However, consider cost-effective alternatives or quick installation options like thinset with ceramic tiles if budget is a concern.
For exterior walls, plaster provides excellent protection but can be labor-intensive compared to painting or using veneers. Evaluate long-term durability and maintenance requirements when choosing between these finishes.
If aesthetics are important, plaster excels in creating unique textures and designs that other finishes may not offer.
Surface Preparation and Planning
Ensure the cement board is in good condition, flat, clean, with no significant delamination, dust, oils, or loose fasteners. Address any issues that may arise during preparation.
Plan for repairs or replacements before mixing plaster, but be prepared to reassess as needed if unexpected problems occur during application.
Clean surfaces thoroughly and choose the right primer or bonding agent based on substrate conditions. Time your coat to avoid curing delays that weaken adhesion, especially in moisture-prone areas.
Test moisture levels using a hygrometer; if high moisture is detected, plan for vapor barriers such as polyethylene sheets or breathable membranes like bituminous paper. Align plaster cure times with ambient conditions to maintain predictability even on imperfect substrates. Set clear inspection points before starting plastering to catch issues early.
Fastening, Taping, and Joint Treatment
To ensure your cement board is ready for plaster, start by securing it firmly to the wall or ceiling with screws spaced appropriately based on weight and movement concerns.
Cover joints and seams with fiberglass mesh tape or reinforcing mesh to prevent cracks. Apply joint compound over the tape to create a smooth surface before plastering.
For corners or edges needing extra support, use corner beads back-buttered with joint compound for secure bonding.
Primers, Bond Coats, and Scratch Coats
Use a bonding agent or primer to improve adhesion if your cement board has oils or residues. This is crucial for ensuring a strong bond.
A scratch coat can roughen smooth surfaces and provide texture for subsequent coats of plaster. Apply it thinly and score with a trowel.
In moisture-prone areas, an acrylic primer might work better than a cementitious one due to faster drying and water resistance. Follow manufacturer instructions on timing between priming and applying your first coat of plaster.
Before proceeding, perform adhesion pull tests as needed to ensure proper bonding. Reassess if results are unsatisfactory or if substrate issues arise.
Which Plaster Products Work over Cement Board
Selecting the right plaster type is crucial for a successful DIY project. Incorrect choices can lead to cracks, poor adhesion, or mold growth in high-humidity areas like bathrooms and kitchens.
Cement-based Plasters (Portland/lime-cement)
These plasters bond well with cement board and are moisture-resistant, making them ideal for humid environments. Ensure the surface is clean and dry before applying a bonding agent if required by the product’s data sheet. Apply a thin scratch coat first, followed by additional layers as needed. Allow each layer to cure properly according to the manufacturer’s guidelines.
Gypsum-based Plasters
Gypsum plasters are suitable for dry interior spaces but require careful moisture management and proper substrate preparation. Clean the surface thoroughly and apply a bonding agent if recommended by the product’s data sheet. Avoid using gypsum-based plasters in areas with high humidity or moisture exposure to prevent mold growth and structural damage.
Acrylic and Polymer-modified Plasters
These flexible plasters offer excellent adhesion and are ideal for exterior applications and humid interiors. Clean the surface thoroughly and use a bonding agent if necessary, following the product’s data sheet instructions. Apply in thin layers to prevent cracking and ensure durability.
Product Comparison and Real-world Behavior
This section compares representative products like Gold Bond Kal-Kore versus solid alternatives, focusing on adhesion to cement board, crack resistance under typical substrate movement, moisture tolerance in baths and kitchens, ease of finishing, and cost per square foot. We’ll provide a concise decision matrix based on availability, price tier, and common use by DIYers versus pros.
Practical real-world notes cover substrate prep, mixing ratios, recommended thickness, cure times, and common failure modes. This information helps you plan primer needs, backing board conditioning, ventilation, clean-up, and flags warranty or code considerations before committing to a product.
Gold Bond and Manufacturer-specific Notes
Gold Bond products are designed for cementitious substrates like cement board. Follow the manufacturer’s guidelines on substrate preparation, including cleaning and priming the cement board before plastering.
The recommended thickness typically ranges from 1/8 to 1/4 inch per coat. Ensure proper curing time between coats as specified by the manufacturer to achieve optimal adhesion and durability.
Competing Products and When They Outperform
Silica-reinforced plasters offer enhanced durability and crack resistance, making them ideal for areas prone to substrate movement.
Polymer-modified plasters provide better flexibility and water repellency compared to traditional cement-based plaster. These products are suitable for moisture-prone environments or projects requiring faster drying times.
Choose the right product based on your project’s specific needs, such as durability requirements or resistance to humidity.
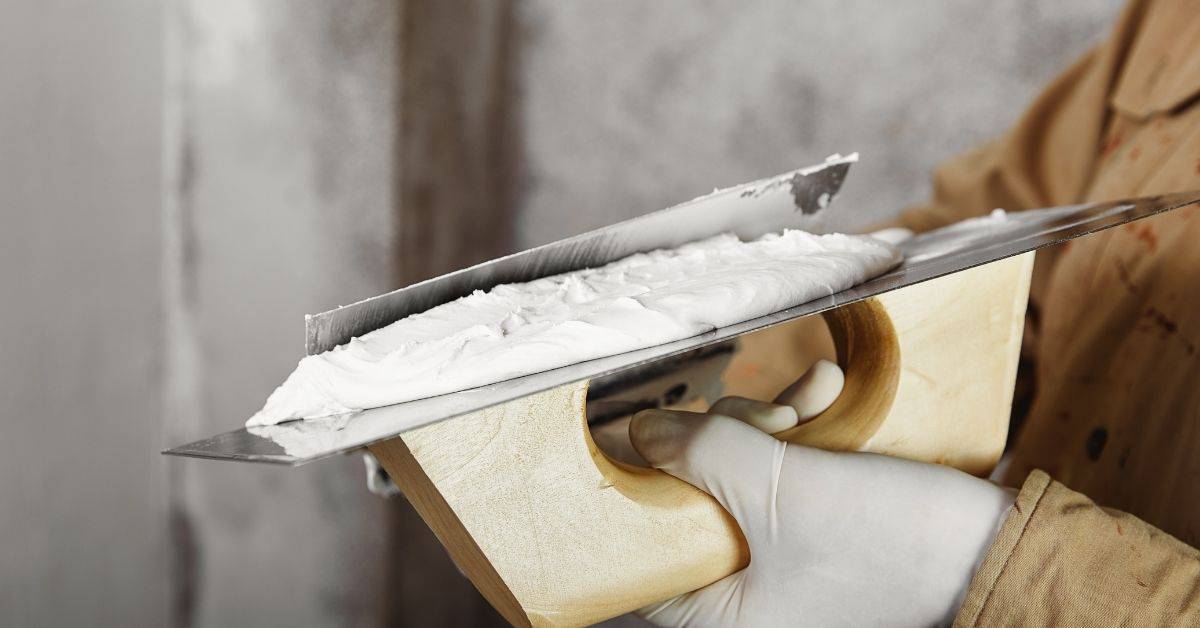
Application Techniques and Best Practices
Start with a clean, flat cement board and a solid moisture barrier. Decide early if you’ll do a single-coat veneer or a traditional multi-coat system, then mix to a DIY-friendly consistency and plan the pass sequence from bonding to finish.
Maintain steady trowel angles, apply consistent coats, and finish with a smooth float to minimize pinholes and cracks. Proper prep and correct coating choice save time and prevent rework. Good mixing, timing between passes, and careful curing protect bond strength and reduce hairline cracks on DIY projects.
Thickness, Layering, and Curing Times
The thickness of each plaster coat is important for a smooth finish without cracks. For the base layer or scratch coat, aim for approximately 1/8 to 1/4 inch thick to ensure good adhesion and coverage over imperfections.
After applying the initial coat, allow it to dry thoroughly before moving on to subsequent layers. Typically, wait at least 24 hours between coats, but this can vary based on humidity levels and room temperature. In humid conditions, you might need longer drying times to prevent moisture from causing issues.
During the curing process, keep the plaster moist by misting it lightly with water every few hours for several days after application. This helps prevent cracking and ensures a strong bond between layers.
Reinforcement and Control Joints
To minimize cracks, use fiberglass mesh or corner reinforcement tape at corners and edges where plaster meets walls. This helps to distribute stress evenly across the surface.
Control joints should be placed every 10 feet in both directions for large areas to allow controlled expansion and contraction without causing unsightly cracks. Use a straight edge to mark these lines before applying plaster, then cut through the mesh reinforcement at each joint location.
For added strength, reinforce corners with metal corner beads or pre-cut fiberglass tape designed specifically for this purpose. This ensures that corners remain strong and crack-free over time.
Performance in Different Climates and Moisture Conditions
Climate affects the bond between plaster and cement board, influencing shrinkage during curing. Hot and dry climates require careful moisture control; cold and freezing conditions demand freeze-thaw resistance; humid environments need breathable plasters; and coastal areas must handle salt exposure.
Select polymer-modified Portland cement for strength in most climates or gypsum-based plaster with moisture resistance where quick drying is essential, but consider specific project needs as ideal plasters may vary. Ensure proper substrate preparation, including testing moisture content and running adhesion pull tests to avoid failure modes such as cracking due to excessive movement.
Exterior vs. Interior Considerations
Select plasters that can withstand UV exposure, thermal movement, and moisture fluctuations for exterior use. Polymer-modified or waterproofing additives are often necessary in harsh conditions. For interiors, focus on moisture management in wet areas like bathrooms and kitchens.
Ensure the cement board is dry and free of contaminants before applying any primer or bond coat. Proper substrate preparation sets a solid foundation for long-lasting plaster performance.
Freeze-thaw, Salt, and Coastal Performance
In coastal areas with high salt content, choose plasters that resist corrosion and handle repeated freeze-thaw cycles. Polymer-modified or cementitious options often work best in these conditions.
Add waterproofing admixtures to enhance the plaster’s ability to repel moisture and resist salt damage. Regular inspections are crucial; look for signs of cracking, peeling, or discoloration that might indicate issues with freeze-thaw cycles or salt exposure. Address problems early to prevent further deterioration.
If you notice hairline cracks or delamination during regular checks, stop and reassess the situation. Consult a professional if unsure about repair procedures or plaster selection for complex conditions.
Safety, Tools, and Materials Checklist
This section provides a checklist of safety measures, tools, and materials needed before starting cement or gypsum plastering. Put on eye and face protection, a dust mask or respirator, chemical-resistant gloves, and long sleeves and pants to control dust and fumes. Ensure clear ventilation.
Gather core mixing and application tools—drill with a paddle mixer, a mixing pail, trowels of various sizes, a hawk, a screed or straight edge, protective coverings, and choose the plaster type (cementitious or gypsum). Note compatible bonding agents, additives, sealants for moisture-prone areas, and primer required for cement board.
Dust, Silica, and Ventilation Precautions
Cutting cement board or mixing portland-based plasters can release silica dust. Wear a respirator mask to protect your lungs.
- Choose appropriate respiratory protection based on the task.
- Use wet methods for cutting and drilling to reduce dust.
- Work in well-ventilated areas or use exhaust fans.
- Sweep up dry debris with a HEPA vacuum regularly.
- Avoid eating, drinking, or smoking near dusty materials.
- Store unused material bags off the ground and away from moisture.
- Wear chemical-resistant gloves when handling plaster mixes.
- Use dust extraction systems if available for large projects.
- Check local regulations on silica exposure limits.
- Label all containers with proper disposal instructions.
- Dispose of waste in accordance with local environmental laws.
- Wear long sleeves and pants to prevent skin contact.
If you notice any movement or settling during application, stop work immediately and address the issue before continuing.
Tools and Mixing Equipment
Having the right tools is crucial for a smooth plastering job. Here’s what you need:
- A drill with a paddle mixer attachment.
- A mixing pail or bucket, typically around 5 gallons in size.
- Trowels of various sizes for applying and smoothing plaster.
- A hawk to hold small amounts of plaster while working.
- A screed or straight edge to ensure even layers.
- Protective coverings like drop cloths to shield the floor.
- A mixing tray for easy access to plaster during application.
- A sprayer for applying water to keep plaster moist during curing.
If you notice any movement or settling while working, pause and address it before continuing.
Costs, Time Estimate, and Maintenance
This section breaks down a small job into a simple cost plan: materials (plaster type, bonding agents, cement board) with rough price ranges, separate tools (trowels, mixers, protective gear) with where to source them, and a clear labor framework (DIY vs. hire) including regional price differences. We’ll give an example total for a 4×6 ft area and set reasonable time estimates for surface prep, setting and cure, number of coats, plus buffers for conditions and safety checks.
Also include a practical maintenance plan: crack prevention, patching timelines, moisture management, and when to recaulk or reseal to maximize lifespan. Compare common plaster systems over cement board in cost and maintenance: bonded veneer plaster, traditional plaster, cementitious stucco, with quick pros and cons.
Budgeting and Comparing Material Costs
To estimate material costs, start by measuring your project area in square feet. For a small wall or ceiling of 4×6 ft, you’ll need about 10 to 15 pounds of plaster mix. Expect bonding agents like acrylic latex at around $2 per quart and cement board sheets costing roughly $8 each.
Compare costs by calculating the total material price for your square footage. For example, a gallon of plaster might cover up to 60 sq ft but can cost twice as much as a bag mix. Factor in tools like trowels and mixing buckets at around $50-$100 depending on quality.
DIY labor is typically cheaper than hiring professionals, who charge about $30-$70 per hour. For a weekend project, plan for materials to be 60-80% of your total budget with labor making up the rest.
Common Mistakes, Troubleshooting, and Repairs
Mistakes in plastering over cement board can lead to costly repairs. Here are some common issues:
- Mistake: Not priming the surface properly before applying plaster. This leads to poor adhesion and cracking.
Fix: Use a bonding agent or primer designed for cement board. - Mistake: Using too much water when mixing plaster, causing it to dry out quickly and crack.
Fix: Follow the manufacturer’s instructions on water-to-plaster ratio carefully. - Mistake: Not allowing enough time for each coat of plaster to cure before applying another layer.
Fix: Wait at least 24 hours between coats, depending on environmental conditions and product specifications. - Mistake: Overlooking the importance of proper ventilation during application.
Fix: Ensure good airflow to prevent dust buildup and improve drying time. If you experience difficulty breathing or high dust levels, stop work immediately and reassess your workspace. - Mistake: Not sealing or resealing joints properly, leading to water damage over time.
Fix: Regularly check and maintain caulk around edges and corners. If you notice any gaps or cracks forming, address them promptly to prevent further damage.
The fastest on-site correction is often addressing moisture issues immediately by drying out wet areas thoroughly before proceeding with plaster application.
Visual Checkpoints and Final Inspection
Visual adhesion and bond are your first telltale signs of a solid plaster over cement board. Look for uniform, tight adhesion with no delamination, peeling, or hollow spots when you gently tap, and check that edges pull consistently with fasteners so there are no surprises after paint. Inspect surface texture and flatness by running a straightedge or level across the board, noting any high or low spots, excessive feathering, or ridges that will telegraph through the finish.
Why it matters: when adhesion, texture, and thickness line up, the surface will paint true, hold up, and resist cracks, saving money and hassles down the line. Keep a brief punch-list as you go: voids filled, touch-ups done, edges feathered, fasteners flush, and paint-primer compatibility verified, plus a quick moisture and cure check before you coat.
Adhesion and Surface Integrity Tests
To ensure your plaster job is solid, start by tapping the surface gently with a hammer or knuckle. Listen for dull thuds that indicate loose spots or hollow areas.
- Tap test across the board to check for uniform adhesion.
- Inspect edges and fastener locations for tight pull without gaps.
- Look for hairline cracks, especially around control joints.
- Check for blisters or bubbles that might indicate moisture issues.
- Verify no delamination at corners or edges.
- Feel the surface for any rough patches or uneven textures.
- Inspect for consistent texture without excessive feathering.
- Look out for any signs of shrinkage cracks, especially near control joints.
If you find issues like hollow spots or hairline cracks, address them immediately to prevent further damage.
Ready-to-paint and Finishing Criteria
A plastered surface is ready for painting when it feels dry to the touch and shows no signs of moisture or blisters. Ensure the texture is even without high spots.
- Check that all voids are filled and touch-ups complete.
- Ensure edges are feathered smoothly into surrounding areas.
- Make sure fasteners are flush with the surface.
- Verify compatibility between primer and paint for best adhesion.
- Confirm proper curing time has passed before applying finishes.
- Check that corners, edges, and penetrations have full coverage.
- Evaluate flatness using a straightedge or level.
If any issues are found during inspection, address them promptly to avoid problems later on.

Conclusion
Plastering over cement board can be durable and look sharp, but only if you lock in proper prep, the right product, and solid moisture control. The core idea is simple: prep clean, choose compatible materials, and cure with care to avoid cracks, delamination, or water damage.
First, inspect for flat, undamaged boards and fix any bowing or loose panels, clean the surface, and follow the plaster manufacturer’s guidance. Then pick a plaster product that is labeled as compatible with cement board, mix and apply per instructions, apply in the recommended coats with proper embedment, keep joints and edges sealed, protect from rapid moisture changes during curing, and finish with a compatible primer and sealant for the intended environment. Finally, perform visual checkpoints as you go and after, testing for adhesion and moisture exposure, and schedule maintenance checks to catch small problems before they grow.
Common mistakes to avoid include using an incompatible plaster or base, skimping on surface preparation or waterproofing, and rushing curing or skipping proper ventilation and safety gear. Always test a small area first, keep moisture in check, and wear eye protection and a mask when mixing and applying materials. If you see active moisture, suspect hidden damage, or you’re unsure about substrate flatness, stop and reassess—rework the prep or call for help before you proceed.
If the project involves a large area, high humidity, or potential structural concerns, it makes sense to bring in a pro rather than pushing ahead blindly. Stay methodical, follow the checklist, and you’ll end with a solid, durable finish that looks good and lasts. You’ve got this—steady progress beats rushed, costly mistakes.
FAQ
Can I plaster directly onto cement board?
In most cases, yes. Cement board acts as a great base for plaster. Just ensure the board is properly sealed first.
Which plaster works best on cement board?
Go for high-quality lightweight or traditional gypsum plasters. Avoid exterior-specific plasters with added fibers, they’re not needed here.
Should I prime my cement board before plastering?
Absolutely. Priming seals the board and improves plaster adhesion. Use a quality primer to ensure nothing goes wrong later.
Can I use exterior plaster on cement board in my house?
No! Exterior plasters have extra ingredients to resist water, making them harder to sand and finish neatly inside your home. Stick to interior plasters only.
<