

Introduction
Plaster patch shrinkage is the small pullback and cracking that happens as a plaster patch dries. It occurs when the patch loses moisture and the set plaster contracts, often showing up as fine cracks or a mismatch in texture with the surrounding wall.
Watch for hairline cracks, edges that pull away, or visible ridges around the patch. Moisture levels and the drying rate matter, so follow proper layering and timing and check manufacturer guidelines for curing conditions. If you suspect settling or differential movement, pause and inspect the wall before patching again.
Key takeaways
- Identify plaster shrinkage by fine cracking, pinch-line gaps, and inconsistent patch texture.
- Control moisture with gradual layering, letting each coat firm up before next application.
- Avoid rapid drying by maintaining moderate ambient conditions and protecting from drafts.
- Check substrate for movement and settling; differential movement can magnify cracks.
- Use proper bonding and feathering techniques to minimize visible joints.
- Safety: wear eye protection and masks when sanding plaster and mixing mortars.
Table of Contents
- Introduction
- Key takeaways
- What Plaster Shrinkage Is and How to Recognize It
- Why Shrinkage Happens: Moisture, Mixes, and Substrate Interactions
- Layering Techniques to Minimize Shrinkage in Patchwork
- Timing and Environmental Controls During Application and Curing
- Practical Preparatory Steps and Tools Checklist for Successful Patches
- Troubleshooting Common Problems and When to Call a Professional
- Conclusion
- FAQ
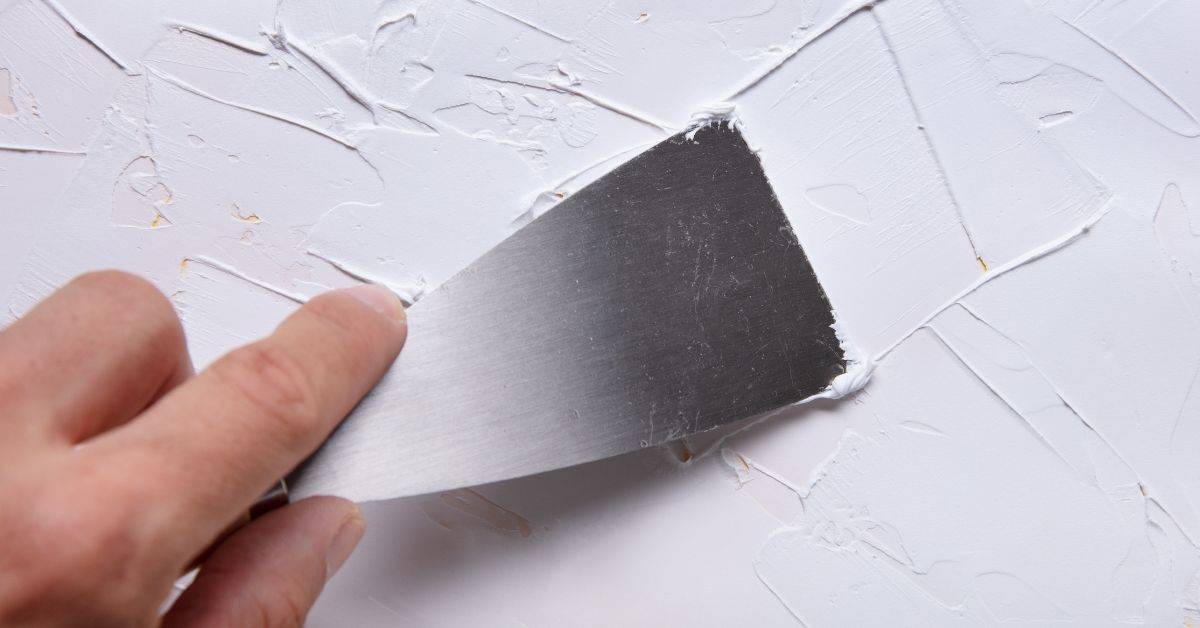
What Plaster Shrinkage Is and How to Recognize It
Plaster shrinkage comes in two flavors: plastic and dry. Plastic shrinkage happens as the mix begins to set and still has workability, while dry shrinkage shows up after the surface has stiffened and continues to tighten as it dries. Recognizing which type you’re dealing with helps you choose the right fix and timing for patches.
In typical patchwork across walls, look for fine, hairline cracks that form patterns like zigzags or spider webs, often near edges, joints, or corners. These patterns differ from cracks caused by settlement or moisture intrusion, which tend to follow more regular lines or originate from structural gaps. A quick field check includes noting when the cracks appear relative to movement, temperature changes, and how the surface feels to the touch as it cures.
Common visual signs and crack patterns
Plaster shrinkage often reveals itself through distinctive cracks. Here’s what to look for:
Hairline cracks – These are thin, almost invisible lines that appear on the surface. They’re usually a sign of minor plastic or dry shrinkage.
Diagonal lines – Wider, diagonal cracks often indicate more severe plastic shrinkage. They can run from corners to mid-wall, forming a zigzag pattern.
Horizontal splits and stair-step patterns typically suggest dry shrinkage. These cracks follow the direction of joints or run horizontally across walls, indicating that the plaster has shrunk evenly as it dried.
Timing of appearance: plastic vs dry shrinkage
The time at which cracks appear can help you identify whether they’re due to plastic or dry shrinkage:
Plastic shrinkage – These cracks typically show up within minutes to hours after plaster application. They form as the surface water evaporates quickly, leaving the top layer with less moisture than the underlying layers.
Dry shrinkage – Cracks from dry shrinkage usually become noticeable days to weeks post-application. As the plaster dries out evenly over time, it shrinks uniformly, causing cracks to form.
Timing is crucial for mitigation. Early intervention can prevent minor plastic shrinkage cracks from worsening. Meanwhile, identifying dry shrinkage early helps you plan for controlled cracking and avoid excessive shrinkage.
Why Shrinkage Happens: Moisture, Mixes, and Substrate Interactions
Moisture loss creates tensile stresses as plaster dries, especially where restraint from framing or adjacent materials stops the surface from moving freely. Internal gradients pull the surface tighter than the interior, which invites shrinkage cracks to form in vulnerable spots. The way water is handled in the mix and how the substrate draws moisture all feed into how much shrinkage you’ll see during cure.
Water-to-cement ratio, mix consistency, and any excess water influence the pore structure and the early-age behavior of the plaster. Admixtures change set time, water demand, and overall shrinkage tendency, so compatibility with plaster is key. A porous or dry substrate pulls moisture from the new patch, creating differential shrinkage between layers and near edges, which compounds crack risk if movement or vibration occurs. Layering and controlled timing help minimize internal stresses, with practical checks like moisture balance and temperature control guiding your approach.
Surface evaporation vs internal curing mismatch
Plaster dries from the surface first. This outer layer hardens quickly, but the inside stays soft.
The hardened surface can’t stretch as the inner plaster shrinks. This creates tension and pulls on the surface, causing cracks.
To minimize this: Keep the top layer moist with a damp cloth or plastic sheeting until it’s fully cured.
Effect of substrate moisture demand and pre-wetting
Dry substrates suck water out of the plaster. This causes differential shrinkage – more at the edges than in the middle.
Pre-wetting or priming the substrate before applying plaster helps. It reduces suction, letting the plaster cure evenly.
To do this: Mist the substrate lightly with water before applying the first layer of plaster. Let it sit for 10-15 minutes to allow absorption.
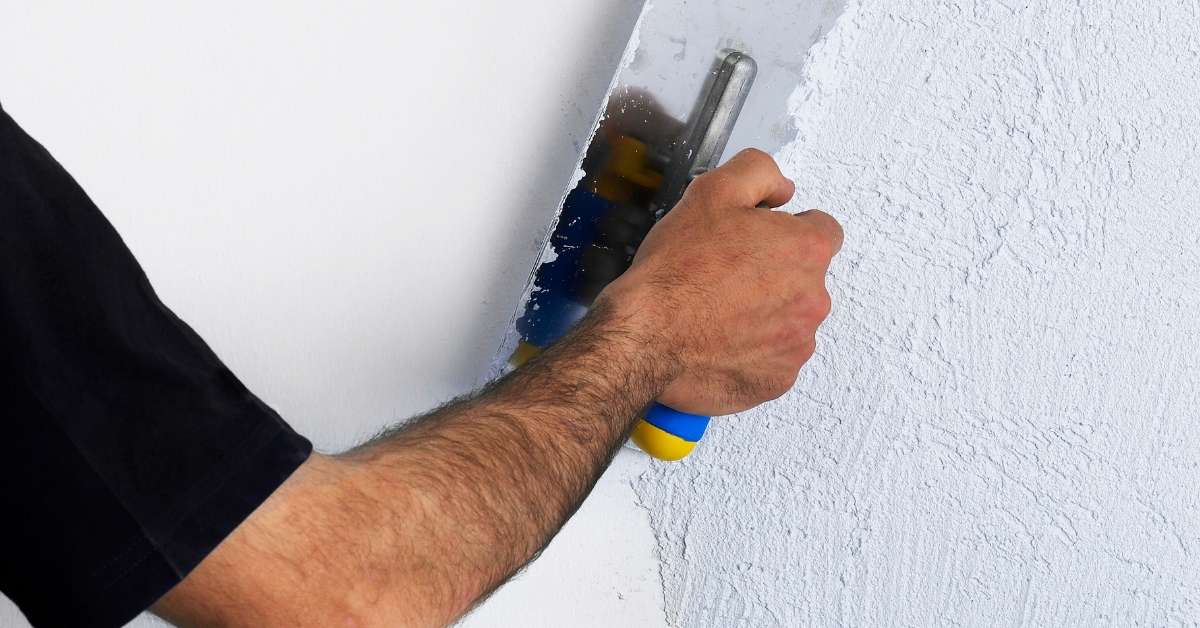
Layering Techniques to Minimize Shrinkage in Patchwork
The core idea of a multi-coat approach is to control moisture loss, manage heat/workability stresses, and align micro-surfaces so cracks don’t propagate. Each coat plays a role: a bonding layer to grip, an intermediate key to build stiffness, and a final skim coat to create a smooth finish. This sequencing helps keep shrinkage cracks small and easier to protect against with proper curing.
When you plan coat thicknesses, keep the bonding/adhesion layer thin and the intermediate coat a touch thicker, with a final feathered skim that’s shallow. Choose bonding agents and primers based on substrate and patch type, and decide between setting plasters for rapid firmness or drying plasters for easier finishing within the patch sequence. Prepare the surface and environment carefully, checking tack and keys, and pace drying with attention to edges and transitions to avoid trapped moisture.
Base coat, intermediate coat, and finish coat strategy
The key to successful patchwork is building up layers. Each layer serves a purpose: bonding, strengthening, and finishing.
Bonding/Adhesion Layer (1-2mm): This first layer sticks the patch to the substrate. Use a setting plaster for quick grab. Apply thinly to avoid shrinkage.
Intermediate Key Coats (2-3mm each, 2-3 layers): These build up the bulk of the patch. Use drying plasters here. Each layer bonds to the previous one, creating ‘keys’ that lock together. Apply thin coats to control shrinkage and allow proper curing.
Final Skim/Top Coat (1-2mm): This is your finish. It should be smooth and even. Use a setting plaster for quick drying and easy sanding. Apply thinly to avoid shrinking and cracking.
Key materials, additives, and backing choices
Choosing the right materials is crucial for minimizing shrinkage. Here’s what you need:
- Setting Plasters (e.g., Thinset, Multi-Purpose): Use for bonding layers and final coats. They harden quickly, reducing shrinkage risk.
- Drying Plasters (e.g., Joint Compound, Base Coat): Ideal for intermediate coats. They cure slowly, allowing for better bond formation with the next layer.
- Bonding Agents: Use to improve adhesion between old and new plaster. Apply thinly before your first coat.
- Fiber Reinforcements (e.g., Glass Fiber Mesh): Add to intermediate coats for extra strength and crack resistance. Embed in the middle of each layer.
- Backing Plasters (e.g., Brown Coat): Use as a base for heavy texture or where extra strength is needed. Apply thickly (3-5mm) but allow to cure slowly to avoid shrinkage.
Timing and Environmental Controls During Application and Curing
Set the right window between coats by looking for surface readiness indicators without relying on exact times. Test by touch and surface behavior to avoid applying a coat onto a skin that’s not ready. Managing the ambient conditions is part of the job, not an afterthought, to keep temperatures and humidity in a range that supports even curing.
Use practical controls like gentle heat, controlled ventilation, and moisture management to slow or moderate drying without shocking the work. Keep an eye on substrate versus surface temperatures, and monitor moisture levels to prevent sudden shifts that can drive cracks. Anticipate drafts and contaminants that could compromise bond and cure quality, and adjust your plan accordingly.
Recommended wait times and tests before re-coating
Between coats, let your plaster patch dry naturally. Don’t rush it.
Wait at least 24 hours for the first coat to start setting. Then, test if it’s ready for the next layer:
– Touch: It should feel tack-free, no longer sticky.
– Moisture meter: Check for surface moisture content around 15-20%.
– Thumb test: Press gently with your thumb. If it leaves an imprint but doesn’t crumble, it’s ready.
Controlling environment: humidity, temperature, and drafts
Keep your patch happy during curing. Here’s how:
Humidity: Maintain 40-60% relative humidity. Use a humidifier if it’s too dry.
Temperature: Keep it between 50-70°F (10-21°C). Use heaters or insulation if it’s cold, but avoid rapid temperature changes.
Drafts: Shield the patch from wind. Use temporary barriers or plastic sheeting.
Ventilation is key too. Open windows or use fans to maintain air circulation without causing drafts.
Practical Preparatory Steps and Tools Checklist for Successful Patches
Start with a clear prep workflow: assess the surface, remove loose plaster, and check for damp spots or leaks before planning patch sequencing. This reduces surprises mid-patch and helps you choose the right materials from the outset. A logical sequence keeps patches stable and easier to finish cleanly.
Assemble a tools and materials list that fits your patch job, including bonding agents, patching compound, primers, skim coats, and finishing plaster if needed. Prepare the surface by cleaning, roughening glossy areas, and testing for dampness with a meter. Safety comes first with eye protection, a mask, gloves, and proper ventilation when you’re handling chemicals or dusty surfaces.
Visual checkpoints and measuring progress
Use this checklist to monitor your patchwork’s adhesion and shrinkage at different stages.
- Tapping test: Gently tap the patched area with a trowel. A hollow sound indicates poor adhesion or delamination.
- Crack width gauges: Use them to measure crack widths. If they widen over time, shrinkage is occurring.
- Photographic record: Take photos from the same angle and distance at each stage. Compare them to spot any changes or issues.
- Moisture meter readings: Check moisture levels before and after applying each coat. Significant drops indicate excessive evaporation and potential shrinkage.
- Edge feathering: Inspect edge feathering. If it’s lifting or cracking, re-wetting might be needed.
- Crack patterns: Look for new cracks or changes in existing ones. They can signal ongoing shrinkage.
- Surface appearance: Check for signs of powdering, flaking, or discoloration, which may indicate shrinkage or other issues.
- Timing checks: Keep track of cure times between coats. Too short a wait can lead to excessive shrinkage.
Quick rule: Regular visual checks help catch problems early, saving you time and materials in the long run.
Safety and moisture diagnostics
Before starting any work on damp walls, follow this checklist to ensure safety and accurate diagnosis.
- Mold inspection: Check for visible mold or musty odors. If present, consider hiring a specialist for remediation before proceeding.
- Electrical safety: Turn off power at the main panel and use a non-contact voltage tester to ensure no live wires are nearby.
- Moisture meter: Use one to check moisture levels in walls. Readings over 15-17% may indicate excessive dampness or leaks.
- Leak detection: Inspect plumbing and roofing for signs of water ingress if high moisture readings are present.
- Ventilation: Ensure the area is well-ventilated to avoid inhaling mold spores or dust.
- PPE: Wear safety glasses, gloves, and a mask to protect against dust and potential hazards.
- Specialist consultation: If moisture levels are high or you suspect structural damage, consult a specialist before proceeding with repairs.
- Temperature check: Ensure the temperature is within recommended ranges (50-77°F / 10-25°C) for plaster application and curing.
Quick rule: Safety first! Accurate diagnosis helps prevent further damage and ensures your repairs last.
Troubleshooting Common Problems and When to Call a Professional
Differentiate shrinking from delamination or rapid re-cracking by focusing on moisture balance, substrate movement, and how well the patch material adheres. Layering and timing adjustments can address many of these issues, but persistent patterns may require more insight, which is why clear visuals or notes help you diagnose later. On-site checks after initial repairs guide your next steps and reduce guesswork.
Document cracks with photos and measurements, and record environmental conditions to track changes over time. If you notice signs of structural movement, ongoing damp intrusion, large widening cracks, or suspected subsidence, plan for a professional assessment. When in doubt, err on the side of caution and seek a structural or damp specialist to prevent future failures.
Repair vs replace: assessing patch durability
Before you start patching, ask yourself: will this repair last?
If the cause of the damage is ongoing – like movement or leaks – a new patch might just crack again. First, fix the root problem.
Check for signs of structural issues, damp intrusion, or subsidence. If you’re unsure, call a pro. It’s better to spend more upfront and get it right than keep repairing.
Cost and time implications of preventative layering vs repeated repairs
Layering and timing your patches properly takes more effort upfront. But it’s like painting a wall: you prep once, then paint in layers for a durable finish.
Sure, it might take longer and cost more initially. But consider this: recurring cosmetic repairs add up. Each time you redo a patch, you’re spending again on materials, time, and maybe even labor.
Preventative layering is an investment. It reduces the need for repeated repairs, saving you time and money in the long run. Plus, it ensures your patches last longer, looking good and doing their job.

Conclusion
Shrinkage control comes down to planning and discipline: install patches that dry in stages, keep moisture in check, and respect the substrate so the repair lasts without cracking or reappearing. Safety first keeps you from causing more damage and saves money in the long run.
Before you start, run through this quick check in your head as you work: verify that the area is clean and sound, mix only what you need for the patch, apply in thin, even layers, and maintain steady conditions during cure. After each pass, pause to assess fit and texture, and test a small patch if you’re unsure. If a patch feels tacky or sinks after cure, recheck moisture and timing before proceeding, and never rush the final finish.
Avoid these common traps: skip layering or slam patches with dry plaster, which traps shrinkage cracks; ignore surface prep or use the wrong mix for your substrate; and push curing with heat or fans when the patch is not yet stable. Keep the area ventilated but steady, protect the patch from rapid temperature swings, and always follow the product directions for mixing and curing. If the patch keeps sinking, or you see repeating cracks after several cycles, stop and reassess rather than chasing a quick fix.
When the patch is large, you’re unsure about the substrate, or you notice persistent cracking or dampness, it’s time to call a professional. For small patches that you can manage, stay patient, document moisture conditions, and work in controlled steps. Stay steady, and you’ll get a durable repair that blends in and lasts.
FAQ
What causes plaster shrinkage and how can I spot it early?
Shrinkage comes from moisture leaving the patch as it cures. Look for fine, hairline cracks that run across the patch or along edges where the patch meets the old wall. If you see cracks forming after the patch dries, plan to adjust layering and timing for the next attempt.
Why do moisture and drying cycles produce cracks in patches?
Moisture moves in and out of the patch and substrate, and uneven drying can pull the surface before the base sets. Cracks tend to show up where the patch is thinner or where the substrate moves a bit. Check the surface for pattern cracks that follow joints or edges, not random splotches.
How do settling, subsidence, or movement affect plaster patches?
Walls move with framing and framing settles over time. Differential movement creates new cracks after you patch. If you notice new cracks near corners or at transitions, you may need to re-evaluate substrate and follow slower, layered patching methods.
What practical steps reduce shrinkage through layering and timing?
Use multiple thin coats rather than one thick patch, allowing proper set time between layers. Keep patches away from rapid drying by controlling local airflow and moisture during curing. Always follow manufacturer instructions and check labels for recommended layering order and drying guidance. If unsure, consult product sheets or local guidelines for safe ranges.