
Introduction
The process of applying veneer plaster over blueboard can seem daunting, but understanding the timeline and steps involved can help you plan your project effectively. This guide walks you through the duration of each stage, from preparation to finishing, ensuring you stay on track and achieve a smooth, professional-looking result.
Before we dive into the step-by-step process, let’s briefly discuss what veneer plaster is and why it might be chosen over joint compound for your project.
For the full guide, see Plaster Over Blueboard: When Veneer Plaster Beats Joint Compound for Smooth Walls.
The Complete Timeline & Steps for Plastering Over Blueboard
Plastering over blueboard involves several stages that require careful planning and execution. Here’s a detailed breakdown of the timeline and steps to help you understand what’s involved in this process:
- Preparation (1-3 days): Clean, prime, and repair any seams on your blueboard. This stage sets the foundation for a successful plaster application.
- Mixing & Application of Base Coat (2-4 hours): Prepare your veneer plaster according to manufacturer instructions and apply the base coat using a hawk and trowel. Allow it to set as directed before proceeding.
- Scratch Coats (1-3 days, depending on drying time): Apply one or more scratch coats, embedding fiberglass mesh if required. Each coat should be allowed to dry according to the product’s specifications before sanding and applying the next layer.
- Finishing Coat & Sanding (2-4 hours + drying time): Apply the final finish coat using trowels to achieve your desired look. Once dried, lightly sand any imperfections and prepare for painting or wallpapering.
By following this timeline and dedicating sufficient time for each stage, you’ll ensure a durable, smooth plaster finish that lasts for years to come.
Key takeaways
The preparation stage is crucial as it directly impacts the overall timeline of your project. Taking the time to clean, prime, and repair your blueboard will help minimize delays and ensure better adhesion for your veneer plaster.
- Veneer plaster provides a single-surface finish with less seam visibility than joint compound.
- For blueboard, plaster over involves bonding base coat, scratch coats, and finish coat steps.
- Tools you need: hawk, trowels, mixing paddle, and seamless feathering tools.
- Veneer plaster costs and availability may exceed joint compound for some projects.
- Prep blueboard properly; clean, prime, and embed paper or fiberglass mesh as required.
- Safety: wear eye/respiratory protection, ventilation, and follow manufacturer instructions during mixing and sanding.
Table of Contents
- Introduction
- Key takeaways
- Quick Comparison: Veneer Plaster Vs Joint Compound
- When to Choose Veneer Plaster (Decision Guide)
- Planning and Prep Before You Start
- Tools and Materials Checklist
- Surface Preparation: Veneer Plaster over Blueboard Vs Joint Compound Prep
- Application Techniques: Step-by-Step Comparison
- Finish Quality, Durability, and Maintenance
- Cost, Risks, Safety Precautions, and Common Mistakes
- Conclusion
- FAQ
Quick Comparison: Veneer Plaster Vs Joint Compound
Think of this as a fast read to pick the right surface system: veneer plaster is designed to produce a thin, hard, seamless plaster finish over blueboard while joint compound is a forgiving, economical option for skim coats, drywall repairs, and small renos. Check product labels or technical data sheets for recommended substrates and bonding agents before you commit.
Technically, veneer plaster systems typically demand different prep (blueboard sealing, scratch or bond coats) and handle shrinkage and hairline cracking differently than drying-type joint compounds. For most DIY concrete-related surfaces, use joint compound for patching or skim coats; choose veneer plaster when you want a long-lasting, plaster-like surface over properly prepared blueboard and are prepared for the extra steps and tools.
What veneer plaster is vs what joint compound is
Veneer plaster, also known as Venetian plaster, is a thin layer of plaster applied over a base coat to create a smooth, durable finish. It bonds well with blueboard, a type of drywall specifically designed for plaster applications.
Joint compound, on the other hand, is a powdered gypsum-based material used to fill joints and seams in standard drywall. It’s applied in multiple thin coats to create a smooth surface.
Veneer plaster systems typically involve three layers: a base coat, a veneer plaster layer, and a final skim coat. Joint compound systems usually require taping, bedding, and skimming of joints.
Core pros and cons summary
Here’s a quick rundown of the main advantages and disadvantages of veneer plaster and joint compound.
Pros
- Veneer Plaster: Smooth, durable finish; wide range of textures; seamless look over blueboard.
- Joint Compound: Cost-effective; easy to apply; versatile for repairs and curved surfaces.
Cons
- Veneer Plaster: Longer drying times; requires more skill; higher cost.
- Joint Compound: Less durable finish; can crack over time; may require multiple coats for smoothness.
Choose veneer plaster when you want a high-quality, long-lasting finish. Opt for joint compound when budget or ease of application is your top priority.
When to Choose Veneer Plaster (Decision Guide)
Pick veneer plaster when the substrate is blueboard in good condition, you need a very smooth, durable finish, and you can provide the proper bond, curing environment, and skill level for multi-coat work; verify adhesion and moisture limits on the product technical sheet. If the board has telegraphing texture, wide cracks, or moisture issues, address those first or prefer a simpler skim with joint compound.
Consider room use: high-traffic or humidity-controlled spaces often benefit from a harder veneer surface, while bedrooms or quick cosmetic fixes can usually do fine with joint compound. Balance time, cost, and your comfort with mixing, embedding mesh, and finishing—if you’re unsure, run a small test patch and consult manufacturer instructions or a pro before scaling up.
Best project types and substrate matches
Veneer plaster is ideal for projects where a smooth, seamless finish is crucial. It’s perfect for:
New construction or major renovations, especially when using blueboard as the base. Blueboard provides excellent support for veneer plaster.
It’s also great for high-traffic areas like hallways, living rooms, and offices where a durable, long-lasting finish is needed.
However, avoid using it on walls with severe texture issues or cracks that could telegraph through the plaster. Always ensure the substrate is sound and ready for plaster application.
Aesthetic and performance goals that justify plaster
Veneer plaster offers unique aesthetic and performance benefits that might make it worth the extra steps:
The ultra-smooth, seamless finish of veneer plaster can’t be matched by joint compound. It’s perfect for achieving a glass-smooth or hand-troweled look.
It also provides excellent moisture and impact resistance. This makes it ideal for areas like bathrooms, kitchens, or homes in humid climates where moisture resistance is crucial.
However, if you’re looking for a lighter skim coat that’s easier to apply and can be painted over, joint compound might be sufficient. Weigh the pros and cons based on your specific project needs.
Planning and Prep Before You Start
Start by inspecting blueboard for moisture damage, loose edges, or substrate movement and repair any structural or water intrusion issues before attempting veneer plaster; confirm board fastening and seams are acceptable per product guidance. Measure walls, note openings and problem areas, and calculate material needs with extra for waste so you don’t stop mid-job.
Sequence the work: clean and prime, install any reinforcement, apply base or scratch coats, then follow with finish coats—block out realistic time for mixing, working, and curing between coats. Call a pro if you find hidden moisture, extensive delamination, or if you’re uncomfortable with mixing/setting plasters or local code/licensing questions.
Assessing the substrate: blueboard vs drywall
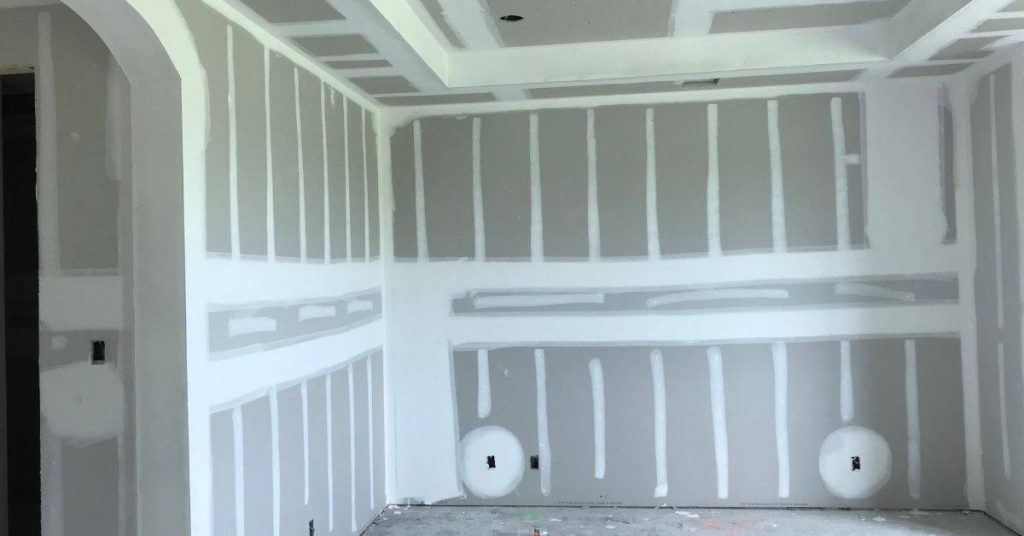
Before you start, it’s crucial to understand that blueboard and drywall are not one and the same. Blueboard is a type of gypsum board specifically designed for veneer plaster applications. It has a unique core and face paper that makes it ideal for accepting and holding plaster.
Inspect your walls for any signs of damage, such as cracks, holes, or delamination. Check the edges to ensure they’re clean and secure. Inspect the fasteners – they should be evenly spaced and not protruding too much. The tape at the seams should be well-adhered with no bubbles or gaps.
If you find any issues, address them before proceeding with your veneer plaster application. Remember, blueboard is the correct base for veneer plaster. If you’re working with drywall, consider switching to blueboard for better results.
Scheduling, staging, and environmental controls
Planning your work schedule is as important as the work itself. Consider the temperature and humidity – plaster works best between 50°F to 70°F (10°C to 21°C) with a relative humidity of 40% to 60%. Keep these conditions in mind when scheduling your work.
Ventilation is key. Ensure there’s adequate airflow in the room, but avoid drafts as they can cause rapid drying and cracking. Staging your work – patching, priming, masking – helps maintain a clean workspace and prevents rework. Allocate time blocks for each stage to prevent rush jobs.
Remember, plaster needs time to cure properly. Don’t rush it. In winter or high humidity climates, expect longer curing times. Plan accordingly to avoid disappointment.
Tools and Materials Checklist
Gather core tools for both methods: hawks, finishing knives, mixing paddles, sanding blocks, straightedges, and clean buckets; veneer plaster adds trowels sized for plastering, plaster hawks, and possibly a dedicated plaster mixer or mixing paddle for larger batches. Check product labels for compatible bonding agents, primers, and whether fiberglass mesh or specific tapes are required with your chosen veneer plaster or joint compound.
Stock consumables and safety gear: blueboard or drywall, veneer plaster mix or setting/all-purpose joint compound, bond primer, edge beads, mesh/tape, PPE (respirator, eye protection, gloves), and cleanup supplies. Note which items are method-specific so you can assemble a starter kit that prevents extra trips to the store and follow manufacturer instructions for mixing and tool recommendations.
Materials and specs to source (blueboard, plaster, joint compound, tapes, primers)
Before you start, use this checklist to ensure you’ve got the right materials for your job. It’s crucial to match products correctly to avoid compatibility issues.
- Blueboard: Look for 1/2″ or 5/8″ thick, moisture-resistant blueboard with a Type X core for fire resistance.
- Veneer Plaster Mix: Choose a ready-mix, veneer plaster formulation designed for thin coats (1/16″ to 3/32″). Check the label for application and coverage rates.
- Joint Compound: Get both all-purpose and setting-type compounds. All-purpose is for initial skim coats, while setting-type is for final coats.
- Plaster Base Coats: If needed, source a base coat plaster mix to apply before veneer plaster.
- Fiberglass Mesh or Tape: Choose 3″ wide mesh tape for blueboard joints and 2″ wide tape for inside corners. For wider joints, use fiberglass mesh.
- Bonding Agent Primers: Get a primer specifically designed to bond with your chosen plaster or joint compound.
- Sealants: Consider waterproofing sealants if your walls are prone to moisture.
- Edge Tapes and Corner Beads: For blueboard, use edge tapes for outside corners and corner beads for inside corners.
Quick rule: Always check labels and compatibility before mixing or applying products. Mixing incompatible materials can lead to poor adhesion and surface issues.
Tools and PPE
Having the right tools makes your job easier and ensures a professional finish. Here’s what you need for both veneer plaster over blueboard and joint compound skim coats.
- Trowels: You’ll need 6″ to 12″ trowels for applying plaster and 4″ to 6″ trowels for joint compound. For veneer plaster, get a 1/8″ notched trowel.
- Hawks: Use hawks to hold your trowels while mixing or carrying material.
- Mixing Paddles: Get a paddle that fits your drill for mixing joint compound and plaster.
- Margin Trowels: These 12″ to 16″ trowels help apply base coats evenly.
- Sanding Blocks/Sandpaper: Use 150-grit or 220-grit sandpaper for final smoothing. For large areas, use a sanding block.
- Plaster Mixer (optional): A dedicated plaster mixer can make mixing easier and faster.
- Plastering Brushes: Use these to apply bonding agents or sealants before plaster application.
- Mud Pans: For joint compound, use mud pans to mix and hold your material.
- Sponge Joints (optional): These help create a smooth finish on wide joints.
- Dust Masks: Protect yourself from drywall dust with a proper-fitting mask.
- Goggles and Gloves: Wear safety goggles to protect your eyes and gloves to keep your hands clean.
Quick rule: Always wear appropriate PPE when working with drywall or plaster. Dust and chemicals can cause irritation or more serious health issues.

Surface Preparation: Veneer Plaster over Blueboard Vs Joint Compound Prep
For veneer plaster on blueboard, focus on a clean, properly fastened substrate, addressing any paper lifts or loose tape and ensuring seams are treated per the plaster system’s instructions; joint compound prep is generally less demanding but still needs clean, dust-free drywall or patched surfaces. Always read the manufacturer instructions or product data sheet for recommended primers or bonding agents and for any special seam treatment before plastering.
Test surface suction and porosity before you mix large batches: damp-spray or mist tests will tell you if a primer or scratch coat is required to control suction and achieve a good key. Follow the specified scratch/bond coat procedures for veneer systems, reinforce vulnerable seams as directed, and avoid rapid drying conditions that increase the risk of microcracking.
Prepping blueboard for veneer plaster
Before applying veneer plaster, your blueboard needs a clean, primed surface. Here’s how:
Remove backing paper. It can trap moisture and hinder adhesion.
Lightly score the seams with a utility knife to improve bonding. Apply a thin tack coat of veneer plaster, let it set for 15-30 minutes, then lightly sand or scratch it to create ‘key’ for better adhesion.
Inspect your work. Ensure no dust, debris, or contaminants remain. Blueboard’s porous surface needs a clean slate for optimal bonding.
Prepping drywall for joint-compound skim coats
For a smooth finish with joint compound, start with a clean, primed drywall surface. Follow these steps:
Tape and fill. Apply joint tape over seams and screw holes, embedding it in joint compound. Let it set.
Sand lightly to remove excess compound and create a smooth base for your skim coat. Use a degreasing cleaner to remove gloss or contaminants from the drywall surface.
Apply a thin layer of joint compound primer or bonding agent, ensuring full coverage. Let it set according to manufacturer’s instructions before skim coating.
Application Techniques: Step-by-Step Comparison
Veneer plaster generally follows a multi-coat workflow: substrate prep and bonding coat, then a base or scratch coat to create a key, followed by one or more thin finish coats applied with trowels to achieve the plaster look; consult the product data sheet for set and working times. Joint compound skim coats usually mean patching, a thin fill or skim application, and sanding/feathering with knives and sanding tools between coats.
Mix small, consistent batches to maintain workability and follow recommended rework windows on the product label; control room temperature and humidity to avoid setting or drying issues. Use the proper tools for each stage, check flatness and feathered edges as you go, and revert to earlier coats for major defects rather than overbuilding the finish.
Step-by-Step Process
This step-by-step guide will walk you through applying a concrete overlay, ensuring a smooth and durable finish.
- Prepare the surface: Ensure the existing concrete is clean, dry, and free of any loose material. Use a wire brush to remove dust and debris. Why it matters: A proper base ensures good adhesion. Check: Run your hand over the surface; it should feel smooth with no rough spots.
- Mix the overlay: Follow the manufacturer’s instructions for mixing the concrete overlay. Typically, you’ll mix one part water to four parts powder. Why it matters: Correct consistency ensures easy application and proper curing. Check: The mixture should have a thick, pudding-like consistency.
- Apply the first coat: Using a trowel or notched spreader, apply the overlay to the concrete surface in small sections at a time. Work quickly and evenly to avoid leaving visible trowel marks. Why it matters: Even application ensures a consistent finish. Check: The surface should look smooth and even.
- Score and grout (optional): If desired, use a groover tool to create control joints in the overlay while it’s still wet. This helps prevent cracking due to shrinkage. Why it matters: Control joints help manage stress and prevent random cracks. Check: The grooves should be clean and straight.
- Apply the second coat (if needed): If a thicker overlay is required, apply a second coat following the same method as the first. Allow the first coat to cure for at least 24 hours before applying the second. Why it matters: Multiple coats provide additional strength and durability. Check: The second coat should adhere evenly without lifting or peeling.
- Cure the overlay: Keep the newly applied overlay moist for at least 72 hours to ensure proper curing. You can do this by covering it with plastic sheeting or misting it regularly. Why it matters: Proper curing prevents cracking and ensures full strength development. Check: The surface should feel cool and slightly damp after the initial curing period.
- Seal the surface (optional): After the overlay has fully cured, apply a concrete sealer to protect it from moisture and stains. Follow the manufacturer’s instructions for application and drying times. Why it matters: Sealing extends the life of your overlay by protecting it from damage. Check: The sealer should dry clear with no visible residue.
Pro tip: Always wear appropriate safety gear, including gloves, goggles, and a dust mask when working with concrete. Safety first!
Veneer plaster application stages
Alright, listen up. We’re gonna break down the typical two-coat veneer process here. You’ve already prepped your base, right? Good. Now, let’s get into it.
First off, you’ve got your scratch coat. This is your base layer that’ll give your final coat something to grip onto. Mix it up as per the bag’s instructions, and make sure it’s not too thick or thin. You want a nice, workable consistency here.
Now, grab your trowel – I prefer a 12″ for this job, but you do you. Apply the mix to the wall in a ‘V’ shape, working from top to bottom. Use even strokes, and don’t be too heavy-handed. You’re not trying to make cement pancakes here.
Let it set for a bit – check your product label for exact times, but it’s usually around 24 hours. Once it’s ready, you’ll want to scrape or comb the surface to create some texture. This helps the final coat stick better.
Now we’re onto the final coat. Same deal with mixing – follow your product’s instructions. Apply this one in a similar ‘V’ shape, but this time you want a nice, smooth finish. Use light, even strokes, and don’t be afraid to let it sit for a bit before smoothing out any imperfections.
Once it’s set enough, use your trowel to polish the surface. You’re not trying to buff out diamonds here, just give it a nice, smooth finish. Let it cure as per the manufacturer’s instructions – usually around 28 days – and then you’re good to go.
Joint compound skim-coating technique and tips
Skim-coating is the final touch before sanding. You’ve already applied your base coats, now it’s time to smooth out those joints and create a seamless finish.
Mix your joint compound as per the manufacturer’s instructions. Keep it thin for this skim coat – think pancake batter consistency. Too thick and you’ll end up with ridges.
Using a wide taping knife (10″ to 12″), apply the compound in thin, even coats over your joints. Feather the edges so there’s no sharp line where the new coat starts. This helps prevent ridges and makes sanding easier.
Let it dry – check the label for drying times. Once dry, you’ve got a couple of options for smoothing:
Dry-sanding: Use a fine-grit sandpaper (120-150 grit) to lightly sand the surface. This removes any high spots and prepares it for painting.
Wet-sanding: For a really smooth finish, wet-sand with a very fine grit (400-600 grit) using a lubricant like mineral spirits or water. This helps prevent dust and gives you a mirror-like finish.
Finish Quality, Durability, and Maintenance
Veneer plaster typically yields a harder, more seamless surface with fewer visible joints and better edge detailing compared with joint compound skim coats, which are easier to sand but can show repairs or feathered seams over time. For impact resistance and long-term wear, check manufacturer guidance on expected surface hardness and follow recommended topcoat systems for paint or sealers.
Repair paths differ: small dents or chips in joint compound are usually simple to patch and sand; veneer plaster repairs may require careful feathering or matching the existing finish to avoid visible patches. For repainting or refinishing, test adhesion and absorption in a small area and follow paint manufacturer prep instructions to avoid blistering or peel-back issues.
Surface finish and texture control
When it comes to achieving a smooth wall surface, both veneer plaster and traditional joint compound can deliver, but they respond differently to tools and techniques.
Veneer Plaster is applied in thin layers, allowing for better control over the final finish. It’s easier to achieve an ultra-smooth surface with minimal sanding using a trowel or hawk and knife technique. For a slightly textured look, you can use a sponge float or brush off technique.
On the other hand, joint compound tends to require more sanding to achieve a smooth finish due to its thicker application. It’s also easier to create texture with joint compound using techniques like ‘orange peel’ or ‘knockdown’.
Repairability, impact resistance, and life-cycle care
Both systems can withstand typical DIY wear and tear, but they have different repair methods and expected lifespans.
Veneer Plaster is more resistant to minor impacts and hairline cracking due to its flexibility. Repairs are typically done by reapplying a thin layer of plaster over the affected area, which blends well with the original finish. Cleaning is easy with just soap and water, and repainting can be done after light sanding.
With joint compound, minor impacts may result in small cracks or chips that need to be filled and resanded. Repairs can be challenging as joint compound dries quickly and doesn’t blend as well with the original finish. Cleaning requires gentle scrubbing, and repainting may require a primer to ensure adhesion.
In terms of life-cycle care, both systems should last for many years with proper maintenance. However, veneer plaster may have a slight edge in longevity due to its flexibility and resistance to cracking.
Cost, Risks, Safety Precautions, and Common Mistakes
Estimate costs by listing materials, tool needs, labor hours, and waste; request contractor bids that break out wall area, substrate condition, and needed prep so you can compare line items. Don’t guess numbers—collect quotes and product data to form a realistic budget and weigh upfront cost against long-term durability and maintenance needs.
Safety: use appropriate respirators, eye protection, gloves, and dust control when sanding or mixing; secure ladders and scaffolds and keep electricals safe around wet work. Common DIY mistakes include inadequate surface prep, wrong skim thickness, rapid drying, and not following bonding/priming instructions—when in doubt, check the product label or consult a pro before continuing.
How to estimate costs and what to verify
Estimating concrete costs involves two main parts: materials and labor. Here’s a simple way to do it.
Materials: First, calculate your volume need. For slabs, use this formula: Length × Width × Thickness (in feet) ÷ 27. Then, add a 10-15% waste factor. Next, check with suppliers for prices per cubic yard. They’ll usually include sand, gravel, and cement in their mix.
Labor: Hiring pros? Get quotes from contractors. They should include equipment rental (like pumps or finishers) and labor hours. If DIYing, estimate your own time. A typical 10′ × 10′ slab at 4″ thick might take 8-12 hours for mixing, pouring, and finishing.
When verifying prices, always check these with suppliers/contractors:
- Cement, sand, and gravel prices per yard
- Concrete delivery fees (if applicable)
- Contractor’s labor rate and equipment rental costs
- Local taxes and permits
Safety precautions for veneer plaster over blueboard
Veneer plastering over blueboard is a dusty job. Here’s what you need to do to keep it safe:
Dust control: Wet down the blueboard before you start. Use a spray bottle or garden hose with a nozzle. This cuts down on dust and helps the plaster stick better.
Respirator: Wear a proper respirator, not just a dust mask. Plaster dust is fine and can get into your lungs easily. Check the label on your respirator to make sure it’s rated for plaster dust.
Ventilation: Open windows and use fans to keep the area well-ventilated. If you’re working in a small room, consider using a HEPA vacuum or a shop vac with a HEPA filter to clean up any spills or excess dust.
Setting-type plasters: Be careful when handling setting-type plasters like Venice plaster. They start to set as soon as they’re mixed and can cause skin irritation if they get on you. Wear gloves and long sleeves, and clean up any spills immediately.
Cleanup: Clean your tools and the work area thoroughly after you’re done. Use a solution of water and a mild detergent to remove any plaster residue. Remember, even though it’s dry, it can still cause irritation if it gets on your skin or in your eyes.
Common mistakes to avoid and troubleshooting
Even with careful planning, DIYers often make these common mistakes when applying veneer plaster over blueboard. Let’s go through them so you can avoid these pitfalls.
- Improper substrate prep: Skipping or rushing this step leads to poor adhesion and bubbling. Always ensure the blueboard is clean, dry, and primed before applying veneer plaster.
- Wrong mixing: Not following the manufacturer’s instructions for water-to-plaster ratio can result in a weak, crumbly finish or one that doesn’t adhere properly. Check your product label and mix carefully.
- Over-sanding: Sanding too much between coats removes the ‘tooth’ needed for the next layer to stick. Stick to light sanding with 220-grit sandpaper and wipe clean with a damp cloth.
- Poor timing between coats: Applying the next coat before the previous one is fully dry can cause delamination. Allow each coat to dry for at least the recommended time (usually 24 hours) before applying the next.
Double-check these points before starting your project. It’s better to spend a bit more time preparing than to end up with a subpar finish that needs professional help to fix.
Conclusion
Sticking to proper prep and correct product choice makes a big difference in safety, durability, and a smooth finish you can live with. Veneer plaster on blueboard can deliver a stronger, more even wall if you follow the plan and avoid quick, careless work.
To make it real, check the substrate for flatness and damage, confirm you’re using the right veneer plaster or joint compound for your setup, assemble the tools and materials, clean and prime the surface, apply in the correct coat sequence, let it cure, and test adhesion before finishing. Do the work in small, deliberate steps and verify each stage before moving on; this is how you prevent costly rework and ensure a lasting result.
Common mistakes to avoid are skipping or skipping over prep, applying plaster over a damp or contaminated surface, overworking the mix, and ignoring safety gear. Always wear eye and skin protection, work in a well-ventilated area, and keep moisture under control. Don’t rush cure times or push beyond recommended limits, and always test a small area first to confirm adhesion and finish before committing to the whole wall.
If you’re dealing with large areas, uneven framing, moisture problems, or you’re unsure about the substrate, it makes sense to call a pro. A quick consult can save you from expensive fixes later. Stay steady, follow the plan, and you’ll end with walls that look good, stay intact, and keep you safe.
FAQ
What are the main advantages of veneer plaster over joint compound on blueboard?
Veneer plaster tends to create a harder, smoother wall with fewer texture mismatches. It’s less prone to hairline cracks from small movements and can feel more durable long term. Check the product label for compatibility and follow manufacturer instructions for best results.
What is the basic application process for plaster over blueboard?
Apply a plaster veneer in thin coats over the blueboard’s paper and cement board joints. Key steps are a solid bond coat, a subsequent scratch or brown coat, and a final skim coat. Always follow the plaster manufacturer’s guidance for mixing, pot life, and curing times.
What tools do I need for veneer plaster versus joint compound?
For veneer plaster, you’ll need trowels, a hawk, mixing sticks, and a plastering float. You’ll also want a sanding block or screen for a final smooth finish. For joint compound, have a taping knife, mud pan, mixer or drill, sandpaper, and a sanding pole. Use only the tools specified by product instructions.
How does the cost and durability compare between the two methods?
Veneer plaster can cost more upfront but may offer a longer-lasting, smoother surface. Joint compound is cheaper per coat but can require more work to hide joints and texture. Check local pricing, but evaluate total labor time and repair ease when deciding.