

Introduction
Beginners often misjudge the prep and coating process for veneer plaster over Blueboard, leading to cracks, delamination, and poor adhesion.
This article explains what typically goes wrong and why proper substrate prep, plaster application, and curing matter so you can finish with a durable, smooth veneer.
You’ll learn how to assess the Blueboard, apply the right plaster coats, manage joints, and refine your technique to reduce failure and achieve a consistent finish.
Key takeaways
- Veneer plaster enhances blueboard’s fire resistance and soundproofing.
- Plan your project, gather tools (trowels, hawk, tape measure), and materials (plaster, primer).
- Prime blueboard, tape joints, and use a straight edge for consistent jointing. Ensure joints are tight to prevent cracks.
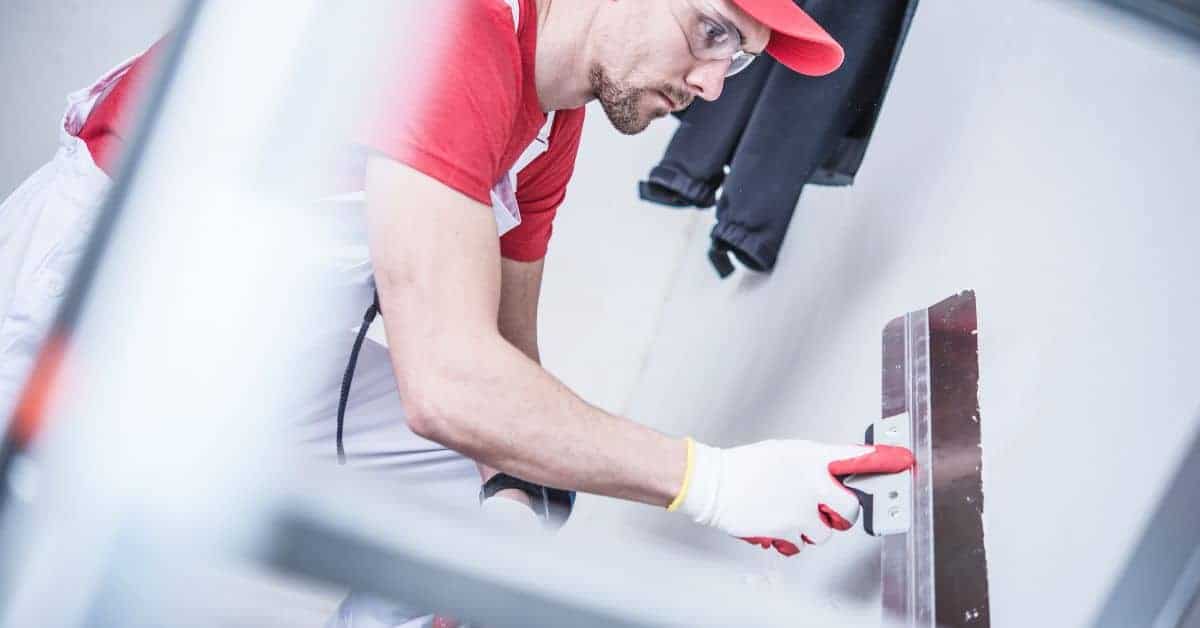
- Apply the scratch coat at approximately 1/8″ thickness using an “S” or “X” pattern to embed mesh properly. This helps in achieving a strong base layer.
- The brown coat should be flat and smooth; use a wide trowel, apply thin layers, and screed off excess plaster for a uniform surface.
- For the finish coat, practice techniques (sponge, comb) on scrap material before applying to achieve desired texture. This helps in avoiding mistakes on your walls.
- Tape transitions and corners tightly, feathering edges for a seamless look. Ensure all tape is securely embedded to prevent future cracks or gaps.
Table of Contents
- Introduction
- Key takeaways
- What Is Veneer Plaster and Why Use It on Blueboard
- Planning Your Veneer Plaster Project (Beginner Checklist)
- Tools and Equipment You Must Have
- Materials and Mix Choices for Veneer Plaster
- Surface Preparation: Priming, Taping, and Jointing on Blueboard
- Scratch Coat Application: Technique and Troubleshooting
- Brown Coat (Leveling Coat): Achieving Flatness
- Finish Coat Techniques and Creating Textures
- Taping Transitions and Inside/outside Corners for a Seamless Look
- Drying, Curing, and Sanding: When and How
- Painting and Final Finishes over Veneer Plaster
- Common Mistakes Beginners Make (and How to Avoid Them)
- Troubleshooting Defects: Cracks, Delamination, and Pinholes
- Safety and Health Precautions
- Cost Estimate and Project Budgeting
- Comparing Veneer Plaster to Alternative Drywall Finishes
- Visual Checkpoints and Quality Inspection Before Painting
- Step-by-step Beginner Project Plan (Single Room)
- Practical Next Steps and Trusted Sources
- Conclusion
- FAQ
What Is Veneer Plaster and Why Use It on Blueboard
Veneer plaster is a thin, durable finish made from lime putty or Portland cement that cures differently than traditional plaster or joint compound. It bonds well to blueboard, which has grooves and a paper-faced surface designed for better adhesion compared to regular drywall.
Preparation involves ensuring the blueboard is clean, dry, and free of dust. Proper edge control and gap sealing are crucial to avoid weak spots and air pockets. Veneer plaster offers a smoother finish, harder surface, better moisture handling, color consistency, and a refined look compared to joint compound or traditional plaster.
Start with spot repairs, verify product compatibility with blueboard, gather essential tools, and plan staged passes to minimize shrinkage and cracking. Allow adequate curing time before finishing.
Veneer Plaster vs. Joint Compound
Veneer plaster is made with lime putty or Portland cement, resulting in a harder finish that’s more durable over time.
Joint compound, softer and easier to work with, is ideal for beginners seeking quick results but can be prone to cracking if not applied correctly. It’s often used as a base coat before applying veneer plaster for a smoother surface.
What to check when deciding:
- Project timeline: If you need the job done quickly, joint compound might be your best bet due to its faster application time.
- Budget: Joint compound is generally less expensive than veneer plaster.
- Long-term durability: For areas with high foot traffic or heavy use, consider veneer plaster for better longevity.
Common mistake:
Applying too many thick coats of joint compound at once can lead to cracking and a poor final finish. It’s crucial to allow each coat to dry thoroughly before applying the next one.
Veneer plaster typically requires multiple thin coats, while joint compound often needs fewer thicker applications. This means veneer plaster takes longer to apply but offers better long-term durability and aesthetics.
Why Blueboard Is the Recommended Substrate
Blueboard provides an excellent bond with veneer plaster due to its grooves and treated paper surface, enhancing durability.
The treated paper on blueboard improves bonding properties with lime putty or Portland cement in veneer plaster, reducing delamination risks compared to regular drywall.
Before applying veneer plaster:
- Check for any damaged or loose sections of the blueboard and repair them.
- Ensure the blueboard is clean and free of dust, using a damp cloth if necessary. Dust can compromise adhesion.
- Inspect for any imperfections such as holes or cracks, filling them with a suitable patching compound for a smooth final finish.
Common mistake: Applying veneer plaster over dirty or damaged blueboard can lead to poor bonding and increased risk of delamination, resulting in costly repairs and potential structural issues.
Planning Your Veneer Plaster Project (Beginner Checklist)
Evaluate room access, lighting, ventilation, temperature stability, and moisture risk. Ensure you have space to stage materials without disrupting finished surfaces.
Assessing Wall Condition and Repairs
Inspect blueboard and studs for soundness before starting.
- Check stud spacing and alignment.
- Look for signs of moisture damage or mold.
- Identify loose screws or nails in the blueboard.
- Evaluate previous repairs and their effectiveness.
- Test adhesion on existing surfaces with a small patch.
- Clean all surfaces thoroughly before plastering.
- Address gaps, cracks, or uneven areas.
- Apply bonding agent if needed.
- Install moisture barriers in damp areas.
- Replace damaged blueboard panels as necessary.
- Ensure electrical outlets and switches are accessible for repair.
- Mark all studs and openings clearly before work begins.
If you notice significant movement or instability, stop and address these issues first to avoid problems later on.
When to Hire a Pro vs DIY
Determine whether to do veneer plaster yourself based on your skills, the room’s size, and desired finish detail.
- Evaluate experience with similar projects.
- Assess the overall area size.
- Weigh cost versus potential savings by doing it yourself.
- Consider the level of finish detail needed.
- Determine access to necessary tools and materials.
- Evaluate comfort with handling electrical work around plastering areas. If you’re unsure about any aspect of electrical work, hire a licensed electrician.
- Check local regulations for required certifications or permits.
- Weigh time investment versus hiring a professional.
- Consider safety concerns, especially in older homes with asbestos.
- Determine realistic expectations of project completion.
- Evaluate ability to manage dust control and cleanup effectively.
If you feel overwhelmed or unsure about any aspect, it might be best to hire a professional for peace of mind and quality workmanship.
Tools and Equipment You Must Have
Essential tools include solid steel trowels, margin trowels, a sturdy hawk, finishing knives, straightedges, and a Darby for even plaster thickness. Add a mixing drill with a paddle, heavy-duty bucket, measuring cup, mud pan, clean mixing paddle, and reliable drill bit if needed.
Corner tools, edge feathering tools, good mixer blade, PPE, dust control gear are crucial for safety. Layout tools like chalk line or laser, straightedge, gauge R, plumb bob or level ensure accuracy. Masking paper or wax keeps edges clean; use a shop vacuum with HEPA filter to manage dust.
Trowels and Knives (Sizes and Profiles)
For the scratch coat, use a 6-inch steel float. Switch to an 8-inch or 10-inch steel float for the brown coat to smooth imperfections. For the finish coat, opt for a margin trowel with a flexible blade, typically 4-inch or 5-inch size.
Finishing knives in various widths handle small areas and tight corners effectively. Experiment with different sizes to find what works best for your project.
Mixing, Mixing Rigs, and Measuring Tools
A reliable mixing drill ensures consistent plaster mix. Use a heavy-duty bucket that can hold wet plaster without tipping over.
- Tool: A mixing paddle prevents lumps in the mixture.
- Tool: A measuring cup maintains water-to-plaster ratios for smooth finish. Tip: Check for consistent mix by dropping a small amount into water; it should sink immediately and not float.
- Tool: Mud pan is handy for small batches or touch-ups.
- Tool: Straightedge and gauge R check flatness before plaster application.
- Ensure straightedges are level to avoid wavy walls.
- Check drywall seams with a gauge R for any gaps or low spots.
- Tool: Chalk lines or laser level mark work area accurately. Tip: Snap chalk lines at the top and bottom of your work area to create a straight reference point.
Common mistake: Not pre-mixing small batches in a mud pan can lead to inconsistent plaster application, causing visible texture differences or missed spots.
If starting out, consider renting mixing equipment to determine what works best for your project size and needs.
Materials and Mix Choices for Veneer Plaster
Gypsum veneer plaster comes in standard formulas and specialty versions with color additives or performance tweaks, and it must be matched to blueboard or drywall substrates with proper prep. Learn the approved water-to-plaster ratios, typical batch yields, and working time, then adjust for heat or humidity so you don’t rush or slow too much.
Expect to see additives like bond enhancers, retarders, and latex modifiers. Bond enhancers improve adhesion on challenging surfaces, while retarders extend pot life in humid conditions. Latex modifiers can enhance flexibility and durability but may affect drying time. Choose beginner-friendly brands with clear substrate notes and nationwide availability to avoid issues like delamination or pinholes.
Surface prep is essential—check flatness, tape joints, corner beads, and any mesh reinforcement before mixing, and follow the right order and pot life to keep tools clean. Safety matters, so ventilate, wear PPE, and watch curing conditions; avoid common mistakes like over-watering, improper curing, or skim coats that create weak layers.
Ready-mix vs Powdered Gypsum Veneer
When it comes to choosing between ready-mixed and powdered gypsum veneer, the decision often hinges on your project size and convenience. Ready-mixed products come pre-blended and are easy to use straight from the container, making them ideal for smaller projects or when you’re short on time.
Powdered gypsum requires mixing with water on-site, which gives you more control over consistency but demands a bit more effort upfront. This option is better suited for larger projects where precise batch sizes are needed to avoid waste.
Additives and Retarders/Accelerators
Adding retarders or accelerators can help tailor your veneer plaster mix for specific conditions. A retarder slows down the drying process, giving you more working time in humid environments or when applying thick layers.
An accelerator speeds up setting times, useful for faster project completion but be cautious as it can shorten pot life and make mixing tricky if not done correctly. Always check compatibility with your chosen gypsum veneer plaster to avoid issues like poor adhesion or cracking.
Surface Preparation: Priming, Taping, and Jointing on Blueboard
Start with a clean, even blueboard surface by removing dust and checking for flatness. Address any imperfections that could telegraph through veneer plaster.
Select a bonding primer compatible with veneer plaster and apply it evenly, noting the dry time to compensate for board suction during feathering and additional coats.
Taping Seams vs. Leaving Seams for Veneer
Taping seams on blueboard is essential for a smooth surface when applying veneers like plaster or drywall compound later.
Uneven spots or gaps in untaped seams will show through thin veneers, leading to extra work fixing imperfections.
What to check:
- Ensure all seam edges are straight and flush with the blueboard surface.
- Check for any high or low spots along the seams that could cause uneven taping.
- Inspect for any missing tape at the seam edges, which can lead to gaps.
Decision rule: If you notice any of these issues, retape and resand the affected areas before proceeding with veneering.
Common mistake: Rushing through taping seams can result in missed spots or improperly applied tape. This leads to uneven or incomplete coverage, causing visible imperfections when applying thin veneers.
Fastener and Corner Prep
Ensure all fasteners are fully countersunk into the blueboard before taping. Check for any protruding screws or drywall nails, as these can compromise your finish:
- Screws: If head is visible, use a drill with a countersink bit to recess it.
- Nails: If nail heads are raised, gently tap them down flush with the surface using a hammer and nail set.
When checking corners:
- Look for any gaps between blueboard and corner bead. If found, adjust and secure tightly to prevent cracking during finishing.
- Ensure corner beads are properly aligned with the blueboard edges to maintain a clean, sharp angle.
Common mistake: Rushing through this step can lead to visible imperfections in your final finish, such as screw or nail holes left unaddressed, or cracked or misaligned corners.
After setting fasteners and securing corners, give everything another thorough check before priming and taping. This ensures no surprises during finishing.
Scratch Coat Application: Technique and Troubleshooting
The scratch coat is the foundational layer that bonds veneer plaster to blueboard and provides early strength for the finish coat. Apply it at a consistent thickness, typically around 1/8 to 1/4 inch, using a notched trowel or special tool to create shallow grooves, and avoid overworking the surface.
Common mistakes include uneven scratches, dragging too long, leaving high spots, pulling excessive moisture from the mix, or bridging joints. Proper preparation of blueboard, verifying veneer-plaster compatibility, and protecting the substrate are crucial for even curing and strong interlock with the board.
Proper Scoring and Keying Methods
Apply a thin, even layer of plaster using your trowel. Once it reaches the “hairline” stage – set enough to resist fingernail but still soft – proceed with scoring.
- Check: The plaster’s consistency; it should be workable yet firm.
- Look for: A slight sheen on the surface, indicating it’s ready for scoring.
- Avoid: Scoring too early or too late; both can compromise adhesion.
Use a notched trowel or scratch tool to create shallow, consistent grooves. Aim for light scoring that creates mechanical bond without damaging the blueboard paper.
Common mistake: Over-scoring, which can damage the blueboard surface and compromise its integrity.
Consequence: Weakened wall structure, leading to potential cracking or delamination over time.
Common Scratch Coat Errors
Mistakes in applying the scratch coat can affect appearance and durability. Here are typical errors and fixes:
- Mistake: Overworking plaster causes it to dry too quickly before scoring.
Fix: Work in smaller sections, keep tools damp. - Mistake: Not scoring deeply enough results in poor adhesion for the next coat.
Fix: Use a notched trowel for deeper grooves. - Mistake: Scoring too aggressively damages blueboard paper and weakens bond.
Fix: Apply less pressure; aim for shallow but effective grooves. - Mistake: Leaving gaps or uneven areas leads to patchy surface.
Fix: Ensure even coverage and smooth transitions between sections. - Mistake: Applying too thin a scratch coat doesn’t provide enough material for proper scoring.
Fix: Add more plaster to achieve the right thickness before scoring.
If issues arise, reapply fresh plaster over problematic areas and ensure even coverage and proper scoring. If the scratch coat fails to adhere, remove it carefully using water and a scraper, clean the surface, and reapply.
Brown Coat (Leveling Coat): Achieving Flatness
The brown coat is your thick, working layer in veneer plaster on blueboard, and its job is to control thickness, plane the wall to a solid flat surface, and give the finish coat a dependable base. It differs from the finish coat in both goals and texture, because this layer fills hollows, bridges small gaps, and creates a stiff, workable surface rather than a smooth final skin.
Prepare the substrate with cleaning and priming, then lay down a robust reference grid using corner lines and plumb lines to guide consistent thickness across the wall. Mix for a slightly stiff but workable consistency, avoid air pockets, and apply with a hawk and trowel in even coat thickness, using screed passes to achieve dead-flat levels. Check with straightedges frequently; back-remove high spots or add material where needed, tolerating small imperfections but ensuring overall flatness.
Feathering and Blending to Match Corners and Openings
To seamlessly blend the brown coat into corners, windows, and door jambs, feathering is key. Start by gently tapering the edges of your plaster where it meets these features, ensuring a smooth transition without any abrupt changes in thickness.
- Check: The edge of your trowel should be parallel to the surface you’re blending into.
- Check: Ensure there are no visible lines or ridges as you blend, indicating a smooth transition.
- When blending around corners, use a wide trowel and work from both sides of the corner to avoid creating a shadow line.
- When feathering around openings like windows or doors, maintain consistent pressure on your trowel to keep the plaster thickness even.
A common mistake is not checking for visible lines or ridges while blending. This can lead to an uneven finish coat and a less professional-looking final result.
Drying Time and Environmental Control
The brown coat needs time to dry properly before you can apply the finish coat. Damp conditions or high humidity can slow drying, while overly dry environments may cause premature cracking.
Keep your workspace at a comfortable temperature—around 65 to 75 degrees Fahrenheit is ideal—and ensure good air circulation without direct drafts on the plaster. This helps maintain consistent moisture levels and prevents uneven drying.
If you notice any cracks forming, it’s often due to rapid drying or poor environmental control. Addressing these issues early can save a lot of trouble later on. Properly managed conditions will lead to a stronger, more durable finish coat.
Finish Coat Techniques and Creating Textures
This finish coat is the final thin veneer you apply over blueboard or drywall to create a smooth or textured look. It covers the skim coat with careful thickness and evenness, so avoid overworking, inconsistent mud, or dragging it too long. You’ll learn smooth trowel steps and three repeatable textures: skip, swirl, and sand float.
Mix, test, and time are your best tools—match ratios, test readiness on a backing board, and keep it damp while you work. Tools and technique matter for a clean, uniform surface, edge details, and avoiding pinholes or drag; then finish by curing properly and protecting the surface. Finish checks, clean-up, and safe disposal follow once you’re done.
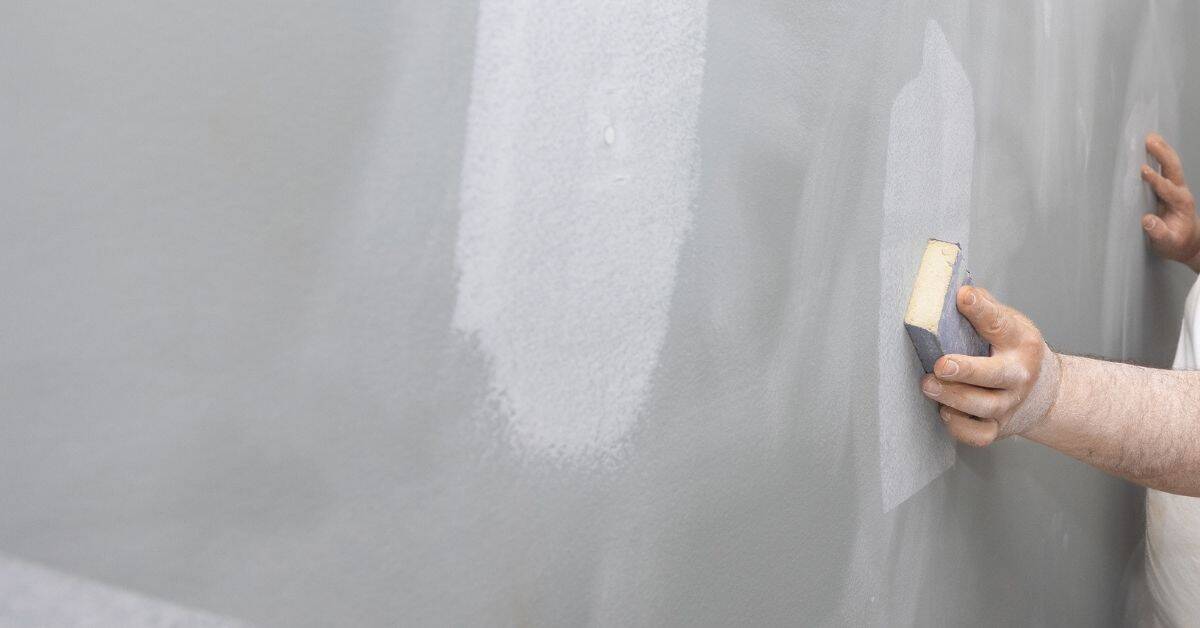
Trowel Techniques for a Smooth Finish
To achieve a smooth, glass-like finish with veneer plaster over blueboard or drywall, start by ensuring the plaster is at the right consistency. It should be slightly sticky but not too wet.
When applying the final coat, hold your trowel at a slight angle and use even pressure to spread the plaster thinly across the surface. Move quickly to avoid setting up before you can smooth it out.
After initial application, re-wet the area lightly with a damp sponge or spray bottle, then go back over it with the trowel to feather any edges and blend them into the surrounding areas for a seamless look.
Matching Textures to Existing Walls
To match existing textures when patching or repairing walls, start by closely examining the texture type and density. Common textures include skip, swirl, and sand float.
- Check for: The direction of application (vertical, horizontal, or random).
- Observe: The depth and width of grooves or ridges in the texture.
- Note: Any unique patterns or variations in the existing texture.
Select tools that mimic the original application method. For example, use a notched trowel for skip texture and a paddle tool for swirls. Apply pressure evenly to replicate the pattern accurately.
Common mistake: Not practicing on a small section first can lead to wasted materials and time if the new plaster doesn’t match well.
Practice on a small section first to get the hang of it before moving onto larger areas. Adjust your technique based on how well the new plaster matches the old one in terms of depth, density, and overall appearance.
Taping Transitions and Inside/outside Corners for a Seamless Look
Choose and apply the right transition materials for blueboard over drywall—mesh or paper tape, veneer plaster mix, and skim coats—and embed them in the first coat with careful feathering to fade ridges and seams. Use a proper inside corner method, like corner bead or foam, and feather evenly so the width stays consistent with no gouges. For outside corners and edge transitions, aim for true squares or precise radii, back with solid substrate, and control pressure to prevent buildup or cracking while transferring the seam cleanly to ceilings or trim.
Transitions between materials and trim must be masked with skim coats to prevent differential shrinkage and prepare edges for priming and finish paint so seams disappear under finish lighting. A thoughtful finishing sequence, proper drying times, and humidity control matter; plan selective sanding only at the seam and have fixes ready for hairline cracks or color mismatches after the final skim. Do it right, and you’ll avoid visible seams, crack-prone joints, and touch-up headaches later on.
Handling Reveal Trims and Casing Transitions
Before you start: Check that your trim is securely fastened and there are no gaps wider than 1/8″ between the plaster and casing.
- Ensure a tight fit by using shims if necessary.
- Inspect for any nail or screw heads sticking out, which could cause uneven surfaces.
- Check that your veneer plaster mix is thin enough to spread easily (similar consistency to sour cream).
- Verify your taping knife is clean and free of debris.
- Wear gloves to protect your hands from the plaster.
If gaps are wider than 1/8″, use a setting compound or joint tape to fill before applying veneer plaster. When working around casing transitions, maintain consistent pressure to avoid overfilling or creating uneven surfaces that could show under finish paint.
Common mistake: Applying too much pressure when feathering out the plaster into the drywall surface can cause ridges and visible seams. This results in a less professional look and may require additional sanding or skim coats to fix.
To avoid this, use light, even strokes with your taping knife, ensuring each layer is well blended and free from ridges or visible seams. Allow each layer to dry thoroughly before applying additional layers if needed.
Working with Crown and Ceiling Junctions
Before starting, check for any gaps or imperfections at the wall-ceiling junction to ensure a smooth finish.
- Inspect for nail pops or drywall screws that may need to be set back.
- Look out for any unevenness caused by drywall seams or tape joints.
- Ensure the ceiling is clean and free of dust or debris.
When dealing with existing crown molding, carefully mask off areas around it to prevent plaster from getting onto the molding. Use a thin mix for feathering and allow each layer to dry completely before adding more coats to avoid cracking.
Common mistake: Applying too much pressure while plastering at ceiling junctions can cause buildup, leading to visible ridges or seams after drying.
To feather plaster into ceilings, start by ensuring a clean, straight edge where the wall meets the ceiling. Use a corner bead or foam corner to create a crisp line if needed. Apply veneer plaster along this junction using controlled pressure to avoid buildup at corners or edges. Feather out the plaster gradually from the wall towards the ceiling to create a seamless transition without visible ridges or seams.
Drying, Curing, and Sanding: When and How
Drying, curing, and sanding on veneer plaster are distinct processes. Recognize initial set, surface cure, and full hard cure to adjust for environmental factors like humidity and temperature.
Use tapping tests, check hardness with your fingernail, inspect visually, and measure moisture content if unsure. Ensure proper curing before proceeding to avoid damage.
How to Test Readiness for Sanding or Painting
Before sanding or painting:
- Gently tap the surface; a dull sound indicates readiness.
- Press your fingernail lightly into the plaster; no indentation means it’s hard enough.
- Inspect visually and feel for soft spots or moisture. Dryness is key.
- If uncertain, use a moisture meter; below 10% typically confirms readiness.
- Start with coarse grit paper, then progress to finer grits for smooth finish.
Always check for any soft spots before sanding.
Dust Control and Cleanup Best Practices
Manage dust during sanding to protect the plaster and surrounding areas. Proper containment keeps your workspace clean and safe.
Wear a high-quality respirator with appropriate filters, use ventilation or an exhaust fan if possible, cover non-work areas with plastic sheeting, and clean up regularly using damp cloths.
If you notice any signs of mold growth during the curing process, stop, ventilate the area, and call a professional to assess before proceeding.
Painting and Final Finishes over Veneer Plaster
Ensure the surface is fully cured, dry, and free of efflorescence or dust before painting. Seal edges to prevent flashing.
Select a bonding primer that blocks porosity without hindering adhesion. Adjust for wall versus skim-coated areas to ensure even color and topcoat performance.
Primer vs. Sizing: What to Use and When
Veneer plaster requires a primer or sizing coat before painting to achieve uniform coverage and prevent blotches. Apply the primer once the plaster is fully cured, dry, and free of dust or efflorescence.
Decorative Finishes and Faux Techniques
Veneer plaster supports various decorative finishes like limewash or mineral glazes for unique character.
Limewash provides a soft, matte appearance with excellent breathability but requires careful mixing ratios to avoid streaking. Mineral glazes or faux patinas can mimic natural materials; apply lightly for professional results.
Common Mistakes Beginners Make (and How to Avoid Them)
Common mistakes beginners make start with the substrate. Verify gypsum drywall with blueboard under veneer plaster, check for moisture intrusion, efflorescence, or loose paper, and outline remediation steps before you plaster. Don’t rush to coat before the surface is sound, dry, and properly prepared, or you’ll fight cracks and delamination from day one.
Get the material chemistry and mixing right, follow veneer plaster ratios, and add water carefully; substitutions like portland-only mixes ruin bond and cause shrinkage. Nail down the coat sequence and thickness—at least scratch, brown, and finish coats with consistent thickness—and avoid bundling or feathering ridges that show up as soon as paint hits. A calm, measured approach with proper taping, joint control, and climate management keeps cracking at bay and makes the DIY project finish like a pro.
Overworking the Plaster
Excessive troweling can weaken plaster, causing it to crack and lose its integrity. Once you’ve applied a coat and it’s set enough for feathering or smoothing, resist the urge to go over it again unless absolutely necessary.
To avoid overworking, test your work on small sections first. If the surface feels smooth and doesn’t crumble when lightly touched with a trowel edge, you’re good to move on. Over-troweling can also trap air bubbles or create thin spots that won’t hold up well under paint or texture.
Remember, each coat should be allowed to dry properly before moving to the next step. Rushing through this process can lead to uneven finishes and weak bonds between layers.
Ignoring Environmental Controls
The environment plays a critical role in plaster drying and curing. Extreme temperatures or humidity levels can cause cracking, poor adhesion, or even delamination of the plaster from the substrate.
Maintain a consistent temperature between 60°F to 85°F (15°C to 29°C) for optimal results. Ensure good ventilation but avoid direct drafts that could dry out the plaster too quickly, leading to cracking and poor bonding.
High humidity can slow down drying times significantly, so use dehumidifiers if necessary to keep moisture levels in check. Conversely, very low humidity might require misting or adding moisture to the air to prevent the plaster from drying too fast.
Troubleshooting Defects: Cracks, Delamination, and Pinholes
Inspect for cracks, moisture staining, lifted edges, and use a meter if available to check moisture levels. Perform a tape test by pulling on joints to see if they remain glued; conduct a delamination test by gently probing with your finger or screwdriver. Address issues accordingly: fill cracks with compatible patch material in thin layers, remove suspect sections for delamination, and seal pinholes with primer.
Improper repairs can trap moisture, odors, or cause poor bonding, leading to further defects. Follow proper prep, dust control, use compatible materials, adhere to curing times, and conduct quick checks before sealing to ensure durable results.
Fixing Delamination and Loose Patches
To address delamination, inspect for loose patches by probing with your finger or a screwdriver. If the plaster feels soft or moves easily, it’s likely delaminated.
Carefully remove damaged areas using a utility knife or scraper to avoid damaging surrounding sections. Clean the substrate thoroughly and apply a thin layer of bonding agent like masonry adhesive before reapplying veneer plaster over blueboard.
For larger patches, reinforce with fiberglass mesh tape for added durability. Allow ample drying time according to manufacturer’s recommendations and sand lightly if necessary before applying final finish coats.
Repairing Hairline and Larger Cracks
Hairline cracks can be filled with a thin layer of veneer plaster mixed slightly thicker than your base coat for better adhesion. Apply in thin layers allowing each to dry before adding another until the crack is fully covered.
Larger cracks may indicate structural issues or significant movement. Determine if the crack is active by applying a small patch and checking it after a few days. If stable, use a flexible joint compound designed for plaster repairs. Sand lightly once cured and apply finish coat as needed.
Safety and Health Precautions
Safety starts with your kit: wear a proper respirator (P100 for dusty work or N95 with goggles as a minimum), eye protection, gloves, long sleeves, and sturdy footwear. Follow a clean donning and doffing routine to prevent contamination. Set up local exhaust or portable fans with HEPA filters to pull dust away from your breathing zone.
Verify substrate dryness with a moisture meter before plastering. Address any signs of mold or prior moisture damage immediately, using temporary containment and a plan for long-term moisture control to protect adhesion.
Silica and Gypsum Dust Hazards
Wear a respirator rated P100 or N95 when working with veneer plaster to filter out silica and gypsum dust. Use goggles and gloves to prevent eye and skin irritation. Dampen the plaster as you mix it to reduce airborne dust levels.
Ensure proper ventilation with fans or HEPA filters in confined spaces. This protects both you and adjacent rooms from dust build-up.
Ladder and Ergonomic Safety
Use a sturdy ladder that can support your weight plus the load of materials, maintaining three points of contact when climbing. Take frequent breaks to stretch and rest if working above shoulder height for extended periods.
Keep tools within easy reach to avoid overextending yourself. Use smaller batches of plaster mix to reduce the weight you carry up ladders or scaffolding, preventing strain injuries from lifting heavy loads repeatedly.
Cost Estimate and Project Budgeting
Cost estimates for a blueboard and veneer plaster project hinge on clear material costs and a practical labor plan. Expect materials to run in the low hundreds for a small job, with joint tape, paper or metal lath, and bonding agents adding another chunk.
A rough DIY time frame versus hiring trades often translates to a per-square-foot ladder of cost that grows with crew size and skill, and you should plan for 5–15% extra for waste and hidden prep needs. Budgeting by project phase keeps you honest: prep, application coats, curing time, and finishing all carry different costs and time.
Sample Material Quantity and Pricing Guide
To estimate material needs, start by measuring your room’s square footage. For a typical 10×12 foot room (120 sq ft), you’ll need about 4-5 sheets of blueboard, each covering around 48 sq ft. Veneer plaster typically comes in bags that cover roughly 30 to 50 sq ft per bag depending on the thickness applied.
Expect to spend approximately $10-$12 per sheet for blueboard and about $6-$9 per bag of veneer plaster. Joint tape costs around $4-$7 per roll, covering up to 80 linear feet. Bonding agents like primer or sizing are essential and cost roughly $5-$8 per gallon.
Calculate your total material needs by dividing the room’s square footage by the coverage area of each product. Add a buffer for waste—typically around 10% extra materials is wise to avoid shortages.
Hidden Costs Beginners Overlook
Beginners often overlook several hidden costs that can add up quickly, such as primer or sizing for the blueboard and joint tape. Patch materials like spackle or drywall compound are necessary if there’s any damage to the blueboard before plastering.
Don’t forget disposal fees for waste materials, which vary by location but typically range from $20-$50 depending on volume and local regulations. Tool rentals such as sanders or trowels might be needed if you don’t own them, costing around $10-$30 per day.
Extra coats of plaster may also be required for a smooth finish, adding another layer of cost to your project. Watch for red flags like moisture, damaged drywall, or irregular surfaces, which tend to blow up expenses and extend schedules.
Comparing Veneer Plaster to Alternative Drywall Finishes
To compare finishes, inspect samples under different lighting conditions, touch them to feel texture, and measure their thickness. This helps identify the durability and aesthetic qualities of each option.
Knowing these tradeoffs matters on a DIY job because it shapes your plan for durability, repairability, and long-term upkeep in kitchens and bathrooms where moisture and traffic test finishes, especially in aging homes or busy projects. It also clarifies why you may choose skim coats for speed or veneer plaster for a smoother, more durable look.
When Skim Coat or Joint Compound Is Sufficient
If you’re looking for a quick fix to cover up minor imperfections on your drywall, skim coating with joint compound might be the way to go. It’s easier and faster than veneer plaster, requiring less material and labor time.
Skim coat is ideal for small projects or areas where durability isn’t a major concern. For instance, in bedrooms or living rooms that don’t see much wear and tear, skim coating can provide a smooth finish at a lower cost compared to veneer plaster. However, if you need a more durable surface that can withstand moisture or heavy use, veneer plaster is the better choice.
Remember, choosing between these options depends on your specific needs and budget constraints. Skim coat offers simplicity and economy, while veneer plaster delivers longevity and resilience in high-traffic areas.
Venetian Plaster and Lime Options vs Gypsum Veneer
Venetian plaster and lime finishes offer unique aesthetic qualities that differ from traditional gypsum veneer. Venetian plaster can create a luxurious, marble-like appearance with its distinctive texture and sheen, making it ideal for high-end interior design.
Lime plasters provide a softer, more organic look compared to the smoother finish of gypsum veneer. They are also easier to repair over time due to their flexibility and ability to self-heal minor cracks.
While both Venetian plaster and lime offer distinctive aesthetics and performance benefits, they require specialized skills and materials that may not align with every project’s budget or timeline. Gypsum veneer remains a reliable option for achieving a smooth, durable finish quickly and efficiently.
Visual Checkpoints and Quality Inspection Before Painting
Before you pick up a brush, walk every room with a critical eye and document what must be flat, bonded, and evenly textured so paint won’t telegraph every flaw, and talk less about guesswork, more about measurable conditions you can show to a helper. Check flatness with a straightedge or laser, locate high or low spots, ridges, and sags, and note any areas that need rework before you lay on primer. Inspect bond and substrate for loose plaster, cracks, or delamination, especially where veneer plaster over blueboard isn’t gripping; mark repairs clearly so you can fix them properly first.
Look at texture consistency, compare smooth, skimmed, or stippled finishes, and flag patches with uneven thickness, pinholes, or washboard patterns that will telegraph after paint, and bring a light source to reveal shadows and disguise, and document any undulations over time to confirm they’re not moving. Search for moisture clues—water stains, efflorescence, or dark spots—and plan fixes now, because hidden damp will ruin adhesion and lead to future peeling. Document a precise repair, patch, and feathering plan, test a patch, verify dust-free surfaces, photograph defects, and set acceptance criteria so you won’t repaint twice, and also review edge joints and corner beads for hairline gaps. This saves money later and gives you a predictable finish you can rely on, so you won’t have to redo work after the first coat. If you skip this, expect touch-ups, more sanding, and a longer job, and keep the plan visible on site and review it with anyone helping to stay on track.
Using Straightedges and Lighting to Find Flaws
Before painting, use a straightedge or laser level to check for high spots, low spots, ridges, and sags. Raking light can also reveal imperfections that might be hidden in normal lighting.
- Hold the straightedge against walls and ceilings to find uneven areas.
- Use raking light at a 45-degree angle to highlight surface flaws.
- Look for any gaps or cracks where veneer plaster isn’t adhering well.
- Check corners and edges for consistency in texture and flatness.
- Inspect around windows, doors, and other fixtures for smooth transitions.
- Note areas with loose plaster that might need re-troweling.
- Identify any delamination or lifting of veneer plaster from blueboard.
- Check ceilings for sagging in the center or along edges.
- Look for pinholes, bubbles, or other imperfections in the surface texture.
- Inspect corners and joints for proper feathering and blending.
- Ensure all repairs are smooth and level with surrounding areas.
- Mark any spots that need attention before proceeding to painting.
If you find movement or unevenness, stop and fix these issues before moving forward.
Final Walk-through Acceptance Criteria
A quick check to ensure the surface is ready for painting. Look for uniform texture, smoothness, and overall quality.
- The surface should be free of cracks or delamination.
- No loose plaster or areas where veneer isn’t adhering properly.
- Consistent texture across walls and ceilings without pinholes or washboard patterns.
- No visible water damage, efflorescence, or discoloration indicating moisture issues.
- All repairs should be seamless with no noticeable patch marks.
- The surface must be dust-free before painting to avoid imperfections.
- Take photos of any lingering defects for documentation and future reference.
If you notice any flaws, address them immediately before proceeding to the next step.
Step-by-step Beginner Project Plan (Single Room)
A Step-by-step Beginner Project Plan guides you through a phased, day-by-day timeline for a single room, starting with prep and materials day and moving through scratch, brown, and finish coats to painting. It includes realistic curing windows and warm-up and cool-down periods, plus a comprehensive materials and tools checklist with color-coded timing that shows exactly which items are used in each phase. Expect precise thickness targets, mixing ratios, and work times for each coat, along with essential quality-control checkpoints for surface prep, plaster consistency, edge and corner checks, and safe drying conditions between coats.
This approach helps you manage a small project like a single room with predictably paced progress and fewer surprises on site. You’ll reduce risk by following clear steps, knowing when to pause for humidity or temperature changes, and having ready-made risk-reduction tips for pinholes, cracking, or delamination. The plan also covers quick post-application cleanup and protection, so you finish with a solid surface you can paint on without rework or delays.
Step-by-step Process
Start by setting up your workspace and gathering all necessary tools and materials. Ensure safety checks are complete before beginning work.
- Prepare the room: Clear out furniture, cover floors, and lay down drop cloths.
- Inspect blueboard for any imperfections or loose edges and fix them with joint compound.
- Mix your veneer plaster according to manufacturer instructions. Use a mixing drill for consistency.
- Apply the scratch coat using a 1/4-inch trowel, feathering out at corners and edges.
- Let the scratch coat dry until it’s firm but not hard. This can take several hours depending on humidity.
- For the brown coat, use a 3/8-inch trowel to smooth over the scratch coat, filling any low spots or imperfections.
- The finish coat should be applied with a 1/4-inch trowel for a fine texture. Sand lightly if needed before painting.
Finish by cleaning tools and disposing of waste properly. Check your work for any flaws before painting.
Day-by-day Sample Schedule
Start with room preparation on day one, including setting up drop cloths and inspecting blueboard. Mix plaster and apply scratch coat the next day, allowing it to dry overnight.
Apply brown coat on day three, followed by a finish coat on day four. Allow at least two days for drying before sanding lightly and painting.
Small-scale Practice Exercise Before Tackling Walls
Before applying veneer plaster to walls, practice on a scrap board. This helps you get comfortable with mixing and troweling techniques.
Mix a small batch of plaster and apply it in thin layers, practicing different trowel angles and pressures for smoothness.
Practical Next Steps and Trusted Sources
Manufacturer Technical Bulletins to Read
Before you start your veneer plaster project, make sure to read the technical bulletins from the manufacturers of the products you plan to use. These documents will give you crucial information on mix ratios and open times.
Pay attention to temperature limits as well; extreme temperatures can affect how the plaster sets and dries. This knowledge is key for a successful application, so take your time to understand it thoroughly before beginning work.
Mixing ratios are particularly important—getting them right ensures that your plaster has the proper consistency and strength. Also, check if there are any specific bonding agents or additives recommended by the manufacturer to enhance adhesion on blueboard substrates.
Questions to Ask a Potential Plaster Contractor
When interviewing potential plaster contractors, ask about their experience with veneer plaster over blueboard. You want someone who has worked on similar projects and understands the nuances of this technique.
Inquire about warranties they offer for their work and how long those warranties last. Also, check if they include cleanup in their service package or charge extra for it.
Request to see a portfolio of previous veneer plaster jobs. This will give you an idea of the quality of their work and help you decide if they are the right fit for your project. Don’t hesitate to ask about any challenges they faced during past projects and how they overcame them.

Conclusion
Veneer plaster over blueboard is a durable, attractive finish when you follow the steps and respect the limits. The payoff is a smooth, flat wall that holds up over time, but it only happens if you stay safe and deliberate at every stage.
First, check that your blueboard is sound and dry, then confirm you have the right tools and a clearly planned order: prime and tape joints, apply scratch and brown coats with consistent thickness, finish with the top coat and textures, let each coat cure properly, then sand lightly and test for adhesion before painting. Work in a small area first, keep the workspace ventilated, and wear a mask when you sand or mix compounds. Don’t rush curing or skip steps like priming and joint treatment, and keep a clean, organized pace so you don’t trap dust or air voids.
Common mistakes to avoid include skipping primer or using a joint compound that’s too forgiving, mixing plaster too wet or too dry, and rushing corners or transitions that show mismatched texture. A simple safety rule is to always mask off doors and floors, wear eye protection and a respirator when sanding, and test any new mix in a small patch before committing to the full wall. If you spot cracks, delamination, or pinholes, back up and fix them in the correct order rather than bodging a patch that won’t hold.
If the project involves a large area, persistent moisture, or questionable framing, don’t push ahead alone. A professional is appropriate when you have structural concerns, recurring cracks, or damp conditions. With careful planning, steady hands, and adherence to the steps and safety rules, you’ll finish strong and enjoy a solid veneer plaster surface that lasts.
FAQ
What’s the biggest mistake beginners make with veneer plaster?
Most folks start applying veneer plaster before the drywall (blueboard) is completely dried. This can cause your finished wall to look bumpy and uneven.
How do you know when the blueboard is really ready for plastering?
Give it a gentle poke with a screwdriver or tap it gently. If it feels solid, it’s ready. You should also wait at least 24 hours after installation before starting.
Should I wet the blueboard before applying veneer plaster?
No, don’t do that! Wetting your blueboard can cause moisture to get trapped under the plaster and lead to nasty mold growth. Work on small sections, keep them moist during application with a damp sponge, but don’t soak the board.
Can I use regular joint compound as veneer plaster?
No way! Joint compound is too thin for venetian plaster applications. It won’t give you that smooth, thick, luxurious finish you’re after. Stick with real veneer plaster products for best results.