

Introduction
Interior trim molding should be installed with careful measurement, precise cuts, and proper finishing for a polished look.
You’ll learn how to plan layout, choose profiles, and make clean joints, plus practical tips for fitting corners, accounting for gaps, and achieving consistent reveals across a room.
The guide walks through step-by-step techniques, common mistakes to avoid, and real-world examples to help you tackle common trim projects with confidence.
Key takeaways
- Trim enhances aesthetics, adds value to rooms.
- Gather tools: miter saw, nail gun, tape measure, safety gear.
- Choose material: MDF for durability, wood for warmth.
- Prepare workspace, pre-finish materials before installation.
- Install window trim in this order: sill, sides, header, apron.
- Use nails for initial attachment, adhesives for support, joints for alignment.
- Secure with wood fill, sand, caulk; prime and paint for durability.
Table of Contents
- Introduction
- Key takeaways
- Why Interior Trim Matters
- Tools and Materials Checklist
- Choosing the Right Molding Material
- Preparing Materials and Workspace
- Step-by-step: Installing Window Trim (Sill, Sides, Header, Apron)
- Fastening Techniques: Nails, Adhesives, and Joints
- Securing and Finishing: Wood Fill, Sanding, and Caulk
- Priming and Painting Trim for Durable Results
- Quick Safety Checklist for DIY Trim Projects
- Common Mistakes and How to Avoid Them
- Cost Breakdown and Budget Planning
- Maintenance and Long-term Care of Trim
- Conclusion
- FAQ
Why Interior Trim Matters
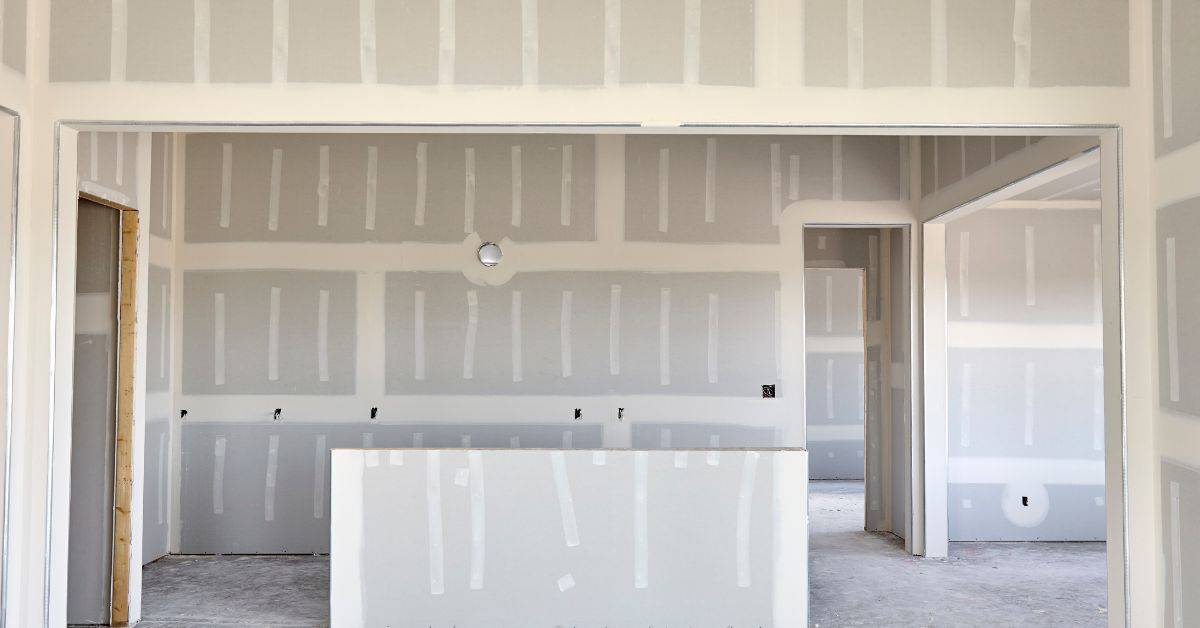
Interior trim molding enhances aesthetics and functionality by framing windows, doors, and baseboards, protecting edges, and hiding imperfections.
Select materials like wood, MDF, or PVC/urethane composites based on moisture exposure, room use, and design style. Ensure proper reveals, consistent joints, and correct corner techniques for a cohesive look.
Install trim with care—level, plumb, aligned with surfaces—and check fit around irregular openings before fastening to avoid gaps and misalignment. Proper installation elevates perceived quality and resale value significantly.
Function vs. Form
Trim protects edges and hides gaps between walls and floors or ceilings functionally. It frames windows and doors, making them stand out architecturally.
Aesthetically, material choices like wood species or PVC composites can dramatically change room feel. Choose materials that match your home’s style and protect it from wear.
Thicker baseboards can increase durability and visual impact, but they may not be suitable for all design styles.
Common Trim Types and Where They Belong
Baseboards cover wall-floor joints, protecting them from scuffs. Casing frames doors and windows for a clean line where they meet walls.
Crown molding sits at the top of walls where they meet ceilings, adding elegance. Chair rails divide walls into upper and lower sections, often used in dining rooms or hallways for visual separation and protection.
Apron trim under window sills provides a decorative finish and hides gaps between frames and walls. Each type serves specific purposes to create a cohesive look throughout your home.

Tools and Materials Checklist
This section delivers a concise, prioritized checklist for interior trim projects, starting with the essential tools you will use most and then adding the fasteners, adhesives, and finishes that actually keep trim secure and looking right from room to room. List must-have hand tools and power tools by priority—saw options (miter or handsaw), chisel, tape measure, square, utility knife, level, and nail set—then hammer or brad nailer and finish nails you’ll reach for first. Also call out safety basics—goggles, hearing protection, and a dust mask—because cutting, sanding, and dust create real hazards you must respect on every project.
Cover fasteners and securing methods: choose finishing nails versus brad nails, proper nail sizing by trim type, corrosion-resistant options for moisture-prone areas, and where construction adhesive helps reduce nail pops. Finish materials include wood filler, caulk, painter’s tape, wood conditioner if staining, primers and paints or stain, sealant or varnish, plus optional edge-retapping tools for clean miters. Finally, frame a practical workflow and procurement guide—must-haves versus nice-to-have, budget substitutes, bulk versus specialty sources, and a quick reminder to plan for material compatibility and smooth sequence from measuring to finishing.
Hand Tools Everyone Should Have
For interior trim work, having the right hand tools is crucial. Start with tape measure, square, utility knife, chisel, nail set, sanding block or power sander, hammer or brad nailer.
- Tape Measure: Essential for accurate measurements.
- Square: Ensures cuts are straight and true.
- Utility Knife: Cuts trim to size quickly and cleanly.
- Chisel: Removes small amounts of wood for fitting joints.
- Nail Set: Drives nails below surface without damaging wood.
- Sanding Block or Power Sander: Smooths rough edges before painting.
- Hammer or Brad Nailer: For driving in finish nails or brads.
Always check work for movement and adjust as needed. Stop immediately if you notice any signs of instability or excessive play.
Power Tools and Safety Gear
Power tools speed up the process but safety is paramount. A miter saw and brad nailer are must-haves for efficiency.
- Miter Saw: Cuts precise angles for corners and edges. Ensure safe setup with backer boards and zero-clearance fences to prevent kickback.
- Brad Nailer: Drives in small finish nails quickly and neatly. Set air pressure correctly to avoid damaging wood or causing injury.
- Sander: Smooths out rough surfaces before painting or staining.
- Goggles: Protect eyes from flying debris.
- Hearing Protection: Essential for loud machinery noise.
- Dust Mask: Keeps dust out of lungs, especially when handling materials like MDF which can be harmful if inhaled.
Always stop and reassess for any movement or instability before proceeding. Call a professional if you encounter issues beyond your expertise.
Choosing the Right Molding Material
MDF is a cost-effective option for interior trim molding, offering smooth and consistent surfaces ideal for painting without showing knots or grain patterns. However, it may have lower durability compared to solid wood in high-traffic areas; it tends to crack when nailed and isn’t suitable for damp environments.
Solid wood provides a natural look with visible grains and knots, making it more expensive but better suited for durability and moisture resistance. Solid pine is often chosen for DIY projects due to its affordability and workability. Consider the room’s humidity levels and budget: MDF works well in bedrooms or living rooms where durability isn’t critical, while solid wood is preferable for bathrooms or kitchens.
MDF vs. Solid Wood: When to Use Each
To measure window and door openings accurately, start by measuring the width at multiple points along the top, middle, and bottom of each opening. Note any irregularities such as arches or angles. MDF is ideal for clean lines and minimal profiles but lacks durability compared to solid wood in high-traffic areas. Solid wood offers better moisture resistance and longevity in kitchens and bathrooms. Choose MDF for budget-friendly projects with lower humidity needs, and opt for solid wood where moisture resistance is crucial.
Matching Trim to Room Style and Budget
Select the right trim profile based on room style: modern rooms benefit from clean lines, while traditional spaces may require more ornate moldings. Budget considerations also influence material choice; MDF or pine are suitable for tighter budgets, whereas hardwoods like oak or maple offer better quality and durability.
High-traffic areas demand sturdier options, such as solid wood, while bedrooms or studies can accommodate softer woods or painted MDF. Ensure the profile’s complexity and material quality align with your space’s design scheme.
Preparing Materials and Workspace
Acclimate wood, MDF, or PVC to your workspace humidity for several days before cutting to avoid warping and gaps.
Measure openings precisely to minimize waste and set up dust control measures to keep the work area clean and safe.
Measuring and Ordering Materials
Accurately measure window and door openings before ordering materials, adding a bit extra for mistakes.
- Masonry Mesh: Add extra material around openings. Check for any tears or rust spots.
- Sand: Ensure your sand is free from contaminants.
Avoid using warped or weak materials like bowed forms or damaged rebar as they can compromise the integrity of your pour and lead to costly repairs later on.
Pre-priming and Filling Knots
Prime knots and sap streaks before installing wood. This prevents bleed-through when applying finish coats.
To fill knots and sap streaks, use a wood filler that matches your wood type. Apply it thoroughly with a putty knife, let it dry completely, then sand smooth for a professional look.
Step-by-step: Installing Window Trim (Sill, Sides, Header, Apron)
Prepare your workspace and gather materials before starting the installation process. Measure the window frame accurately to ensure precise cuts.
Set up the trim layout by marking the sill, sides, head, and apron so reveals line up with existing openings, walls stay plumb, and ceiling lines remain level. Double-check measurements before cutting wood, considering stock width, height, depth, and whether you buy pre-primed or need custom cuts.
Step-by-step Installation Process
Clear your workspace and gather tools. Measure the window frame accurately.
- Mark the sill position on wall and floor to ensure it’s level.
- Secure the sill using shims for leveling and fasteners like nails or screws.
- Cut and fit side casings, ensuring they are plumb and aligned with the sill. Use a level to check alignment.
- Attach the header over the top of the window frame, making sure it’s level and flush with the wall.
- Measure and cut the apron to fit under the sill, adjusting for any gaps or imperfections in drywall.
Before painting or staining, check all pieces are secure and aligned properly. Adjust as needed to ensure a clean finish.
Cutting and Fitting the Sill
The sill fits snugly under the window frame. Measure carefully to ensure a tight fit without gaps or overhangs that could cause water issues.
Use shims to level the sill on both sides, ensuring it sits evenly. Secure with fasteners like nails or screws and check for imperfections before moving onto the next piece of trim.
Fitting Side Casings and Header
Measure each side casing individually to fit perfectly between window frame and wall. Use a level to ensure they are plumb.
The header should sit directly above the top of the window, aligned with casings below. Avoid complex miters by using butt joints or coped joints for cleaner lines.
Secure each piece firmly but carefully, checking alignment as you go to avoid misalignments that could affect overall look.
Adding the Apron and Final Adjustments
The apron fits under the sill and adds a finished look. Measure carefully to ensure it covers any gaps or imperfections in drywall.
Secure the apron using nails or screws, placing them discreetly away from visible areas to avoid unsightly marks.
Before painting or staining, do a final check for alignment and fit. Ensure all pieces are secure and level before proceeding with finishing touches.
Fastening Techniques: Nails, Adhesives, and Joints
Select the appropriate nails, adhesive, and joints to ensure your trim remains secure over time. Use brad or finishing nails based on the size of the trim piece; smaller pieces like chair rails and baseboards work well with brads, while larger pieces benefit from finish nails.
Brad Nails vs. Finish Nails vs. Pocket Screws
For small trim pieces, use brad nails to minimize surface damage. For larger pieces, opt for finish nails which provide more holding power and can be countersunk easily.
Pocket screws can additionally reinforce joints in hidden areas or when building large frames like window casings. Pre-drill holes to avoid splitting the wood when using pocket screws.
Gluing, Caulking, and Furring Filler Gaps
Apply construction adhesive along edges where trim meets walls or other pieces for added stability. Use caulk after gluing to fill small gaps and create a smooth transition between surfaces.
If glue doesn’t hold or nails pop out after installation, stop and reassess the fit of your trim pieces. Ensure that all joints are properly secured with adequate adhesive and fasteners before proceeding. If issues persist, consider consulting a professional for additional support.
For larger gaps or uneven substrates, use furring strips or shims to level the surface before installing trim. This ensures your final product is straight and secure without visible imperfections.
Securing and Finishing: Wood Fill, Sanding, and Caulk
Finish in a logical order: fill nail holes first, then sand joints and surfaces, then caulk, and finally inspect seams for invisible transitions. Use a compatible interior wood filler that matches the stain or paint color, and plan for shrinking or expansion gaps; test on scrap before committing to the project.
Sand progressively from coarse to fine grits, cover nearby surfaces, and address open joints and high spots to avoid chasing problems later. This approach saves rework and yields a cleaner, longer-lasting job. Gaps, hollow joints, or rough caulk lines show up in light and ruin the finish’s look.
Choosing Fillers and Sanding Sequence
Pick the right filler for your material—wood putty for wood, spackling compound for MDF or drywall. Test on scraps to match color before filling nail holes and seams.
Start sanding with a coarse grit paper like 120-grit to smooth out rough spots and fill gaps. Move up to finer grits for a smoother finish, paying extra attention to corners and profiles where tools can’t reach easily.
Protect adjacent surfaces from scratches by using tape or foam padding around the trim pieces while sanding. Address any high spots or uneven areas before moving on to caulking for seamless transitions.
Caulking Tricks for Tight, Paint-ready Seams
Select the right caulk type—painter’s caulk works well for interior wood joints, while silicone or acrylic latex is better for drywall. Apply a thin bead of caulk along seams and corners to fill gaps and create smooth transitions.
Use your finger or a caulk tool to press the bead into place and smooth it out. This helps prevent excess material from squeezing out and ensures a clean, professional look when painted over.
Avoid common mistakes like applying too much caulk, which can lead to an uneven surface that’s hard to paint. Also, make sure to fill gaps properly without leaving any voids or hollow spots underneath the bead for best results.
Priming and Painting Trim for Durable Results
Select a primer that matches your trim material—oil-based for stain blocking or water-based for quick coats and better adhesion. Clean, degrease, sand thoroughly, fill any cracks and nail holes, then prime before painting.
Choose enamel or high-gloss paint for durability. Weigh latex against alkyd based on finish preference and ease of cleanup. Apply with a brush along edges, use spray or roller for larger areas, and plan at least two coats with proper drying time to avoid laps, runs, or peeling.
Primer Selection: Bonding and Stain-blocking
Select the right primer based on your trim material. For MDF, opt for a water-based primer to seal the surface and prevent stains from showing through.
Pine trim requires an oil-based primer due to its tendency to bleed tannins when painted. This also ensures good adhesion with latex paints later on.
For stained wood, use an oil-based primer to block residual stain bleeding while ensuring strong paint adhesion. Shellac-based primers are ideal for darker stains or woods prone to tannin bleed due to their superior sealing properties.
Best Practices for Paint Application
Start by brushing along edges and corners where rolling won’t reach, then use a roller for larger areas. Maintain an even flow of paint across your brush strokes to avoid lap marks.
If using a sprayer, ensure the nozzle is set up correctly and move it steadily to prevent uneven coverage or drips. Use long, smooth strokes in one direction with brushes to avoid lap marks.
Allow each coat to dry thoroughly before applying another; this typically takes several hours but depends on humidity levels. Sand lightly between coats if needed for a smoother finish.
Quick Safety Checklist for DIY Trim Projects
Keep this quick safety checklist handy for every trim job. Wear eye protection, hearing protection, gloves, and a dust mask, and make sure tool guards stay in place. Secure the workpiece with clamps and check for movement before cutting; use a stable ladder with three points of contact and avoid overreaching.
Dust control matters: use a vacuum, dampen surfaces, and ventilate well to protect lungs. Be ready for emergencies: unplug tools before adjustments, keep a first aid kit and fire extinguisher accessible, and have a simple incident protocol.
Tool-specific Safety Notes
Always keep safety in mind while using power tools for your trim project. Here are some quick reminders:
- Ensure the miter saw guard is properly adjusted and never remove it.
- Keep hands clear of the blade area when operating a miter saw.
- Use eye protection and hearing protection with all power tools.
- Secure trim pieces before using a nailer to avoid kickback.
- Never touch the sanding belt or disc while the sander is running.
- Check for any loose parts on your tools before starting work.
- Use gloves when handling sharp edges and rough surfaces.
- Ensure all guards are in place on power tools to prevent injuries.
- Avoid overreaching with hand-held tools; use a stable base or stand.
- Unplug tools immediately if you notice any malfunction or unusual noise.
- Keep the work area clean and free of clutter to avoid tripping hazards.
- Use appropriate respirators when working with dust-producing materials.
If your tool starts moving unexpectedly, stop immediately and check for loose parts or other issues before continuing.
Workspace Ventilation and Dust Control
Maintaining a clean workspace is crucial to reduce dust inhalation risks. Here’s what you should do:
- Use a HEPA filter mask when working with wood dust.
- Set up a dust extraction system or vacuum near your work area.
- Dampen surfaces before sanding to minimize airborne particles.
- Wear appropriate respirators for fine dust and maintain good ventilation.
- Cover exposed skin to prevent irritation from sawdust and other debris.
- Regularly clean the workspace to remove accumulated dust and waste.
- Store unused materials in sealed containers to reduce dust exposure.
- Use a wet mop or damp cloth for cleaning instead of dry sweeping.
- Place fans strategically to direct airflow away from your work area.
- Keep windows open if possible, but use air filters during high-pollution days.
- Store tools and equipment in designated areas to keep the workspace tidy.
- Dispose of waste properly to avoid attracting pests or creating hazards.
If you notice an increase in dust levels despite your efforts, stop work immediately and reassess your ventilation and cleanup procedures.
Common Mistakes and How to Avoid Them
Common DIY mistakes in interior trim molding—measuring errors, failing to acclimate wood, using the wrong fasteners, and overcaulking—show up as loose joints, crooked reveals, gaps that hold paint poorly, and shorter life for the trim. Always verify walls are true, set up story poles and calipers for small profiles, and measure twice before cutting so fit and finish stay tight from the first nail to the last bead of paint.
Wood must be acclimated to the room and climate, humidity controlled, and you should pick nails or screws by substrate, predrill and use anti-corrosion options so nail colors, warping, and joint tightness stay predictable. Do a dry run, shim where needed, keep caulk selective, and fix mistakes early; quick checks and disciplined practice keep miters square, reveals even, gaps minimal, and paint lines clean.
Measurement and Layout Pitfalls
Missteps in measuring and layout can lead to trim pieces that don’t fit properly, causing gaps or overlaps. Double-check your measurements and use story poles for consistent marking.
- Mistake: Measuring only once without a second check leads to incorrect cuts.
Fix: Always measure twice before cutting. - Mistake: Not accounting for wall irregularities results in uneven trim pieces.
Fix: Use calipers and story poles to mark out precise measurements, especially on small profiles. - Mistake: Cutting without a dry fit can waste material and time.
Fix: Dry-fit all pieces before fastening them to the wall. - Mistake: Not checking for plumb lines or level lines during layout leads to crooked trim.
Fix: Use a laser level or long straight edge to ensure everything is perfectly aligned. - Mistake: Overlooking door and window openings can lead to gaps around them.
Fix: Measure multiple times near openings, adjusting for any irregularities.
The quickest on-site correction is a test-fit dry run before fastening anything permanently.
Finish Problems and Their Fixes
Poor finishing can result in visible seams, lap marks, or knot bleed that detract from the overall look of your trim. Address these issues promptly to maintain a clean appearance.
Lap marks occur when paint dries too quickly between coats, leaving streaks on the surface. To fix this, ensure each coat is fully dry before applying another and use a primer that seals well.
Visible seams can be unsightly if not properly filled or caulked. Use a fine-grit sandpaper to smooth out any rough edges and apply a thin layer of filler for a seamless look.
Knot bleed through the paint is common in pine or other softwoods. Apply a knotting sealer before priming to prevent this issue, ensuring your final coat looks clean and professional.
Cost Breakdown and Budget Planning
This section gives you a clear cost breakdown and planning approach for interior trim projects. You’ll see a simple taxonomy: materials (wood, composites, finishes, fasteners), tools (hand vs. power), and miscellaneous (glue, caulk, nails) with rough price ranges and notes on durability. You’ll also get a buy vs. rent guide for essential tools, a straightforward cost template with line items for materials, labor, and incidentals, plus a waste factor and contingency to keep the budget honest, all paired with time estimates for prep, measuring, cutting, fitting, fastening, caulking, sanding, painting, and cleanup.
This matters because a realistic plan prevents overspending and delays. It helps you decide what to own long term, what to rent for one-offs, and how to track hours to stay on scope, so DIY homeowners avoid surprises and finish faster with better results.
Itemized Material Costs (Example)
MDF trim can cost around $1 to $2 per linear foot, while pine might range from $2 to $4 depending on quality. Finishing nails and screws typically run about 50 cents for a pack of 100.
Caulk usually comes in tubes costing between $3 and $6 each, enough for several joints or seams. Primer prices vary widely but expect around $10 to $20 per gallon depending on the brand and quality needed.
Save Money without Sacrificing Quality
Renting specialty tools like a miter saw or compound mitre box can save money if you only need them for one project. Buying these items outright might not be worth it unless you plan to use them frequently.
Using primed MDF for painted trims is often cheaper and just as durable as natural wood, especially in areas where moisture isn’t a concern. This material also sands and paints easily without showing imperfections.
Purchasing trim materials in bulk can reduce costs per unit by taking advantage of volume discounts from suppliers or home improvement stores during sales periods.
Maintenance and Long-term Care of Trim
Keep trim looking good by sticking to a simple routine: clean painted and unpainted trim with the right cleaners, wash down surfaces regularly, scrub at least twice a year, and seal any hairline cracks and screw holes before they become rot, using eye protection and gloves. Do a yearly moisture inspection for soft spots, swelling, blistered paint, and mold, check caulk lines, and document findings with photos and notes, so you know when to touch up, repair, or replace and you have a traceable history. Plan when to paint again, what undercoats and primers are needed, how to prep the surface, and which brushes or rollers to use, because a thorough surface job prevents adhesion failure and saves you costly call-backs.
Small fixes like caulking, filler, and nail pops can extend life, but at the first sign of rot or widespread damage, justify replacing sections or profiles to avoid mismatches and ongoing leaks, and set clear criteria for repair vs replacement. Keep a simple care calendar, note seasonal checks, track products used, and stash spare trim pieces; this habit reduces downtime, helps you plan ahead for weather windows, and keeps moisture problems around windows and doors from sneaking back.
Seasonal Checks and Caulk Renewal
Once a year, give your interior trim a thorough look for any gaps that have opened up or caulk that’s cracked. These are signs of movement in the house structure.
Check around windows and doors where moisture can sneak in. If you spot any issues with paint peeling or bubbling, address them right away to prevent bigger problems down the road.
To keep your trim looking sharp, renew caulk every few years as needed. This helps seal up gaps that might let drafts through and keeps water out.
Repairing Dings and Repainting
If you notice small dents or gouges in your trim, don’t worry. These can usually be fixed with a bit of filler and sandpaper.
To touch up paint, first clean the area to remove any dirt or grime. Then match the existing color as closely as possible for seamless blending.
After applying touch-up paint, let it dry completely before buffing out any rough spots with fine-grit sandpaper. This ensures a smooth finish that matches the rest of your trim.

Conclusion
Safety first and durable results come from doing the prep, install, and finish steps with care. When trim is installed right, it enhances the room’s look and protects the walls for years to come.
Inspect your materials and tool setup, prep the workspace, measure twice, cut square, test fit the window trim, fasten with the proper nails or adhesives, fill the joints, sand and caulk, then prime and paint for a lasting finish—all in that order and with attention to moisture and alignment.
Avoid common missteps: rushing nail placement, using the wrong fastener or adhesive for the material, skipping a test fit, or skipping caulk and paint in joints. Always wear eye protection, unplug tools when not in use, and handle trim flat and secure it before final fastening; test a small area first to confirm paints and primers adhere well.
If the window reveals aren’t straight, the frame is out of plumb, or you encounter hidden wiring or structural issues, don’t push on alone. Call a professional, then use the experience to guide your next project. You’ve got this—finish strong and make it look right the first time.
FAQ
What’s the best way to measure for trim molding?
Measure wall length, then cut your molding about 1/4″ short. This lets you accommodate any imperfections.
How do I handle corners? No miter saw here!
Use coping saw or jigsaw. Mark the cut at 45 degrees (standard for inside corners), follow with a straight cut at corner. Clean up with chisel if needed.
Can I use nails to attach trim? Isn’t that old-school?
Hell no! Nails pop out over time, creating unsightly bumps. Use brad nailer or finish nailer instead. 15-18 gauge nails, 1″ to 2.5″.
How do I avoid visible gaps in my trim?
Avoid cheap molding with wide knobs. Spring for quality wood, and use a nail set to ensure nails don’t pop up. Paint or stain afterwards.