
Introduction
Install Cove Lighting in Crown Molding to create seamless ambient illumination with no visible fixtures.
You’ll learn how to prep the space, choose the right LED strip or linear light, and run wiring safely for a clean, professional look. The guide walks through practical steps, tips, and rules of thumb to help you plan, mount, and tune the lighting for even coverage and reliable performance.
Key takeaways
- Plan layout along crown line, run power from nearest outlet or switch.
- Use low-profile LED strip with diffusing channel for even glow.
- Secure channels with painter’s tape before fastening crown molding.
- Test wiring with multimeter before concealment to prevent shorts.
- Plan dimming control placement to avoid glare and hot spots.
- Maintain airflow, avoid sealed cavities that overheat LED tape.
Table of Contents
- Introduction
- Key takeaways
- Planning and Designing the Layout
- Prep Work and Safety Precautions
- Tools and Materials Checklist
- Step-by-Step Installation Process
- Wiring, Controls, and Testing
- Troubleshooting & Common Mistakes to Avoid
- Pro Tips, Finishing Touches, and Budget Considerations
- Conclusion
- FAQ
Planning and Designing the Layout
Plan what areas will be lit and what mood you’re after, keeping glare and shadows in mind from crown molding. Choose between strip or tape LEDs, pick a color temperature, and set a rough brightness level while noting where the power driver will live. Map the light runs around the room, decide continuous versus segmented runs, and plan hiding channels or profiles.
Doing a quick mockup and test run helps catch line-of-sight issues, heat buildup, and color consistency before you commit. Knowing where to place power, switches, and control hubs keeps wiring clean, compliant, and easier to service.
Calculating lumen output and strip spacing
To figure out how many lumens you need per foot, start by deciding on the lux level for your space. For instance, a living room might want 100-200 lux for general lighting. Once you have that number, use an online calculator or consult LED spec sheets to find the lumen output required.
Next, determine how many LEDs per foot will give you the right lumens. If your strip is rated at 35 lumens per foot and you need 100 lux, you might end up with two strips side by side for twice the light. This helps avoid over-lighting or under-lighting areas.
Remember to check heat dissipation too. Too many LEDs can cause overheating, which shortens LED lifespan and reduces brightness. Use a thermal profile chart from your supplier to guide spacing between strips.
Choosing color temperature and dimming strategy
The right color temperature can set the mood for any room. Warm white (2700K-3000K) gives a cozy feel, while cool white (4000K-5000K) is more energizing. For most homes, 3000K to 3500K strikes the right balance.
Consider the CRI (Color Rendering Index) too. A higher CRI means colors look truer and richer. Aim for at least 80 CRI for good color rendering in your space.
If you plan on dimming, make sure your LEDs are compatible with your dimmer switch or smart hub. Some LED strips won’t work well with certain dimmers, leading to flickering or buzzing issues.
Layout considerations for corners, runs, and access panels
Corners can be tricky. Inside corners need a continuous strip with a slight bend, while outside corners often require separate strips joined at the corner. Use connectors or custom cuts to ensure a seamless look.
For long runs, keep an eye on maximum run lengths for your LED type. Most tapes and strips have limits based on voltage drop and heat buildup. Plan power feeds every 15-20 feet if needed to avoid issues.
Don’t forget access panels for maintenance. Hide junction boxes behind molding or in closets where they won’t be seen but are easy to reach. This makes replacing LEDs or fixing wiring much easier down the line.

Prep Work and Safety Precautions
Prep work means outlining the scope: verify framing integrity, crown molding clearances, and the routing path for Cove Lighting so it sits cleanly behind or inside the molding without weakening the structure. Inspect the studs, plates, and any existing electrical or plumbing in the field, note access points, and map where you can safely cut or route without damaging finishes. Lock out power before any cut or wire work, identify whether you’re dealing with line-voltage or low-voltage lighting, and plan transformer placement if needed.
Accessibility and protection matter: plan for future maintenance access, cover finished surfaces with masking or drop cloths, and set up dust control from the start. Gather tools and materials you’ll rely on—drill, stud finder, level, chisel, saw, LED strips, channels, adhesive, fasteners—and write a simple step sequence from power shutoff to final test, with a safety pause for inspection after framing and routing. Document simple risk controls: check for live wires, hidden insulation, and water exposure around windows or doors, and note any permit or local electrical checks needed.
Assessing structure and clearance behind crown
Before you start cutting into your walls, grab a stud finder to check for any hidden obstacles like joists or pipes. Make sure there’s enough space behind the crown molding for your Cove Lighting strips without hitting anything important.
Use a flashlight to peek inside the wall cavity where you plan to install the lighting. Look out for ductwork, electrical wires, and plumbing that could get in the way of your project. If you find something unexpected, mark it on your layout so you can work around it.
Also, measure the depth of the cavity behind the crown molding. You need at least 1 inch of clearance to safely install LED strips or lighting channels without compromising the structural integrity of your walls. This space is crucial for heat dissipation and keeping everything neat and tidy.
Electrical safety and code basics
When it comes to electrical work, always err on the side of caution. If you’re not comfortable with wiring or unsure about local codes, call in a licensed electrician. They can handle tricky parts like installing junction boxes for future access.
Check your local building codes for requirements on how to conceal and protect wires within walls. Make sure any junction boxes are easily accessible if maintenance is needed down the line. Also, verify that you have enough circuit capacity to support Cove Lighting without overloading existing circuits.
If your project involves areas near water or outdoors, ensure proper GFCI protection and grounding for safety. This isn’t just about avoiding electrical shocks; it’s also crucial for passing inspections and keeping your home safe.
Tools and Materials Checklist
Start with a prioritized tools and materials list you can actually use on site. For crown and cove work, keep the essentials handy: a accurate miter saw, utility knife, level, chalk line, and plenty of clamps. For LED coves, grab thin-profile LED strips, diffusers, aluminum channel, and end caps, plus the mounting clips and connectors you’ll need. Stock both DIY-friendly options and pros-only components for lighting, including dimmable drivers and compatible power supplies, while noting any required dimming or smart-control hardware. Have basic fasteners, construction adhesive, caulk or sealant, primer, and paintable silicone for waterproofing in damp zones, plus a finish that won’t trap moisture.
This matters because you’ll move faster with a ready-to-go kit and fewer trips to the supply house. The plan accommodates budget-minded substitutions and upgrade paths, so you can scale up without reworking the job. It also keeps you safe and code-aware by listing wire nuts, box extensions, low-to-line voltage considerations, and GFCI awareness sandwiched into the workflow. Use the planning aids—measuring tools, a cut/list worksheet, and a basic layout guide—to pre-assemble sections off-wall and reduce on-site handling, which saves time and cuts mistakes.
Essential tools for cutting and mounting molding
Before you start installing your crown molding, make sure you have the right tools to cut and mount it accurately.
- Miter saw: Use a compound miter saw for precise angled cuts. Confirm it’s set up correctly with test pieces; skipping this can lead to misaligned corners.
- Coping saw: For intricate curves or tight spaces, use a coping saw to cut the back edge of molding. Check that your saw is sharp and in good condition; dull blades will tear wood.
- Nailer: Use a pneumatic nailer for fast, secure mounting. Confirm it’s properly adjusted with test shots; improperly set nails can cause damage or require manual hammering.
- Level: Ensure your molding is straight and level using a torpedo level. Check that the bubble is centered before nailing in place; skipping this step means crooked molding.
- Tape measure: Measure accurately with a retractable tape measure. Confirm measurements twice to avoid cutting errors; incorrect cuts waste material.
- Utility knife: Use for trimming excess material or making quick cuts. Check that the blade is sharp and replace it regularly; dull blades can slip and cause injury.
- Chalk line: Mark straight lines with a chalk line tool. Confirm the line is taut before snapping to avoid wavy marks; inaccurate lines mean misaligned molding.
- Caulking gun: Apply construction adhesive or caulk for sealing joints. Check that the nozzle is clean and properly set up; clogged nozzles waste time and material.
Quick rule: Always double-check your tools before starting to avoid costly mistakes.
Lighting components and electrical supplies
Before you start installing cove lighting, ensure you have all the necessary components for a safe and functional setup.
- LED strip: Choose thin-profile LED strips with dimmable drivers. Confirm compatibility with your existing wiring; incompatible strips won’t work properly.
- Diffusers: Use diffusers to soften light output. Check that they fit snugly over the LED strips; loose fits cause glare and uneven lighting.
- Aluminum channel: Install aluminum channels for housing LED strips. Confirm proper installation with test pieces; improperly installed channels can lead to exposed wiring.
- End caps: Use end caps to cover cut ends of LED strips. Check that they fit securely and are properly sealed; gaps allow moisture in, damaging the circuitry.
- Mounting clips: Secure LED strips with mounting clips. Confirm proper placement and tightness; loose clips can cause sagging or falling lights.
- Connectors: Use connectors to link multiple LED strip sections. Check that connections are secure and waterproofed; faulty connections lead to flickering or failure.
- Power supplies: Choose appropriate power supplies for your setup. Confirm correct voltage and amperage ratings; incorrect supplies can cause overheating or damage.
- Transformers: Use transformers for line-to-low voltage conversion. Check that they are properly wired and grounded; improper wiring is a safety hazard.
Quick rule: Always verify component compatibility and installation to ensure reliable performance.
Step-by-Step Installation Process
This step-by-step process guides you from prep to final hookups in a clear sequence: plan measurements, remove or relocate crown molding, route and hide wires, mount LED channels, connect drivers, and test the system. Do it with a wall-to-wall, ceiling-to-floor flow to minimize backtracking and extra work.
Plan the power source, run cables, and manage them so they stay tucked inside the crown profile, with GFCI considerations as needed. For mounting, corners, and seams, aim for clean alignment and safe cable routing and include quick safety checks like turning off power, labeling breakers, and testing with a voltmeter. The result is even light, reliable connections, and easier touch-up if gaps appear.
Step-by-Step Installation Process
This sequence guides you through the installation process, ensuring safety and efficiency from start to finish.
- Start by turning off power at the breaker. Label breakers for your project area and test with a voltmeter to confirm no electricity is present.
- Measure and mark where crown molding will be installed or modified. Use a miter saw for cuts, ensuring angles are precise for seamless fit.
- Install crown molding using nails or adhesive. Ensure it’s secure before moving on to the next section.
- Run wiring along the ceiling, hiding it within the crown profile. Secure wires with staples and ensure they’re not exposed.
- Mount LED strips in channels behind the crown molding. Use clips or adhesive for a snug fit, ensuring even spacing.
Prep cuts and mounting the crown molding
Measure your wall carefully to determine where the crown molding will go. Use a miter saw for precise angles, ensuring corners fit perfectly.
Cut the crown molding with coping or miters as needed. Coping is better for tight corners but requires more skill and time.
Install the modified crown molding using nails or adhesive. Ensure it’s level and secure before moving on to wiring.
Routing wiring and installing drivers
Run low-voltage wires along the ceiling, hiding them within the crown profile. Use staples to keep wires in place and avoid exposure.
Mount LED drivers securely with proper ventilation. Ensure they’re not too close to insulation or flammable materials.
Respect maximum run lengths for wiring to prevent voltage drop. Check your layout against electrical codes before proceeding.
Attaching and concealing LED strips
Mount LED strips in channels behind the crown molding. Use clips or adhesive for a snug fit, ensuring even spacing along the length.
Place diffusers over the LED strips to ensure an even wash of light across the ceiling. Adjust as needed for optimal coverage and brightness.
Ensure heat management by allowing space between strips and insulation. This prevents overheating and extends the life of your lighting system.

Wiring, Controls, and Testing
This section walks you through finishing the electrical work: make final connections, pair the dimmer with your LED cove modules, and tackle flicker before you light up. Plan cable routing to stay hidden, use the right driver or transformer, and run a clear path for service access and future adjustments. Then run commissioning tests to verify operation and safety.
A proper testing sequence catches issues early—continuity, insulation, voltage verification, and dimmer pairing—before final concealment. It matters for reliable, even lighting and safe operation, and it helps you spot flicker or control quirks before they become a nuisance.
Making safe connections and junction-box rules
When wiring your cove lighting, always follow the National Electrical Code (NEC) for safety. Use approved wire nuts or connectors to make secure splices inside junction boxes. Ensure each box has enough space for wires and devices without overcrowding.
Install junction boxes at regular intervals along your run to keep connections accessible and safe. Each box should have a clear path to the next one, allowing room for future repairs or upgrades. Remember, every splice needs a proper junction box with adequate fill capacity based on wire gauge and number of conductors.
For low-voltage systems, use appropriate connectors designed for your specific cable type. Secure all connections tightly to prevent any accidental shorts or damage during installation. Keep in mind that NEC requires accessible boxes for service and maintenance, so plan accordingly.
Dimmer compatibility and troubleshooting flicker
Choose a dimmer switch compatible with your LED cove lighting modules. Leading-edge dimmers are cheaper but can cause flickering or buzzing, especially with modern LEDs. Trailing-edge dimmers cost more but provide smoother operation without the noise.
If you encounter flickering lights during testing, first check if your dimmer is rated for LED loads. Sometimes a simple switch to a compatible model solves the issue. If not, inspect connections and ensure there are no loose wires causing interference or heat buildup.
Another common cause of flicker is improper grounding. Verify that all components are properly grounded according to NEC standards. This includes checking ground continuity from the dimmer through each junction box to the fixtures.
Troubleshooting & Common Mistakes to Avoid
Common symptoms show up fast: an uneven wash, hotspots or overheating, visible LEDs, color shifting, and layout problems. Use quick checks like measuring light intensity at intervals and watching color consistency across fixtures to pinpoint where the issue starts. Then follow practical fixes in order—switch to aluminum channel diffusers, fine‑tune LED strip spacing and mounting, add heat sinking or thermal pads, re‑adhere segments, and verify end‑to‑end continuity to eliminate hotspots.
Why it matters to you is simple: sloppy installs waste time, waste materials, and can create unsafe heat buildup. A solid workflow—test, observe, adjust, re‑test—lets you catch problems early and build a repeatable process for future projects. Pay attention to electrical basics, use proper wiring routes and mounting hardware, keep the crown clean for adhesive bonds, and seal joints to prevent moisture issues in damp spaces while you dial in color temperature, CRI, and diffuser blending to get a clean, lasting look.
Fixing light hotspots and shadows
To tackle uneven lighting, start by checking the spacing of your LED strips. If you notice hotspots or dark spots, it could be due to incorrect placement or too much distance between LEDs. Adjust the setback—how far back from the edge of the crown molding—the strips are mounted.
Another solution is to use aluminum channel diffusers over the LED strips. These channels help spread out the light more evenly and reduce glare. Make sure you install them correctly, with no gaps or misalignments that could cause shadows.
If adjusting spacing doesn’t solve the issue, consider changing the density of your LEDs. More LEDs per inch can fill in dark spots but remember to balance this with heat management since denser LED arrays generate more heat.
Addressing overheating and premature failure
Overheating is a common issue that can lead to early LED strip failures. To combat this, ensure your installation allows for proper airflow around the LEDs. Use heat sinks or thermal pads to draw heat away from the strips.
Another key factor is the length of your LED runs. Longer runs mean more resistance and voltage drop, which can cause overheating at the end of the run. Break up long runs into shorter segments with additional drivers if necessary.
Selecting higher-quality LEDs and drivers also helps prevent overheating. Cheaper components may not have adequate heat management features built in. Invest in reputable brands that meet industry standards for thermal performance.
Pro Tips, Finishing Touches, and Budget Considerations
This section covers pro tips for clean concealment, reliable performance, and a practical budget for crown-LED installations. Think low-profile strips, single-run layouts, removable diffusers, and hiding cables behind crown while keeping access for maintenance.
The right finishing touches make it look built-in and stay durable over time, with careful caulking, paint touch-ups, and diffusion to reduce glare. Keeping a simple access path, labeling wires, and storing spare fittings saves you time on maintenance and future upgrades. Plan your budget with itemized components and a small contingency; check labels for drive and strip specs.
Finishing & visual checkpoints
Use this checklist right after installing the LED strips and before painting.
- Paint touch-ups: Apply paint or stain to match crown molding. Check for even coverage; missed spots show light leaks.
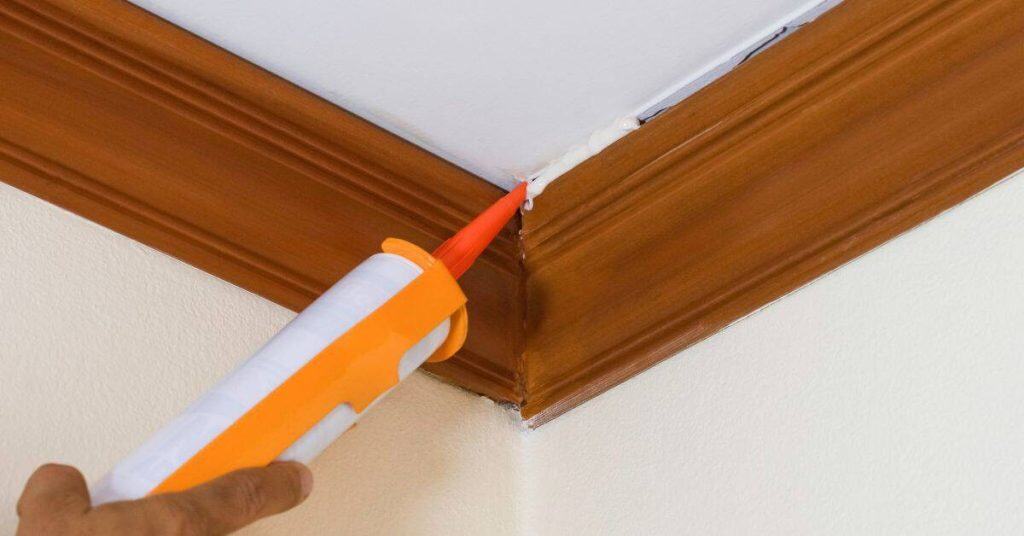
- Caulk gaps: Seal all joints with matching caulk. Inspect for smooth, clean lines; gaps let in dust and moisture.
- Diffuser installation: Install frosted covers or diffusers to soften light. Ensure no glare spots; missing diffusers create harsh lighting.
- Nighttime test: Turn on lights at night for a final check. Look for even illumination without hotspots; uneven light ruins the look.
- Cable routing: Confirm cables are hidden behind molding. Check no exposed wires; visible wiring looks messy and unsafe.
- Molding fit: Verify crown fits snugly against walls. Inspect for gaps or misalignment; loose fitting shows poor craftsmanship.
- Driver access: Ensure easy transformer access. Test by reaching in; inaccessible drivers mean future headaches.
- Seam alignment: Check painter’s tape lines match perfectly. Look for uneven edges; mismatched seams look amateurish.
Quick rule: A thorough night test is your final pass before calling it done.
Cost estimate and ways to save
Materials like LED strips, aluminum channels, and diffusers can add up. Plan for around $50-$100 per linear foot depending on quality.
Labor costs vary widely by region but expect about $20-$40 per hour for installation time. Factor in an extra 10-20% contingency fund for unexpected issues.
Save money without compromising safety by opting for budget-friendly LED strips and using DIY methods to hide cables instead of professional routing services.

Conclusion
Finish with confidence by treating this install as both a craft and a safety test. A clean, well-planned layout, solid wiring, and careful finishing ensure you get even light, zero overheating, and a look that lasts as long as your crown molding does.
Check in this order: confirm your design is straight and balanced, verify your power source and dimmer or controls meet the load, prep the surface and secure all under crown components, run a careful test in a small area, then wire and seal per the plan, finally test again before you finish trim and paint. If you find anything off, pause, recheck the layout, and correct before proceeding.
Common mistakes to avoid include rushing the layout, skimping on the boxing or securing methods for the low-profile lights, and skipping a full test after wiring. safety first means double-checking all connections, turning off power while you adjust, and using the right tools for each step. Always test in a controlled, low-risk way and watch for heat or flicker as you go.
If you see signs of a heat source, loose connections, or if the system clearly exceeds the planned load, call a licensed electrician. When in doubt, pause and get a pro to review the wiring and controls. With careful planning and disciplined execution, you’ll finish clean, safe, and ready for long-term use. You’ve got this—light up the room with a job well done.
FAQ
What prep work should I do before running the cove lighting?
Clear the work area and measure the crown line so you know exactly where the LEDs will sit. Patch any gaps in the ceiling or wall and run a clean electrical plan with a dedicated circuit if possible. Don’t skip cleaning the surface; dust will kill adhesion and wrap-around heat can shorten life.
What tools do I need to install crown molding with cove lighting?
You’ll need a stud finder, a level, a miter saw, a drill, finishing nails, and a small flashlight for tight spots. A hot glue gun and double-sided tape help with securing LED strips in tight bends. Have a voltage tester and proper wire nuts or connectors for safety.
What are common mistakes to avoid with the lighting setup?
Avoid hiding the power cable behind the crown or under trim. Don’t run wires through hollow crown without a chase; use a proper conduit or install in-wall wiring per code. Don’t skimp on a diffuser or proper channel; glare and hotspots wreck the look.
How do I finish and test the system after install?
Attach the crown, hide the LEDs, and run a low-voltage test first. Power up and check for even glow and hotspots, then tweak strip alignment. Leave a clear access point for future maintenance and endpoints for easy replacement.