
Introduction
Locating studs in plaster walls means finding the framing behind the plaster to secure anchors or fixtures reliably. It involves using practical tests to confirm where the vertical supports run. Mark your likely lines and verify with a second method before drilling.
If a stud isn’t where you expect, re-check with another method and adjust your plan accordingly. Use alternative fasteners or anchors rated for hollow plaster when you can’t hit a stud. Always double-check for utilities and follow manufacturer instructions for anchors and screws.
Key takeaways
- Always verify plaster thickness and lath backing before drilling or anchoring.
- Use multiple tests to locate studs, then mark consistent center lines.
- Avoid behind-wall utilities by checking for pipes or cables before holes.
- If a mark shifts, recheck with a new probe a few inches.
- Apply appropriate mechanical anchors rated for plaster and hollow reveals.
- Plan visual checkpoints and wall-mapping before final installation to reduce mistakes.
Table of Contents
- Introduction
- Key takeaways
- Why Plaster-and-Lath Walls Behave Differently
- Tools and Materials Checklist for This Hack
- The Simple Hack — Step-by-Step Method
- Quick Tests to Confirm a Stud Location
- Why Stud Finders Fail on Plaster and How to Fix Them
- Fixes When Your Mark or Hole Is Off
- Anchoring and Load Strategies for Plaster Walls
- Visual Checkpoints and Wall-Mapping Before Final Installation
- Conclusion
- FAQ
Why Plaster-and-Lath Walls Behave Differently
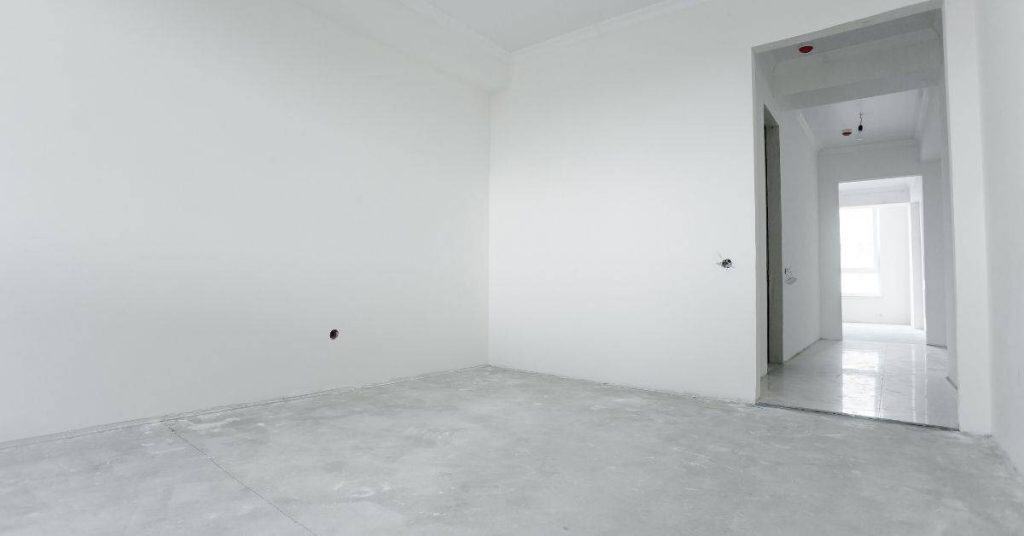
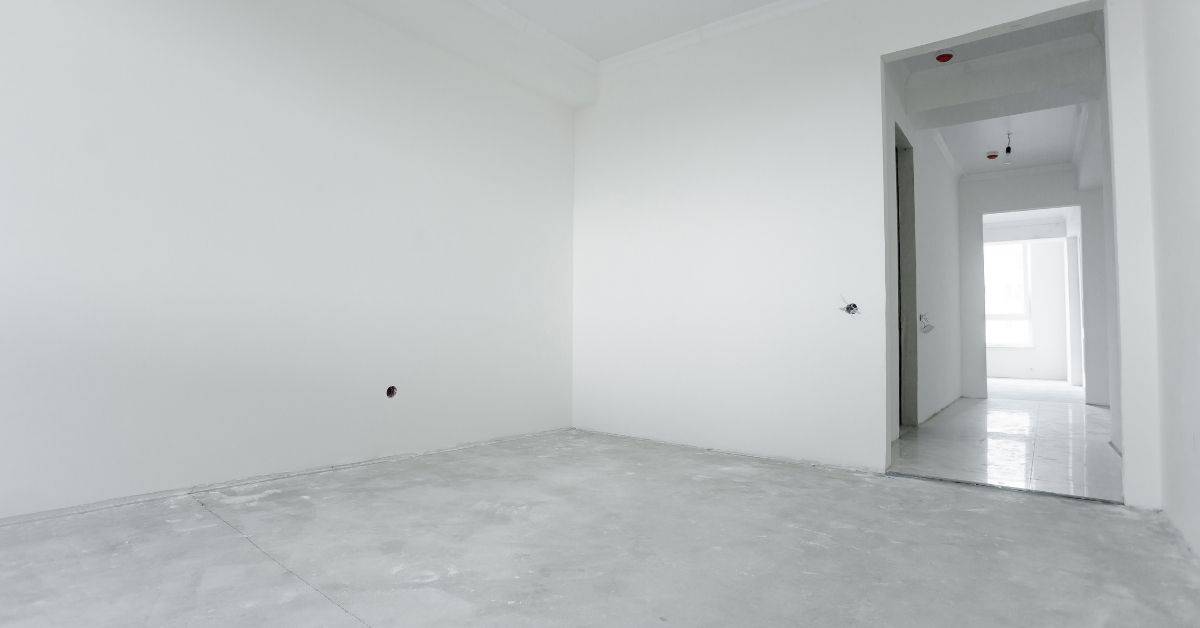
Plaster-and-lath walls aren’t solid drywall. They’re built with plaster over wooden or metal lath, which throws off electronic stud finders and can hide studs behind thick layers.
That means you–as a DIYer–need to verify with more than one method and drill carefully. Expect readings to be misleading, and confirm by tapping, measuring from known edges, and checking manufacturer instructions for your finder. If in doubt, check the label or datasheet for how to proceed on layered walls.
What plaster and lath look and feel like
Plaster-and-lath walls have a unique appearance and texture. The surface is usually uneven, with small cracks or imperfections. You might see faint seam lines where the wooden or metal lath strips were placed.
Wooden lath gives a slightly rougher feel than metal lath. Nails used to secure the lath are often visible, creating small bumps or dimples. Modern drywall has a smooth, uniform surface and no nail patterns.
The overall look is old-fashioned, unlike the clean lines of modern drywall. But remember, these walls have history – they’ve been around for decades!
Typical challenges for stud finding in plaster
Locating studs in plaster-and-lath walls can be tricky. Here’s why:
Metal lath can confuse electronic stud finders. They might pick up on the metal, giving false readings. You could end up drilling into a wall void instead of solid wood.
Plaster layers can dampen signals too. Thick plaster or multiple coats can make it hard for your finder to ‘see’ the studs behind them. This might lead you to miss some studs altogether.
Air gaps between lath strips and plaster can also cause issues. These gaps can hide stud edges, making it tough to pinpoint their exact location. You might end up drilling too far from the center of the stud, weakening its support.
Tools and Materials Checklist for This Hack
This section covers the essential and optional non-powered tools that work well on plaster walls. It also tells you what to inspect on each tool before you start. Always check the manufacturer guidelines for ratings and limits instead of guessing.
Using the right tools with the right limits keeps you from harming plaster and making a bigger mess. If a tool has ratings, read the label or datasheet to stay within them.
Essentials: magnets, small drill/pin, flashlight, tape measure
Before you start any work, use this checklist to ensure you have the right tools and materials. It’s crucial for a smooth job and avoiding costly mistakes.
- Strong magnet: To verify rebar placement in concrete before drilling or cutting. Check by holding it against the surface; if it sticks, rebar is present.
- Small drill/pin (1/8″ – 3/16″): For probing suspected rebar locations to avoid damaging tools and causing injuries. Test by gently pushing into the concrete; stop if you hit resistance.
- Flashlight: To inspect dark areas where rebar might be hidden, preventing unexpected encounters while working.
- Tape measure (at least 25′): For accurate measurements to ensure proper placement of anchors, bolts, or other fixings. Check by measuring twice before marking.
- Check local rebar rules: Before starting, confirm rebar size and spacing requirements to avoid violating codes and causing structural issues.
- Verify concrete strength: Ensure the concrete’s compressive strength is suitable for your task. Check product labels or manufacturer instructions.
- Inspect tools: Before use, check all tools are in good working condition to prevent accidents and ensure efficiency.
- Wear appropriate PPE: Safety glasses, gloves, and sturdy boots protect you from flying debris, cuts, and falls. Check your gear before starting work.
Quick rule: Always double-check measurements and locations to avoid damaging rebar or other hidden structures, which can lead to costly repairs and safety hazards.
Helpful electronic tools and safety gear
Before you start any work, make sure to check off this list. It’ll save you time, money, and potential injuries.
- Stud Finder: Locates studs behind walls for safe drilling. Check by marking the stud locations on your wall.
- Wire/Metal Detector: Finds hidden wires or metal pipes before cutting or drilling. Test it over known metal objects to ensure functionality.
- Protective Eyewear: Shields eyes from debris and hazards. Check they fit well and provide adequate coverage.
- Flashlight: Ensures clear visibility in dark spaces. Test its brightness and battery life before starting work.
- Tape Measure: Accurate measurements prevent costly mistakes. Verify it’s calibrated by measuring a known distance.
- Level: Keeps your work straight. Check it against a known level surface to ensure accuracy.
- Circuit Tester: Ensures power is off before working on electrical components. Test it on a known live circuit first.
- Safety Gloves: Protects hands from cuts, burns, and other hazards. Check they fit well and provide adequate protection.
Quick rule: Always double-check your measurements and locations to avoid costly rework or damage to hidden pipes or wires.
The Simple Hack — Step-by-Step Method
The simple hack is to sweep slowly with a magnet to find metal fasteners, listen for changes in sound with a knock test, then probe gently to verify a stud behind plaster. Mark each confirmed stud with a clear sign and scan a little at a time to build a pattern.
This approach matters because plaster walls hide studs and misplacing fasteners leads to cracked patches or loose anchors. Going slow and marking as you go keeps you from chasing false signals and helps you plan where to drill or drive screws. If unsure about results, check the label/datasheet for tool guidance or local rules.
Step-by-Step Process
The following steps will guide you through a simple concrete repair, ensuring your fix is strong and long-lasting.
- Preparation: Clear the area. Remove any loose debris or contaminants from the surface using a wire brush. This ensures good adhesion of the new concrete.
- Measure and Mark: Use a tape measure to determine the size of the repair needed. Mark out the area with chalk, ensuring you’ve got the right dimensions for your patch.
- Cut Out Damaged Area: Using an angle grinder or chisel and hammer, carefully cut out the damaged concrete, creating clean edges. Be sure to wear safety glasses and gloves. If you hit rebar, stop and consult a professional.
- Clean the Area: Use a wire brush to remove any remaining debris from the repair area. Then, use a shop vacuum to ensure it’s completely clean. This is crucial for a strong bond between old and new concrete.
- Mix Concrete: Follow the manufacturer’s instructions on your concrete mix bag. Mix thoroughly until you have a consistent, workable consistency. Over-mixing can cause the concrete to lose its strength.
- Apply Concrete Patch: Using a trowel or shovel, apply the mixed concrete into the repair area. Ensure it’s packed tightly and level with the surrounding surface. Use a float to smooth out any excess material.
- Finish and Cure: Use an edging tool to create a slight slope away from the center of the patch to prevent water pooling. Cover the patch with plastic sheeting, ensuring it’s well-sealed at the edges. Allow it to cure for 72 hours before removing the covering.
- Final Check: After curing, check the repair area for any signs of cracking or weakness. If all looks good, you’re done! If not, consult a professional immediately.
Pro tip: Always wear appropriate safety gear when working with concrete. This includes gloves, safety glasses, and, if necessary, a dust mask.
Prep: clear surface and establish baseline
First things first, mate. You gotta clear that wall like you’re cleaning your gran’s house.
Start by removing any old trim or seams. They’ll just get in the way later. If you’re not sure about something, check with a pro before you start hacking away.
Now, mark your reference lines. You want to know where your ceiling and floor are, yeah? Use a level and a pencil, draw those lines nice and straight. This is your baseline, so don’t mess it up.
Lastly, take a good look at that wall. Check for any obvious seams or cracks. You want to know what you’re dealing with before you start scanning. It’s like checking your tools before you start work – makes the job go smoother.
Sweep with a magnet then confirm with a tap
Now that you’ve prepped your wall and established a baseline, it’s time to find those studs. Grab a strong magnet – the bigger, the better.
Start at one corner of your wall. Hold the magnet against the surface and sweep it horizontally across the wall, about 16″ off the floor. You’re looking for spots where the magnet sticks. Those are likely your studs.
Check each spot by giving a light knock with your knuckle or a tap hammer. A solid sound means you’ve found a stud. If it sounds hollow, keep sweeping.
Once you’ve found one stud, use a tape measure to find the others. They’re usually spaced 16″ or 24″ apart on center. Keep sweeping and tapping until you’ve located all the studs in your working area.
Probe to verify with a tiny test penetration
Alright, listen up. You’ve swept with a magnet and tapped the wall. Now it’s time to confirm those studs without making a mess.
Grab a thin probe or a small drill bit, like an 1/8″ or 3/16″. Anything bigger might cause unnecessary damage. Check your drill settings, you want low speed and no more than 1/4″ depth for this test.
Now, gently press the probe against the wall where you suspect a stud. Apply steady pressure. If you feel resistance and it feels solid, you’ve likely found wood. If it goes in easy and feels hollow, you’re probably in a void. Remember, the feel of solid wood is different from hitting an empty space.
Quick Tests to Confirm a Stud Location
Quick tests to confirm a stud location rely on magnetic, acoustic, and mechanical checks. Do at least two checks before committing to a big hole, and don’t trust the first mark alone. If something feels off, keep comparing methods until they agree.
These checks give you real-world clues without heavy digging or guesswork. They help you avoid crooked holes or missed studs and save you from drilling into a pipe or wire. If you’re unsure about a method, check the label or datasheet for guidance and use a safe range of checks to verify the spot.
Magnet pull test
Start by grabbing a strong magnet. Move it slowly across the wall, about an inch above the suspected stud line.
You’re feeling for a pull. This sudden attraction suggests there’s a metal fastener or framing member beneath the plaster.
It might take some practice to feel this pull, but once you do, you’ll know it. It’s like when you’re near a strong magnet with another hidden magnet.
Knock/tap and listen method
Grab a small, hard object – like a coin or a small hammer. Tap the wall lightly along the suspected stud line.
Listen closely. You’re looking for differences in sound. Hollow sounds usually indicate no stud (just lath and plaster). Solid, duller sounds suggest you’ve found a stud.
It’s like tapping on wood versus tapping on an empty box. The sounds are different because one is solid, the other is hollow.
Small-screw or probe verification
Before you drill a big hole, confirm your findings with a tiny test penetration. Use a small pilot screw or a thin probe like an ice pick.
Insert it gently into the wall in an inconspicuous spot where any damage won’t show. If you hit solid wood, you’ve found your stud.
If you need to, patch that tiny hole with some spackling compound and paint over it. No one will ever know it was there.
Why Stud Finders Fail on Plaster and How to Fix Them
Stud finders struggle on plaster because metal lath, thick plaster, and electrical interference throw off the sensors. Calibration can go out, and the tool starts guessing. The fix is to recalibrate, test in a known area, and use proper settings instead of guessing.
Knowing these limits helps you locate studs reliably and avoid wall damage. Regular testing and recalibration give you real results, especially after moving the finder or drilling elsewhere. If a reading seems off, verify with a second method and check the label/datasheet for guidance.
Recalibration and proper usage tips
First, clear the surface. Stud finders work best on smooth, flat areas.
Calibrate your stud finder by placing it on a known stud, then adjust the sensitivity until it beeps. Scan slowly, about an inch per second, to avoid false readings.
Test regularly as you work. If it stops working right, recalibrate and try again.
Handling metal lath and false metal returns
Metal lath or nails behind plaster can cause constant metal signals. Don’t trust these.
If you get constant beeps, switch to manual verification methods. Use a magnet, tap with a small hammer, or drill a tiny hole to confirm stud locations.
Remember, metal lath doesn’t mean there’s no stud. It just means your stud finder can’t tell you where it is.
Dealing with electrical wiring and pipes
Live wires can interfere with stud finders, causing false readings. Use a non-contact voltage tester to check suspect areas before you start.
If you’re getting random beeps, it might be due to electrical interference. Move your finder around until the beeping stops, then scan slowly and carefully.
Pipes won’t interfere with stud finders, but they can cause false positives. If you hit something hard that doesn’t sound like wood, don’t assume it’s a stud.
Fixes When Your Mark or Hole Is Off
When a mark or hole is off, fix it with small, clean repairs. For minor mis-drills, fill and re-drill carefully, keeping the patch tight. If you need to relocate a stud after an incorrect mark, move it only enough to stay solid and patch cleanly.
Relocating a stud now saves bigger plaster mess later. Make sure the new stud location is sound and respects the existing framing; verify by checking the manufacturer’s instructions or local rules if you’re unsure. A tidy patch keeps the wall looking good and reduces chances of cracking or wobble down the line.
Patching small plaster holes neatly
First, clear the hole of any loose debris with a soft brush. Use a damp sponge to lightly moisten the surrounding area to help prevent cracking.
Mix your joint compound according to package instructions. Using a putty knife, apply a thin layer over the hole, feathering it outwards to blend with the wall. Let it dry completely.
Sand the patch smooth using fine-grit sandpaper. Wipe off any dust with a damp cloth. Apply a second, thinner coat of joint compound, letting it dry and sanding again if necessary. Prime before painting or attaching anything else.
Relocating studs after a missed attempt
If you’ve drilled into a void, expand your search area. Studs are typically spaced 16 or 24 inches apart on center.
Re-run the magnet/knock/probe sequence in the new area. Use reference points like windows, doors, or existing hardware to map stud positions reliably. If you’ve hit metal lath, you’re likely close but off by an inch or two.
Once located, re-verify with a small screw or probe to ensure you’ve found a solid stud. Mark the center and proceed with your original task.
When to abandon and use anchors instead
If you can’t locate a stud, or it’s not practical (e.g., too close to an edge), consider using anchors. They’re designed to grip plaster walls securely.
Choose the right anchor for your task. Expansion anchors are good for heavy loads, while toggle bolts work well in hollow walls. Always check packaging for load information.
Drill a pilot hole slightly smaller than the anchor’s diameter. Tap the anchor into place using a hammer or the provided tool. Insert and tighten the screw or bolt as instructed.
Anchoring and Load Strategies for Plaster Walls
Anchoring plaster walls uses three basic categories: light-duty, medium, and heavy anchors. When you can’t find a stud, or you need extra holding power, choose the option that matches the load and wall condition. Always verify the rated load on the product label before installation.
This matters because plaster walls can act differently than drywall, and the wrong anchor can fail or pull out. Knowing the category helps you pick a safer, longer-lasting solution and keeps the repair from becoming a bigger headache. If in doubt, check the label or datasheet for load ratings and follow the manufacturer instructions.
Best choices for lightweight fixtures
For light-duty items like shelves, pictures, or small cabinets, choose anchors designed for plaster walls. These include:
Plastic Expansion Anchors: They expand inside the hole to grip the plaster. Use them in holes up to 1/2″ diameter.
Drywall Screws with Anchor: For lighter loads, drywall screws with an anchor can work. But remember, they rely on the plaster’s strength, which might not be ideal.
To minimize stress on the plaster:
– Use smaller pilot holes to reduce plaster damage.
– Tighten screws gently to avoid cracking.
Options for heavy mounts when studs aren’t usable
When you can’t find a stud or need extra holding power, consider these heavy-duty options:
Reinforced Anchors: These have a larger expansion area and are suitable for heavier loads. Use them in holes up to 1/2″ diameter.
Toggles: Toggles work by pulling back on themselves inside the wall, creating a tight grip. They’re great when you can’t find a stud or need extra support.
Mounting Plates: For very heavy items, use mounting plates that distribute load across multiple anchors. This reduces stress on any single point.
Always check the product label for rated load to ensure it suits your needs.
When to consult a professional
DIY is great, but there are times when you should call in a pro:
– Uncertain Loads: If you’re unsure about the load your anchor needs to bear, get expert advice.
– Hidden Utilities: Before drilling into walls, ensure no electrical wiring or pipes are present. A professional can help with this.
– Extensive Repair Needs: If your plaster repair needs are extensive, it might be best to leave it to the pros to avoid further damage.
– Safety Concerns: Always prioritize safety. If you’re unsure about any aspect of your project, consult a professional.
Visual Checkpoints and Wall-Mapping Before Final Installation
Before you install, map the wall with a simple stud map. Use ceiling and floor references to locate each stud and mark them clearly. Verify every stud and keep a quick note of what you found.
This matters because proper anchors rely on solid studs, not guessing. Documenting the findings helps you future-proof other projects and saves you from rechecking later.
Creating a reliable stud diagram
Before you start drilling, create a stud map to avoid mistakes and ensure your fixtures are secure.
- Locate ceiling/floor joists: These run perpendicular to the wall. Find them by tapping along the ceiling or floor until you hear a solid sound.
- Mark every 16 inches (or 24, depending on your home): Measure and mark along the wall at these intervals. Studs are typically spaced this way in residential construction.
- Use a level to draw vertical lines: Connect your marks with a straight line. This projects the stud path across the wall.
- Avoid false positives: If you find a solid spot but it’s not at a 16-inch interval, it might be metal lath or a pipe. Recheck before drilling.
- Check for electrical wires: Use a stud finder to check for wires behind your marks. They’re usually found near outlets and switches.
- Document your findings: Sketch the wall with your stud locations noted. This helps for future projects.
- Avoid drilling near corners: Studs may be offset here, so recheck before drilling.
- Check for plumbing pipes: Use a pipe scanner to locate any hidden pipes that could cause damage or leaks if drilled into.
Quick rule: Always double-check your marks. A few extra minutes can save you from costly mistakes.
Final verification checklist before drilling
Before you drill that final hole, double-check everything to ensure a secure and safe installation.
- Recheck stud location: Use your stud map and a level to confirm the stud is where you marked it.
- Confirm stud width: Measure the width of the stud to ensure your anchor will fit properly.
- Check for wires again: Even if you checked before, it’s worth another pass with your stud finder. Wires can be hidden behind insulation or other obstacles.
- Choose the right anchor: Select an anchor that’s designed for plaster walls and fits your hardware’s needs.
- Avoid drilling near outlets/switches: These often have wires running through them. Recheck before drilling nearby.
- Check for level and plumb: Ensure your fixture will hang straight and true.
- Confirm you’re not drilling into a pipe: Use a pipe scanner to ensure no hidden pipes are in the way.
- Double-check your measurements: Measure twice, drill once. This old adage still holds true today.
Quick rule: Taking the time to recheck everything ensures a solid, safe installation that will last.
Conclusion
Locating studs in plaster walls safely and accurately protects the repair, keeps fasteners strong, and prevents costly damage to the wall finish. Do the checks with care, verify locations at multiple points, and only drive anchors where you know you are in solid framing and clear of utilities.
First, confirm you’re working with plaster-and-lath, gather and arrange your tools and materials, then run a couple of quick tests at different heights or angles to validate each mark, and finally plan your anchors and patching so everything lines up before you drill or drive any fasteners.
A few mistakes to avoid: assuming a single mark is perfect across the wall, drilling without confirming the stud depth or behind-the-wall dangers, and overtorquing anchors in plaster that hasn’t been prepared. Safety rules are simple: test in a small area first, recheck locations with a second method, and never force a fastener into a suspect spot. If you’re unsure about wiring, plumbing, or unusually thin plaster, pause and reassess rather than push ahead.
If the mark or hole is off or you’re unsure about load requirements, it makes sense to call a professional rather than push on and risk damage. With careful checks and deliberate steps, you can mount with confidence and finish cleanly—your wall will look and perform right when you follow these practical limits and checks.
FAQ
1. What should I do if the stud mark moves after tapping the wall?
Stop drilling near the marked spot. Re-test in small areas around the original mark to verify the stud edge. Use the tests you already learned to confirm where the stud actually is before drilling again.
2. How can I confirm a stud is truly there before committing to a hole?
Use a combination of tests you’ve practiced—taps, slight probing, and any non-destructive checks. If in doubt, pause and re-check with the manufacturer instructions for your tools and your wall type.
3. What should I do if I need to mount a heavy item and the wall is off by a bit?
Choose an anchoring method suitable for plaster walls and the load. If alignment is imperfect, offset the fix to the nearest solid material per safe guidelines and consider additional mechanical support as needed.
4. How can I protect the plaster while drilling or driving anchors?
Go slow, use the right bit for plaster, and avoid forcing the tool. If the wall shows cracks or crumbling, stop and reassess before continuing to prevent bigger damage.