
Introduction
For plaster finish work, you only need an essential, practical set of tools and you can skip the rest.
This article explains which tools truly make a difference, how to use them, and practical tips to judge what you need based on your project.
You’ll learn steps and rules of thumb to select the right tools for smooth, consistent results.
Key takeaways
- Choose a stainless trowel and hawk for consistent plaster transfer.
- Keep a damp sponge for feathering edges and smoothing corners.
- Manual tools suffice for small jobs; power mixer speeds larger batches.
- Use a margin trowel and drywall knife for tight spaces.
- Store tools dry, labeled, and protected from curing plaster residues.
- Wear eye protection, respirator, and ear protection when sanding.
Table of Contents
- Introduction
- Key takeaways
- Overview: Why tool selection matters for plaster finishes
- Essential hand tools you should own
- Power tools that speed the job (but aren’t always required)
- Tools you can usually skip or substitute
- Tools and materials checklist for common projects
- Tool maintenance, care, and storage
- Safety gear and dust control you must not skip
- Pro tips: techniques that multiply tool effectiveness
- Conclusion
- FAQ
Overview: Why tool selection matters for plaster finishes
Choosing the right tools matters for plaster finishes. The quality, speed, and cost ride on the tools you use. Think in terms of essential tools you must have and optional tools that help, not required.
For DIYers, sticking to the basics keeps you on track and avoids wasted effort. Pros may add on optional tools to speed work or improve a flawless surface, but you still judge by your results and finish.
Understanding different plaster finishes
When it comes to plaster finishes, there are several styles you might choose from depending on the look and feel you want for your space. Each style requires a specific set of tools that can make or break the final outcome.
A skim coat finish, for example, is all about achieving a smooth surface with minimal texture. This type of finish demands precision and attention to detail, so having the right trowels and sanding blocks is crucial. On the other hand, a Venetian plaster finish involves layering different colors and textures to create depth and character in your walls.
For a textured finish, you’ll need tools that can help you achieve unique patterns and effects. This could range from specialized brushes and sponges to textured rollers, each adding its own flair to the final look of the plastered surface.
The key takeaway is that your choice in tools directly influences not only how the finish looks but also how long it takes to complete and how much you’ll spend on materials. So, picking out the right set of tools for your specific project is essential.
Cost vs quality trade-offs
In plastering, there’s a delicate balance between spending wisely and cutting corners. Some tools are non-negotiable because they significantly impact the quality of your finish. For instance, investing in high-quality trowels can save you time and effort by making it easier to achieve smooth, even surfaces.
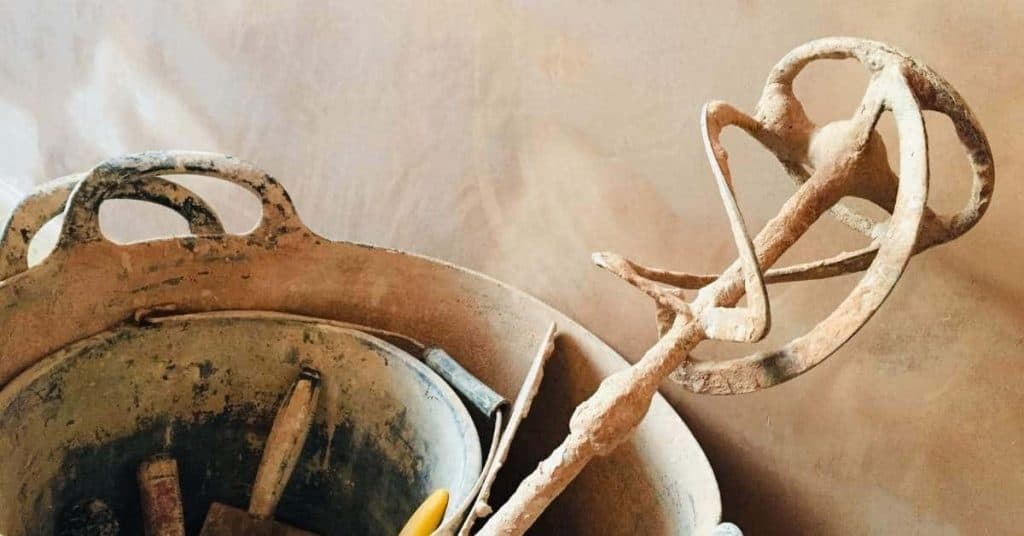
However, not every tool needs to be top-of-the-line. Basic items like buckets and brushes are less critical as long as they serve their purpose adequately without causing delays or quality issues. For example, while a professional might use an expensive mixing paddle for efficiency, a DIYer can often get by with a simple stick.
The trick is knowing where to splurge and where you can save. Spending on essential tools like good trowels and sanding blocks will pay off in the long run because they help you avoid common mistakes that could ruin your plaster job. But for less critical items, opting for budget-friendly alternatives won’t compromise the overall quality of your work.
Remember, while it’s tempting to go all out on every tool, focusing on what truly matters will keep costs down without sacrificing the look and durability of your plaster finish.
Essential hand tools you should own
These are the non-negotiable hand tools every DIY plasterer should own. Each tool has a specific job, from mixing and applying to smoothing and finishing joints. You need the right tool to get a quality, durable plaster finish.
Choose tools that feel solid in your hand and stay sharp or true under use. If you’re unsure about a spec, use a simple rule of thumb: pick tools that are comfortable, well-made, and easy to control. Check the label or datasheet for any care notes or usage guidelines before you buy or start a job.
Trowels, hawks, and floats
You can’t do plaster work without the right trowel. Start with a 6-inch pointing trowel for detailed work around edges and corners. A hawk board is essential to hold your plaster mix while you work.
For larger areas, use an 8-inch or 10-inch straight-edge trowel. These are great for spreading plaster over large surfaces smoothly. Floats come in handy too; they’re used to smooth out the surface and remove any imperfections left by the trowel.
The material of your tools matters—steel blades hold up better than aluminum but can be heavier. For a balance, opt for stainless steel which is lighter yet durable enough for daily use on site.
Joint knives and taping tools
Joint knives are crucial for finishing seams and corners smoothly. They come in various widths to fit different joints, from narrow ones for edges to wider blades for larger areas.
- Narrow blade: Ideal for tight corners; use with stiff blades for precise cuts.
Tip: Keep your knife sharp for clean lines. - Middle width: Great for standard wall joints; flexible blades help in smoothing out patches.
Note: Flexibility is key for a smooth finish without ridges. - Wide blade: For large areas and flat surfaces; stiff blades ensure even coverage.
Tips: Rent these if you only need them once or twice.
Mixing buckets and mud pans
The right mixing container is crucial for a consistent plaster mix. A 5-gallon bucket with graduations helps measure out your materials accurately, while a mud pan is perfect for scooping up small amounts of plaster.
Look for features like spouts or handles that make pouring and carrying easier. Consistency in the mix depends on how well you can control water content and mixing time—proper containers help with both.
Mixing buckets should be easy to clean, durable, and have a wide mouth for easy access. Mud pans are typically smaller but must hold enough plaster for quick applications without needing constant refills.
Power tools that speed the job (but aren’t always required)
Power tools can save you real time, but they aren’t always needed for every project. This section highlights tools that clearly speed the job and helps you decide when to rent or buy.
Renting can keep costs down for one-off projects, while buying makes sense if you’ll use the tool again soon. Think about how often you’ll use it, the job size, and safety practices; if in doubt, check the label or datasheet for guidance.
Plaster mixers and drill mixers
If you’re tackling a big plaster job, a mixer can save your back and speed up the process. For smaller projects or occasional work, hand mixing might be enough. But if you’re doing this regularly, investing in a good plaster mixer is worth it.
When choosing a mixer, look for one with variable speeds to handle different plaster types. Higher RPMs mean faster mixing but can also introduce air into the mix, so find a balance that suits your needs. A sturdy build and reliable power source are key too.
A drill mixer, on the other hand, is more portable and works well for smaller batches or tight spaces. It’s great if you don’t want to commit to a full-sized mixer but still need some speed over manual mixing.
Orbital sanders and hand sanders
An orbital sander is a game changer for smoothing out plaster. It’s fast, efficient, and easy to control. But it can kick up a lot of dust, so make sure you have good dust collection. Hand sanding might be better for detailed work or areas where an orbital sander could damage the surface.
Orbital sanders are great for large, flat surfaces but hand sanding is essential for edges and corners. It’s a trade-off between speed and precision. If you’re working in a tight space, dust control becomes even more critical to avoid clogging your tools or making a mess.
For DIY projects, an orbital sander can save time and effort, but don’t skimp on the safety gear like masks and goggles. Hand sanding is still necessary for those tricky spots where you need precision over speed.
Rotary skimming machines and spray rigs (optional)
For large-scale plaster work, commercial tools like rotary skimmers and spray rigs can be a huge time-saver. But for most DIY projects, these are overkill. They’re expensive to buy outright but renting might make sense if you have a big job coming up.
A rotary skimming machine is ideal for smoothing large areas quickly. It’s precise and efficient, leaving a smooth finish that’s hard to achieve by hand. But the setup can be complex and requires training to use effectively.
Spray rigs are another option if you’re looking at applying plaster in one go over big surfaces. They offer consistent coverage but require practice to get right. For small DIY jobs, stick with traditional methods unless you have a lot of experience or a large budget for equipment rental.
Tools you can usually skip or substitute
You can skip or substitute several commonly recommended plaster tools. For most DIY plaster jobs, you don’t need every specialty tool. Use practical, inexpensive alternatives and focus on the basics.
Choosing practical substitutes keeps costs down and reduces clutter on the job. It matters because you stay focused on what actually works for plastering rather than chasing every new gadget. If in doubt about a substitute, check the tool label or datasheet before you use it.
Specialty Profile Trowels and Metal Rasps
These tools are often touted as essential for achieving specific textures, but they’re not always necessary. For most DIY projects, a standard set of trowels can handle the job just fine.
A metal rasp is useful for smoothing out rough edges or creating texture, but you can achieve similar results with sandpaper or even a coarse sponge. If you’re working on intricate designs or need to replicate specific textures from professional samples, consider renting these tools instead of buying them outright.
Remember, the key to plaster work isn’t having every possible tool; it’s knowing how to use what you have effectively. So don’t stress if you can’t get your hands on specialty trowels or rasps—there are plenty of ways around that.
Expensive Laser Levels for Simple Jobs
A laser level is a handy tool, but it’s not always necessary. For basic plastering tasks like ensuring walls are straight and true, you can use a standard bubble level or even a plumb bob.
If your project involves complex angles or large areas that need precise alignment, then investing in a good quality laser level makes sense. But for most DIY jobs where accuracy is within an inch or two, cheaper alternatives will do just fine.
Save money by sticking with traditional leveling tools unless you’re tackling something more advanced. A laser level can be a lifesaver when it’s needed, but don’t feel pressured to buy one if your project doesn’t require it.
Commercial Polishing Machines for Venetian Plaster
Venetian plaster requires a high shine finish, but you don’t need to break the bank on commercial-grade polishers. Hand-burnishing with a soft cloth or buffing pad can achieve excellent results.
For DIY projects, consider using affordable finishing pads designed for wood or metal polishing. These work well and are much cheaper than specialized plaster machines. Just be patient and take your time to get that mirror-like finish.
If you’re new to Venetian plaster, start with these simpler tools before investing in more expensive equipment. The key is consistency and patience—don’t rush the process or compromise on quality just because you don’t have all the fancy gear.

Tools and materials checklist for common projects
This section gives simple checklists for three common projects: small patch, full wall skim, and a decorative finish. Each list covers the core tools and materials you’ll need, plus general quantity guidance and optional items you might add. Use it to gather what you need before you start; for exact numbers, check the product label or datasheet.
Having a ready list helps you plan, buy smarter, and avoid trips back to the store. It keeps you focused on prep, application, and finish, and shows you where optional items can speed things up or improve the result. If something seems off, rely on the label/datasheet for the right amounts and safety steps.
Small repair/patch checklist
This list covers quick fixes for small wall patches under a few square feet.
- Tape measure: Check dimensions; ensure accurate cuts and measurements. Skimping leads to misfits.
- Mixing bucket: Ensure clean, dry container; check no debris or old mix left over.
- 5-gallon paint roller: Use for smooth application; confirm even coverage without streaks.
- Trowel set: Include 4- and 6-inch trowels; ensure sharp edges, clean surfaces. Skipping leads to uneven finishes.
- Sandpaper: Grade 120 grit for smoothing rough patches; confirm no scratches or marks left behind.
- Joint knife: For feathering edges; check sharp edge and straight blade. Missing this causes visible seams.
- Mud pan: Clean, dry container for plaster mix; ensure no residue from previous use.
- Sprayer bottle: Water for wetting surface before applying plaster; confirm even moisture without puddles.
Quick rule: Always prep the area thoroughly and keep tools clean to avoid issues later on.
Full wall skim coat checklist
This list covers larger areas needing a smooth, uniform finish over existing walls or ceilings.
- Tape measure: Check dimensions; ensure accurate cuts and measurements. Skimping leads to misfits.
- Mixing bucket: Ensure clean, dry container; check no debris or old mix left over.
- 5-gallon paint roller: Use for smooth application; confirm even coverage without streaks.
- Trowel set: Include 4- and 6-inch trowels; ensure sharp edges, clean surfaces. Skipping leads to uneven finishes.
- Sandpaper: Grade 120 grit for smoothing rough patches; confirm no scratches or marks left behind.
- Joint knife: For feathering edges; check sharp edge and straight blade. Missing this causes visible seams.
- Mud pan: Clean, dry container for plaster mix; ensure no residue from previous use.
- Sprayer bottle: Water for wetting surface before applying plaster; confirm even moisture without puddles.
Quick rule: Always prep the area thoroughly and keep tools clean to avoid issues later on.
Decorative/venetian finish checklist
This list covers materials and tools for creating unique, textured finishes like Venetian plaster.
- Tape measure: Check dimensions; ensure accurate cuts and measurements. Skimping leads to misfits.
- Mixing bucket: Ensure clean, dry container; check no debris or old mix left over.
- 5-gallon paint roller: Use for smooth application; confirm even coverage without streaks.
- Trowel set: Include 4- and 6-inch trowels; ensure sharp edges, clean surfaces. Skipping leads to uneven finishes.
- Sandpaper: Grade 120 grit for smoothing rough patches; confirm no scratches or marks left behind.
- Joint knife: For feathering edges; check sharp edge and straight blade. Missing this causes visible seams.
- Mud pan: Clean, dry container for plaster mix; ensure no residue from previous use.
- Sprayer bottle: Water for wetting surface before applying plaster; confirm even moisture without puddles.
Quick rule: Always prep the area thoroughly and keep tools clean to avoid issues later on.
Tool maintenance, care, and storage
Keep your tools clean and dry. After plaster use, wipe them down, rinse if needed, and dry them before putting away. Proper storage keeps rust away and finish looking sharp.
Cleaning and storing now prevents rust, corrosion, and gunk that can ruin a tool’s edge or grip, and it saves you time and money later. Different tools and finishes need different cleaners; check the label or datasheet for exact guidance.
Cleaning trowels, hawks, and mixers
After each use, clean your tools immediately to prevent plaster from hardening on them. Start by scraping off excess material with a putty knife or similar tool.
Rinse the tools under running water while scrubbing any remaining residue with a stiff brush. Pay extra attention to crevices and edges where plaster tends to accumulate.
Once you’ve removed most of the debris, soak your trowels, hawks, and mixers in clean water for at least an hour before rinsing again thoroughly. This soaking helps loosen any stubborn bits that didn’t come off easily during initial cleaning.
Dry all tools completely with a towel or let them air dry to prevent rust formation. Proper maintenance keeps your equipment ready for the next job and ensures better finish quality every time you use it.
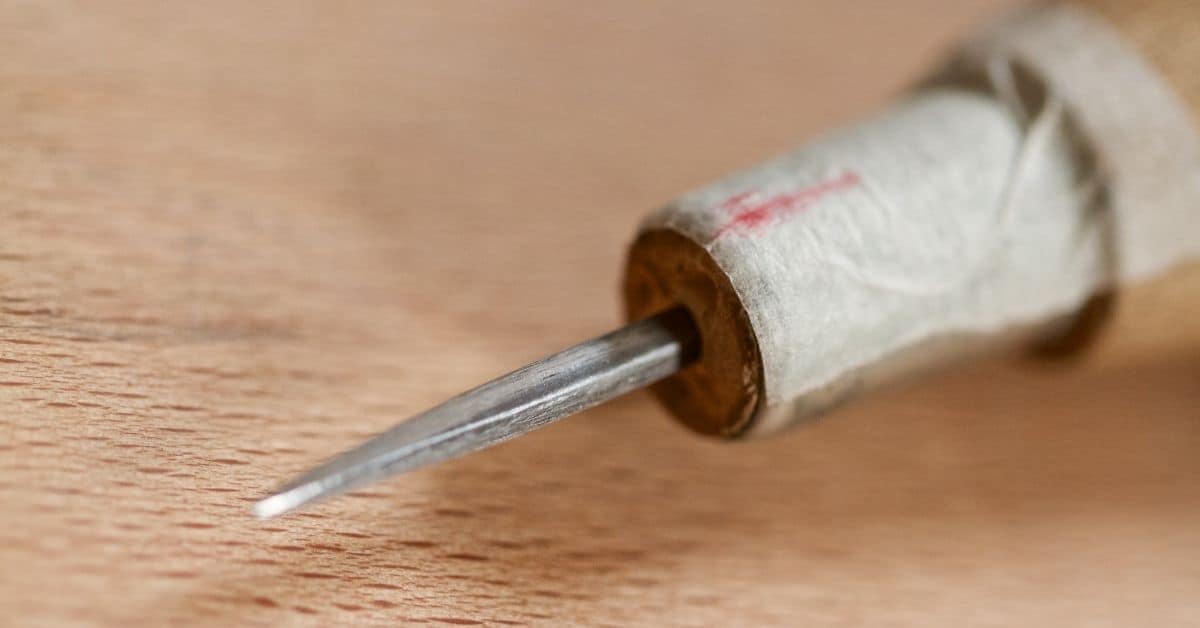
Sharpening and replacing blades
Maintaining sharp blades is crucial for achieving a smooth, consistent plaster finish. Dull blades can lead to uneven surfaces and require more effort to cut through the material.
To determine if sharpening or replacement is needed, inspect your blades regularly for signs of wear such as nicks, dull edges, or excessive rust. If you notice these issues but the blade still has some life left in it, consider sharpening instead of replacing.
Sharpening should be done carefully to maintain the original angle and shape of the blade. Use a honing stone or file designed for metal tools to restore sharpness without damaging the edge.
If your blades are beyond repair due to severe damage or wear, replace them promptly with high-quality alternatives that match your tool specifications. New blades ensure optimal performance and help maintain professional standards in your work.
Safety gear and dust control you must not skip
Wear the right PPE and control dust every time you handle silica or lime dust. Use a proper respirator, eye protection, and gloves, and follow the product label for any disposable items. Don’t skip dust control steps or you’ll pay with your lungs.
Dust management protects your health and keeps the job site safe for others. Wet methods and vacuum systems with good filtration help, and avoid dry sweeping or actions that kick up dust.
Personal protective equipment (PPE)
Masks and respirators are a must to avoid inhaling harmful dust. Eye protection is also crucial, as plaster can irritate your eyes.
- Dust mask: Filters out large particles but not fine silica dust. Wear it for light sanding or small patches.
Consider buying a reusable one with replaceable filters to save money over time. - N95 respirator: Blocks 95% of airborne particles, essential for full plaster jobs.
Check the seal fits tight around your face and wear it all day long. - Safety glasses: Prevents dust from getting into your eyes. Look for wraparound style to cover more area.
Wear them anytime you’re handling drywall or mixing plaster powder. - Gloves: Protect hands from irritation and splashes of wet plaster.
Nitrile gloves are a good choice, as they resist chemicals better than latex. - Coveralls: Keeps dust off your clothes. Rent them if you don’t want to buy.
Wear long sleeves under coveralls for extra protection against cuts and scrapes.
Dust extraction and containment
Vacuum attachments can be attached to your shop vac or rented from a tool store. Use them when sanding plaster for minimal dust spread.
Plastic sheeting is another must-have, especially if you’re working in an enclosed space like a bathroom or kitchen. Seal off the area around your work zone with plastic and tape it down tightly to contain the dust.
Wet sanding is also effective at reducing airborne particles. Mix water with your drywall compound before applying it, then use wet sponges for finishing instead of dry sandpaper.
This method can be a bit messy but significantly cuts down on dust levels.
Pro tips: techniques that multiply tool effectiveness
This is about practical tricks that boost tool performance without extra gear. Focus on setup, grip, and alignment to get cleaner cuts and faster progress. With the right approach, a beginner can run like a pro.
These tips save you time and reduce error by making the tool work smarter, not harder. They help you finish tasks with better edge, fit, and finish, and they cut down on wasted material and rework. If you need a specific spec, check the label/datasheet for guidance.
Setup and staging for efficient work
Before you start plastering, organize your workspace to minimize movement once the job begins. Set up a staging area near your mixing station with all tools and materials laid out in order of use.
Keep buckets, trowels, hawks, and other essentials within arm’s reach. This reduces trips back and forth, saving time and energy. A well-organized workspace also helps you stay focused on the job at hand.
Think about your work flow as you set up. For instance, place tools for starting a section near where you’ll begin, then arrange the rest of your gear in sequence down the wall or across the ceiling. This keeps everything handy and cuts down on unnecessary movement.
Hidden tweaks that improve finish
The right adjustments can make a big difference in how smooth your plaster looks. Start with your trowel pressure—too much or too little can leave marks or thin spots.
Also, pay attention to the blade angle on your mixer. A slight tilt helps mix more thoroughly without splashing plaster everywhere. This keeps your work area cleaner and reduces waste.
The consistency of your plaster mix is crucial for a smooth finish. Too thick, and it won’t spread easily; too thin, and it will sag or run. Adjust the water content carefully to get just the right viscosity. A well-mixed batch goes on smoothly and evenly, making your job easier and faster.

Conclusion
Getting a solid plaster finish comes down to choosing the right tools and using them safely every step of the way. The wrong combo or skipped safety can ruin surface quality, create cracks, or burn you out with rework.
Start with a clear plan, inspect your tools for wear, set up dust control and PPE, choose basic hand tools first and add power tools only if you need speed, substitute or skip only when you’re sure the result won’t suffer, test a small patch on scrap, and keep your materials and tools ready and clean as you go. Work in a logical order from patch to finish, and stop to re-evaluate if anything looks off before you push ahead.
Common mistakes to avoid: mixing plaster too wet or too dry, overworking joints, and rushing with power tools without the right guards or PPE. Safety rules: test in a small area first, wear eye protection and a dust mask, clamp or secure parts, and keep a damp sponge and water bucket handy to clean edges without chalking the surface. Don’t skip dust control or proper ventilation, and clean tools after use to prevent corrosion or rust.
If you run into stubborn setting issues, hidden moisture behind the wall, or a project that spans a large area or high ceilings, it makes sense to call a professional. Stay patient, stay precise, and you’ll finish with a durable, good-looking surface you can be proud of.
FAQ
What basic tools do I actually need for plaster finish?
You need a hawk, trowel, margin trowel, and a mixing bucket. A slicker or wood float helps at the end, but you can skip fancy gadgets if you know how to finish with what you have. Don’t overbuy before you try a small patch first.
Can I skip a money-saving tool like a plaster mixer?
If you’re mixing more than a small batch, use a mixer. Hand-stirring can burn you out and stay clumpy. A cheap mixer saves time and makes a smoother coat.
Should I use a mixing paddle or drill with a mixer for plaster?
Yes. Use a drill with a proper paddle to get a uniform mix. A poor mix shows up as pinholes and uneven texture on the wall.
Is a plater’s comb or scoring tool necessary?
Not for every job. A comb helps if you’re chasing a specific texture or removing excess slip. For smooth finishes, you can skip it but keep it handy for repairs.