
Introduction
This guide explains how to choose and use plastering tools and avoid common mistakes.
You’ll learn practical steps, tips, and general rules of thumb for planning, mixing, applying, and finishing plaster.
The guide emphasizes practical techniques you can apply on real projects and what to watch for to improve finish quality.
Key takeaways
- Plan layout and substrate assessment before mixing or applying plaster.
- Keep tools organized; dampen trowels to prevent sticking during use.
- Prepare surfaces with cleaning, dust removal, and compatible primer for adhesion.
- Mix plaster in small batches, maintain consistent ratios, and avoid air bubbles.
- Apply in thin coats, scrub into pores, and consolidate before set.
- Protect finished work with curing time, masking, and proper cleanup after.
Table of Contents
- Introduction
- Key takeaways
- Planning Your Plastering Project
- Tools and Materials Checklist
- Proper Preparation Before Plastering
- Mixing and Applying Plaster: Step-by-Step
- Achieving a Smooth, Professional Finish
- Common Mistakes and How to Avoid Them
- Safety, Cleanup, and Waste Disposal
- Advanced Tips, Troubleshooting, and When to Call a Pro
- Conclusion
- FAQ
Planning Your Plastering Project
Planning your plastering project starts with a clear scope: identify walls and ceilings to plaster, assess what the substrate is, and note any corners or details that slow you down.
Next, judge the difficulty, time, and labor by looking at moisture, height, access, and whether you can handle repairs plus plastering yourself or if a pro is wiser; use a simple start-to-finish planning checklist to guide you. Check the label or datasheet for substrate prep and drying notes, and keep a realistic view of phases from prep through finishing.
Assessing the Surface and Damage
Before you start plastering, it’s crucial to inspect your walls and ceilings thoroughly. Look for any cracks, holes, or areas where moisture might be an issue. These can affect how well the plaster adheres and how long it takes to dry.
Check if there are existing layers of plaster or drywall that need repair. If you find old lath work, make sure it’s in good condition. Any loose or damaged parts will need fixing before applying new plaster. This step is key for a smooth finish later on.
Don’t forget to look out for structural issues like uneven surfaces or sagging areas. These can cause problems during the drying process and might require additional work beyond just plastering. Address these issues early to avoid headaches down the line.
Budgeting and Time Estimates
When planning your plastering project, start by estimating material costs. Factor in the type of plaster you’ll use, tools needed for mixing and application, and any additional supplies like sandpaper or paint brushes. Don’t forget to budget for protective gear too.
Consider if there are any rental items required, such as scaffolding or power mixers. These can add up quickly but might be necessary depending on the scope of your project. It’s also important to estimate how long each phase will take—from surface prep to final finishing touches.
If you’re working with a large area or complex details, it might be wise to hire professionals for parts of the job. Assess whether minor repairs plus plastering is feasible within your skill set and time frame. Professional help can save you from costly mistakes and ensure quality work.
Permits, Local Climate, and Environmental Considerations
Before starting any plastering project, check if local building regulations require permits. This is especially important for structural changes or large-scale renovations. Ignoring these rules can lead to delays and fines.
The climate in your area also plays a big role. High humidity levels can slow down drying times significantly, so plan accordingly. If you’re working during rainy seasons or high moisture periods, consider using additives that speed up curing processes.
Environmental factors like temperature fluctuations should be monitored closely. Extreme heat or cold can affect how plaster sets and dries. Ensure your workspace is stable and protected from these elements to maintain consistency in the quality of work.

Tools and Materials Checklist
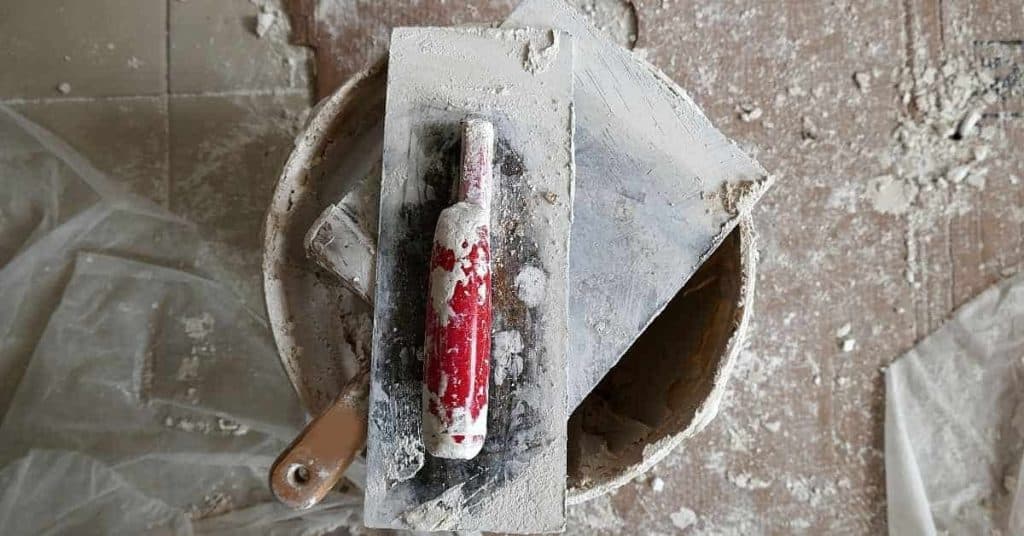
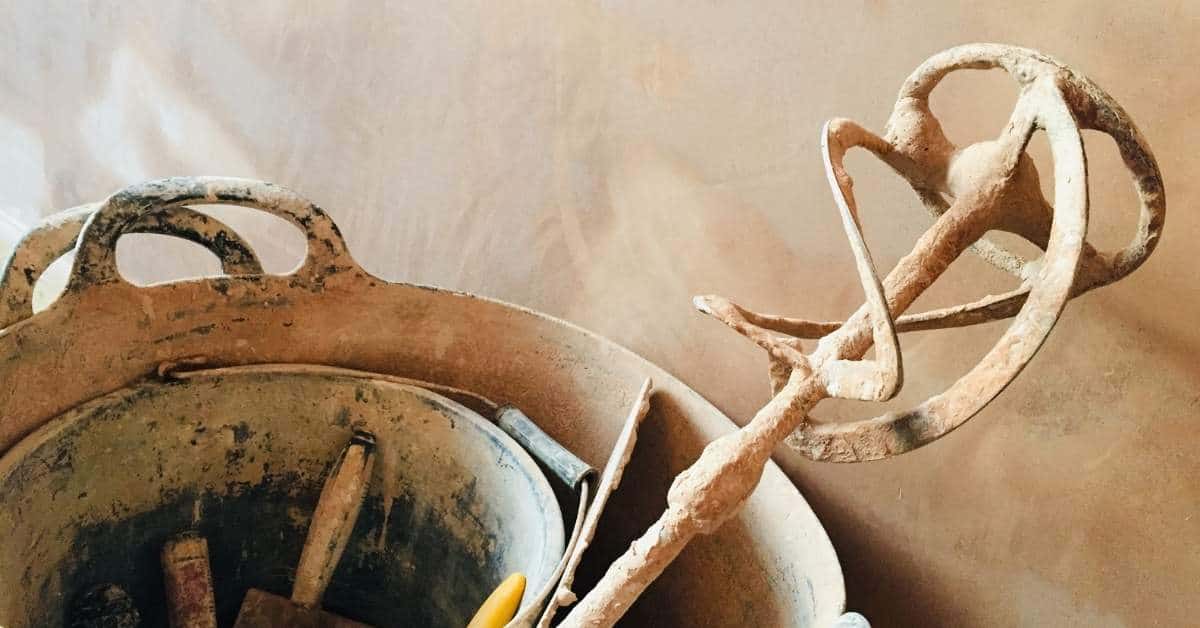
This section lays out a practical, DIY-friendly tools and materials checklist for plastering, separating essentials from nice-to-haves and pairing each item with a short purpose note. You’ll see basic tools like hawk and trowel sets, mixing drill with paddle, buckets, and plastering trowels, along with common consumables such as plaster types and bonding agents. Safety gear and setup tips sit alongside tool care and storage guidance so you can plan a smooth workflow without chasing down missing pieces mid-project.
Why it matters: having the right mix of basics and extras keeps downtime to a minimum and helps you achieve a better finish. It also shows you what to check on labels or instructions when you’re unsure about compatibility or usage, and it prompts you to consider ventilation, ladder or scaffold access, and cleanup workflows before you start. Keep a simple planning checklist for quantities, wall areas, and rough budget ranges, and decide early which items to source mid-range versus pro-grade so you’re not stuck paying for poor-quality tools after the first job.
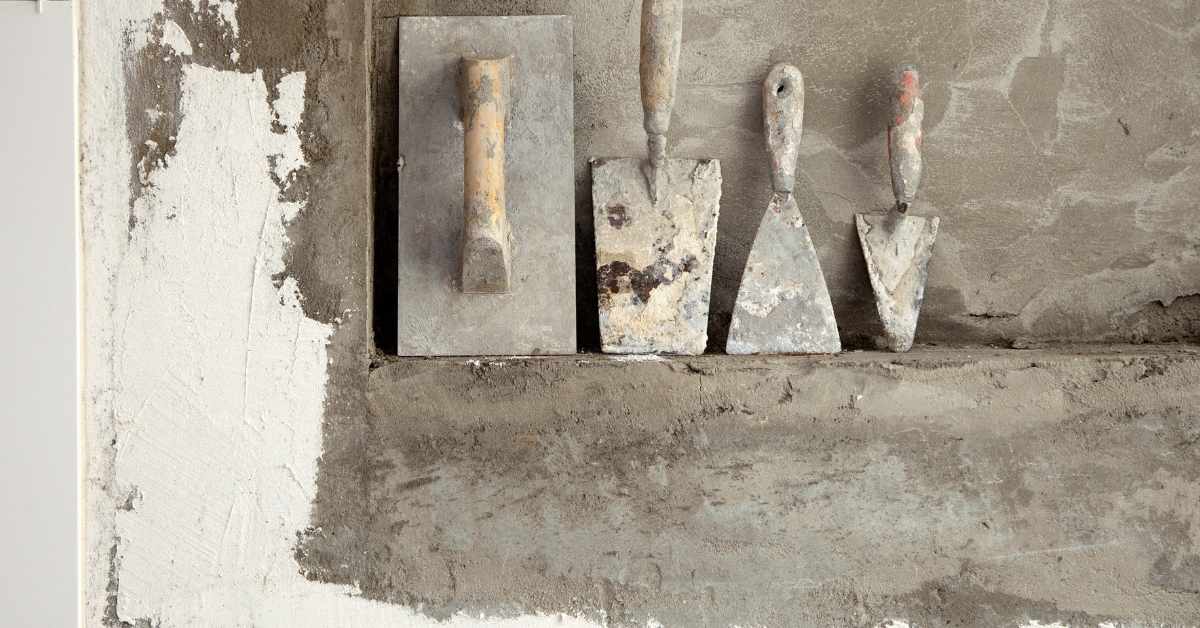
Essential Hand Tools
Before you start plastering, make sure you have the right hand tools on site.
- Hawk and trowel set: Mix plaster in hawk and apply with trowel; check for a sturdy handle. Missing this can lead to uneven plaster application.
- Mixing tub: Large enough to hold dry materials and water separately; confirm it’s clean and free of debris. Skipping this leads to poor mixing quality.
- Plastering trowel: For applying basecoat and finish coat; ensure sharp edges for smooth application. Without, plaster will be lumpy.
- Margins trowel: Edges and corners; check blade is straight and clean. Missing this causes rough edges.
- Corner turl: For inside and outside corners; confirm it’s sharp and fits snugly. Skipping leads to uneven corners.
- Sandpaper: Smoothing plaster before painting; ensure grit matches surface needs. Skipped, results in a rough finish.
- Mixing bucket: For small batches of plaster mix; check it’s clean and dry. Missing this leads to poor quality mixes.
- Water tray: To hold water for mixing; ensure it’s large enough and clean. Skipping results in dirty mixes.
Quick rule: Always have a hawk, trowel set, and mixing tub ready before starting any plastering work.
Power and Specialty Tools
Having the right power tools can make your plastering job much easier. Here’s what you need:
- Mixing drill with paddle: For mixing large batches; ensure it’s powerful enough to handle plaster. Missing this leads to manual labor.
- Sanding pole: For sanding large areas; check for a comfortable grip and adjustable length. Skipping results in hand fatigue.
- Masonry crack filler: Fills small cracks before plastering; confirm it’s suitable for masonry work. Missing this leaves gaps visible.
- Plaster mixer attachment: For large-scale mixing; ensure it fits your drill securely. Skipping leads to poor mix quality.
- Skimming knife: For smoothing out plaster; check blade is sharp and clean. Missing results in rough surfaces.
Quick rule: Rent or buy power tools based on the size of your project, but always have a backup plan for manual options.
Materials and Consumables
Ensure you have all necessary materials before starting plastering work. Here’s what to check:
- Bonding agent: For priming surfaces; confirm it’s suitable for your substrate type. Missing this leads to poor adhesion.
- Basecoat plaster: First layer of plaster; ensure it’s the right consistency and quality. Skipping results in weak base layers.
- Finish coat plaster: Final smooth layer; check for fine particles and even color. Missing this leaves a rough finish.
- Gypsum or lime plaster: Depending on project needs; confirm it’s the correct type. Using wrong types leads to poor results.
- Masonry crack filler: Fills small cracks before plastering; ensure it’s suitable for masonry work. Missing this leaves gaps visible.
- Screws and anchors: For securing plasterboard; check they’re the right size and type. Skipping leads to unstable boards.
Quick rule: Always have a checklist of materials before starting any plastering project, ensuring all items are correct for your specific needs.
Proper Preparation Before Plastering
Proper preparation before plastering means getting the surface clean, sound, and protected, then sealing and reinforcing joints before the plaster goes on. Do a clean-up sequence: remove loose debris, degrease if needed, wash the substrate, and let it dry completely to a dust-free base. Then inspect, repair cracks or holes, tape joints, and set up masking to keep surrounding areas safe and dry.
This prep matters because a clean, well-sealed base prevents suction, telegraphing, and moisture trouble later on. It gives the plaster something solid to grab onto, reduces call-backs, and helps you achieve a smoother, more durable finish without drama from dust, damp, or loose patches.
Surface Cleaning and Repair
Before you start plastering, the surface must be clean and free of any loose material. Start by sweeping up all debris with a broom or vacuum cleaner to remove dust and dirt. If there’s grease or grime on the surface, use a degreaser to clean it thoroughly.
Next, inspect the substrate for cracks, holes, and delamination. Use a patching compound to fill in any gaps or cracks you find. For larger areas that need repair, consider replastering rather than just patching. If there’s mold or efflorescence on the surface, treat it with an appropriate cleaner before proceeding.
Once cleaned and repaired, let the substrate dry completely. It’s crucial to wait at least 24 hours after cleaning to ensure no moisture remains that could affect plaster adhesion later on. This step is critical for a successful plaster job.
Key Priming and Bonding Steps
The right primer can make or break your plaster job. For brick walls, use a bonding agent to ensure the plaster adheres well. Bare plasterboard requires PVA (polyvinyl acetate) primer for optimal adhesion.
If you’re working over old paint, test the surface with a solvent to see if it’s still intact and can support new plaster. If the paint is flaking or peeling, scrape off loose paint and prime the area before plastering.
Always follow manufacturer instructions for primer coverage and drying times. A good rule of thumb is to apply enough primer so that you don’t see any dry spots on the surface. This ensures a uniform base for your plaster layer.
Masking, Drop Sheets, and Workspace Setup
To protect floors from plaster dust and drips, lay down drop cloths or plastic sheeting. Cover any fixtures that could get damaged by plaster splatters with masking tape and paper.
Ensure good lighting in the workspace to see details clearly while working. Use work lights if natural light is insufficient. Proper ventilation is also essential; open windows or use fans to keep air moving and reduce dust accumulation.
Before you start, make sure all tools are within easy reach but not cluttering your workspace. A well-organized area helps maintain focus and efficiency throughout the plastering process.
Mixing and Applying Plaster: Step-by-Step
Mix plaster to the right consistency by starting with clean water and then gradually sprinkling in powder while you stir, aiming for a smooth, lump-free pot that stays workable long enough to apply. Stir steadily and scrape the sides often so any settled powder gets incorporated and you avoid dry pockets. Keep the work area clean and organized, wear dust mask and eye protection, control dust with a shield or tarp, and vent the room to minimize fumes and airborne particles.
Plan to apply the base coat first, then the skim coat, after you’ve prepped the substrate and created a good key so subsequent layers bond properly. Work in small, manageable sections with the trowel held at the appropriate angles, applying even pressure and building up the coat in thin, even layers while keeping an eye on open times to prevent dragging or curling. Finishing and curing are about timing, temperature, and humidity; smoother edges, feathering, and watching for common defects help you avoid heavy repairs later, so you’ll get a stronger, more durable finish with less disappointment.
Step-by-Step Process
This sequence ensures a smooth plastering job, from prep to finish.
- Check workspace for dust control and ventilation. Wear PPE like masks and gloves.
- Mix plaster in clean water using the correct ratio; add powder slowly to avoid lumps.
- Apply base coat with a trowel, feathering edges for smooth transitions between layers.
- Wait until base coat is set but still workable before applying skim coat for a smooth finish.
- Clean tools and workspace immediately after use. Check plaster surface for defects like cracks or pinholes.
Mixing Ratios and Consistency Guidance
Start with the right water-to-plaster ratio to achieve a lump-free, workable consistency. Avoid over-mixing, which can lead to plaster setting too quickly.
Check the product packaging for recommended ratios; mix in small batches and adjust as needed. A good rule is to aim for a consistency similar to thick cake batter.
If plaster sets up too fast, it may crack or be difficult to work with. If too runny, it won’t adhere properly. Always test on a scrap piece of substrate before applying to the main area.
Application Techniques for Walls and Ceilings
For walls, use a trowel at a 45-degree angle to hog in base coats. This ensures good adhesion and helps create a key for subsequent layers.
On ceilings, set boards or battens to support plaster until it sets. Use a straight edge to ensure even thickness across the surface.
Tight corners can be tricky; use a smaller trowel or corner tool to get into these areas without leaving gaps or excess material.
Layering, Thickness, and Feathering
The base coat should be about 1/8 inch thick for walls and slightly thicker on ceilings. Skim coats are thinner, around 1/16 inch.
To build up layers, apply the base coat first, let it set but remain workable, then add skim coats to achieve a smooth finish.
Feathering edges is crucial for seamless joins; use a trowel at an angle to blend edges into surrounding plaster. This prevents visible lines and ensures a professional look.
Achieving a Smooth, Professional Finish
Achieving a smooth skim coat starts with a clean, dust-free, and properly primed substrate. Control the plaster or joint compound consistency and apply with the right trowel angle and pass sequence to lay down a uniform skim.
Feather edges and manage joints to avoid ridges, then refine through careful sanding and finishing to a paint-ready surface. Use the appropriate timing, sanding grits, and damp-dusting or sponge finishing, and consider burnishing or sealers as needed, while protecting surrounding areas and preventing moisture risks.
Trowel and Float Techniques
To achieve a smooth, professional finish, start with the right trowel angle. Hold it at about 45 degrees to the surface as you work across the wall or ceiling. This angle helps distribute plaster evenly without leaving marks.
Once the plaster starts to set but is still slightly soft—this stage is called ‘slack’—use a burnishing technique. Press down firmly with your trowel, then lift it quickly and repeat in straight passes. This removes any ridges or uneven spots left by earlier applications.
The timing for this step is crucial. If you wait too long, the plaster will be too hard to smooth out properly. Burnish when the surface feels slightly tacky but not dry—this stage is called ‘bite’. Overworking at this point can cause cracking and weakening of the finish layer.
Sanding, Polishing, and Visual Checkpoints
After plastering, wait until the surface is dry but still slightly soft to start sanding. Begin with a medium grit paper (120-150) for initial smoothing.
- Check flatness: Use a straight edge or level across the wall; any gaps indicate areas needing more plaster or sanding.
- Inspect corners: Ensure all angles are sharp and clean, no rounded edges that could catch paint later.
- Evaluate texture consistency: Sand until you see uniform finish without ridges or bumps. Unevenness can lead to patchy painting results.
- Dust removal: Damp-dust with a soft cloth after sanding; this prevents dust from embedding back into the plaster.
Quick rule: Always check for smoothness and flatness before moving on to polishing or sealing steps.
Common Textures and Decorative Finishes
The choice of tools can dramatically change the final look of your plastered surface. For a smooth skim finish, use a trowel with minimal pressure to create an even layer.
To add texture, switch to a notched float or stippling tool. These leave patterns that catch light differently and hide minor imperfections well.
Decorative finishes like Venetian plaster require specialized techniques and tools. Use a spatula for layered applications followed by burnishing with a trowel for a glossy sheen.
Common Mistakes and How to Avoid Them
Top beginners trip points are a messy surface, moisture in the substrate, an off-target plaster mix, weak bonding, and poor tool control. Intermediate pitfalls include overworking the patch, rushing drying times, and inconsistent mix or application. We’ll cover practical prevention steps like a surface prep checklist, simple moisture checks, correct mix guidance for each plaster type, feathering edges, and choosing the right tools, plus clear correction steps for stiff or sloppy mixes, dried seams, and pinholes before finishing.
Drying and curing are where DIY projects fail—the temp, humidity, and ventilation matter, and you’ll hear touch-dry vs full cure timelines explained in plain terms. Keep dust under control and wear a respirator when mixing powders, and if issues show up you should follow a quick, stepwise plan: fix prep, adjust moisture, re-prime porous substrates, or patch and re-finish as needed.
Preparation and Mixing Errors
Avoid these common mistakes that can ruin your plaster job before it even starts.
- Inadequate surface prep: Poor cleaning or repair leads to weak bonding. Use a thorough checklist for all surfaces, including dust removal and filling cracks.
- Incorrect mix ratio: Too much water makes the plaster too runny; too little makes it stiff. Always measure carefully according to the type of plaster you’re using.
- Insufficient bonding agent: Lack of proper primer or adhesive can cause peeling and cracking. Ensure all substrates are properly primed, especially porous ones like concrete.
- Poor tool control: Using the wrong tools or techniques leads to uneven application. Choose the right trowel or float for your plaster type and feather edges carefully.
Making these mistakes can be costly but they’re easy to avoid with a little extra care upfront.
Application and Timing Mistakes
Avoid these common application errors that can compromise the quality of your plaster finish.
- Overworking plaster: Excessive mixing or smoothing causes air bubbles and weakens the bond. Mix only until thoroughly combined, then apply quickly.
- Taking too long between coats: Drying time varies by plaster type; rushing can lead to uneven layers. Follow manufacturer guidelines for each coat’s drying times.
- Inconsistent thickness: Uneven application leads to cracking and poor finish quality. Use a consistent layering technique, feathering edges smoothly with the trowel.
Maintaining proper timing and consistency is key to achieving a smooth, professional-looking plaster job.
Drying, Curing, and Post-Work Errors
Avoid these common mistakes that can ruin your hard work after the plaster is applied.
- Premature painting: Applying paint too soon weakens the plaster. Wait until fully cured before applying any coatings or finishes.
- Inadequate curing conditions: High humidity and poor ventilation slow drying, causing mold growth and cracking. Control temperature and humidity levels to ensure proper curing.
- Rushing the process: Premature exposure to cold can cause cracking and weakening of plaster. Allow adequate time for full curing before exposing to extreme temperatures or direct sunlight.
Maintaining ideal drying conditions is crucial for a strong, durable finish that lasts.
Safety, Cleanup, and Waste Disposal
Safety starts with a clear plan: a simple risk assessment, a pre-work checklist, and site rules that keep you and your family out of harm’s way. Wear the right PPE—gloves, eye and face protection, a dust mask or respirator, long sleeves, and non-slip footwear—and choose gear that fits the plaster mix and dust level you’re dealing with. Handle tools like trowels, hawks, mixers, and drills with care, keep ladders and cords tidy, and set aside heavy bags so you don’t surprise yourself or others in a hurry.
Dust control and ventilation matter every day, not just when you’re cutting; use wet methods or low-dust tools, pull ventilation through a vent, and seal off the workspace to minimize airborne particles. Mixing, storage, and cleanup should be deliberate: follow safe mixing practices, avoid splashes, contain spills, label containers, and store materials away from heat or ignition sources. Dispose of contaminated rags and leftover plaster responsibly, separate recyclables when possible, and follow local disposal guidance for rinse water and containers to keep the environment out of the mess you’ve made.
Personal Protective Equipment and Safe Practices
Wear the right gear to stay safe while plastering. Here’s what you need:
- Masks and Respirators: Protect your lungs from dust. Use a respirator or N95 mask for heavy work.
- Eyewear Protection: Safety glasses keep dust out of your eyes. They’re cheap but essential.
- Gloves: Wear thick gloves to avoid splashes and skin irritation. Latex or nitrile are good choices.
- Non-Slip Shoes: Keep feet safe with sturdy, non-slip shoes. Avoid barefoot work at all costs.
- Lifting Techniques: Lift heavy bags safely by bending your knees and keeping back straight. Use a dolly if possible.
Cleanup Techniques and Tool Care
Proper cleanup keeps tools in good shape and prevents messes. Follow these steps:
- Immediate Cleanup: Clean trowels, floats, and hawks right after use to avoid setting plaster.
- Dust Control: Use wet rags or vacuums with HEPA filters to minimize dust during cleanup.
- Tool Storage: Store tools in a dry place away from direct sunlight. Keep them organized for easy access next time.
- Maintenance Tips: Regularly inspect and sharpen trowels and floats. Replace worn-out parts as needed.
Waste Management and Recycling Options
Proper disposal of plaster waste is crucial for environmental responsibility. Check local regulations to ensure compliance.
Minimize leftover material by measuring accurately before mixing. Use a bucket scale or rent one if needed, around $20 per day.
For recycling options, contact your city’s recycling center or construction waste management services. They can provide bins for plaster and other materials at reasonable rates.
Advanced Tips, Troubleshooting, and When to Call a Pro
Advanced tips cover refined plastering methods and when to reinforce with mesh, control joints, and proper edging for durable, seamless finishes. You’ll learn about scratch and brick coats, polymer-modified mixes, skim coats, and feathering, plus what signs mean you should escalate to professional help. We’ll also walk through common problem spots and how to diagnose faults before you start patching.
This matters because better technique saves time, reduces callbacks, and keeps the surface flat and honest across tricky shapes. You’ll get practical checks, patching sequences, and guidance on choosing the right tools and timing to control open time and curing. Look for clear red flags and know what to document before calling a pro, so you’re not wasting either party’s time.
Pro Techniques and Time-Saving Shortcuts
Timing is everything when it comes to plastering. Use accelerators on cold days or retarders on hot ones to keep your mix working just right. Mix small batches for better control, especially if you’re using polymer-modified mixes that need precise handling.
For faster results and cleaner edges, invest in specialist tools like a hawk board and a long-handled trowel. These will help you cover more area without wasting time or energy on awkward reaches. Remember, the right tool makes all the difference.
When dealing with large areas, consider using mesh reinforcement for added durability. This is especially useful over existing cracks to prevent them from reappearing. And don’t forget control joints—they’ll help manage shrinkage and cracking in expansive surfaces.
Troubleshooting Common Problems
Cracks can be a real headache, but they’re often fixable. Start by cleaning the area thoroughly with water or a solvent to remove any dust or debris that might interfere with bonding. Then apply a thin layer of patching compound over the crack and feather it out smoothly.
If your plaster is curling at the edges, it could be due to uneven drying conditions. Make sure you’re working in a controlled environment where temperature and humidity levels are stable. Use a hair dryer or heat lamp to speed up drying if necessary, but avoid direct sunlight that can cause rapid evaporation.
Bonding failure is another common issue. If the plaster isn’t sticking well to the substrate, it might be due to poor surface preparation. Clean the area with a wire brush and apply a bonding agent before starting your work. This will ensure a strong bond between layers.
When to Hire a Professional
If you encounter extensive dampness or water damage, it’s best to call in the pros. Persistent moisture can lead to serious structural issues and mold growth that require professional assessment and remediation.
Structural cracks are another red flag. These often indicate underlying problems like foundation shifts or settling that need expert attention to avoid further damage. Don’t risk your home’s integrity by attempting repairs yourself.
High ceilings or complex decorative plasterwork also warrant a pro’s touch. Working at height can be dangerous, and intricate designs require specialized skills and tools. It’s safer and more cost-effective in the long run to hire someone experienced with these challenges.
Conclusion
Plastering well is about safety, durability, and a surface you’ll be proud to look at every day. Do it right, and the finish stays smooth and intact for years.
First, inspect the wall, repair major defects, then gather and check your tools and materials, mix within recommended ratios, test the mix on a small area, and work in controllable sections. Keep a steady pace, wipe edges clean as you go, and dispose of waste as you finish each section. Always prioritize ventilation, PPE, and a dry, clean work zone so you don’t chase mistakes you can’t undo later.
Common mistakes to avoid include skipping proper surface preparation, rushing the mix or the application, and overworking or under-wetting the plaster. Safety rules are simple: wear eye and respiratory protection as needed, keep mixed plaster within its working time, and stop if you see curls, cracking, or excessive drying at the surface. If something feels off, test on a small patch first and don’t push a bad mix or a poor bond.
If the area is large, the substrate is tricky, or you’re unsure about moisture risks, it makes sense to call a pro rather than push on alone. Stay focused, take it one section at a time, and you’ll finish with a professional finish and no costly mistakes.
FAQ
What basic plastering tools do I need?
You’ll want a hawk and trowel, a plastering float, mixing bucket, and a drill with a paddle mixer. A planer or rasp helps, and a corner trowel makes tight edges easier. Don’t overbuy small tools; basics first, then add as you work.
How do I mix plaster correctly?
Follow the bag instructions, but aim for a pancake-like consistency. Add powder gradually to water and stir until smooth with a slow, steady mix. If it won’t hold a peak, add a pinch of powder and mix again.
What common mistakes ruin plastering projects?
Mixing too thick, applying when the wall is dusty, and rushing joints. Don’t skip priming or bonding agents on dusty or rough walls. Let coats set properly before proceeding to the next one.
How do I avoid cracks in plaster finishes?
Keep walls clean and damp between coats. Don’t skim over fully dry patches or cold surfaces. Control temperature and humidity, and don’t overwork the putty once it starts to set.