
Introduction
Plaster bonding agent application is applying an adhesive coat to help plaster bond, focusing on how much area it covers and when it becomes tacky or dries.
In practice, you spread or roll on the bonding agent following the surface you’re working with, pausing long enough for it to tack to the right feel before applying plaster. Always check the product label or manufacturer instructions for recommended coverage and touch/test times, and adjust for room temperature and humidity as needed. If you’re unsure, test a small area first and wait for the surface to reach the recommended tackiness before continuing.
Key takeaways
- Understand plaster bonding agents: cementitious, acrylic, and PVA types require surface prep.
- Calculate coverage by test area; actual spread depends on surface roughness and porosity.
- Apply methods tailored to material: skim coats use different tacking from bonding primers.
- Tacky vs dry timing matters; grout control, edge bonding, and plaster pull-back risk.
- Environmental factors, humidity, and airflow dramatically affect drying and tack times.
- Safety check: wear eye, skin protection, and ventilation when applying bonding agents.
Table of Contents
- Introduction
- Key takeaways
- Types of Plaster Bonding Agents and How They Differ
- Coverage Rates — How Much Bonding Agent You Need
- Application Methods and Best Practices
- “Tacky Vs Dry” Timing: What It Means for Plastering
- Environmental and Jobsite Factors Affecting Drying and Tack Time
- Visual Checkpoints and Inspection Criteria
- Tools and Materials Checklist
- Conclusion
- FAQ
Types of Plaster Bonding Agents and How They Differ
Bonding agents come in several families. You’ll see cement-based, polymer-modified, PVA or emulsion, acrylic, and specialty commercial products.
Each type has its own composition and performance profile. Check the product label or manufacturer data sheet for specifics on how it bonds to your substrate and plaster mix.
Cementitious and polymer-modified agents
Cement-based bonding agents are stable with cementitious plasters. They’re easy to mix and apply, but can be brittle.
Polymers, like PVA or acrylics, added to cement create polymer-modified agents. These improve flexibility and adhesion, making them great for areas with movement or vibration.
They’re more expensive than straight cement-based agents, but their improved performance often makes up for the cost.
Emulsion and acrylic-based agents
These are ideal for interior gypsum or lightweight plasters. They provide good adhesion and can be tinted to match your plaster color.
Emulsions, like PVA, are water-based and sensitive to moisture. Acrylics, on the other hand, are more resistant but can be harder to clean up.
Both can be recoated once dry, making them suitable for multi-coat applications. But remember, they need a clean, dry surface to bond properly.

Coverage Rates — How Much Bonding Agent You Need
Coverage depends on the surface and the product. Start by assessing the porosity and texture of the substrate, then estimate the area you need to treat.
Use the product instructions to determine application thickness and coverage per area. If in doubt, verify with the manufacturer instructions or product label before mixing.
Typical coverage ranges and example calculations
A liter of bonding agent should cover around 8 to 12 square meters (m2) on a normal substrate. That’s roughly 87 to 129 square feet (ft2) per gallon.
For porous surfaces, increase coverage by about 30%. So, that’s 10-16 m2 or 107-172 ft2 per liter/gallon.
If you’re applying a second coat, double the amount needed. So, for a porous surface, you’d need around 20-32 m2 or 214-345 ft2 per liter/gallon.
Factors that reduce or increase coverage
Coverage can decrease if the substrate is very porous. It sucks up the bonding agent, reducing what’s left to bond with the plaster.
Temperature matters too. Warmer weather means faster drying, which can reduce coverage. Apply in cooler conditions if possible.
Thicker applications use more product, so adjust your calculations accordingly. Dilution can increase coverage but reduces bonding strength, so avoid it unless necessary.
Always do a test patch to see how your specific job site affects coverage. Apply, let it dry, then measure the area covered.
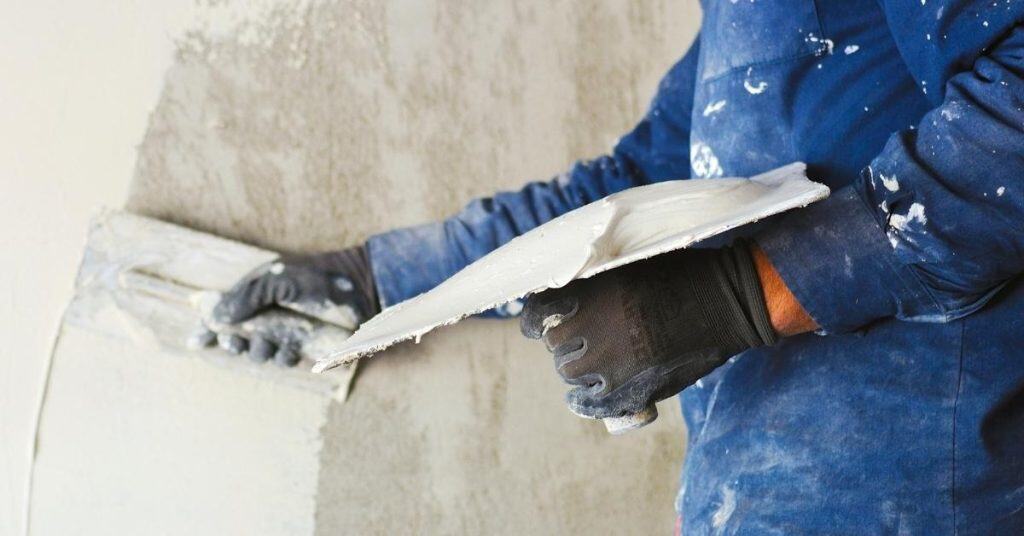
Application Methods and Best Practices
Prepare the surface by cleaning and roughening as needed, then remove dust and debris. Mix or open the product according to the guide for your chosen type.
Apply with the method recommended for the product, whether brushing, rolling, spraying, or troweling. Keep applications even and avoid puddling or over brushing to prevent weak bonding points.
Surface preparation and troubleshooting
Before applying any bonding agent, ensure your surface is clean, dry, and free of contaminants. Here’s how:
Cleaning: Remove all dust, dirt, and grease using a wire brush or scraper.
Repairs: Fill any cracks or holes with an appropriate filler, let it dry, then sand smooth.
Laitance removal: If your surface has laitance (a weak, powdery layer), remove it using a stiff brush and water. Prime the surface to seal it and improve adhesion.
Techniques: brush, roller, spray, and trowel tips
Each application method has its pros and cons. Choose the right one for your job:
Brushing: Use a good quality paintbrush for small areas or intricate work. Apply in even strokes, working from top to bottom.
Rolling: For large, flat surfaces, use a roller with a short nap cover. Apply in ‘M’ or ‘W’ patterns for even coverage.
Spraying: This method is fast but requires proper ventilation and protection. Spray in thin, even coats, maintaining a consistent distance from the surface.
Troweling: For thick applications, use a trowel to spread the bonding agent evenly. Work in small sections at a time.
“Tacky Vs Dry” Timing: What It Means for Plastering
Tacky means the surface can still feel slightly sticky to the touch; dry means it feels firm and dry. You test it with a light press and by checking if dust comes off easily. The timing between bonding agent and plaster matters for adhesion—if you go in too soon or wait too long, you’ll get weak bonding; check the label or datasheet for exact guidance.
Getting this right keeps plaster from cracking or popping off later. It also gives you a cleaner finish and fewer surprises on cure day. If you’re unsure, look up the product instructions and follow the recommended window.
How to test for tackiness and readiness
The ‘tacky’ state is when the bonding agent has absorbed some moisture from the air but isn’t yet dry. Here’s how to check:
Tactile check: Gently press your finger onto the surface. If it feels sticky, like a post-it note, it’s tacky.
Visual check: Look for a slight sheen or gloss on the surface. This indicates it’s ready to accept plaster.
Consider temperature and humidity. Warmer conditions speed up drying, so adjust your timing accordingly.
Risks of applying too early or too late
Applying plaster too early, when the bonding agent is still wet, can cause:
– Poor bonding: Plaster may not stick properly.
– Slump: The plaster might slide off or sag.
Applying too late, after it’s fully cured (dry), leads to:
– Uneven suction: The plaster may absorb moisture unevenly, causing cracks or an inconsistent finish.
– Debonding: Plaster can peel off in sheets if not properly adhered.

Environmental and Jobsite Factors Affecting Drying and Tack Time
Temperature, humidity, and airflow all influence drying and tack times. Substrate temperature also plays a role in how quickly the product cures.
Ventilation and nearby heat sources can either speed up or slow down drying. On site, adapt by consulting the product label and adjusting conditions as needed.
Accelerating or slowing film set safely
The drying and tack time of a plaster bonding agent can be influenced by adjusting the environment. Here’s how to do it safely:
Speed up the process: Increase ventilation, use heaters (but not too much), or apply in shade.
Slow down the process: Reduce ventilation, move the application area into a cooler spot, or apply on an overcast day. Never use solvents to speed up drying – it’s unsafe and can damage the substrate.
Seasonal and climate considerations
Different climates and seasons affect bonding agent performance:
Cold conditions: Apply when temps are above 50°F (10°C). Use heaters, but not too much. Consider using a faster-setting agent.
Hot and humid conditions: Apply early morning or late evening. Increase ventilation. Consider using an agent with built-in humidity resistance.
Coastal conditions: Salt air can accelerate drying. Apply when there’s no wind, and use a salt-resistant agent.
Visual Checkpoints and Inspection Criteria
Look for an even film with no dry spots, skips, or pooling. The surface should feel tacky or slightly dry according to the product used.
Use a simple tactile test and a light visual inspection to confirm readiness. Always verify against the manufacturer instructions or product data sheet before plastering.
Acceptable film appearance and coverage
Use this checklist before plastering to ensure the bonding agent was applied correctly.
- Sheen/Matte: Check for uniform sheen or matte finish. Inconsistencies may indicate missed spots or uneven application.
- Pooling: Look for any pooling or puddles. These can cause uneven plaster adhesion and should be spread out or removed.
- Color Consistency: Ensure the bonding agent’s color is consistent across the surface. Darker patches may indicate overapplication, while lighter areas could mean underapplication.
- Edges: Check edges and corners for proper coverage. These areas are easy to miss but crucial for a strong bond.
- Coverage Rate: Ensure you’ve applied the bonding agent at the correct rate (see earlier section). Too little can cause poor adhesion, while too much can lead to issues with drying and tack time.
- Dry Time: Test for tackiness (see ‘Tacky Vs Dry’ Timing section) to ensure the bonding agent is ready for plastering. Applying plaster too early or late can compromise bond strength.
- Surface Preparation: Recheck surface preparation steps (see Surface Preparation and Troubleshooting section). Any missed spots or contaminants can affect bonding agent adhesion.
- Temperature and Humidity: Ensure job site conditions are within acceptable ranges for the bonding agent used (see Environmental and Jobsite Factors Affecting Drying and Tack Time section). Extreme conditions can delay drying and tack time.
Quick rule: If in doubt, reapply or troubleshoot. A few extra minutes now can save hours of rework later.
Common defects and how to fix them
Use this checklist to identify and address common bonding agent application issues before plastering.
- Pinholes: Small holes in the film indicate insufficient coverage. Reapply or use a trowel to fill in these areas.
- Uneven Absorption: Visible differences in absorption rate across the surface suggest inconsistent application. Reapply or troubleshoot application method (see Application Methods and Best Practices section).
- Flaking: Flakes or peeling indicate poor adhesion, likely due to contaminants or insufficient drying time. Remove flakes, clean the area, and reapply.
- Curing Issues: If the bonding agent is not fully cured (see ‘Tacky Vs Dry’ Timing section), it can cause issues with plaster adhesion. Allow sufficient curing time before plastering.
Quick rule: Fix defects now to prevent them from compromising your plaster job later.
Tools and Materials Checklist
Gather the bonding agent, appropriate applicator, measuring tools, and PPE. Have extra brushes or rollers and a spray rig if needed for your method.
Keep a handy reference to the product label and the manufacturer instructions for mixing ratios and application guidelines. Check local rules or jobsite requirements if any special handling is mandated.
Recommended tools and PPE
Before you start, make sure you have all the necessary tools and personal protective equipment (PPE) to ensure a safe and accurate application of your plaster bonding agent.
- Broad-tip paintbrush: For cutting in edges and corners. A 1.5-2 inch brush works well.
- 9-inch roller cover with extension pole: For applying the bonding agent to large, flat surfaces. Use a medium nap cover for smooth surfaces or a heavy nap for textured ones.
- Airless sprayer (optional): For large areas and speedy application. Ensure it’s compatible with your bonding agent.
- Hygrometer: To measure humidity levels, crucial for determining when to apply the bonding agent.
- Timer: To keep track of drying times between coats or before plastering.
- Safety glasses: Protect your eyes from splashes and debris.
- Gloves: To protect your hands from chemicals. Choose a pair that allows for good grip.
- Dust mask or respirator: For protection against dust and fumes, especially when sanding or applying bonding agents in enclosed spaces.
Quick rule: Always prioritize safety first. Ensure your PPE is in good condition before starting any task.
Consumables and patch materials
Having the right consumables and patch materials on hand will ensure a smooth application process and optimal results for your plaster bonding agent.
- Primer: Choose one that’s compatible with your bonding agent and substrate. It promotes better adhesion and seals the surface.
- Plaster mix: Ensure it’s compatible with your chosen bonding agent to avoid any compatibility issues.
- Fillers: Have a range of fillers ready for different types of cracks or holes, from fine hairline cracks to larger gaps.
- Cleanup supplies: Keep plenty of rags, sponges, and buckets filled with clean water on hand for easy cleanup.
- Sandpaper (120-grit): For lightly sanding the surface after application to remove any imperfections or excess material.
- Tack cloth: To wipe away dust and debris before applying the bonding agent, ensuring a clean surface for optimal adhesion.
- Plastic sheeting: For protecting floors and nearby surfaces from spills and splashes during application.
Quick rule: Always check your materials’ compatibility before use to avoid any unwanted reactions or reduced performance.

Conclusion
Get this right and you’ll have a solid bond, even plaster finish, and fewer callbacks. Safety and good preparation protect the work and your budget, so test first, respect times, and don’t rush the cure.
Start with a quick, practical checklist: pick the right bonding agent for your surface, confirm coverage by applying a thin, consistent coat in the expected area, wait for the tack or dry window defined for that product, and check environmental factors like temperature and humidity before plastering. Move step by step from cleaning and priming to application, then inspect the surface for uniform adhesion before proceeding to plastering.
Common mistakes to avoid: using the wrong type of bonding agent for the substrate, skimping on coverage, and rushing the tack/dry timing. Always verify the surface with a simple test patch, keep the work area well ventilated, and wear eye protection and a mask as needed. Never push through when condition or tack time isn’t right—materials and temps can flip quickly and cause bond failure or cracks.
If you’re dealing with tricky substrates, variable weather, or large sections, consider bringing in a pro sooner rather than later. You want a reliable base, not a costly call-back. Stay methodical, stay safe, and you’ll finish with a strong, lasting bond and a clean, even plaster finish. You’ve got this.
FAQ
How do I estimate coverage for bonding agent on my walls?
Check the product label for its coverage guidance per square foot or per square meter. Apply in a thin, uniform coat and multiply by your wall area. If in doubt, call the manufacturer or check their datasheet for your specific product.
What affects tack time and how do I test it safely?
Ambient temperature, humidity, and the surface texture slow or speed up tack time. Test a small area with the same mix and wall condition, and observe how it changes over time. If it starts to set before you finish the coat, plan your workflow accordingly.
How should temperature and humidity influence application timing?
Hot or humid days change how quickly the product dries. Cool, dry conditions typically give you more working time. Always verify any temperature or humidity limits in the label or instructions before you start.
What are common mistakes to avoid during application and drying?
Avoid applying too thick a coat or letting it dry unevenly. Don’t delay plastering until the bonding agent is fully dry unless the manufacturer says it’s okay. If you’re unsure, re-check the label or manufacturer instructions and local rules.