
Introduction
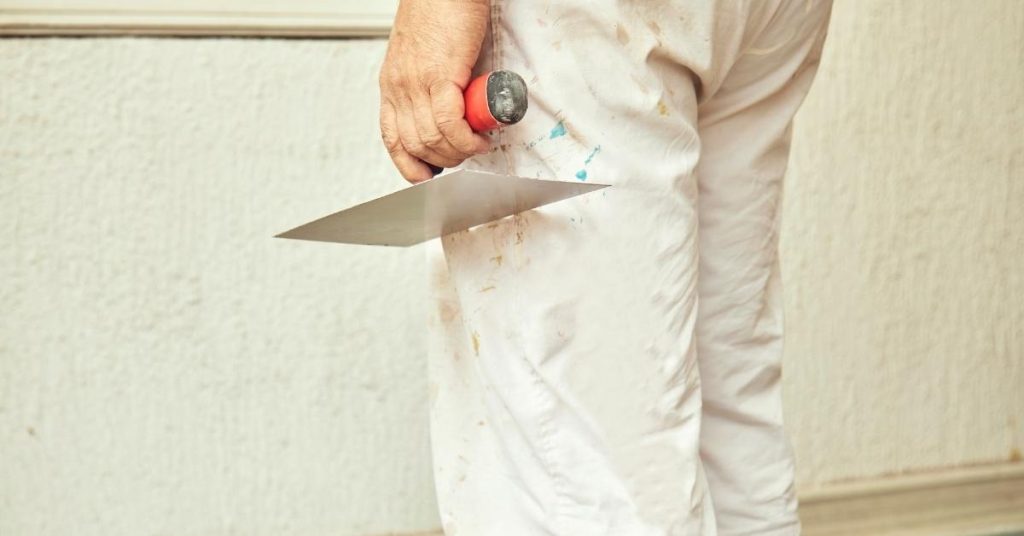
Venetian plaster burnishing is the final rubbing of a polished plaster surface to compact and shine it using the right tools at the right moment. Pick flexible trowels or burnishers suited to your plaster type and check the product label for recommended tools, and make sure the base coat is dry and sound before you start. Timing matters: burnish too soon and the plaster smears, too late and it won’t compress properly.
To avoid black marks, work with clean tools, clean hands, and a dust-free surface, and test a small area to see how the plaster reacts to pressure and speed. Prepare by patching, sanding, and wiping the wall, and if unsure about a material or technique, follow the manufacturer’s instructions or ask a pro.
Key takeaways
- Choose burnishing tools: stainless steel trowel or polyurethane float for Venetian plaster.
- Burnish after initial set but before full cure; perform touch tests.
- Different plaster types require lighter pressure and varying angles during burnishing.
- To avoid black marks, keep tools clean, work in dry patches, avoid overworking.
- Proper surface prep: clean, dust-free, primed or sealed; environment governs cure.
- Wear eye protection and gloves; clean spills promptly and dispose waste per local rules.
Table of Contents
- Introduction
- Key takeaways
- What Burnishing Is and What Results to Expect
- Types of Venetian Plaster and How They Affect Burnishing
- Choosing the Right Tools for Burnishing
- Timing: When to Burnish and How Cure and Climate Change the Window
- Burnishing Technique: Pressure, Angle, and Motion for Clean Finishes
- How to Avoid Black Marks — Causes, Prevention, and Fixes
- Surface Preparation, Cleanup, Safety, Costs and Environmental Considerations
- Conclusion
- FAQ
What Burnishing Is and What Results to Expect
Burnishing is the controlled, pressure-driven polishing of a cured plaster surface using trowels, burnishers, or pads to compact and smooth the top layer. It alters surface porosity, increases reflectivity, and refines microtexture so the same plaster can read from soft satin to high gloss depending on technique.
Light, brief passes leave a soft satin with visible micro-texture and depth, while longer, heavier passes produce a high sheen with fewer visible pores and stronger reflections under room lighting. Burnishing densifies and helps seal lime- or acrylic-based plasters—improving stain resistance—but lime and acrylic systems respond differently, so check the product label or data sheet for recommended timing and compatible tools before proceeding.
Burnishing versus other finishing techniques
Burnishing is not the same as standard troweling or polishing. Here’s how it differs and when to use each.
Troweling: This is the initial application of Venetian plaster, using a trowel to spread and smooth the material onto the wall. It’s about coverage and basic smoothing.
Polishing: Polishing comes after burnishing, using a soft cloth or pad with a small amount of water-based lubricant. It’s for fine-tuning the sheen and removing any remaining haze from the burnish.
Burnishing: This is the controlled, pressure-driven polishing of a cured plaster surface. It densifies, polishes, and seals the plaster in one step. Use it after troweling to achieve your desired finish.
Visual checkpoints for a successful burnish
Before you start, know when to use this checklist. After burnishing, step back and inspect your work under natural light.
- Uniform sheen: Check if the entire area has an even sheen. Inconsistencies may indicate missed spots or over-worked areas.
- No drag lines: Look for any visible lines left by the burnisher. These can be fixed with a soft cloth and water-based lubricant during polishing.
- Smooth touch: Run your hand over the surface. It should feel smooth, not gritty or rough.
- Color consistency: Ensure the color is even throughout. Burnishing can slightly darken the plaster; if it’s too dark in some spots, you may have over-worked those areas.
- No crazing: Check for any hairline cracks. These can occur if the plaster was not fully cured or if you used excessive pressure during burnishing.
- No dull patches: Ensure there are no dull, unburnished spots. These may need to be touched up.
- Reflective spots: Look for any overly shiny or reflective areas. These indicate over-working and can be addressed during polishing.
- Consistent texture: Feel the surface for a consistent micro-texture. Inconsistencies may require touch-ups.
Quick rule: If something doesn’t look or feel right, trust your instincts. It’s easier to fix issues now than later.
Types of Venetian Plaster and How They Affect Burnishing
Lime-based plasters (Marmorino, Grassello-style) and acrylic/synthetic Venetian plasters have different base chemistries, binder types, and particle-size profiles that change workability and burnish potential. Particle size and binder stiffness influence how readily the surface polishes, the color depth you can achieve, and how susceptible the material is to polishing marks or micro-cracking.
Lime plasters generally build warm, breathable patinas with slower sheen development and greater sensitivity to overworking; acrylics tend to burnish faster and give a more uniform sheen with different color-depth behavior. For any product, consult manufacturer instructions, test on a scrap panel, then pick tools and timing to match the material—lime systems often need gentler, later burnishing while acrylics can accept quicker, firmer passes.
Lime-based plasters (Marmorino, Grassello)
Lime-based Venetian plasters like Marmorino and Grassello are traditional choices that offer a warm, natural patina. They’re made with lime hydrate, which gives them breathability – they can absorb and release moisture, helping regulate indoor humidity.
Burnishing these plasters requires patience. Lime takes time to cure and harden, so you’ll need to apply gentle pressure initially. Too much too soon can cause micro-cracking or leave polishing marks.
The lime chemistry also influences sheen. Lime-based plasters typically offer a soft, matte to satin finish. They won’t achieve the high-gloss look of some synthetic plasters, but they do develop depth and richness over time.
Acrylic and synthetic plasters
Acrylic and synthetic Venetian plasters are modern alternatives that offer durability and easy maintenance. They’re made with resin binders, which provide strong adhesion and moisture resistance.
Burnishing these plasters can be faster than lime-based ones, but it requires different techniques. Synthetics often need more pressure to achieve a high-gloss finish. Be careful not to over-burnish, as this can cause staining or discoloration.
The particle size in synthetic plasters is usually smaller and more uniform, leading to a more consistent sheen. However, they may lack the depth and richness of lime-based plasters. Also, while synthetics resist moisture well, they don’t breathe like lime plasters do, which could potentially lead to condensation issues if not properly addressed.
Choosing the Right Tools for Burnishing
Select tools by starting with plaster type and finish target: identify whether you’re on a lime-based or synthetic plaster and whether you want matte, satin, or high gloss. That decision steers trowel edge profile, blade material, and whether to use felt pads or polishing discs—rounded edges for softer burnish, square or firm edges for leveling or aggressive polish.
Use flexible stainless or chrome-treated blades for feathering and corrosion resistance with lime mixes, and pair natural felt or wool pads for softer plasters before moving to denser polyurethane pads for final sheen. If using power tools, keep RPMs low-to-mid, monitor heat buildup, and always trial tools on a sample board to check for marks or darkening before working the wall.
Hand tools: stainless, chrome-treated, and plastic trowels
The right trowel makes all the difference. Here’s what to consider:
- Stainless steel trowels: Rust-resistant, ideal for long-term use. Pros: Durable, low maintenance. Cons: Can be heavier and more expensive.
- Chrome-treated blades: Corrosion-resistant, great for lime-based plasters. Pros: Long lifespan under moisture. Cons: Ensure compatibility with your plaster’s set time.
- Plastic trowels: Lightweight, flexible, and affordable. Pros: Easy to handle, won’t rust. Cons: Less durable than metal, may not last as long.
- Edge profile: Rounded: Smooth burnish, ideal for matte finishes. Tip: Use for initial passes and tight corners.
- Edge profile: Square: Aggressive leveling, good for high-gloss sheen. Warning: Can leave marks if not handled gently.
- Venetian trowel (optional): Small margin, controlled burnish in tight spots. Rent or buy: Consider renting for one-time projects to save cost.
Specialty burnishers and polishing accessories
For a smooth, high-gloss finish, consider these tools:
Felt or leather pads are soft and gentle, perfect for initial burnishing with softer plasters. Tip: Use natural wool or felt for best results.
Low-speed polishers help achieve a deep sheen without overheating the surface. When to use: For final passes on high-gloss targets. Caution: High speeds can scorch lime plasters.
Power-assisted burnishing is appropriate when working with large areas or tight deadlines. Remember: It requires steady, even pressure and intermittent cooling to prevent scorching.
Tools and materials checklist
Before you start, ensure you have everything needed for a successful burnish:
- Trowels (stainless or chrome-treated): For leveling and burnishing.
- Spatulas/chrome-treated blades: For controlled burnishing and feathered edges.
- Felt/leather pads: For initial burnish with softer plasters.
- Low-speed polisher (optional): For final high-gloss passes.
- Cleaning supplies: To remove dust and debris before burnishing.
- Non-reactive protective items: To prevent oil contamination and black marks.
- Spare blades/pads: For replacement during the job.
- Safety gear (gloves, goggles): To protect yourself from dust and debris.
- Test area: To experiment with tools and techniques before starting on the main surface.
Quick rule: Always check your tools and materials before starting to avoid mid-job delays.
Timing: When to Burnish and How Cure and Climate Change the Window
The burnish window is the period when the plaster surface has set enough to take pressure without smearing but is not fully hardened—timing here is critical for achieving the desired sheen and avoiding mar or color shifts. Because cure rates change with product chemistry, temperature, humidity, and airflow, always confirm the manufacturer instructions or product data sheet for guidance specific to the material you used.
Use a simple surface-feel check on a scrap or discreet area: the surface should be firm but give slightly under light pressure rather than tacky or brittle. Document ambient conditions (temperature and relative humidity) during application and test passes, and adjust your schedule when conditions are colder, wetter, or unusually dry to avoid working outside the safe burnish period.
Indicators the surface is ready to burnish
The clock’s not the only timer. Your touch and eyes can tell you when it’s time to burnish.
First, touch the surface. It should feel tack-free, neither wet nor sticky. But don’t wait till it’s bone-dry; that’s too late.
Next, look. The plaster should hold together when you gently rub your fingers across it. If it crumbles or flakes off, it’s still too soft. If it’s fully cured and hard as a rock, you’ve missed the window.
How temperature, humidity and ventilation alter timing
Heat, moisture, and airflow – they all speed up or slow down cure. Here’s how:
Hot days and low humidity quicken the process. In these conditions, you might need to burnish a day earlier than usual.
On the flip side, cool temperatures and high humidity slow things down. You’ll have more time before the plaster cures too hard for burnishing.
Good ventilation also speeds up cure. If you’re working in an enclosed space with lots of airflow, plan to burnish a bit earlier.

Burnishing Technique: Pressure, Angle, and Motion for Clean Finishes
Your aim is an even sheen with no scuffing, smearing, or visible streaks; get there by controlling blade angle, stroke pattern, and pressure progression. Set a repeatable stance, start with a moderate blade angle, and use steady, overlapping passes so each area receives the same treatment.
Begin with lighter passes to level micro-irregularities, then increase pressure gradually while narrowing the blade angle for finishing touches; keep a calm, rhythmic motion and avoid circular dragging that creates haloing. Work when the surface feels slightly skinned, use minimal mist or a clean cloth to control tackiness, and inspect under raking light to catch uneven reflections for targeted re-burnishing.
Stroke patterns and pressure control
Start with a light, overlapping stroke pattern to create an even surface. Use deliberate, calm motions – like light cross-strokes or linear arcs.
Begin with minimal pressure. This helps prevent scuffs and smears. Gradually increase pressure as you work, but keep it consistent across each pass.
Watch for sheen. As you burnish, the plaster should reflect light evenly. If you see drag marks or uneven sheen, ease off on the pressure.
Edges, corners and tight spots
Transitions and confined areas need special attention. Use a smaller trowel for edges and corners to maintain control.
For edges, work from the center outwards. This helps avoid creating burnish lines. For corners, use a light, circular motion to avoid concentrated pressure marks.
In tight spots, use a damp controlling cloth to keep the plaster tacky and prevent dry-to-wet transitions. Work slowly and deliberately to maintain an even sheen.
How to Avoid Black Marks — Causes, Prevention, and Fixes
Black marks typically come from metal contamination, dirty or reactive tools, pigments or salts, and moisture-related reactions—especially on lime plasters. Preventive steps start with clean, dedicated tools, non-reactive blades or coverings, and ensuring pigments, water, and cloths are free of oils or metal particles.
Confirm the wall is dry and within recommended environmental conditions before burnishing and test a small area for reactions; use light, controlled passes and stop if any darkening appears. If marks form, pause, let the surface stabilize, clean with a compatible method per the product guidance, re-test, and consider sealing after full cure to reduce future reactions.
Step-by-Step Repair Process
Follow these practical steps to avoid and fix black marks during Venetian plaster burnishing.
- Inspect your tools: clean trowels, floats, buffers using soap and water, then dry. Use non-reactive or dedicated burnishing tools.
- Check the surface: Ensure the wall is dry, stabilized, and within recommended temperature and humidity range (50-80°F, 40-60% RH).
- Test a small area: Apply a light pass with your tool on an inconspicuous spot to check for reactions.
- Burnish carefully: Use controlled, light passes. Avoid excessive pressure that can drag contaminants into the surface.
- Clean up: After burnishing, wipe off any residue with a clean, damp cloth and let it dry before applying sealer or wax.
Pre-burnish prevention steps
Before you start burnishing, take these essential preemptive actions to reduce the risk of black marks:
Clean tools thoroughly. Remove any metal particles or residue that could contaminate the surface.
Control dust: Keep your workspace clean and use protective barriers to prevent contaminants from settling on the plaster.
Use a protective barrier: Apply a thin layer of compatible sealer or wax before burnishing to create a barrier against potential stains.
Treating black marks if they appear
If black marks do appear, follow these steps to treat and remove them:
Isolate and test: Find the cause of the mark (e.g., metal contamination, moisture reaction) and test cleaning methods on an inconspicuous area.
Gently buff: Use a soft, clean cloth or buffer to lightly abrade the surface. Be careful not to damage the plaster.
Spot recoat or light abrade: If necessary, apply a compatible sealer or wax to the affected area after cleaning and gently abrading. If marks persist, consult the plaster manufacturer or a professional for advice.
Surface Preparation, Cleanup, Safety, Costs and Environmental Considerations
Proper substrate prep includes smoothing, managing moisture, and using compatible primers or bonding layers depending on lime versus acrylic systems; poor prep is a common source of later problems. Clean tools and surfaces during and after work to remove residues that could cause staining—follow product cleaning recommendations and keep wash water and cloths free from contaminants.
Use appropriate PPE for lime dust and any solvents, ensure ventilation, and control dust during sanding or grinding. When weighing options, consider tool investment and maintenance, working time, and the environmental profiles of lime versus acrylic systems—consult product data sheets and local disposal rules when managing unused materials or waste.
Surface prep and visual inspection checklist
Before you start burnishing, follow this checklist to ensure your surface is ready. It’s crucial for a smooth, even finish.
- Smooth substrate: Check for any bumps or ridges. Sand if necessary.
- Cure base coats: Make sure all previous layers are fully cured and dry.
- Remove dust: Clean the surface thoroughly to avoid contamination.
- Use primers/sealers: Apply as needed for lime-based or acrylic mixes. This helps adhesion and prevents black marks.
- Check leveling: Ensure a Level 4-5 substrate for best results. Use a straight edge and level to confirm.
- Avoid moisture: Check for any dampness. Moisture can ruin your finish.
- Temperature check: Make sure it’s between 60-80°F (15-27°C).
- Humidity control: Keep humidity below 60%.
- Ventilation: Ensure good airflow to prevent dust buildup.
Quick rule: Skipping these steps can lead to black marks, poor adhesion, and a ruined finish.
Cleanup, tool care and waste handling
Proper cleanup keeps your tools in good shape and prevents black marks. Here’s how:
- Separate rinse buckets: Use one for cleaning tools, another for final rinsing to prevent cross-contamination.
- No steel wool transfer: Clean tools thoroughly before switching between tasks.
- Safe solvents: Use mild soap and water for lime-based plasters. Acetone or denatured alcohol for acrylic.
- Residue disposal: Dispose of residues responsibly, following local waste management guidelines.
- Optional tools: Consider renting a power washer for tough residue. Around $50-$100 per day.
Safety, budgeting and eco trade-offs
Protect yourself, your wallet, and the environment with these tips:
PPE: Wear gloves, safety glasses, and a respirator to protect against lime dust and solvent fumes.
Budgeting: Invest in quality tools for longevity. Rent expensive items like burnishers ($20-$50 per day).
Eco trade-offs: Lime-based plasters have lower VOCs but can be harder to apply. Acrylic plasters are easier but emit more volatile organics. Dispose of unused materials responsibly.
Conclusion
Finish with confidence by keeping safety first and honoring the curing window. A good burnish is a durable, smooth surface, not a rushed job, so always test on a discreet area before full work and respect temperature and humidity as part of the plan.
To proceed, check these in order: confirm your plaster type and finish goal, verify the climate window, choose the right tool for the job, prep the surface thoroughly, try a small sample burnish, then apply steady pressure with a consistent angle and motion, and finally clean and inspect for any marks before proceeding to the whole wall.
Common mistakes to avoid include overworking the surface, which can burnish too hard and create dull spots or black marks, starting with the wrong tool for the plaster, and ignoring surface prep or cure conditions. Safety rules: wear eye protection and a mask as needed, work in a well-ventilated area, keep tools clean, and stop if you see flashing or soft spots that indicate improper curing or damage.
If the project starts to feel risky or you’re dealing with a tricky climate window or an unfamiliar plaster type, it makes sense to call a professional rather than push on. When you do, you’ll protect durability, avoid costly fixes, and finish with a clean, even burnish you can be proud of. Stay steady, stay safe, and you’ll get a professional look with DIY grit.
FAQ
What tool should I choose for burnishing Venetian plaster?
Go with a clean, dense pad or a stainless-steel trowel for burnishing. Switch to a softer pad if you see scratch marks or pull-away at edges. Always keep tools clean and dry to avoid smearing or staining the finish.
When is the right time to burnish after applying Venetian plaster?
Burnish after the plaster reaches a firm skin but before it fully hardens. If you press and it leaves a dent, wait longer. If it hardens too much, you’ll drag and dull the sheen when you try to burnish.
How can I avoid black marks during application and burnishing?
Use a light, even coat and avoid overworking in one spot. Work with clean hands and tools, and keep the surface dry before burnishing. If you see dark spots, stop, let the coat cure a bit, then recheck your technique or recoat only where needed.
What preparation steps make burnishing easier and prevent flaws?
Prepare a smooth, dust-free surface. Patch any cracks, let primer cure, and don’t apply over damp or dusty walls. Plan your work area to minimize drafts and temperature swings that can affect drying and sheen. For lime-based vs. acrylic, read the label for cure times and compatibility with your base coat.