
Introduction
Tadelakt soap application is the manual rubbing of a fatty soap into cured lime-based plaster to create and maintain a water-resistant, burnished surface. It’s a hands-on finish: you’ll work small areas, rub until the surface feels slick, and then buff to a sheen while avoiding run streaks. Check the soap product label and manufacturer instructions for cure times and compatibility before starting.
Think of this as routine maintenance, not a one-time fix—done right, it refreshes water resistance and touch without changing the plaster’s look. Work methodically, keep tools clean, and test a hidden spot if you’re unsure about technique or soap strength. If you need exact timing or product limits, follow the manufacturer’s directions or local guidance.
Key takeaways
- Understand Tadelakt soap plays a key role in water resistance and finish, not a sealant.
- Prepare surface with thorough cleaning, dust removal, and consistent moisture before soap.
- Use recommended tools and keep a wet edge to prevent streaks during application.
- Apply soap in thin, even coats and monitor curing checks between passes.
- Safety: wear eye protection, gloves, and ensure good ventilation during work.
- Environmental and substrate variation can affect absorption; test small area first.
Table of Contents
- Introduction
- Key takeaways
- Understanding Tadelakt and the Role of Soap
- Tools and Materials Checklist
- Surface Preparation and Curing Checks
- Step-by-Step Soap Application Technique
- Avoiding and Correcting Streaks
- Achieving and Testing Water Resistance Without Streaks
- Environmental and Substrate Variables to Account for
- Maintenance, Cleaning, and Long-Term Care
- Conclusion
- FAQ
Understanding Tadelakt and the Role of Soap
Tadelakt is a lime-based plaster system that produces a hard, polished surface when compacted and burnished; it’s a finish, not just a paint or sealer. Soap applied to cured lime reacts chemically at the surface and helps form a hydrophobic layer while also serving as a lubricant during final polishing.
Soap won’t substitute for correct plaster mixing, layering, or curing — those structural steps remain primary. Understand soap’s dual role: a polishing lubricant to close pores and a chemical aid to water resistance, and check product instructions or the plaster manufacturer’s guidance for compatibility.
How soap interacts with lime plaster
Soap plays a crucial role in the tadelakt process. It’s not just about lubrication for polishing; it reacts chemically with our lime plaster to create water resistance.
The lime in our plaster is calcium hydroxide (Ca(OH)2). When we apply soap, its fatty acids react with this lime to form a new compound: calcium stearate. This is what gives tadelakt its hydrophobic properties and helps beads of water roll off the surface.
Soaping also helps compact our plaster surface. As we polish, the soap lubricates, allowing us to smooth out any imperfections. It also fills in tiny pores, making our finish more dense and uniform.
Common soap types and selection criteria
When it comes to soaping your tadelakt surfaces, you’ve got options. Natural soaps are popular, but commercial ones work too.
Natural soaps, like those made from olive or coconut oil, are often preferred for their purity. They’re typically free of harsh chemicals and fragrances. But they might be harder to find and could have varying strengths.
Commercial soaps, on the other hand, are usually consistent in strength and widely available. However, they may contain additives and fragrances that could potentially affect your finish.
When selecting a soap, consider these factors:
- Purity: Opt for soap with minimal additives if you want a natural look and feel.
- Additives: If you’re using commercial soap, check the label to avoid any ingredients that might cause discoloration or affect curing.
- Scent: Consider fragrance-free options if you don’t want any scent lingering in your space.
- Availability: Choose a soap that’s readily available, so you can easily touch up your surfaces as needed.
Tools and Materials Checklist
Gather a practical kit: padding stones or trowels for polishing, soft natural sponges, a non-abrasive cloth, containers for mixing, and the soap product you’ll use; include a scrap board for practice. Consider alternatives for tight budgets and upgrades for longevity, and read the soap label or product data sheet to confirm use on lime plaster.
Safety gear matters: gloves, eye protection, and good ventilation protect you while mixing and rubbing soaps and lime dust. Each tool has a job—polish stones compact, sponges spread and lubricate, and cloths buff—so choose items that help you control pressure and overlap to avoid streaks.
Essential tools and their purpose
Before you start, gather these tools to ensure a smooth, streak-free soaping process.
- Polishing stone: Smooths the surface and brings out the sheen. Skip it, and your finish will be dull.
- Sponge: Applies soap evenly. Using a brush can leave streaks.
- Soft cloths (microfiber or cotton): Buffs off excess soap and reveals the final shine. Harsh materials can scratch the surface.
- Mixing bucket: Ensures your soap solution is well-blended before application.
- Measuring cup/container: Accurate measuring prevents waste and ensures proper concentration.
- Protective gear (gloves, goggles): Safety first. Soap can irritate skin and eyes.
- Plastic scraper or trowel: Removes excess soap from edges and corners.
- Timer (optional but helpful): Keeps track of soaking time for consistent results.
Quick rule: Always inspect your tools before starting. Damaged or wrong tools can ruin your finish.
Soap product options and preparing your solution
Choose the right soap and prepare it correctly for optimal results.
- Natural or synthetic soap: Natural soaps like potash or olive oil are traditional but can be harder to find. Synthetic soaps are easier to source but may not provide the same depth of finish.
- Soap concentration: Follow manufacturer instructions or test a small area for ideal concentration. Too little soap won’t seal properly, too much leaves streaks.
- Water quality: Use clean water to prevent contaminants from ruining your finish.
- Soaking time: Allow the soap to soak into the surface long enough (usually 15-30 minutes) for proper absorption and water resistance.
- Temperature: Apply soap at room temperature. Hot or cold surfaces can cause streaks.
- pH level (optional but recommended): Test your solution’s pH to ensure it’s within the ideal range (7-8) for proper curing.
- Soap storage: Store soap properly to prevent contamination and maintain quality.
- Cleanliness of application area: Ensure surfaces are clean before soaping. Dirt or debris can leave marks.
Quick rule: Always test your solution on a small, hidden area first to avoid costly mistakes.
Surface Preparation and Curing Checks
The plaster must be sound, fully set according to the plaster manufacturer, and free of loose dust, trowel marks, or repairs that haven’t been finished before soaping. Check smoothness by running your hand lightly over the surface and look for pinholes, ridges, or uncured patches that will show after polishing.
Verify readiness with simple tests like a fingertip scratch on an inconspicuous area or a small water drop to see immediate absorption behavior, and defer to cure guidance on product labels. If repairs are needed, finish and allow them to integrate with the surrounding plaster before attempting soap application.
Verifying plaster cure and moisture level
The first step before applying soap to your Tadelakt surface is ensuring the plaster is fully cured and dry. Here’s how you can check:
Cure: Follow your plaster manufacturer’s guidelines for proper curing time. Typically, this ranges from 28 to 45 days.
Moisture level: Press a piece of plastic wrap onto the surface. Leave it for 24 hours. If condensation forms on the underside, the plaster is still too moist. Wait a few more days and recheck.
Cleaning, patching, and smoothing prior to soaping
Before applying soap, your Tadelakt surface needs to be clean, smooth, and free of defects. Here’s how to prepare:
Cleaning: Remove any dust or debris using a soft brush or damp cloth. Ensure the surface is completely dry afterwards.
Patching: If there are hairline cracks or small defects, use a matching Tadelakt repair kit to patch them up. Follow the manufacturer’s instructions for best results.
Smoothing: Use a trowel or float to even out any rough spots or texture. The surface should be uniform and smooth to prevent uneven soap uptake.
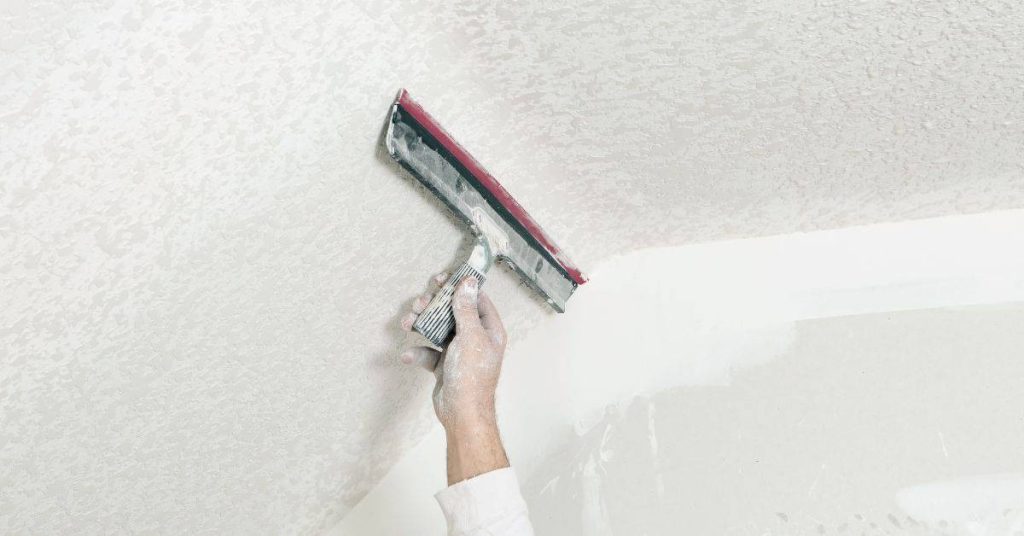
Step-by-Step Soap Application Technique
Start by preparing a working concentration of soap per the manufacturer’s recommendations and test it on your scrap panel to tune feel and polish response. Apply soap with a damp sponge or cloth in consistent overlapping passes, then follow with a polishing stone or hard burnisher using steady pressure and a rhythmic motion to close the surface.
Practice the sequence—apply, work in, polish—so you learn how the finish changes as the soap interacts with the lime; adjust amount and pressure rather than aiming for precise ratios. If unsure about strengths or mixing, check the soap’s instructions and experiment on a scrap until you get uniform sheen without streaks.
Step-by-Step Process
This section guides you through the soap application process, from preparation to cleanup. Follow these steps for a successful outcome.
- Check your safety gear: gloves, goggles, and old clothes.
- Prepare your soap solution as per the earlier guide.
- Wet the tadelakt surface with clean water using a spray bottle or damp cloth. This helps the soap spread evenly.
- Apply the soap using a natural bristle brush in smooth, even strokes. Work from top to bottom, side to side.
- Let it sit for 10-15 minutes, then rinse thoroughly with clean water. Inspect for any missed spots or streaks.
- Polish and burnish the surface using a trowel or float, moving in smooth, overlapping strokes until you achieve a consistent sheen.
- Let it dry completely before exposing it to moisture.
- Inspect your work. If there are any issues, don’t hesitate to call a pro for advice.
Preparing and testing the soap solution
Making a test batch helps ensure your soap solution is right for your tadelakt surface. Here’s how:
Mix a small amount of soap with water, following the manufacturer’s instructions. The consistency should be like thin yogurt.
Test it on a scrap panel or an inconspicuous area. Let it sit, then rinse off. Check for even coverage and no streaks. If it’s too thick, add more water. Too thin? Add more soap.
Remember: The soap should leave the surface feeling smooth and slightly soapy to the touch.
Application strokes, pressure, and overlap strategy
The key to a streak-free finish is consistent application. Here’s how:
Use smooth, overlapping strokes with your brush. Work in sections, moving from top to bottom, side to side.
Apply even pressure. Too much, you’ll leave marks. Too little, you won’t get good coverage.
Tip: Practice on a scrap panel first to get the feel for it.
Polishing and burnishing techniques
Polishing after soaping helps compact the surface and brings out the sheen. Here’s how:
Use a trowel or float, moving in smooth, overlapping strokes. Work from top to bottom, side to side.
The motion should be firm but not too hard. You’re not trying to scrape off the soap, just compact it.
Keep going until you see an even sheen across the entire surface. If you start seeing high or low zones, stop and let it dry before trying again.
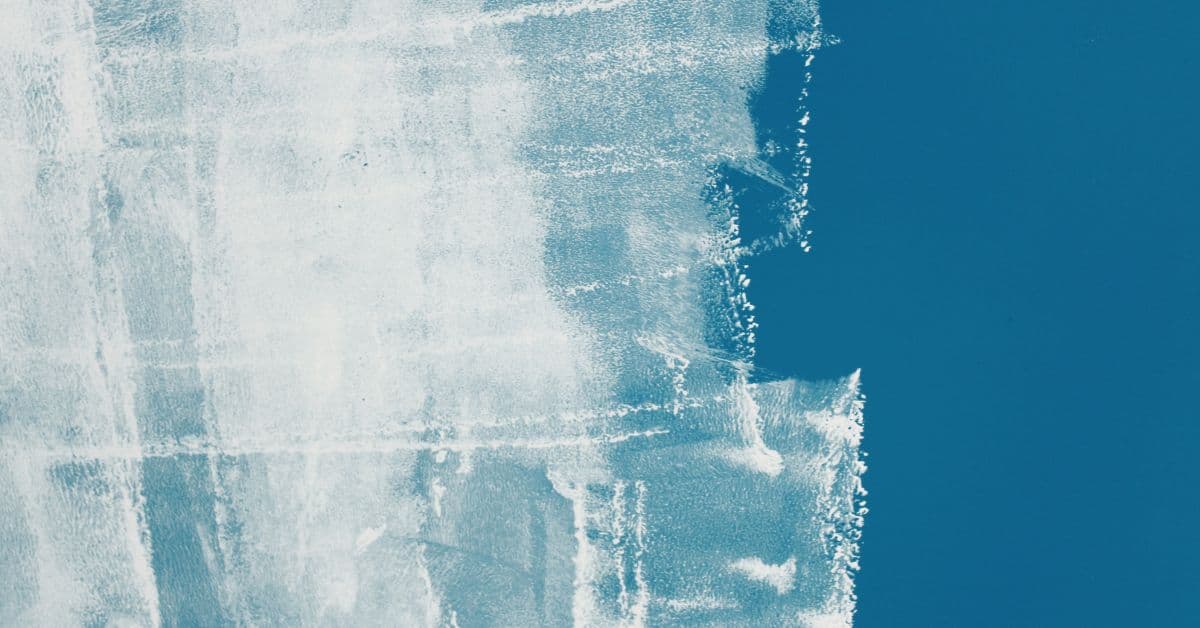
Avoiding and Correcting Streaks
Streaks usually come from uneven soap distribution, variable pressure while polishing, or polishing over areas that differ in readiness; prevent them by maintaining consistent overlap and steady hand pressure. Keep tools clean and change or rinse sponges frequently so you’re not dragging concentrated soap or grit across the surface.
Fresh streaks often respond to immediate reworking with a damp sponge and renewed polishing rhythm; if marks persist, a targeted reapplication or a light local abrading and repolish may be necessary. When in doubt about product behavior, consult the manufacturer instructions or test on a scrap before touching the main surface.
In-process visual checkpoints to prevent streaks
Use this checklist during application and polishing to catch streaks early.
- Wet/Dry Contrast: Check for any areas where the wet plaster looks darker or lighter than surrounding dry areas. Inconsistency here can lead to visible lines later on.
- Sheen Consistency: Ensure the sheen is even across the surface. A dull spot may indicate a missed area, while a shiny spot could mean too much soap was applied.
- Tactile Uniformity: Feel the surface for any rough or smooth patches. These could translate into streaks if not addressed.
- Edges and Corners: Pay extra attention to edges and corners where streaks often start due to uneven application.
- Overlapping Strokes: Ensure each stroke overlaps the previous one by about 50%. Inadequate overlap can cause visible lines.
- Polishing Pressure: Maintain consistent pressure while polishing. Too much or too little can create streaks.
- Drying Time: Allow enough drying time between coats and polishing sessions to avoid trapping moisture, which can lead to streaking.
- Lighting: Use proper lighting to highlight any inconsistencies. Natural light is best for this purpose.
Quick rule: Regular checks during work help prevent streaks from becoming permanent eyesores.
Immediate fixes for minor streaks
If you spot a streak soon after application, don’t worry. Here’s how to fix it quickly:
For fresh streaks, gently re-wet the area with your soap solution using a soft brush or sponge. Work the soap into the plaster, following the direction of your original strokes.
Then, re-polish the area using your burnishing tool. Apply even pressure and work in small sections to blend the streak away.
If the streak is still visible, try blending adjacent areas. Re-wet and re-polish a slightly larger section around the streak to help it disappear into the surrounding surface.
When to strip and reapply soap
Sometimes, streaks are too severe or numerous to fix with immediate remedies. In these cases, you may need to strip the plaster and start over.
Signs it’s time to strip: If streaks are prominent even after trying immediate fixes, if they cover a large area, or if they’re causing significant visual distraction, consider stripping and reapplying the soap.
Before you proceed, test on a small, hidden area. Strip the plaster using a suitable stripper, then reapply the soap to ensure the new application goes as planned. This test will help you avoid wasting time and materials on a failed attempt.
Quick rule: If streaks are persistent or prominent, don’t hesitate to strip and reapply the soap for best results.
Achieving and Testing Water Resistance Without Streaks
Use simple, visual tests to check repellency: place small water drops on a discreet area and observe whether they bead and remain separate or wet the surface uniformly; watch how drops run off rather than relying on numbers. Also inspect for uniform sheen and color shifts that indicate uneven soap coverage or polishing.
If water beads inconsistently or you see patchy wetting, consider another light soap pass on the affected area and repolish until behavior matches the rest of the wall. Rely on observable thresholds — consistent beading and even appearance — and repeat small tests after each touch-up to confirm improvement.
Simple water-beading tests and observation points
The simplest way to check your Tadelakt’s water resistance is by performing a quick water-beading test.
Dab a small amount of water onto the surface using your finger or a soft brush. Observe how it behaves:
- Tight, rounded beads: This indicates excellent water repellency. The Tadelakt is performing as expected.
- Water spreading out: If the water spreads and absorbs into the surface, it’s a sign that the soap application needs improvement or touch-up.
If you see any absorption, reapply soap to those areas following the steps outlined earlier in this guide.
When and how to reapply soap for long-term resistance
Tadelakt’s water resistance isn’t permanent. Over time, it may lose its sheen or absorb water in certain areas.
Inspect your Tadelakt regularly for signs of dullness, water absorption, or loss of sheen. These are indicators that it’s time to reapply soap:
- Dull spots: If you notice any dull patches, perform a water-beading test (as described above) on those areas.
- Water absorption: Check if water is being absorbed into the surface instead of beading up. This could indicate that the soap layer has worn off or wasn’t applied correctly initially.
Before reapplying soap to the entire surface, perform spot tests in an inconspicuous area first to ensure your new soap batch matches the original’s performance.
Environmental and Substrate Variables to Account for
Temperature, humidity, and wind affect drying and how soap and lime react; plan work when conditions are stable and use small trial areas to observe behavior before committing. Substrate composition and prior finishes influence absorption and polishability, so treat different surfaces as separate tests rather than assuming identical results.
Adjust technique rather than chasing exact environmental targets: slow down polishing in fast-drying conditions, or allow more working time in cool, damp settings, and always trial your approach on a scrap. If you need specific limits, check product technical sheets or ask the manufacturer for recommended working ranges.
Effects of Temperature and Humidity on Application
Temperature and humidity play a big role when applying tadelakt soap. Too hot, too cold, or too humid can cause streaks.
Hot temperatures speed up drying. The soap might not spread evenly, leaving marks. Work early in the day or late afternoon when it’s cooler.
Humidity slows down evaporation. The soap takes longer to set, increasing streak risk. If it’s humid, work indoors if possible, or wait for a drier day.
Test first on a small area. If streaks appear, adjust your timing and conditions.
Adapting Technique for Different Substrates and Finishes
Tadelakt soap behaves differently on various surfaces. Lime plaster variations, previous coatings – they all matter.
Smooth surfaces like polished lime plaster may require a lighter touch. Too much pressure can cause streaks. Be gentle, use less soap.
Textured or porous substrates need more soap and firmer strokes to fill the voids evenly. Test first to find your sweet spot.
If you’re unsure about your surface, do a test patch. See how the soap reacts before committing to the whole area.
Maintenance, Cleaning, and Long-Term Care
Keep tadelakt looking and repellent by cleaning gently with soft cloths or sponges and mild, non-abrasive cleaners that the soap manufacturer or plaster producer says are safe. Observe high-wear areas and clean spots as you notice changes rather than following a fixed timetable; frequency depends on traffic and exposure.
For persistent loss of repellency, localized reapplication or professional restoration may be appropriate—ask a specialist if extensive work is needed. When in doubt about product compatibility or deep repairs, consult the plaster manufacturer’s guidance or a restoration professional before proceeding.
Routine cleaning and safe detergents
Tadelakt surfaces need gentle care to maintain their water resistance and appearance. Avoid harsh chemicals that can strip the soap or dull the surface.
Use warm water with a mild, non-abrasive detergent designed for natural stone or tile. Never use bleach, ammonia, or acidic cleaners like vinegar or lemon juice.
Sponge on the cleaner gently, using circular motions. Rinse thoroughly with clean water and dry with a soft cloth to remove any residue.
For tough spots, you can use a soft-bristled brush, but be careful not to scrub too hard as it may damage the surface.
Repairing wear spots and periodic re-soaping
Over time, high-traffic areas or spots prone to moisture may lose their water resistance. Here’s how to spot-repair these wear spots:
First, test the area with a simple water-beading test. If water no longer beads up, it’s time for some touch-up soaping.
Follow the same application process as when you first applied the soap, using a small amount of soap and water mixture on a trowel or brush. Work the soap into the surface in circular motions until it starts to bead up. Then, polish and burnish as usual.
If multiple areas show signs of wear, it might be time for a more extensive refresh. Follow the same process as when you first applied the soap, stripping off any old soap and reapplying a fresh layer.
Conclusion
Finish with lasting water resistance and a clean, streak-free look by following solid steps and staying aware of safety and care. A well-executed soap layer protects the surface and your investment, so work with caution and document your checks as you go.
Check the surface condition, test a small area first, confirm cure and moisture levels, verify the soap is applied evenly in a steady hand, run a final wipe test for streaks, and then confirm you have a complete cure before heavy use. Do the work in the right order: prep and cure checks, even soap application, streak inspection, water-resistance test, and then ongoing maintenance planning.
Common mistakes to avoid are rushing the curing window, skipping a moisture check, and piling on soap in thick layers that trap residue. Safety rules are simple: work in good ventilation, wear eye and skin protection, test a tiny area before committing, and never push a repair when signs of failure show themselves—if in doubt, stop and reassess.
When in doubt about substrate compatibility, unexpected staining, or stubborn streaks that reappear after testing, call a professional instead of forcing a result. Stay deliberate, protect surrounding areas, and keep the goal in view: durable water resistance with a smooth, honest finish you can trust for years to come.
FAQ
What should I do if water stops beading after a while?
First, inspect the soap coating for wear. Check the manufacturer instructions or local guidelines for reapplication or maintenance steps. If unsure, perform a light inspection and follow safe maintenance practices rather than guessing at repairs.
Can I fix streaks without stripping or resurfacing?
Yes, you can often buff or rework the surface with appropriate care. Use a clean, non-abrasive cloth and mild, recommended cleaners, then re-wash and reseal per manufacturer guidance. If in doubt, consult the product label or instructions for spot touch-ups.
What cleaning method will preserve water resistance and avoid streaks?
Use a soft cloth or sponge with a gentle cleanser that the manufacturer approves. Rinse with clean water and dry with a soft towel. Avoid harsh scrubbing and abrasive tools that can wear down the soap layer.
How do I know I’m using the right soap and maintenance steps for my substrate?
Refer to the soap’s label and any substrate-specific notes from the manufacturer. Look for guidance on compatibility with your surface and local conditions. If you’re unsure, call out to the supplier or check the instructions and local rules for your setup.