
Introduction
Repairing polished plaster chips means filling and feathering the damaged area so the patch matches surrounding sheen and texture without a visible ring. Start by cleaning and undercutting loose edges, use compatible repair material, and build thin layers that are troweled and polished to blend into the existing finish. Check product labels and manufacturer instructions for compatibility and drying guidance.
Good results come from careful prep, the right tools, and patience when feathering edges and matching texture and sheen. Use fine abrasives, small trowels or spatulas, and test a small inconspicuous spot if you’re unsure about color or finish match. If in doubt about material compatibility or finish techniques, consult the plaster manufacturer or a professional.
Key takeaways
- Prepare edges and surrounding plaster to feather patches for seamless blending.
- Match color, texture, and sheen with controlled patching, blending, and polishing steps.
- Use fine mesh or skim coats to minimize visible halos and transitions.
- Clean the area thoroughly and protect surroundings to prevent further damage.
- Inspect for moisture and ensure proper curing to maintain patch durability.
- Follow local codes and manufacturer instructions; safety gear and ventilation required.
Table of Contents
- Introduction
- Key takeaways
- Why Polished Plaster Shows Halos and How to Avoid Them
- Tools and Materials Checklist for Seamless Patches
- Preparing the Surface Properly Before Patching
- Matching Color, Texture, and Sheen for Invisible Repairs
- Step-by-Step Repair Workflows for Different Chip Sizes
- Application Techniques and Blending Methods That Eliminate Halos
- Common Mistakes, Troubleshooting, and Corrective Fixes
- Safety, Cost Considerations, Durability, and Maintenance
- Conclusion
- FAQ
Why Polished Plaster Shows Halos and How to Avoid Them
Halos appear because small differences in sheen, edge thickness, surface profile, or the angle of reflected light make a patched area read differently than the surrounding plaster. Understanding how each factor—sheen mismatch, a raised or recessed edge, microtexture differences, and lighting geometry—interacts is essential before you start repairs.
Diagnose first under controlled lighting and from multiple viewing angles, and run small test patches to see how halos develop as materials cure and dry. Verify product behavior on the manufacturer’s technical data sheet or label and confirm substrate porosity and pH so cleaning, bonding, and mix choices minimize differential absorption and sheen shifts.
What creates a visible halo
A visible ‘halo’ around a repair is caused by differences between the repaired area and the surrounding polished plaster. Here’s what creates that contrast:
Sheen mismatch: The repaired area may reflect light differently due to variations in sheen, making it stand out.
Edge thickness: If the repair is slightly thicker or thinner than the surrounding surface, it can catch the light and create a halo effect.
Light angle: How light hits the surface affects how halos appear. Changing angles can make halos more or less visible.
Surface profile: Differences in texture or directional burnishing between the repair and surrounding area can cause reflections that create a halo.
Surface types and repair implications
Polished plaster surfaces vary, so understanding your specific type is crucial for successful repairs. Here are common types and their repair implications:
Lime-based plasters: These are porous and breathable. Repairs should match this porosity to avoid absorption differences that cause halos.
Marmorino: This is a fine, polished plaster with a smooth, marble-like finish. Repairs must be ultra-thin and carefully feathered to blend seamlessly.
Venetian plaster: Known for its unique, textured appearance, repairs should mimic the original texture and sheen to avoid halos.
Tools and Materials Checklist for Seamless Patches
Start by identifying the polished plaster system you’re working with and select patch materials, bonding agents, and sealers that specifically state compatibility with that system. If you’re unsure about a product’s behavior, check the product data sheet or manufacturer instructions and keep professional alternatives and DIY-friendly substitutes on hand.
Prioritize surface-prep tools (stiff brush, vacuum, scrapers), patching tools (trowels, knockdown knives, mixing buckets), and finishing goods (fine abrasives, blending sponges, microfiber cloths) plus PPE. Also plan for primers or bonding agents, pigment/tinting supplies, and sealing options that won’t change gloss; verify pot life and application guidance on the product label to avoid flash sets and over-wetting.
Essential tools and applicators
Before you start, gather these tools to ensure a smooth repair process.
- Spatulas (5-in-1): For scraping off loose material and applying patch compounds.
- Micro-trowels: To feather edges and achieve a smooth finish.
- Palette knives: For mixing and transferring materials.
- Sanding pads (60-120 grit): To prep surfaces and smooth out patches.
- Burnishers: To polish the final finish, ensuring no halos.
- Mixing tools (drill with paddle attachment): For efficient mixing of compounds.
- Light source (flashlight or inspection light): To check for missed spots and ensure a smooth finish.
- Tape measure: To ensure consistent patch size and placement.
Quick rule: Always use the right tool for the job to avoid damaging the surface or creating halos.
Repair compounds, pigments, and finishing products
Selecting compatible materials is crucial to prevent visible halos.
- Polished plaster system: Identify if it’s lime-based, gypsum-based, or cementitious before choosing repair compounds.
- Patch material (epoxy, lime-putty, stucco, polymer-modified): Choose one that matches the existing finish in sheen and hardness.
- Pigments: Test match existing color using a small sample area to avoid discrepancies.
- Primers/sealers: Select ones that bond well with the patch material and don’t alter the surface texture.
- Topcoats (waxes, sealants): Choose ones that provide UV protection and maintain the original gloss level.
- Adhesion promoter (if needed): Use to improve bonding between old and new surfaces.
- Cleaner/degreaser: To prep the surface by removing dirt, grease, and contaminants.
Quick rule: Always test materials on a small, hidden area first to ensure compatibility and avoid visible halos.
Preparing the Surface Properly Before Patching
Begin with a clean, dry surface: remove dust, oils, and loose chips with a stiff brush and vacuum, and use an appropriate mild cleaner or solvent where needed. Check the product label or manufacturer instructions for acceptable substrate conditions and remove any friable material to expose sound plaster.
Profile edges by scoring or keying to create a mechanical bond and plan feathered transitions from the patch into the existing surface using a trowel or approved feathering blade. Verify moisture and temperature limits from the technical data and allow substrate conditions to meet those requirements before applying bonding coats or repair mixes.
Cleaning, degreasing, and moisture checks
A clean, dry surface is crucial for a successful patch. Start by removing loose chips with a stiff brush.
Use a vacuum to suck up the dust. For stubborn spots, apply a mild solvent like isopropyl alcohol with a cloth. Wipe gently, then let it dry completely.
Why’s this important? Dust and oils prevent patch compounds from bonding properly. Trapped moisture can cause bubbling or delamination later on.
Before you start, check the humidity and temperature. Ideal conditions are 40-60% relative humidity and 70-85°F (21-29°C). Use a simple hygrometer and thermometer for this.
Edge preparation and feathering the substrate
The key to invisible patches is gradual build-up. Start by profiling chip edges with fine-grit sandpaper or a scoring tool.
Undercut or bevel the edges slightly to create a mechanical bond. This allows thin, gradual application of patch compound instead of a raised island.
Feathering is crucial for smooth transitions. Use a trowel, film sponge, or approved feathering blade to gradually reduce the thickness of the patch compound as you approach the surrounding surface.
The recommended feather width is about 4-6 inches (10-15 cm). This helps blend the repair seamlessly with the existing plaster.
When to prime or use adhesion promoters
Primers and bonding agents help patch compounds stick better. But they’re not always necessary.
If your repair compound is compatible with the substrate, you might not need a primer. Check the product labels for guidance.
When to use one? If the surface is porous, dusty, or has been exposed to elements, apply a bonding agent or primer before patching. This ensures a strong bond and prevents delamination.
Always follow the manufacturer’s instructions when using primers or bonding agents. They often need to be applied in specific conditions and allowed to dry for certain periods.
Matching Color, Texture, and Sheen for Invisible Repairs
Define the target by studying hue, microtexture, and sheen under consistent, controlled lighting and note how the surface reacts at different viewing angles. Use small reversible test patches and document pigment additions, batch numbers, and any changes so you can iterate without guessing.
Replicate microtexture by matching aggregate appearance and glaze depth with the same application technique and abrasives used on the original finish, and test sheen changes using a gloss comparison method or meter where practical. Confirm final selections against the manufacturer’s recommendations for tinting and topcoats, and re-check under multiple lights after curing to ensure a seamless match.
Color-matching strategies and testing
Start by taking a sample from an inconspicuous area. Use controlled lighting to match the hue. Verify under natural daylight.
Mix small batches of plaster, adding pigments gradually. Use color-matching tools for accuracy. Document pigment ratios and batch numbers.
Apply test patches in various areas with different lighting conditions. View from multiple angles to ensure no halos or color shifts.
Recreating microtexture and polish
Observe the surrounding plaster’s grain size, carry, and finish. Replicate these using layering techniques or stippling tools.
For polished areas, use a burnisher to mimic the gloss. Work in small sections, blending edges carefully.
Pro tip: Use a magnifying glass to inspect texture up close before applying the final polish.
Choosing and matching sheen/topcoat
Sheen affects how light reflects off the surface. Use a gloss meter or simple comparisons to match the surrounding sheen.
Adjust binder content or use different topcoats to achieve the desired reflectivity. Test in small, reversible patches first.
Consider applying a final sealer or wax to equalize reflectivity and protect the patch.
Step-by-Step Repair Workflows for Different Chip Sizes
Classify the chip and choose the workflow: hairline, small chip, or deep void each require different fill strategies, layer counts, and feathering approaches. For every size, identify compatible patch materials and bonding agents and plan incremental, thin layers rather than a single thick fill to avoid edge build and halos.
Sequence work so each thin pass dries per the product’s guidance before the next layer; protect patches from drafts and direct sun during curing to prevent ring halos. Finish with progressive sanding and careful feathering, then test color and sheen and apply a compatible sealer only after the repair matches visually under multiple lighting conditions.
Step-by-Step Repair Process
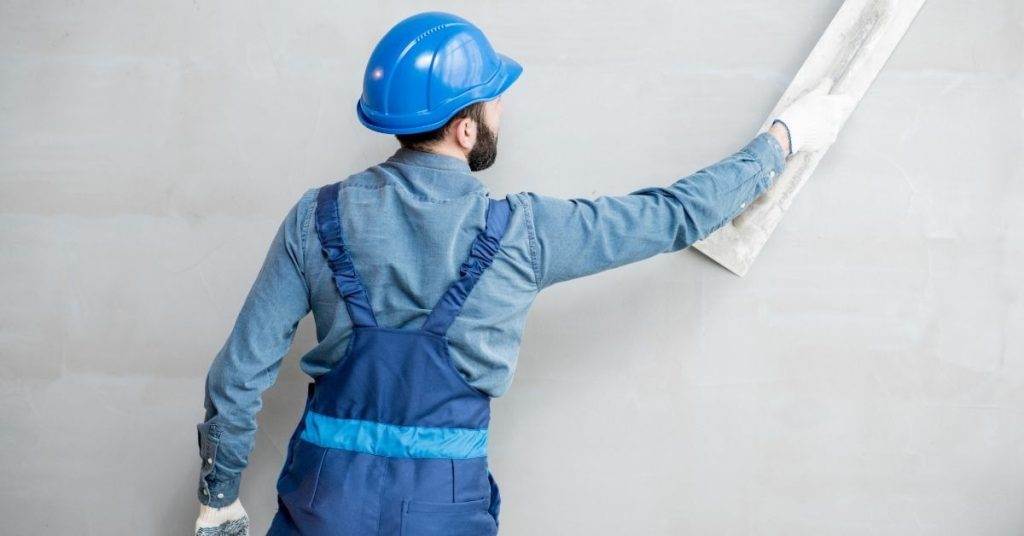
Follow these practical steps to repair chips in your polished plaster surface, from preparation to final checks.
- Inspect the damage and gather tools: Check chip sizes, prepare safety gear (gloves, goggles), and collect necessary materials.
- Prepare the surface: Clean, degrease, and check moisture levels as previously discussed. Feather edges with a razor blade or sharp chisel.
- Apply bonding agent: Use an adhesion promoter to improve patch bonding. Follow manufacturer’s instructions for application and drying times.
- Main repair work: Apply compatible lime-based mortar or epoxy-compatible patches according to chip size (see below). Allow each layer to dry as instructed before proceeding.
- Sanding, feathering, and final checks: Lightly sand with progressively finer grits, starting from 320. Check for halos and re-sand if necessary. Wipe clean and inspect the repair.
Micro-patch workflow for hairline and pinhole chips
For tiny chips, use minimal material application and targeted burnish to maintain surrounding polish.
Mix a small amount of repair mortar or epoxy with matching pigment. Apply sparingly using a putty knife or trowel, feathering edges into the existing surface.
Do not overfill. Allow it to dry according to manufacturer’s instructions. Lightly sand with 320-400 grit abrasive block or flax fiber, focusing on blending edges. Burnish gently using a soft cloth and minimal pressure to maintain the surrounding polish.
Small-to-medium chip procedure
For small to medium chips, use layered filling, intermediate sanding, texture recreation, and final blending for a seamless repair.
Mix repair mortar or epoxy with matching pigment. Apply in thin layers, allowing each to dry as instructed. Sand lightly between coats using progressively finer grits (320-400).
Recreate microtexture by gently rubbing the repaired area with a soft cloth or fine abrasive pad after final sanding. Blend edges carefully to avoid hard transitions.
Apply a compatible finish or sealer that doesn’t alter the gloss of the polished plaster, following manufacturer’s instructions for application and drying times.
Large or structural repairs and when to call a pro
For large chips that expose the substrate or are extensive, consider full-area recoat or professional intervention.
If the chip is larger than 10-15 cm in diameter, or if it exposes underlying structure (like laths or studs), you may need to match a full area recoat. This involves preparing and priming the entire affected area before applying new plaster.
Consider calling a professional if the repair requires specialized knowledge, tools, or materials. For example, if the chip exposes underlying structure that needs repair before re-plastering, or if you’re unsure about matching the existing finish perfectly.
Application Techniques and Blending Methods That Eliminate Halos
Adopt a blending strategy that dissolves the edge through ultra-thin coats, consistent stroke direction, and controlled burnishing that brings patch sheen in line with the surrounding plaster. Switch tools as the material sets—long light passes for leveling, short soft taps for texture—and avoid aggressive pressure that leaves a ridged transition.
Use burnishing, light polishing, or a fine mist coat of compatible sealer to reconcile final gloss, verifying manufacturer instructions for timing and compatibility. Always test the full sequence on a scrap or hidden area, document what worked, and adjust tinting or tooling before treating visible repairs.
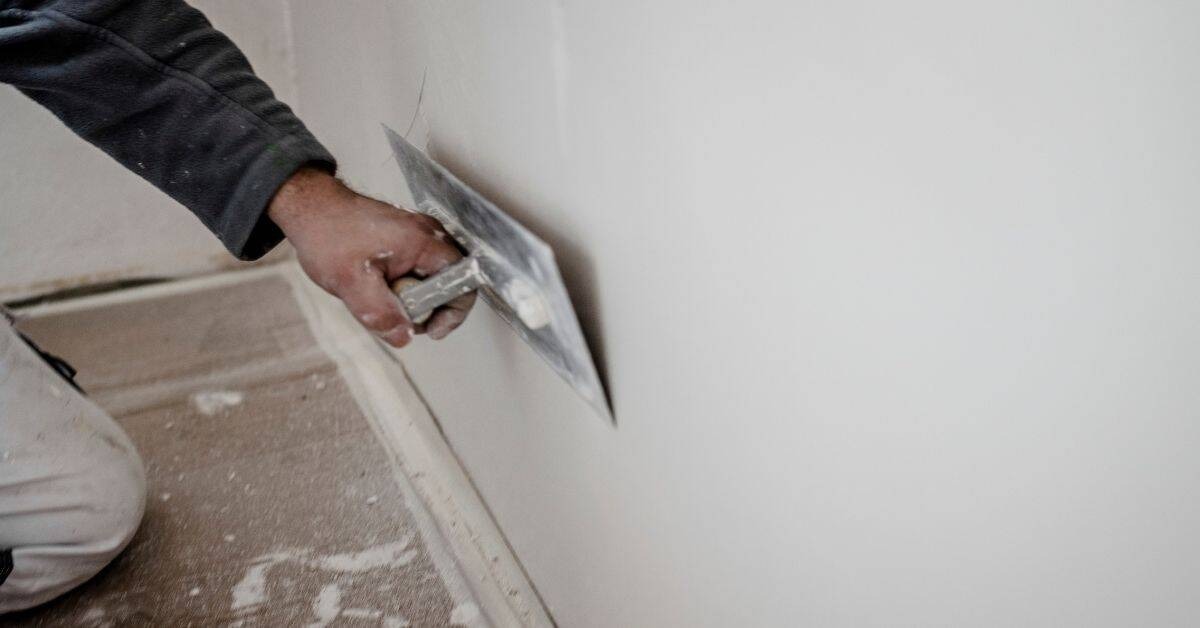
Feathering and edge-blending methods
Start by applying a thin layer of patch compound just at the edges of your repair. Use a soft brush or spatula, making long, light passes to avoid building up too much material.
Tip: Less is more here. You can always add another layer if needed, but you can’t take it away once it’s on.
Next, gradually build depth by applying ultra-thin coats further into the repair area. Use short, soft taps to blend the edges of each new layer with the previous one. This helps dissolve boundaries and prevents halos from forming.
Burnishing and polishing tactics
Once your patch is dry to touch, start burnishing using a smooth, hard object like a metal trowel or plastic scraper. Work in the direction of the plaster’s natural sheen, applying even pressure.
Caution: Be gentle. Overworking can damage the finish and cause halos.
For a high-gloss look, switch to a polishing pad after burnishing. Use circular motions, working from the center outwards. Wipe off any residue with a damp cloth before it cures completely.
Lighting checks and inspection angles
Before declaring your repair complete, check your work under real-use lighting conditions. This helps ensure that the patch blends seamlessly with the surrounding plaster.
- Check under natural light: Look for any discrepancies in sheen or color.
- Use artificial light: Ensure the patch doesn’t reflect light differently than the rest of the room.
- Inspect at low angles: Raking light can reveal halos or other imperfections. Make final adjustments as needed.
- View from different distances: Check your work from across the room and up close to ensure consistency.
- Avoid inspecting in direct sunlight: This can create false reflections and make it difficult to see any issues.
- Check at different times of day: Lighting changes throughout the day, so check your repair at various times to be sure it blends well under all conditions.
- Inspect with the naked eye first: Then use a magnifying glass or loupe for closer inspection if needed. Your eyes are usually the best judge.
- Don’t forget to check corners and edges: These areas can be tricky and often get overlooked.
Quick rule: If it doesn’t look right, keep working at it until it does. Better to spend a little more time now than have to redo the repair later.
Common Mistakes, Troubleshooting, and Corrective Fixes
Frequent errors that produce halos include overbuilt edges, poor feathering, incorrect sheen choice, and inadequate substrate prep. Before attempting fixes, reassess the surface under consistent lighting and consult product labels or technical guides to confirm proper materials and methods for correction.
Corrective steps usually start with light sanding to remove hard ridges, re-feathering thin skim coats, and using compatible glaze or mist coats to even sheen; in stubborn cases remove the patch to the sound substrate and reapply with proper profiling and bonding. Always run small test corrections first and document successful workflows to prevent repeat halos.
Fixing a visible halo after the repair
The most common cause of halos is overbuilding your patch. Here’s how to fix it:
Gentle Sanding: Lightly sand the area with fine-grit sandpaper (around 2000 grit) to remove any excess material and smooth out the surface.
Reapply Micro-Layers: Apply thin micro-layers of your patch compound, allowing each layer to dry before applying the next. This helps build up the area evenly without creating a halo.
Localized Matting: If you’ve overbuilt and have a glossy halo, use a matte sealer or glaze to reduce the sheen locally and blend it in with the surrounding area.
Re-burnishing: For textured plasters, reapply your burnishing technique to even out the texture and reduce halos.
Dealing with adhesion or cracking failures
Adhesion issues can lead to cracks and failed patches. Here’s how to troubleshoot and fix them:
Test Adhesion: Gently scratch the patch with a fingernail or a coin. If it comes off easily, adhesion is poor.
Remove Failed Material: Use a scraper or chisel to remove any failed material. Ensure you get down to a sound surface.
Use Appropriate Primers/Fillers: Apply an appropriate primer or use flexible fillers to improve adhesion and prevent future cracking. Consider using a bonding agent if the substrate is porous or non-absorbent.
When a patch needs redoing vs cosmetic touch-ups
Sometimes, a patch might not turn out as expected. Here’s how to decide whether to rework it or perform touch-ups:
A full redo is needed if:
- The patch is visibly uneven or has large halos.
- The sheen, color, or texture doesn’t match the surrounding area.
- The patch has adhesion issues or cracks.
Consider a cosmetic touch-up if:
- The issue is minor and localized (like a small halo or slight discoloration).
- You can fix it with simple techniques like light sanding, mist coats, or selective polishing.
- Redoing the entire patch would be excessive for the minor flaw.
Safety, Cost Considerations, Durability, and Maintenance
Follow safety protocols: wear gloves, eye protection, and a respirator when sanding or using solvents; ventilate the work area and contain dust for safe disposal. Verify handling and disposal guidance on product labels and local regulations before starting work.
Plan costs around materials, tools, and time, and weigh cheaper shortcuts against longer-term maintenance and potential rework. Choose repair methods and materials that match the plaster’s durability profile, document the repair sequence for future touch-ups, and schedule routine inspections to catch and treat halo risks early.
Safety and environmental precautions
Protect yourself with gloves, eye protection, and a respirator when sanding or mixing plaster. Ventilation is crucial – open windows or use a fan to keep dust levels low.
Dispose of plaster waste in accordance with local regulations. Seal off the work area during sanding to contain dust. Keep solvents away from heat sources and never mix them with other chemicals.
Wear old clothes that cover your skin, and wash up thoroughly after handling pigments or sealants.
Cost factors and budgeting advice
The main costs are materials, tools, and labor time. Get local estimates for materials to avoid overspending. Use patch blends and polyvalent fillers to save on materials.
Rent or borrow tools instead of buying new ones. Allocate enough time for prep work – rushing can lead to mistakes that cost more in the long run.
Don’t skimp on protective gear or quality materials. Cheap products may save you money initially but could cause issues down the line, leading to costly repairs.
Longevity and maintenance after repair
Seal repaired areas with a compatible sealant to protect against moisture and cleaning agents. Clean gently using warm water and mild soap – avoid abrasive cleaners.
Inspect repairs annually for signs of wear or haloing. Touch up any issues early to prevent them from worsening. Re-surfacing may be needed every 5-10 years, depending on use and exposure.
Document all repairs with photos and notes. This helps in future touch-ups and color matching, ensuring your repairs blend seamlessly with the existing plaster.
Conclusion
A solid patch blends in and lasts when you respect surface prep, color, texture, and proper layering. Safety stays front and center, and a patient approach keeps you from causing more damage or costly fixes.
Check like this: inspect for loose plaster, clean and dry the area, mask nearby surfaces, choose the right patch size and materials, test color and sheen on a hidden spot, apply in thin feathered layers, blend the edges until there’s no halo, let each layer dry, and verify a durable finish before you seal or wax if needed.
Avoid common missteps: don’t skip prep or cure times, don’t over-wet the patch or oversand, and don’t guess on color or sheen—test first and adjust. Always wear eye protection and a dust mask when sanding, keep your work area well ventilated, and work in small sections to prevent new damage.
If the damage is large, cracks run through the plaster, or halos persist after testing and blending, it’s wise to call a professional. With careful prep and steady hands, you can finish with a patch that looks right, holds up, and keeps the room looking consistent. You’ve got this—steady work now saves headaches later.
FAQ
What are the essential preparation steps before patching a plaster chip?
Clean the chipped area to remove dust and loose material. Lightly dampen the surface to control dust, then roughen the edges so new material can grip. Remove any flaking glaze or old filler and dry the spot before applying patch materials.
Which tools and materials should I have on hand for plaster repair?
Have a small putty knife, sanding block, utility knife, damp sponge, and a mixing cup. Use a filler compatible with polished plaster and a sealer or finish that matches your surface sheen. Keep a fine-grit abrasive and clean cloths ready for blending and cleanup.
How can I blend a patch so there are no visible edges or halos?
Apply filler slightly proud of the surface, then feather the edges with the knife in long, light strokes. Build color and texture to match by layering thin coats and blending each into the surrounding finish while it’s still workable. Finish with a light touch of the matching sheen to minimize highlight differences.
What should I check to choose the right filler and ensure a seamless result?
Read the product label for compatibility with polished plaster and the expected dry time. Check manufacturer instructions for curing, sanding, and sealing requirements. If in doubt, test the filler on a hidden area first and adjust based on how it sands and accepts texture.