
Introduction
Rescuing a failed skim means re-priming the material and then re-skimming to regain quick, accurate understanding.
The guide walks through practical steps you can apply to re-prime tricky sections, re-skim for gaps, and validate key takeaways.
You’ll learn how to implement clear checks, adjust your reading approach, and use simple rules of thumb to improve skim quality in real-world content.
Key takeaways
- Identify root causes of skim failure to guide targeted re-skim decisions.
- Assess damage with spot repairs versus full re-skim using a clear flow.
- Prepare surface by thorough cleaning, removal of damaged layers, and priming.
- Follow exact re-prime steps and product callouts for adhesion.
- Maintain consistent skim mix; first coat should lay even and flat.
- Feather transitions, proper sanding, and dust control prevent rework.
Table of Contents
- Introduction
- Key takeaways
- Why skim coats fail — common causes
- Assessing damage: spot repair vs full re-skim decision flow
- Tools and materials checklist
- Surface prep: cleaning, removal, and priming
- Re-prime process: exact steps and product callouts
- Re-skim technique: mixing, consistency, and first coat
- Additional skim coats and feathering transitions
- Sanding and dust control best practices
- Painting and finishing after a rescue skim
- Timeframe, staging, and realistic scheduling
- Cost and materials estimate by room size
- Common mistakes and corrective fixes
- Safety, health, and environmental considerations
- Visual signs and examples to look for
- Step-by-step case timeline (detailed walkthrough)
- When to stop and hire a professional — decision checklist
- Long-Term Maintenance to Prevent Future Problems
- Conclusion
- FAQ
Why skim coats fail — common causes
Skim coats fail mainly when the coating cannot form a solid, lasting bond with the surface. Common issues include poor adhesion, contamination on the substrate, trapped moisture, and mistakes in mixing that create voids or inconsistency. When any of these problems occur, you can see delamination, blistering, edge lift, or pinholes after the coat dries.
Understanding these failure modes helps you predict and prevent them on the jobsite: ensure the substrate has proper surface energy and roughness for good bonding, thoroughly clean and degrease away oils or waxes, and use a compatible primer when needed. Control moisture with testing and barriers, follow correct water-to-powder ratios and mixing times, and manage temperature and humidity during application to avoid air voids and uneven film thickness that trap air or create bubbles.
Adhesion and substrate issues
Skim coat won’t stick to a surface that’s dirty, glossy, or unstable. Wallpaper paste, grease, and even old glossy paint act like a release agent so the compound peels off instead of bonding.
Always do a quick adhesion test before you full-skim: press a strip of tape, pull it off, and look for surface material coming with the tape. If the surface flakes or the tape pulls up paint or paper, you’ve got a substrate problem that needs mechanical removal or proper sanding and priming.
Key fixes are cleaning, sanding to dull gloss, and removing loose paper or flaky paint. A good bonding primer or mechanical key will save you a rework later.
Material and technique mistakes
Choosing the wrong compound or mixing it incorrectly ruins a skim coat. The right product and proper mix deliver strength, workability, and adhesion.
- Over‑thinning compound Adds too much water and you lose strength. Thin mixes dry weaker and are prone to cracking. Follow manufacturer water ratios and mix to a creamy, not soupy, consistency.
- Wrong compound type Using interior finishing mud where a set compound is needed leads to sag and cracking. Check the product label for use on ceilings, deep fills, or feathering. Buy the correct grade for the job.
- Skipping bonding primer Primer evens porosity and helps adhesion. On porous or difficult surfaces, primer prevents rapid drying and weak bonds. Use a recommended primer for skim coats.
- Mixing too fast High-speed mixing traps air and makes a foamy, weak mix. That causes pinholes and reduced bond strength. Mix gently to a smooth, lump-free paste.
- Old or contaminated materials Using expired compound or dirty tools introduces lumps and poor performance. Material past its shelf life can separate or lose additives. Keep tubs sealed and use fresh product.
- Incorrect set time Troweling too early or too late causes poor finish and weak adhesion. Work within pot life and follow setting times, especially with fast-setting compounds. Plan small batches for long jobs.
- No key or scratch coat Applying a finish coat over a slick substrate without a keyed base causes delamination. A scratch or roughened base gives the skim coat something to bite into. Prep the base as required by the product.

Assessing damage: spot repair vs full re-skim decision flow
This decision flow guides you from small spot repairs to full-wall skim by quantifying damage, defect types, and moisture risk to pick the most appropriate remediation level. Set thresholds that translate percent of wall needing skim, specific defect types, and drying conditions into stand-alone options: spot repair, partial re-skim, or full-wall re-skim. Assess substrate condition, mold or damp, gypsum exposure, and whether stabilization or remediation must precede any skim work, with a clear go/no-go path based on budget, schedule, and risk tolerance.
A tiered checklist helps identify when local touch-ups suffice or when a larger re-skim protects long-term finish, adhesion, and aesthetics. By documenting edge cases and contingencies—around fixtures, corners, or variable wall conditions—you create reliable records for future repairs and maintain consistency across job sites. Understanding cost, labor, drying times, and disruption lets you set practical expectations and escalate only when threshold criteria demand more extensive work.
Quick adhesion tests to perform
Start with a simple tape test: press a strong adhesive tape onto the wall, pull it off sharply, and inspect what comes away. If paint or skim comes off cleanly with the tape, that area has poor adhesion and needs more than a cosmetic patch.
Follow with a scratch test in a few spots using a coin or the edge of a screwdriver. Score the surface and scrape—if the skim powder crumbles or the substrate flakes, the bond is compromised. If the surface stays firm and the scratch only affects the top coat, you can usually proceed with a spot repair.
Good result = firm bite on both tests; Bad result = peeling or powdering, which points to partial or full re-skim rather than spot fixes.
When to call a pro
If you find soft, bulging areas, persistent dampness, or active mold, stop and ring in a professional. Those are signs of underlying moisture or structural issues that a DIY skim won’t fix and can make problems worse.
Also get help when delamination is widespread (covering multiple panels or more than a small patch), when cracks run through load-bearing walls, or when electrical/plumbing work is involved behind the surface. A pro will diagnose the cause and recommend the right scope—partial re-skim, full re-skim, or repairs to structure and services first.
Rule of thumb: small, isolated adhesion failures you can tackle; anything systemic, wet, or moldy—call a pro.
Tools and materials checklist
Tools and materials are organized into a clear budget DIY track versus pro-grade kits, with side-by-side pros and cons, typical price ranges, and guidance on which skim-coat scenarios each option suits best. Essential PPE such as gloves, eye protection, and a respirator are called out alongside ventilation tips, hazardous-dust handling, disposal considerations, and a core tools list that covers hand tools, mixing gear, trowels, curing blankets, sanding and screening, plus measuring devices compatible with concrete skim products.
Expect quick guidance on estimating quantities, batching tips, and how to calculate coverage per coat for various surface conditions, plus procurement guidance that names vendor types, rental options, and practical SKUs to consider without overpromising on external resources. The aim is to help readers plan safely and cost-effectively, ensuring prep areas are protected, adjacent surfaces are shielded, and a small test patch is performed before full application, with clear decision points to match budget and skill level to the right tools, materials, and safety practices.
Essential tools for re-priming and re-skim
Keep your kit lean but job-ready. These are the handheld tools and a few rentable machines that make a skim coat go on straight, fast, and clean.
- Mud pan Holds your compound at the ready. Use a corrosion-resistant metal pan for longer life. Keep a wet rag nearby to prevent compound from skinning over.
- 8–12″ taping knives For spreading and feathering coats. Use a range—8″ for control, 12″ for feathering long passes. Clean blades between mixes to avoid ridges in the next pass.
- Hawk board Keeps material at hand while you work. Lightweight aluminum hawks cut wrist fatigue. Don’t overload it—work in small batches to avoid drying out.
- Mixing paddle Attaches to a drill to yield lump-free compound. Mix at low speed to prevent air bubbles. Rent a keyed drill if you don’t own a heavy-duty one; expect rental fees around $10–$25/day.
- Dustless sander Speeds sanding and controls dust. Use with a HEPA collection system and correct grit (120–220). These can be rented for $30–$75/day—use P100 respirator while running it.
- P100 respirator Protects lungs from fine dust. Choose a half-mask rated P100 or better. Fit-test it and change cartridges per manufacturer rules; disposable masks are cheaper for single jobs.
- Telescoping pole For overhead work and sanding reach. Saves ladders and limits shoulder strain. Lock mechanisms vary—test stability before you extend fully.
- Hand sander/block Fine-tune problem spots by hand. Use a rigid block for flat areas and a sponge for contours. Replace sandpaper frequently to avoid glazing and re-sanding the surface.
Recommended compounds and primers
Pick compounds and primers based on the surface condition and your timeline. For fast work, a setting-type compound (hot mud) cures in predictable timeframes and is great for deep fills. Use it for large repairs or when you need multiple coats in one day.
For finish coats choose between lightweight topping compound and all-purpose joint compound. Lightweight tops sand easier and give a smoother final coat, but they can be weaker over large repairs. All-purpose is tougher for embedding tape and general patching—use it where strength matters.
Primers matter. A bonding primer is your go-to on glossy, chalky, or repaired drywall—helps the skim coat grab. Oil-based primers block stains and tannins; use them on water or smoke stains before you skim and always follow recoat windows. For most interior walls a quality latex primer is fine, but switch to a high-adhesion or bonding primer when repainting questionable surfaces.
Surface prep: cleaning, removal, and priming
To re-prime a failed skim, begin with a clean, stable surface by removing loose paper and skim, sweeping away dust with a dry brush or vacuum, and then drying the substrate before any primer is applied. Choose a bonding or adsorptive primer appropriate to the substrate—porous concrete or drywall—and plan the coat sequence, allowing for recommended cure times before re-skim. Identify sections that require full removal versus patching, mark any areas showing bowing or delamination, and ensure feathered edges where old skim contacts new so adhesion remains even.
Thorough cleaning prevents contaminants from sabotaging adhesion, while a controlled damp wipe used sparingly helps remove residues without introducing excess moisture. Perform moisture checks on the substrate with a meter if available, verify dryness, and factor in ambient conditions and drying time to avoid primer failure. Finally, condition the surface by deglossing glossy spots and lightly abrading where needed, repair gouges or cracks, and create a uniform, slightly rough surface that maximizes primer grip and provides a predictable skim.
Removing stubborn wallpaper residue
Start with mechanical methods first: scrape and sand to remove any loose, flaky paste and paper. Use a stiff scraper and a hand sander for small areas; take care not to burn through drywall paper.
If mechanical removal stalls, use a warm water and detergent soak or a commercial wallpaper remover. For glue that won’t budge, a low-odor solvent or an enzymatic cleaner can break down adhesive—test a small spot first and ventilate well.
If only a very thin, tightly bonded stain of paste remains, you can leave it provided you seal with a high-adhesion bonding primer. Thin residue under a bonding primer is better than aggressive damage to the substrate.
Choosing a primer and curing times
For heavy staining or adhesive bleed-through use a shellac or solvent-based stain blocker; they stop dyes and odors quickly but need good ventilation. Oil-based primers give strong adhesion and longer open time on difficult surfaces.
Latex bonding primers are the easiest to work with on most drywall and patched areas; they dry faster and sand well before skim coats. Expect latex primers to be touch-dry in 1–2 hours and ready for light sanding or skim in 2–4 hours, depending on temperature and humidity.
Shellac and oil primers usually need longer curing: plan on 2–4 hours touch-dry for shellac and up to 24 hours for some oil-based primers before you skim or apply finish coats. Always check the product label for exact recoat and sanding times.
Re-prime process: exact steps and product callouts
Re-priming failed skim areas requires a concise, timed protocol that targets only the affected zones, including identification of bonded versus loose skim, edge transitions, and documentation of surface condition with notes or photos. It outlines the exact surface prep, primer choice, dilution if needed, two-coat application with specified inter-coat dry times, and the ambient and substrate conditions required to ensure sound adhesion. The process also details how to test for moisture and alkali, choose a suitable bonding primer like a concrete sealer, and implement a controlled sequence from prep to final re-skim.
Following this protocol helps DIYers avoid rework by clearly defining scope and steps, reducing guesswork on where to re-prime and how to treat it. The timed schedule, film thickness guidance, and environmental thresholds help ensure consistent results in varying jobsite conditions, including damp basements or high-alkali substrates. Understanding the rationale behind each step—surface readiness, proper primer selection, and monitoring dew point—leads to durable adhesion and a smoother, longer-lasting skim coat.
Step-by-Step Process
Follow these steps to re-prime failed skim areas so the finish coat will stick and look right. The sequence covers prep, primer choice, application, and final checks.
- Clear and protect the area. Remove loose dust and debris and mask trim and floors. A clean work area prevents contamination during priming; run your hand over the surface to feel for grit.
- Inspect and repair the skim failures. Scrape loose film and sand feathered edges until solid substrate shows. If you hit drywall paper or deep damage, patch and let the compound cure before priming.
- Clean the repaired spots. Wipe with a damp sponge or TSP substitute and let fully dry. Proper cleaning removes salts and residues that cause lifting.
- Choose the primer and thin if instructed. Use a high-adhesion acrylic primer or a bonding primer for stubborn areas; follow the product label for thinning. Check the label for open time and dry times so you don’t trap moisture under the film.
- Spot-prime with a brush or mini-roller, then blend into surrounding wall. Apply a thin, even coat and back-roll to eliminate lap marks. The repair should disappear when primer is dry and consistent with the surrounding sheen.
- Allow recommended dry time then assess for coverage. Lightly sand any raised nap or nibs and remove dust. If the primer still lifts or shows translucence, apply a second full coat or switch to a stronger sealer.
- Finish and clean up. Remove tape while primer is tacky, clean tools per the primer instructions, and ventilate the room. Do a final adhesion check by fingernail; if film peels, stop and re-prep or call a pro for large failures.
Spot priming vs full-wall priming
Spot priming works when failures are tiny and isolated. You can match texture and hide repairs if the surrounding primer and finish are sound.
Full-wall priming is the safer bet after wallpaper removal or when the substrate has variable porosity. Wallpaper residue, adhesive bleed, and old stains can show through if you only spot-prime, so a uniform coat across the wall evens out absorption and sheen.
Do spot-prime for small, well-bonded repairs. Do full-wall prime when you see multiple failed areas, adhesive residue, or uneven color after a first pass.
Troubleshooting primer adhesion
If primer blisters or lifts, stop and remove the failed film back to sound material. Re-clean the area, dry it, and sand any loose edges so the next layer bonds to solid substrate.
For recurring adhesion problems, use a penetrating or bonding sealer designed for difficult surfaces. These products lock into the substrate and give a mechanical key for the finish coats.
If failures continue across a large area, it often means contamination, moisture, or incompatible products. Address moisture first and consider a professional assessment before you keep layering products over a bad bond.
Re-skim technique: mixing, consistency, and first coat
Achieving a solid re-prime/first-skim starts with precise mixing, consistent batches, and a deliberate first coat. Use clear, small adjustments to achieve a workable slump or flow, and avoid over-thinning that can weaken adhesion or create thin, uneven edges. Keep thinning to the minimum needed and rely on measured additions of water or acrylic admixtures only when the mix shows signs of stiffening or dragging on the wall. Before the first skim, prepare the surface by removing dust, controlling laitance, and applying a compatible bonding primer to maximize grip. Apply the skim with a controlled trowel angle, steady pressure, and cross-rolling or back-rolling to achieve a uniform, feathered thickness that hides substrate irregularities.
Working time and open time govern how long you have to spread, blend, and smooth the coat before it skins over. Plan sequence so edges feather into the next area and watch for slow or fast drying conditions that can cause bubbles, pinholes, or creases if rushed. This matters on DIY jobs because consistent technique reduces rework, improves coverage, and helps achieve a durable, even finish with fewer touch-ups.
Choosing the right compound for re-skim
For quick rescue work use a fast-setting, gypsum-based setting compound. It hardens reliably and lets you apply another coat or sand the same day. For larger, slower jobs a good quality premixed all-purpose mud is easier to feather and holds up well for thin re-skims.
Use the setting compound when you need speed and strength—patches, high-traffic repairs, or when humidity might slow drying. Use premixed for touchups, long feathering runs, or when you want more open time to work the surface.
Tip: Match the compound to the job rhythm: short jobs = setting; longer smoothing runs = premixed. Refer back to the mixing and thinning cues already covered for proper consistency before you trowel on the first coat.
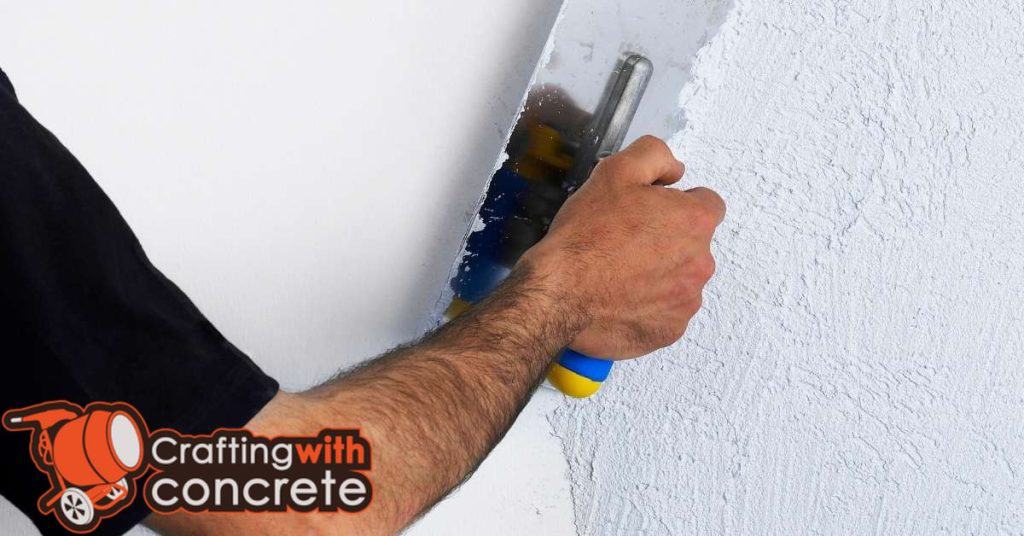
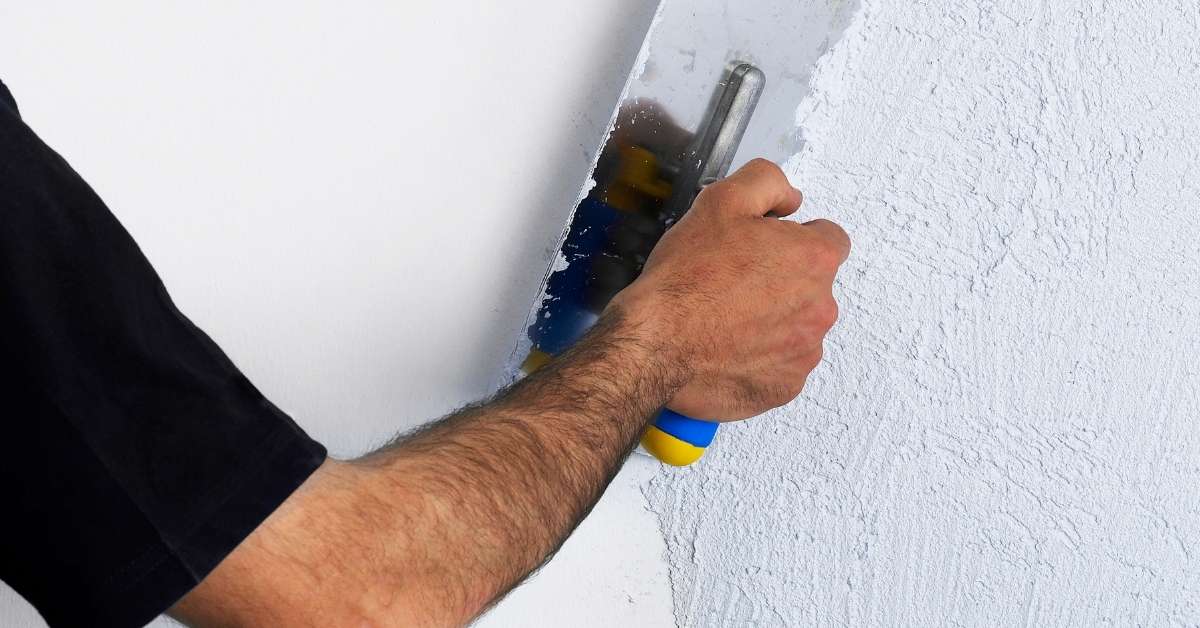
Knife selection and application motions
Carry a 6–8″ knife for walls and a 10–12″ for ceilings or large flats. Bigger knives lay material smoother and reduce seams; smaller knives are better for tight spots and patch edges. Keep both clean and flat—the blade shape matters more than brand.
Apply with a firm, even stroke. Hold the knife at a low angle to feather the edges thin. Use enough pressure to compress the mud into the surface, then lighten on the final pass to leave a smooth feathered edge. For ceilings pull toward you where possible to control drips.
Tip: Finish each pass with a long, continuous stroke to avoid ridges. If you need to rework, wait until the first skim reaches the workable stage described earlier rather than sanding raw wet mud.
Additional skim coats and feathering transitions
Most resurfacing projects with skim coats require about 2–3 coats, depending on the area size, the wear on the current skim, and the degree of final smoothness you’re aiming for. Plan inter-coat timing by testing dryness, checking for tack and surface temperature, and following room conditions for humidity; in hot or humid spaces, allow extra cure time to prevent bubbling or cracking. Feather the edges of each coat to taper thickness at the boundaries and blend with the existing skim, and perform a careful, light sanding between coats to maintain a seamless transition.
Between coats, perform light sanding, remove dust thoroughly, and apply any primer or bonding agent recommended for gypsum- or cement-based skim to improve adhesion for subsequent layers. Anticipate common issues like bubbles, pinholes, or ridges, and address them with targeted spot coats, gentle feathering, or additional finishing steps to equalize texture and sheen. Choosing the right material, understanding compatibility, and following safety practices—good ventilation, dust control, and appropriate PPE—helps protect you and ensures a durable, professional-looking finish.
Wet-on-wet vs sanding between coats
Wet-on-wet means you lay the next skim coat before the previous one fully dries. It speeds the job and reduces loose-dust sanding. Use it when depth builds are small and the base is solid.
Sanding between coats gives tighter control over final shape and removes high spots. Choose sanding when you need crisp edges, thick fills, or when the previous coat has dried and shrunk.
Rule of thumb: do wet-on-wet for thin touch-ups and feathering; sand between coats for larger reprofiles or when layer control matters. Adjust based on material drying time and room conditions.
Avoiding ridges and lap marks
Ridges and lap marks are make-or-break mistakes. They show through paint and scream ‘amateur’ if you don’t handle them right.
- Keep a loaded edge — maintain a consistent amount of compound on the knife so thickness stays even; reload frequently instead of scraping a dry blade.
- Maintain uniform overlap — always overlap the previous pass by the same distance so edges blend; mark a reference line if needed.
- Feather the ends — taper the pressure at the end of each pass to avoid hard ridges; lift the knife slowly instead of snapping it off.
- Watch your angle — hold the knife at a steady angle to control spread; changing angles mid-pass creates uneven thickness.
- Clean the blade — wipe buildup off the knife between passes to prevent bumps and drag marks.
Stay consistent with your tool work and you’ll avoid most ridges. Small adjustments as you go save a lot of sanding later.
Sanding and dust control best practices
Effective sanding for concrete skim coats starts with a safe, deliberate grit progression that flattens high spots with 60–80 grit, then moves through intermediate 120–150 grits, and finishes with 180–220 to yield a smooth skim without excessive edge rounding or surface damage. Choose between screens and paper, consider a handheld block or small orbital sander, and match abrasive density and clog resistance to the skim coating to achieve clean cuts and predictable texture across the work area. Combine dust control and protection by integrating HEPA vacuum attachments, dust barriers or containment, a misting technique to keep dust down, and a disciplined vacuum-maintenance schedule between passes to maintain suction and finish quality.
Using proper respirators—NIOSH-approved P100 with the appropriate cartridges or a multi‑purpose respirator suitable for crystalline silica—along with eye/face protection and careful fit-testing tips, disposable versus reusable options, and hygiene practices is essential to minimize silica exposure during every stage of the job. A thorough cleanup, surface protection, and quality-check routine—post-sand wipe-down with a damp cloth, re-vacuuming to remove fine dust before recoating, texture consistency checks, and documentation of steps for replicability in the case study—helps DIYers achieve safer, more reliable finishes and better long-term performance.
Hand sanding vs pole sanders vs orbital
Hand sanding wins in tight spots and inside corners. Use a sanding block or folded paper for control. It’s slower, but you avoid over-sanding edges and damaging corner beads.
Pole sanders are the go-to for flat walls and high areas. They cover more surface quickly and save your back on ceilings. Expect less precision in corners; you’ll need hand touch-up.
Orbital sanders (with dust collection) are fast on large, flat panels and skim coats. Use them carefully—they remove material quickly and can leave swirl marks if you skip grits. For most drywall jobs follow a grit progression from about 120 to 180, finishing with 220 only for final feathering and smooth skim coats.
Safe cleanup and disposal
Keep dust off the rest of the house. Use a shop vac with a HEPA filter to collect sanding dust as you go. Wipe surfaces with a damp cloth after vacuuming to catch fines you missed.
Gather drywall compound waste and place it in sealed bags or covered containers. Let wet mud harden before disposal where local rules require it. Do not sweep dusty piles into the street or gutter.
Handle contaminated rags and clothing carefully. Store used rags in a sealed bag and launder separately on a hot cycle, or discard if heavily soiled. For silica-risk work, follow your respirator and PPE guidance noted earlier and keep used filters and disposable PPE in sealed waste bags.
Painting and finishing after a rescue skim
After a rescue skim, the key is selecting compatible primers (stain-blocking or bonding types) and finishes (eggshell, satin) with the skimmed surface, while allowing realistic drying times between steps and noting any primer-coverage expectations after the skim. Plan testing before coating—adhesion checks, moisture readings, and a tack test—to confirm the surface is dry, stable, and ready to accept paint without peeling or soaking in, and to identify any residual dust or contaminants that could trap coating. Re-sand high spots, feather edges, and ensure a dust-free, clean substrate, then follow a concrete, step-by-step sequence: primer, skim-appropriate primer coat, then finish coats, to minimize roller marks and lap lines, while keeping coats thin for even cure.
Understanding humidity, temperature, and good air movement helps prevent blistering, delamination, and uneven sheen on a skimmed substrate, and highlights the importance of ventilation and dew-point awareness during each stage. Knowing the impact of surface differences between new skim and old substrate guides paint choice and adhesion expectations, reducing future failures, while cautioning about potential differences in porosity that affect topcoat grip and drying rate. This planning mindset keeps the job efficient, reduces callbacks, and gives a durable, professional-looking result even in busy DIY environments, so you can trust the finish will perform under normal use and cleaning.
Sealers and primer compatibility
Use a sealer when the skim coat is very porous or when you sand a lot and expose different layers. A water-based PVA or acrylic sealer tames porosity and stops blotchy finish coats.
For new joint compound, choose a drywall primer-sealer labeled for “new plaster” or “fresh drywall”. These primers are formulated to stick to porous mud and give a uniform surface for topcoat. If you must use oil-based paint later, use an oil- or alkyd-compatible primer over the sealed mud.
Avoid applying a standard wall paint directly to fresh mud without a sealer. That combo invites flashing and poor adhesion. Let the mud dry fully, seal if needed, then prime with a compatible product before painting.
Final texture and touch-up techniques
Match the existing texture by using the same tool and motion the original trades used. For knockdown, flatten the peaks lightly; for orange peel, use a fine spray and feather the edges. Practice on scrap before touching the wall.
For a smooth finish, feather the edges of your skim and sand with a light grit, then wipe with a damp sponge to remove dust. Apply a thin skim of finishing compound only where needed, sand again, and prime the patched area.
Blend feathered edges by scuff-sanding surrounding paint and extending the primer slightly beyond the repair. That minimizes a visible “halo” once the topcoat goes on.

Timeframe, staging, and realistic scheduling
This section provides a clear, step-by-step timeline from prep to final paint, with explicit drying and cure estimates for each stage. It also includes a practical staging plan that sequences rooms, orders materials and tools, and minimizes dust and disruption. Climate and room size are factored to give realistic buffers between coats and during sanding and priming.
Understanding these timings helps DIYers schedule work, arrange drying spaces, and anticipate delays due to temperature, humidity, or ventilation. It translates into a smoother job, fewer re-dos, and more predictable completion windows.
Accelerating cures safely
You can speed drying without wrecking the job by controlling air movement, temperature, and humidity. Open windows and run fans to move air; use a dehumidifier to pull moisture out; and raise temperature a few degrees with a heater if it’s chilly.
Work in stages: increase ventilation for 24–48 hours after skim coats and primer, then scale back for paint cure. Avoid blasting heat or direct vents on fresh skim coats — that causes cracking and poor adhesion.
Check product data for manufacturer-recommended minimums. If you must push a schedule, test a small area first and allow extra time for tack and full cure before sanding or recoating.
Weather and humidity impacts
High humidity and low temperatures slow every drying step—prep compounds, primers, and paint. Expect drying times to double or worse in damp or cool conditions. Conversely, very hot, humid air can keep water-based products from evaporating cleanly.
Aim for a workshop-like environment: ideally 50–70°F (10–21°C) and under 50% relative humidity for consistent results. If conditions fall outside that range, extend between-step waits and use heat or dehumidification to stabilize the room before proceeding.
Keep an eye on overnight changes. A sunny afternoon followed by a cold, humid night can undo a day’s quick-dry gains. When in doubt, add extra cure time rather than moving to the next stage too soon.
Cost and materials estimate by room size
This section breaks down room-size driven material quantities and labor steps for a reskim workflow, from prep and priming through skim coats to the final finish, with clear budget (DIY) versus pro-grade options for small half baths, medium bedrooms, and large living rooms. It includes per-room estimates for primers, skim coats, bonding agents, sandpaper, tape, brushes, and trowels, plus typical yields and waste factors to help scale materials accurately. A concise quick-check list and a sample bill-of-materials outline for each size category are provided to help plan and compare quotes.
Understanding how room size affects costs helps you translate estimates into a realistic schedule, including drying times between coats and curing windows. The guidance covers cement-based skim versus gypsum-based products, add-ons such as waterproof or exterior-grade options, and how material choices impact price, workability, and labor needs. This context matters for DIYers and job sites aiming to balance budget, quality, and timeline across small, medium, and large spaces.
DIY vs hiring a pro — cost comparison
If you read the earlier cost breakdowns, you already know material totals by room size. The big variable left is labor. A small half bath reskim usually takes a skilled DIYer 4–8 hours; a medium bedroom 8–16 hours; a large living room 16–30 hours, depending on ceilings and prep.
Hiring a pro shifts those hours into money instead of time. Expect to pay 2–4× the DIY material cost as labor on a small job, and more on larger, tricky rooms. Pros bring speed, tools, and guaranteed finish. That can save money long-term if you value time, want warranty, or aren’t confident getting a smooth result.
Rule of thumb: DIY when you have time and patience. Hire a pro when the room is large, ceilings are high, or you need a flawless finish for resale.
Where to save and where to invest
Cut costs on things you can replace later: basic joint compound, standard mesh tape, and cheaper plastic drop cloths will work for one job. Save time by buying a mid-grade drywall knife instead of the cheapest—sharp blades make a cleaner skim and speed up sanding.
Invest in a few key items that affect finish and safety. A quality primer and a good respirator matter more than the fanciest trowel. A decent pole sander or sanding block makes a huge difference on large rooms. For long-term value, spend on tools and safety gear; skimp on consumables if you must.
Practical tip: buy a good respirator and a reliable finishing knife, then choose budget joint compound. Those choices give the best trade-off between cost and a pro-looking finish.
Cost and scheduling guidance by room size
- Small half bath (roughly 25–40 sq ft of skim work):
- DIY material estimates (rough): Primer 1–2 gallons; joint compound 6–8 bags (avg 4.5–5.5 gal per bag when mixed); bonding agent 1 gallon; sandpaper 5–8 sheets; tape 2–3 rolls; brushes 2–3; trowels 1–2; total material cost range: $60–$140; total labor: 4–8 hours.
- Pro material estimates: primers 1–2 gallons; joint compound 8–10 bags; bonding agent 1–2 gallons; sandpaper 6–10 sheets; tape 3–4 rolls; brushes 2–3; trowels 1–2; total material cost range: $90–$180; total labor: 4–6 hours.
- Medium bedroom (roughly 120–180 sq ft skim area):
- DIY material estimates: Primer 2–3 gallons; joint compound 16–22 bags; bonding agent 1–2 gallons; sandpaper 10–15 sheets; tape 4–6 rolls; brushes 2–4; trowels 2; total material cost range: $180–$420; total labor: 8–16 hours.
- Pro material estimates: primers 2–3 gallons; joint compound 22–30 bags; bonding agent 2–3 gallons; sandpaper 12–20 sheets; tape 5–7 rolls; brushes 3–4; trowels 2–3; total material cost range: $270–$540; total labor: 8–16 hours.
- Large living room (skim area 300–600+ sq ft, ceilings varied):
- DIY material estimates: Primer 4–6 gallons; joint compound 30–40 bags; bonding agent 2–3 gallons; sandpaper 15–25 sheets; tape 6–10 rolls; brushes 3–5; trowels 2–3; total material cost range: $400–$900; total labor: 16–30 hours.
- Pro material estimates: primers 4–6 gallons; joint compound 40–60 bags; bonding agent 3–5 gallons; sandpaper 20–30 sheets; tape 8–12 rolls; brushes 4–6; trowels 3–4; total material cost range: $600–$1,200; total labor: 16–30 hours.
Sample bill of materials outline by room size
- Small — 1 primer, 2–3 coats of skim coat, 1 bonding agent, 5–8 sheets sandpaper, 2–3 rolls tape, 2–3 brushes, 1–2 trowels.
- Medium — 2 primers, 2 skim coats, 1 bonding agent, 10–15 sheets sandpaper, 4–6 rolls tape, 2–4 brushes, 2 trowels.
- Large — 3 primers, 3 skim coats, 2 bonding agents, 15–25 sheets sandpaper, 6–10 rolls tape, 3–5 brushes, 3–4 trowels.
Scheduling guidance and project timeline
- Prep stage (1–2 days): Protect surroundings with plastic, remove loose material, clean surfaces, and repair obvious defects with patching compound. Mask adjacent finishes. Final wipe-down before priming.
- Priming (1 day): Apply primer to all skim surfaces (allow manufacturer-recommended dry time, typically 2–4 hours, longer in high humidity or porous substrates).
- First skim coat (1 day): Mix skim coat to manufacturer consistency; apply evenly with a trowel or hawk-and-mosh to achieve a uniform base. Allow to dry fully (4–12 hours depending on product and room conditions).
- Drying window and inspection (0.5–1 day): Check for surface texture uniformity, pinholes, or lap lines. Lightly sand as needed between coats after each coat’s dry period.
- Second skim coat (1 day): Apply to improve uniformity and fill minor imperfections. Allow full cure per product guidelines (4–12 hours).
- Final finish and cure (2–3 days): Light scuff sand, wipe clean, and apply finish or paint if required. Full cure may take up to 7 days for dust-free final finish depending on climate and product.
- Safety and maintenance notes: Always wear a respirator rated for dust and chemical vapors. Use proper ventilation, film-forming sealers if water exposure is a concern, and store materials as per label directions to prevent premature hardening or degradation. After completion, inspect for any moisture-related issues in rooms with high humidity and address promptly to maintain finish integrity.
Common mistakes and corrective fixes
Common issues in skim coat repair on concrete surfaces often come from over-thinning the mix, priming before the skim dries, or sanding through the skim layer, and each mistake tends to propagate adhesion and texture problems if left uncorrected, so the key is to identify the exact failure mode and apply targeted fixes rather than redoing the entire process. For each error, use precise surface prep steps, choose products suitable for DIY repair, and apply materials with controlled angles and thickness targets to avoid thin spots or uneven textures. Implement a quick protocol: re-check mix ratios, re-prime only after the surface is clean and dry, and re-skim with a light, consistent pass followed by controlled curing conditions rather than rushing the next step.
This matters because moisture, temperature, and ventilation dramatically influence skim performance and can reveal latent issues such as poor adhesion or texture mismatches if ignored, making timely corrections cheaper and faster than a full redo. Having a clear corrective workflow helps DIYers decide when to re-prime, when to re-skim, and whether light sanding is sufficient or if a more deliberate pass is required, all while keeping dust control and safety in mind. By aligning timing, curing, and environmental controls with product choices and application techniques, you reduce the risk of recurring defects and achieve a durable, even finish that lasts in real-world conditions.
Fixing bubbles after re-prime
Cut out the bubbled area to sound material. Score a neat square or circle and remove loose skim until you reach firm substrate. Keep the cut just large enough to remove all soft edges.
Dry the cavity completely. Use a heat gun or let it air until no moisture remains. Re-prime the exposed area with a bonding primer, then apply a fresh skim coat in thin layers. Feather each pass so the patch blends with the surrounding surface.
Tip: If bubbles return after re-priming, you missed moisture or contamination. Stop, strip back further, and repeat the dry-and-prime step before re-skim.
Dealing with persistent delamination
If the skim keeps separating, you may need to strip back to the substrate. Remove all loose material until you reach sound drywall or plaster. Patching over failing layers only delays the problem.
For suspect substrates, use a mechanical bonding agent or a mesh-reinforced base coat to create a reliable key. Apply the bonding product per manufacturer instructions and allow full cure before finishing.
When to replace: If the drywall paper is delaminated, soft, or water-damaged, cut out and replace the board. New substrate is cheaper than endless repairs and prevents repeat failures.
Safety, health, and environmental considerations
Key considerations cover respirator choices and fit, with N95 vs P100 selection based on silica and dust exposure, plus required fit tests and seal checks. Plan practical ventilation using local exhaust, fans, and containment zones to minimize airborne particles during scraping, priming, and mixing while monitoring for re-entrainment. Also address silica hazards and exposure limits, wet-suppress techniques, safe mixing procedures, temporary isolation of the work area, and proper disposal of contaminated rags, containers, and debris, along with PPE beyond respirators and clear storage and labeling requirements.
This matters on the jobsite because proper protection and airflow reduce health risks, keep you compliant with safety rules, and prevent cross-contamination between tasks. Following these guidelines helps you maintain a safer workflow, protect nearby occupants, and sustain a cleaner environment by documenting chemical safety data, accessible SDS, signage, and waste procedures. Implementing the plan supports efficient work, clearer responsibilities, and smoother cleanup without costly interruptions or health impacts.
PPE and workplace setup
Put on the basics: a fitted respirator, eye protection, gloves, and disposable coveralls. For dust-heavy jobs choose a P100; for light, non-oily particles an N95 can be acceptable. Make sure respirators seal well and test the fit before you start.
Set up containment to protect the rest of the house: plastic sheeting at doorways, sealed seams, and a one-way entry if possible. Run a negative-pressure option — a HEPA-filtered fan or box fan with a window-mounted exhaust — to pull dust out of the work area instead of letting it spread.
Keep a clean staging area outside the containment for tools and fresh PPE. Remove contaminated clothing and tack-rag surfaces before leaving the zone to avoid tracking dust through the home.
Mold and moisture caution
If you see mold or smell mildew, stop and address the moisture source first. Cosmetic repairs over active damp or mold will fail and can create health risks. Test suspect areas or call a pro if the contamination looks extensive.
Small, dry surface mold can often be cleaned with appropriate cleaners and dried thoroughly. Larger infestations, hidden mold, or ongoing leaks require remediation and repair of the source before you continue with sanding, painting, or insulation work. Never paint over active mold or unresolved moisture.
After remediation, verify the area is fully dry and rechecked for mold before sealing or finishing. Proper drying and ventilation prevents recurrence and protects your health and the home.
Visual signs and examples to look for
Key visual signs to watch for include adhesion test indicators such as tackiness, skin pull, and any film transfer to the trowel or squeegee, along with how to interpret borderline results. Look for skim cues like uniform thickness, even color, roller or brush stippling, and the presence or absence of gaps or pinholes at each stage. Drying indicators—surface dry to touch, a dust-free finish, light chalking, and the typical timeframes between coats—also guide progress and signal when re-priming or re-skim may be needed.
This visual guide helps DIYers diagnose progress on-site before rework becomes necessary, reducing guesswork and costly mistakes. By recognizing trouble signs such as blisters, bubbles, cratering, roller marks, or a pebbly texture early, you can decide promptly whether to halt, re-prime, or re-skim. A reader-friendly self-diagnosis flow with photo examples and clear actions keeps projects on track and improves results without advanced tools or expert input.
Passing vs failing skim photos to compare
Look for a smooth, uniform surface in passing photos: consistent sheen, no trowel ridges, and feathered edges where the skim meets the existing wall. Lighting should be low-angle to reveal subtle highs and lows — a good skim hides those shadows.
Failing photos show pinholes, visible lap marks, sanding gouges or areas that look powdery and flaking. These usually come from wrong mix consistency, poor adhesion, or overworking the skim while it was drying fast.
Compare the problem photos against the good ones and note the trigger that matches: bubbles and craters often point to trapped air or contaminants, while long ridges suggest incorrect trowel technique or too-thick application. Use these visual clues to decide whether a spot repair will do or if you need to strip back to re-skim.
Quick fixes for near-miss finishes
If the finish is almost there, start with light sanding to knock down high ridges and smooth seams. Use a fine grit and a feathering motion so you don’t create low spots. Clean the dust before any touch-up.
For small pinholes or thin spots, apply a thin touch-up skim with a finishing compound and feather the edges. Let it cure fully, sand lightly, then check with low-angle light. For surface powdering or blush, wipe with a damp sponge, let dry, then seal and topcoat.
Spot repair is often faster than full rework, but watch for adhesion failures. If the skim lifts during patching, you’ll need to remove the loose material and address the bond before reapplying.
Step-by-step case timeline (detailed walkthrough)
This step-by-step case timeline logs prep day, primer, skim coats, sanding, and painting with exact times and product names. At 8:00 AM, surface cleaning, patching with DAP Concrete Patch, and a moisture test; by 9:00 AM, two coats of Zinsser Bulls Eye 1-2-3 primer. Skim coats were applied at 10:00 AM and 11:00 AM using Ready Coat skim, then sanding proceeded with 120–150 grit and a final coat of Benjamin Moore Regal Select at 2:00 PM.
This detailed timeline helps DIYers reproduce results, track cure times, and anticipate contingencies like bubbles or pinholes. By documenting exact products, coat counts, and environmental conditions, you can coordinate schedules, compare finish quality, and communicate clearly with clients. It also provides a compact, chronological summary for quick reference on future projects.
Step-by-Step Process
The following sequence gets you from prep to finished paint with minimal rework. Follow each step, check your work, and move on only when the check passes.
- Site prep and safety. Clear the area, remove fixtures, and open ventilation. Check that dust, oil, and moisture are gone before you mix products.
- Tack and spot clean. Wipe surfaces with a lint-free cloth and denatured alcohol where needed. Surface should feel dry and free of grease; test with a fingertip swipe.
- Apply primer coat. Use the specified primer at the recommended spread rate and dry time. Primer should bond firmly and not bead — scrape a small patch to confirm adhesion.
- First skim coat. Mix joint compound to a creamy consistency and apply thin, even passes. Feather edges well; when dry it sands flat without tearing.
- Sanding between coats. Use a sanding block with the specified grit and vacuum frequently. Surface should feel uniformly smooth and show no ridges under light.
- Second skim and detail. Fill low spots and repair pinholes with a thinner pass to avoid buildup. Dry and re-sand until consistent; run a hand over seams to detect hollows.
- Final prep and primer touch-up. Spot-prime any exposed compound and scuff glossy areas. Touch-up primer should disappear into the surface when dry.
- Paint application. Apply paint in full, even strokes using the recommended roller nap and technique. Check for uniform sheen and no lap marks; touch out immediately if needed.
- Cleanup and final inspection. Remove drop cloths, reinstall fixtures, and inspect under natural light. Check for missed spots, runs, or texture mismatch and correct small issues right away; call a pro only for structural or moisture failures.
Materials used and exact product callouts
Picking the right products kept the finish durable and consistent. Wrong choices lead to poor bond, cracking, stain bleed, or excessive sanding.
- Primer: Zinsser Bulls Eye 1-2-3 Used for adhesion and stain blocking. Look for water-based, high-adhesion formula; avoid low-adhesion generic primers or oil primers over certain substrates.
- Primer/Sealer: Kilz Premium Applied on patched areas to seal compound. Choose a high-hide, mold-resistant sealer; wrong sealer lets compound show through or rehydrate.
- All-purpose joint compound: USG Sheetrock 90 Used for skim coats and repairs. Aim for light, creamy mix; heavy or fast-setting products can crack or be hard to sand if misapplied.
- Setting compound: DAP Fast ‘n Final Used for deep fills and quick turnarounds. Pick correct set time for your schedule; wrong set time causes blowouts or extended sanding.
- Finish coat: ProForm Performance Finish Applied thin for a smooth top layer. Look for low shrinkage and fine workability; coarse or fast-drying finishes will show tool marks.
- Paint: Sherwin-Williams Cashmere Interior Chosen for flow and durability. Use appropriate sheen for the room; flat hides imperfections, satin cleans easier—wrong sheen shows flaws or resists cleaning.
- Tools: Purdy XL roller and 6″ stainless taping knife Quality tools give cleaner feathering and fewer ridges. Cheap knives leave tool marks and rollers shed, causing texture defects.
- PPE: 3M N95 respirator and nitrile gloves Protect from dust and solvents. Using no protection risks health and contaminates the finish with oils or dirt.
Lessons learned and checklist for your rescue
Start with clean, dry surfaces and the right primer. That single decision prevents most failures: stains, bond loss, and rework. Keep a consistent thin-first approach — multiple thin coats beat one heavy coat every time.
Sand between coats and remove dust before priming or painting. I learned that skipping a light sand costs extra sanding and touch-ups later. Use a hand test and natural light to find low spots.
Checklist: ventilation and PPE on, substrates dry, primer applied and fully cured, skim coats feathered and sanded, touch-prime where needed, finish paint in even passes. If you hit persistent moisture, significant cracks, or adhesion failure, stop and consult a pro.
When to stop and hire a professional — decision checklist
This decision checklist helps you know when to finish a repair yourself or hire a professional by setting clear thresholds for damage: extent in square feet, moisture level, time since failure, and total cost compared with DIY feasibility. A simple yes/no workflow guides you: if damage is under 30 sq ft, moisture stays below 12%, and it’s been less than 3 days, DIY is reasonable; otherwise, hire a pro.
Safety and moisture red flags—active leaks, mold growth, cracking, or compromised framing—signal a professional assessment is needed. Document findings, pause the project when thresholds aren’t met, and share the notes with a contractor or for a second opinion to avoid costly rework.
Interview prompts for contractors
Start with the basics: ask how long they’ve worked on drywall and how many jobs like yours they’ve completed this year. I want trade-specific answers, not marketing lines. If they hesitate, that’s a red flag.
Ask them to describe their moisture-control and mold-prevention method. Refer back to the moisture and extent thresholds you used earlier and have them explain the steps they’d take to stop repeat failures. Look for a clear sequence: source fix, dry, replace, seal.
Talk warranties and verification. Ask what parts of the job are guaranteed, how long the warranty lasts, and what documentation they provide. Ask for references and at least one recent job you can inspect. If they won’t provide proof, move on.
Preparing a job site brief for a quote
Make the contractor’s job easy. Take clear photos of the whole wall/ceiling and close-ups of damage, framing, and any visible leaks. Include a short note on when the damage appeared and any tests you ran — moisture readings or leak checks from earlier sections will help them estimate accurately.
Measure and note dimensions: length, height, and depth of damaged areas, plus access constraints like narrow hallways or ceiling heights. List finishes you expect replaced and any fixtures that must be removed and reinstalled. A concise brief saves time and reduces surprise charges.
Attach contact and scheduling limits, and ask for an itemized quote with line items for demolition, drying, materials, labor, and warranty. Tell them you expect a timeline and a written warranty before work starts. That keeps everyone honest and the price realistic.
Long-Term Maintenance to Prevent Future Problems
Long-term maintenance focuses on preventing repeated failures by setting up ongoing monitoring, timely repairs, and the right materials so the same problem does not reoccur. It emphasizes identifying early signs such as bubbles, pinholes, cracks, peeling, and moisture glow, establishing a clear inspection cadence—monthly for the first year, then quarterly—and building a routine that includes surface cleaning, light sanding to key the old skim, re-priming with a compatible primer, and a re-skimming schedule with appropriate coat thickness, all while documenting outcomes and using durable, compatible coatings that bond well with the substrate.
For a DIY jobsite, this approach translates into practical steps that reduce downtime, extend service life, and save effort by catching issues before they escalate. It matters because controlling moisture, maintaining proper humidity and temperature during application and curing, and choosing the right products create reliable results and predictable repairs, supported by simple logs, defined thresholds for local versus full re-skim, and safe disposal and reapplication sequences that keep the project on track.
Monitoring for Early Warning Signs and Substrate Health
Walk the area once a month for the first six months after repair, then every season after that. Look for new hairline cracks, soft spots, delamination, damp patches or white powdery efflorescence. Note exact locations and take photos from the same angle each time for comparison.
Keep a simple log with date, conditions (wet/dry), and what you saw. If you catch rising moisture, accelerating crack growth, or repeat delamination, act quickly—these are signs the substrate is moving or still wet and the skim is losing bond.
Early action saves work: small fixes and drying beats full rework. If you’re unsure, compare photos month-to-month; a steady change is not normal and needs investigation.
Re-Prime and Seal: Long-Term Protective Strategy
Pick a primer and sealer that match the substrate and the skim product—acrylic primers for cement boards, PVA or alkali-resistant primers for new plaster, and penetrating silane/siloxane for exterior masonry. Read product labels; choose breathable products where moisture must escape.
Clean and abrade the surface lightly before priming. Apply primer in thin, even coats and allow full flash-off as the manufacturer specifies. For sealer, use two light coats rather than one heavy coat and check curing times; poor cure leads to trapping moisture and future failure.
Test a small patch before doing the whole job. Proper priming and sealing improves adhesion and keeps water where it belongs—outside the substrate, not between layers.
Seasonal Maintenance Schedule and Checklists
Create a simple seasonal calendar: spring—inspect after winter, touch up sealant and fill small cracks; summer—check for heat-related crazing and re-coat sealers if UV exposure is high; fall—clear gutters and check for water entry points; winter—monitor for freeze/thaw damage and keep areas dry.
On each visit bring a flashlight, moisture meter or probe, a scraper, small bucket of matching patch material, primer, and sealer. Make a short checklist: inspect, photograph, test moisture, clean, repair small damage, re-seal where needed.
Avoid common mistakes: don’t paint or seal over damp substrate, don’t use heavy coatings that block breathability, and don’t skip documenting work. Consistent seasonal checks stop small defects from turning into big jobs.
Conclusion
Rescuing a failed skim is a practical, repeatable process that centers on safety, correct prep, and controlled layering to restore strength and a smooth finish. When you follow a real plan, you protect the structure, avoid costly fixes, and end up with a durable surface that looks right.
Start by re-priming and re-skim in clear, logical order: clean the surface, remove loose material, select compatible products, mix to the right consistency, apply the first coat with even pressure and feathered edges, let it dry fully, add any additional coats if needed, sand with dust control between coats, wipe down and prime before painting, then schedule drying time, ventilation, and light checks to confirm uniform results, finishing with a quality paint seal. Keep the workflow tight and test a small area first to verify adhesion and finish before committing to the whole room, and monitor temperature and humidity to honor proper drying times.
Common mistakes are costly when you skip steps or push materials beyond their limits: never skip surface cleaning or ignore peeling edges, never rush coats or thin too much to speed up curing, and never work over damp or poorly mixed skim. Safety rules are simple—wear PPE, ventilate the space, keep tools and debris under control, test a small area first, and stop if anything shows unfamiliar cracking, peeling, or adhesion failure. If you’re unsure about substrate damage, or the skim repeatedly fails after repair attempts, it’s time to call in a pro and use the decision checklist to avoid worse damage.
If the job calls for it, don’t fight through a bad outcome. When a pro is warranted, you’ll save time, reduce risk, and still control the project scope and cost. With discipline, the right steps, and a clear finish plan, you’ll finish confident, move on to long-term maintenance, and keep moisture and wear from turning a rescue skim into a repeat problem.
FAQ
What went wrong with the original skim attempt?
The skim failed because it wasn’t primed right and the surface was dirty. That kept the resin from grabbing onto the particles. If you don’t prime and clean, you’ll waste time and money.
What does re-prime mean in this job?
Re-prime means freshening the bonding area with a proper primer. It helps the new skim grab hold and spread evenly. Don’t skip this step or you’ll fight with the material later.
How do I re-skim correctly?
Apply a thin, even coat and keep the surface clean while it cures. Work in small sections and don’t rush the laydown. Patience here saves you a lot of touch-up later.
What signs show I’m getting a good skim this time?
The surface should look smooth and uniform with no pinholes or rough patches. It should lay flat and bond firmly to the substrate. If it cracks or peels, you missed a step and need to start over from priming.