
Introduction
Patching deep holes in plaster without shrinkage means building the fill in gradual layers so the patch stays level as it dries. Prepare the cavity, mix or choose a filler suitable for plaster, and apply in thin coats, letting each dry as you go. This layering approach helps bridge the depth and reduce cracking.
Choose a filler designed for plaster that you can build in layers, and always follow the label for cure times. Fill the deepest areas first, then build up toward flush, and keep the surface workable without overworking. Allow adequate drying between coats and verify cure before finishing; if anything seems off, check product instructions and local rules.
Key takeaways
- Choose a filler product compatible with plaster and substrate, follow manufacturer guidelines.
- Clean and dampen hole edges, remove loose plaster before layering.
- Apply thin initial layer, then progressively build with slightly wetter mixes.
- Let each layer firm before next; avoid overfilling to prevent shrinkage.
- For deep holes, work in multiple layers rather than one big fill.
- Always wear eye protection and a dust mask; keep ventilation.
Table of Contents
- Introduction
- Key takeaways
- Quick Overview and When to Use the Layering Method
- Tools, Materials, and Safety Precautions
- Preparing the Hole and Surrounding Plaster
- Layering Strategy for Deep Holes (Step-by-Step)
- Techniques for Different Hole Sizes and Wall Types
- Curing, Sanding, and Finishing for a Seamless Repair
- Troubleshooting, Common Mistakes, and How to Fix Them
- Cost, Time Estimates, and Material Planning
- Conclusion
- FAQ
Quick Overview and When to Use the Layering Method
Layering is a patching approach that builds up several thin, bonded layers rather than one thick fill. Each layer is allowed to cure before the next is applied to minimize shrinkage and cracking. This method is most suitable for deep holes where conventional skim coats or full replacement would add unnecessary weight or disrupt surrounding plaster.
Shrinkage in deep plaster repairs happens when the substrate and fast-drying material pull away as they dry, leaving gaps and settlement. Use layering when the hole depth or impact requires a stronger bond and a more precise finish than surfacing with a single coat. Typical use cases include fixture holes, impact damage, and restoration projects where accuracy matters and structural intactness should be preserved.
What causes plaster shrinkage and failure
The main culprit behind plaster shrinkage and repair failure is drying shrinkage. When plaster dries too quickly, it loses moisture faster than it can adjust, leading to cracks. Deep holes often have unsupported voids, which can’t bear weight or distribute stress evenly, causing settlement and cracking.
Using unsuitable fillers for the depth of the hole also contributes to failure. If the filler is too thick, it can’t bond properly with the surrounding plaster, leading to delamination. Additionally, moisture imbalance between the repair and the surrounding plaster can cause differential expansion and contraction, leading to cracks.
Understanding these causes helps you tackle the problem effectively. By addressing drying time, support, filler depth, and moisture balance, you can minimize shrinkage and achieve a strong, lasting repair.
Advantages of layering vs single-fill approaches
The layering method offers several advantages over single-fill approaches. By applying multiple thin layers, you can control drying time and prevent rapid shrinkage. Each layer bonds with the previous one, creating a strong, cohesive repair that’s less likely to crack.
Thin layers allow for better adhesion to the surrounding plaster. A single thick layer may not bond properly, leading to delamination over time. With layering, you can also achieve a more even finish. Each thin layer sands smooth and flat, making it easier to match the final texture of the surrounding plaster.
Controlling drying is another key advantage. By applying layers sequentially with proper curing steps, you allow each layer to dry slowly and evenly. This minimizes shrinkage and reduces the risk of cracking. In contrast, a single thick fill can dry too quickly, leading to rapid shrinkage and cracks.
Tools, Materials, and Safety Precautions
Have a comprehensive tools and materials checklist ready: fillers, bonding agents, plaster, trowels, mixing tools, sanding pads, backing mesh, mixing pails, drop cloths, and dust control gear. Also note backing options and whether you’ll use cement-based or lime-based fillers or pre-mixed patch compounds. Plan for fast-setting versus standard-plaster choices based on the project needs.
Prioritize safety with PPE that fits the job: respirator or dust mask, safety glasses, gloves, and long sleeves. Ensure ventilation and dust containment, plus proper disposal of waste. Keep the work area clean, and prep the surface with dampening and a suitable backing strategy before mixing and layering.
Recommended filler types and bonding products
Choosing the right fillers and bonding agents is crucial for a successful patch job. Here’s what to consider:
Patching plasters are ideal for deep holes as they’re designed to be applied in layers without shrinking. They come in powder form, so you mix them with water on-site.
Ready-mixed fillers are convenient but can dry out quickly. Use them for smaller holes or when speed is essential. Check the label for pot life and coverage.
Setting plasters are fast-setting, perfect for quick repairs. However, they may not be suitable for deep holes due to their rapid drying time. Consider using a slower-setting plaster for better adhesion in layers.
Lightweight fillers are great for ceilings or when weight is an issue. They’re usually made from gypsum and have good coverage.
Bonding primers improve adhesion between old and new plaster. Choose one compatible with your chosen filler to ensure a strong bond.
Safety and workspace setup
Your safety and the condition of your workspace are paramount. Here’s how to prepare:
PPE: Wear a respirator or dust mask, safety glasses, gloves, and long sleeves to protect yourself from plaster dust and debris.
Dust control: Use drop cloths to cover floors and nearby surfaces. If possible, wet down the area slightly before starting to minimize dust.
Electrical isolation: Turn off power at the main switchboard and test all electrical fixtures near your work area to ensure they’re safe to work around.
Workspace isolation: If possible, close off the repair area from the rest of the house to contain dust and debris. This is especially important if you have young children or pets at home.
Preparing the Hole and Surrounding Plaster
Start by removing loose material and pulverized plaster to expose clean edges and a solid base. Undercut the edges slightly to create a ledge that improves adhesion and mechanical grip. A clean, dry surface is essential for a durable repair.
Inspect for hidden damage, moisture intrusion, wiring, or studs behind the patch area and address safety concerns before proceeding. Apply a bonding agent or primer and consider a thin scratch coat or mesh reinforcement to boost adhesion and reduce future shrinkage. Plan your layering approach to minimize bonding failures and rework.
Assessing depth and backing needs
First, measure the hole’s depth. Use a ruler or tape measure. Deep holes need backing to prevent sagging.
If the hole is deeper than 1 inch (25mm), consider adding backing. This could be mesh, foam, or wood support.
For temporary backing, use expanding foam. For permanent backing, install wooden supports or lathes before applying plaster.
Cleaning and priming surfaces
Remove dust with a soft brush. Vacuum to ensure no residue remains. Grease can hinder adhesion, so clean any greasy areas with mild detergent.
Apply a bonding agent or PVA primer before patching. This improves adhesion between old and new plaster layers. Use a paintbrush for even coverage.
Let the primer dry completely before applying the first layer of plaster. This ensures consistent adhesion and prevents shrinkage.
Layering Strategy for Deep Holes (Step-by-Step)
Begin with a depth assessment and decide if backing is needed and where to use a bonding agent. Evaluate hole size, plaster condition, moisture, and debris; determine how many base, intermediate, and finish layers will be required. A clear plan helps prevent surprises during drying.
Outline the base/intermediate/finish layers and keep each layer within practical thickness targets. Choose an appropriate base like a fast-setting patch or plaster mix, ensuring bonding to sound plaster while controlling shrinkage. Between layers, protect from rapid drying and note any conditions that affect adhesion.
Step-by-Step Process
The following is a clear, numbered sequence of practical steps for the layering strategy to patch deep holes in plaster without shrinkage.
- Preparation: Gather tools and materials. Ensure safety glasses, gloves, and dust mask are on hand.
- Assess Hole: Evaluate hole size, condition, moisture, and remove loose debris. Check if backing is needed.
- Main Work: Apply base layer (1/4″–3/8″), let cure for 24 hours. Add intermediate layers (1/8″–1/4″) every 24-48 hours until desired depth reached.
- Final Finish: Apply final finish layer (1/16″–1/8″). Let cure for 72 hours before sanding and priming.
- Cleanup: Clean tools, dispose of waste properly. Check finished patch for flushness with surrounding wall.
Applying the base/structural layer
Forming a stable base layer is crucial to prevent shrinkage and ensure durability. Here’s how:
Choose a fast-setting or structural plaster mix for your base layer. This provides better adhesion and reduces shrinkage.
Ensure proper bonding by wetting the surrounding sound plaster before applying the patch. This helps create a strong bond between old and new plaster.
Apply the base layer (1/4″–3/8″) in one go, embedding any reinforcement materials as needed. Fill large voids with a slightly oversized initial fill to account for shrinkage during curing.
Intermediate layers and managing drying times
Applying intermediate layers helps build up depth gradually, preventing cracking due to rapid drying or excessive thickness.
After the base layer has cured for 24 hours, apply the first intermediate layer (1/8″–1/4″). Let it cure for another 24-48 hours before adding the next layer. This allows each layer to gain some strength before additional weight is added on top.
Protect your patch from rapid drying by keeping the area moist with a damp cloth or plastic sheeting. However, ensure adequate ventilation to prevent trapped moisture causing mold growth.
Check for readiness before applying each new layer. The surface should be firm and no longer sticky to touch.
Final skim and feathering into surrounding plaster
The final skim coat provides a smooth finish, blending the patch with the existing wall texture. Here’s how to apply it:
After the last intermediate layer has cured for 72 hours, lightly sand the surface using fine-grit sandpaper (120-220 grit). This helps the final layer adhere better and creates a smoother finish.
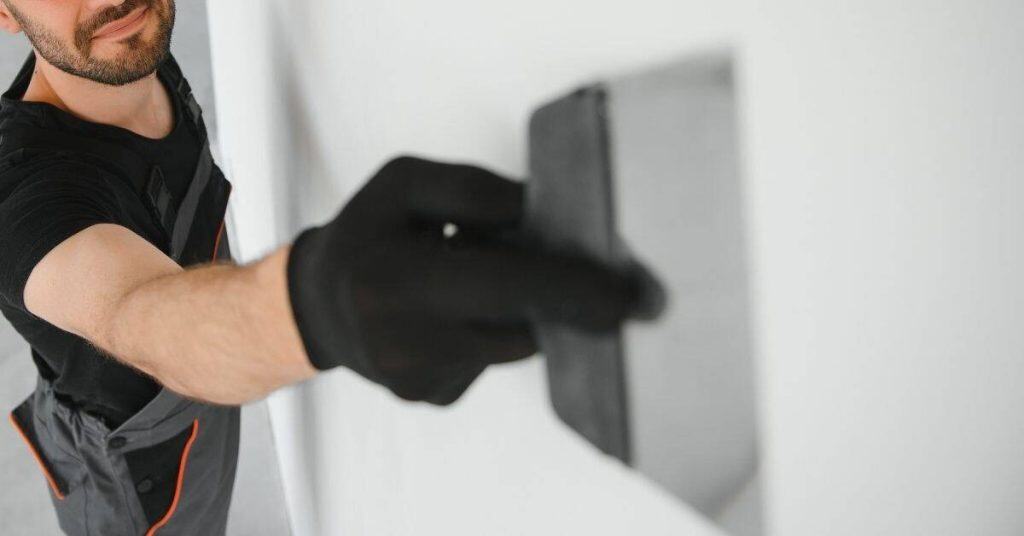
Apply the final skim coat (1/16″–1/8″) using a broad knife or trowel. Feather the edges into the surrounding plaster to create a seamless blend, ensuring no visible joint lines remain.
Let the final layer cure for 72 hours before priming and testing for flushness with the surrounding wall. If any cracking or settling occurs during curing, troubleshoot by checking for proper curing times, moisture levels, and ventilation.

Techniques for Different Hole Sizes and Wall Types
Small nail holes can be treated with quick-dry patches that minimize texture mismatch, followed by light sanding and a thin primer. Medium holes typically need a backing with thin, layered applications to prevent sag and a feathered edge for a seamless blend.
Deep or large holes require a sturdy backing and successive coats with attention to drying between layers. For plaster over lath, address movement around the lath with embedded support and a finish coat that matches surrounding texture. In plasterboard or masonry, select the appropriate patch and backing and build up in thin coats for a smooth result.
Small and Medium Holes (Simple Patch Workflows)
For small nail holes, speed is key. Use a quick-drying lightweight filler or spackle.
Apply thinly, sand lightly after drying, then prime with a thin coat before repainting to minimize texture mismatch.
Medium holes (3/8″–1/2″) need backing to prevent sagging. Use paper or fiberglass mesh backed with joint compound or plaster patch.
Build up in thin layers, key the surface, and feather edges for a smooth finish.
Large or Irregular Holes and Lath/Plaster Repairs
For deep or large holes, use a sturdy backing like hidden lath, metal mesh, or scrap plasterboard.
Apply successive coats of patch material, allowing proper drying between layers to avoid shrinkage. For plaster over lath repairs, address movement by embedding support with lath strips or mesh.
Use plaster patch or veneer plaster and finish with a skim coat to blend with surrounding plaster. If the hole is deeply recessed in plasterboard, use a drywall repair patch or mesh followed by joint compound in multiple thin coats.
Clamp or attach backing if needed, then sand smooth for a seamless finish.
Curing, Sanding, and Finishing for a Seamless Repair
Verify cure for each layer by checking tack-free dryness and surface hardening before proceeding. Use a practical test to ensure there are no imprint marks and that moisture levels are suitable for the next coat. Plan the sequence to avoid trapping damp layers beneath dry ones.
Follow a sanding progression that protects thin spots: start with a coarser grit for leveling and move to finer grits for feathering. Prime and seal the repaired area to promote uniform paint adhesion, then perform final checks for a flush finish and consistent texture with the surrounding wall.
Preventing common finishing problems
Over-sanding can cause thin spots and expose the substrate. Keep an eye out for bare patches while sanding.
Ghosting happens when moisture from the patch wicks into surrounding plaster, causing discoloration. Prime before patching to prevent this.
Visible seams occur if you don’t feather your final layer well enough. Take your time at this stage to avoid them.
Paint absorption differences can make the repair stand out. Test paint on a small area first to ensure even coverage.
Texture matching and final painting
For textured walls, use a texture spray or comb the final layer to match the surrounding wall. Work in small sections for best results.
When painting, start from the top and work your way down to avoid lap marks. Use a primer-sealer to ensure uniform paint adhesion.
Check for any missed spots or visible seams before stepping back to admire your work. A simple damp-ding test can help reveal these issues.
Safety first: Ensure proper ventilation when painting and sanding. Wear a mask and goggles to protect yourself from dust and fumes.
Troubleshooting, Common Mistakes, and How to Fix Them
The most common mistakes include overfilling, insufficient drying time, choosing the wrong product, or skipping backing. Each issue has a practical corrective step and a preventative habit to adopt in future patches. Identify the symptom, then adjust technique or material choice accordingly.
Develop a troubleshooting workflow: confirm hole depth and shape, verify backing compatibility, and test adhesion before moving on. Match backing options to the repair and ensure proper bonding agents are used. Finish with careful feathering, priming, and texture matching to prevent recurring problems.
Repairing cracks, sinking patches, or delamination
If you notice hairline cracks, crumbling edges, or your patch feels soft and sinks when pressed, it’s a sign of failure. Stop work immediately.
Remove the compromised material using a scraper or chisel. Clean the area thoroughly to remove any dust or debris.
Reassess the hole depth and shape. If necessary, reapply backing material and repeat the layering strategy, ensuring each layer is thin and allowed to cure properly before applying the next one.
For persistent issues, consider using a bonding agent to improve adhesion or reinforce with mesh or foam before reapplying patch compound.
When to call a professional
DIY repairs are not recommended for large structural damage. If the hole is bigger than your fist, or if you suspect there’s hidden damage behind the plaster, stop and consult a pro.
Persistent moisture problems, mold, or any signs of concealed wiring issues should also prompt a call to a professional. These issues can indicate serious underlying structural problems that require expert attention.
Before calling, gather information about the issue. Take photos, measure the affected area, and note any relevant details. This will help the contractor provide an accurate assessment and quote.
For complex repairs or when in doubt, it’s always better to err on the side of caution and bring in a professional.
Cost, Time Estimates, and Material Planning
Estimate material quantities based on hole size and the expected number of layering passes, considering the patch mix, bonding agent, and any additives for shrinkage control. Keep a rough tally of supplies as you plan the sequence of work. Use a conservative approach to avoid mid-project shortages.
Plan realistic times for prep, mixing, application, and cure between coats, noting that drying times vary with humidity and ventilation. Consider different patch formulas and compatibility notes, along with tools and waste disposal requirements. Build in contingencies for larger voids or extended drying if needed.
Material quantity guide and shopping tips
The right materials make all the difference. Here’s a guide to help you choose wisely.
- Small holes (up to 6″): You’ll need about 1-2 bags of joint compound, 1 tube of primer, and 1 roll of mesh tape per hole. Look for products with good adhesion and minimal shrinkage.
- Medium holes (6″ – 1 ft): Plan for 2-3 bags of joint compound, 2 tubes of primer, and 2 rolls of mesh tape. Consider using a polymer-modified patch mix for better flexibility.
- Large holes (over 1 ft): You’ll need 4-5 bags of joint compound, 3-4 tubes of primer, and 3-4 rolls of mesh tape. Think about using a cementitious patch mix with shrinkage-control additives for deep repairs.
- Bonding agent: Buy enough to cover the area twice (one pass for priming, one for bonding). Look for products that promote strong adhesion and prevent cracking.
- Shrinkage-control additives: Follow package instructions for usage. These help prevent cracks due to drying shrinkage.
Project timeline example
Here’s a sample timeline for repairing a deep hole in plaster, assuming average conditions (70°F, 50% humidity).
Day 1: Prep work – cleaning, sanding, and applying primer. Allow 2 hours for drying.
Day 2-4: Apply the first three layers of patch mix, allowing 24 hours cure time between each layer. This includes mixing (30 min), application (1 hour per layer), and curing.
Day 5-7: Apply final skim coat, feathering into surrounding plaster. Allow 24 hours for drying before sanding lightly. Let it dry another day before painting.
Conclusion
Keep the hole sized and shaped for a solid patch, then build up with a careful layering approach so you get a durable, flush finish without future shrinkage. The right sequence and proper curing protect against cracking, save time, and keep your wall looking even and strong.
Check your plan as you go: verify the hole edges are clean, test a small area first, dry-fit your patching layers, and apply each coat with enough time to set before the next. Ensure you have the right tools and materials on hand, protect surrounding surfaces, and clean as you work so you don’t introduce dust or debris into the repair. Focus on gradual buildup, not trying to fill the depth in one shot.
Common mistakes to avoid include using too much compound at once, skipping safety steps, and rushing the curing stage. Safety first means wearing eye and skin protection, keeping dust down, and letting each layer cure fully before sanding. If you’re unsure about wall type or need to repair a hole larger than a manageable patch, stop and reassess rather than forcing a quick fix.
If the hole is in a structurally critical area, or you hit unexpected issues like damp plaster or suspect hidden damage, call a professional. When in doubt, a quick consultation can save time and money. Stay methodical, stay patient, and you’ll finish with a solid patch that lasts.
FAQ
What filler product should I use for deep plaster holes?
Look for a plaster patch compound or a multi-layer repair plaster designed for plaster walls. It should cure well when layered and resist shrinking. Check the label for setting time and bonding to plaster; if unsure, ask for guidance from the manufacturer or your local supplier.
How should I prepare the hole before filling?
Remove loose material and clean out dust from the hole. Lightly dampen the area to improve adhesion, then roughen smooth edges so the first layer can grab better.
Describe the layering technique for deep holes.
Fill in shallow passes, pressing each layer in and letting it grab before the next one. Build up the repair in steps until it’s slightly proud of the surface, then feather the edges to blend with the surrounding plaster.
How do I finish and cure safely?
Let the patch cure according to the product label and avoid forcing drying with heat or fans. Once firm, sand with fine grit until smooth, wipe away dust, then prime and paint to match the wall.