
Introduction
Lime plaster compatibility means using a mix that can bond to existing walls without trapping moisture.
It requires considering the old wall material and ensuring the new plaster can move with it. Always check the wall for moisture or stability before patching.
To patch, clean and roughen the surface, then apply a lime-based plaster that matches the old wall. Keep an eye on breathability and seek guidance from labels or local rules if unsure about compatibility. Work in thin coats and monitor for cracks to catch future failures early.
Key takeaways
- Assess substrate compatibility with lime repairs before patching old walls
- Identify moisture sources and porosity to avoid trapped moisture issues
- Match lime type and hardness to existing materials for durable patches
- Use breathable finishes and avoid cementitious paints that block lime
- Prime substrate lightly and test adhesion on inconspicuous area first
- Wear PPE and follow local safety guidelines when mixing lime
Table of Contents
- Introduction
- Key takeaways
- Why Compatibility Matters for Lime Repairs
- Diagnosing the Existing Wall Before Patching
- Principles of Material Compatibility
- Choosing the Right Lime and Additives
- Surface Preparation and Keysite Priming
- Mix Design, Layering and Application Technique
- Curing, Drying, and Environmental Controls
- Finishes, Paints and Coatings That Maintain Compatibility
- Conclusion
- FAQ
Why Compatibility Matters for Lime Repairs
Incompatibility can leave you with debonding, visible cracks, and moisture getting trapped behind the patch. Salt migration and efflorescence are common signs that the repair isn’t moving with the wall. Over time, historic and modern walls suffer as the repair becomes a separate, failing layer.
Choose materials that move and breathe with the wall to avoid future failures. If you’re unsure, check the product label, manufacturer instructions, or local guidance before proceeding, and consider a small test area to confirm behavior with your wall.
Objectives of a compatible patch
When you’re repairing old lime plaster walls, ‘compatible’ means the new patch should behave like the existing substrate. This means it should have similar physical properties, chemical makeup, and moisture behavior.
Here’s what you’re aiming for:
- Similar expansion and contraction: Both old and new should expand and contract at the same rate with temperature changes.
- Matching permeability: They should let in and out the same amount of moisture to prevent stress from buildup.
- Same chemical makeup: This helps avoid reactions that could cause damage over time.
How incompatibility shows up over time
Incompatible repairs don’t show their true colors right away. It’s only after months or years that the problems start to appear.
Here are some signs to watch out for:
- Efflorescence: This is when white, powdery salt deposits appear on the surface. It’s a sign of moisture trapping and salt migration.
- Flaking or delamination: If pieces start falling off or peeling away, it could be due to debonding – where the new patch isn’t sticking properly to the old wall.
- Cracking or differential movement: Cracks appearing at the repair site, or the patch moving differently from the rest of the wall, indicate incompatibility and stress concentrations.
Diagnosing the Existing Wall Before Patching
Start by identifying the substrate type and the layer sequence you’re patching. Assess hardness, porosity, and whether moisture is present. Look for signs of salt contamination and previous repair materials that may not be compatible.
Document what you find and verify expectations with product data sheets, labels, or instructions from the manufacturer. When in doubt, consult a local professional or follow your governing code or guidelines for historic walls.
Identifying substrate materials and layers
The type of material used in your walls significantly impacts how well a patch will hold. Here’s how to identify common substrates:
- Lime Plaster: Looks crumbly, often has a slightly greenish tint; use acid test – vinegar reacts with lime.
- Gypsum (Drywall): Smooth, flat surface; tap to hear hollow sound; use moisture meter to differentiate from cement.
- Cement Plaster: Hard, dense feel; doesn’t crumble easily; use acid test – no reaction.
- Limewash: Thin, often patchy layer; feels slightly powdery; use water test – it may dissolve or darken.
- Painted Layers: Visible color and texture changes; scrape gently to reveal underlying layers.
Moisture and hygroscopic salt checks
Excess moisture and salts can ruin your patch job. Here’s how to check for them:
Moisture: Use a non-invasive moisture meter. Green indicates dampness; red, severe.
For hidden issues, consider specialist thermal imaging or lab analysis of drilled samples.
Salts: Look for efflorescence – white deposits on walls. Scrape gently to check if it’s salt (powdery).
If extensive, call a specialist for testing and advice.
Recording and mapping defects
Systematically documenting defects helps plan your patching job. Here’s how:
Take photographs of affected areas, noting wall orientation.
Draw sketches, marking defect locations and types (cracks, holes, etc.).
Keep written notes detailing observations. This helps identify patterns and prioritize repairs.
Principles of Material Compatibility
Mechanical compatibility means balancing softness and strength so layers don’t crack or debond. Hygric compatibility focuses on vapor permeability and how moisture moves through the wall. Chemical compatibility centers on pH and salts that can drive deterioration.
Explain to yourself why each axis matters for your wall type and patching plan. Always verify with the manufacturer data sheet or instructions to ensure the products you mix align with your substrate.
Mechanical compatibility: stiffness and adhesion
The old plaster wall has been there for years. It’s got its own way of handling stress. When you patch it, the new stuff needs to play nice with the old.
Here’s what matters:
Softness: The patch should be as flexible or slightly softer than the old plaster. This helps reduce stress concentrations where they meet. Too hard and it’ll crack under pressure.
Adhesion: It needs to stick well to the old wall. Poor adhesion means peeling, flaking, and eventually failure.
Hygric compatibility: breathability and moisture transport
Lime plaster loves to breathe. It’s how it stays healthy. When you patch, you need to keep that breathability going.
Here’s why:
Moisture cycling: Lime plaster absorbs and releases moisture as humidity changes. A non-breathable patch traps dampness, leading to mold and damage.
So, use a permeable material for your patch. Let the wall breathe easy.
Chemical compatibility: salts and pH interactions
Lime plaster loves its alkaline environment. But some things can mess with that, causing problems over time.
Here’s what to check:
Soluble salts: These can crystallize when the wall dries, pushing out and damaging the plaster. Before you patch, test for salt deposits.
Reactive cements: Some modern cements are too acidic or reactive for lime plaster. They can mess with its pH balance, causing damage. Avoid these in your patch.
Choosing the Right Lime and Additives
Non-hydraulic lime putty, hydraulic limes, and lime-cement mixes each set differently and offer various strengths. Think about what the patch will endure and how the surrounding material behaves. The goal is a patch that behaves like the wall, not a rigid island.
Compare options using the product label and installation instructions, then verify suitability for historic repairs with the manufacturer or local guidelines. If uncertain, select a lime-based option and avoid untested mixes without guidance.
When to use lime putty vs hydraulic lime
Choosing between lime putty and hydraulic lime depends on your wall’s needs. Lime putty, being non-hydraulic, sets by carbonation – it’s great for internal repairs where walls can dry out slowly. It’s flexible, breathable, and ideal for matching historic finishes.
Hydraulic limes set through hydration, making them faster-setting and stronger. They’re perfect for external repairs or areas exposed to moisture. However, they’re less breathable than lime putty. Use NHL 3.5 (air-lime) for most repairs; it’s a good balance between strength and breathability.
For critical repairs needing high strength, consider lime-cement mixes. But remember, cement reduces breathability – use sparingly and only where necessary.
Acceptable additives and aggregates
Use compatible aggregates for your mix. Sharp sand is usually best, but consider using a fine aggregate like ‘dust’ or ‘all-in ballast’ for better workability in thin coats.
Particle grading matters. A well-graded aggregate ensures good compaction and strength. Check your aggregates’ particle size distribution to ensure they’re suitable.
Safe admixtures include natural fibers (like horsehair) for added flexibility, or pozzolans (like silica fume) for increased strength. Always verify with product data and conservation guidance before using.
Avoiding incompatible materials (cement, modern gypsum)
Using the wrong materials can lead to failure. Historic lime substrates need compatible repairs.
- Cement-rich mortars: They’re strong but don’t breathe. This causes moisture buildup, leading to cracking and weak bonds. Look for low-cement or no-cement mixes; avoid high cement content.
- Modern gypsum products: Gypsum plasters are incompatible with lime. They set too fast, causing stress on the wall. Use only where absolutely necessary and ensure proper priming first.
- Concrete: Too strong for most repairs. It causes stress on historic walls, leading to cracking. Stick to lime-based mixes.
- PVA: While it improves bond strength, excessive use can cause long-term issues. Use sparingly and only where needed.
- Plasticizers: These improve workability but reduce breathability. Use only when necessary; consider alternatives like natural pozzolans.
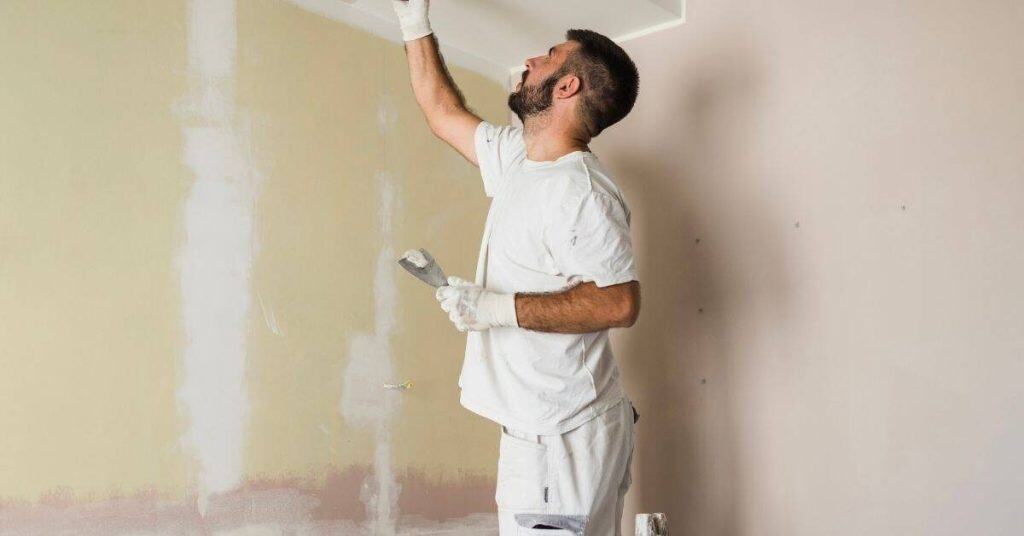
Surface Preparation and Keysite Priming
Clean the surface to remove loose material without digging into sound fabric. Consolidate fragile edges and trim back protrusions to create a clean, stable edge. Establish a mechanical key that won’t harm the historic material.
Follow edge preparation and priming methods per product instructions and your own judgment on substrate condition. If you’re unsure, check the label, manufacturer guidance, or a qualified craftsman for recommended primers and conditions.
Removal of unstable material and feathering
The choice of removal method impacts the final result. Removing unstable material ensures a solid base for your new lime plaster.
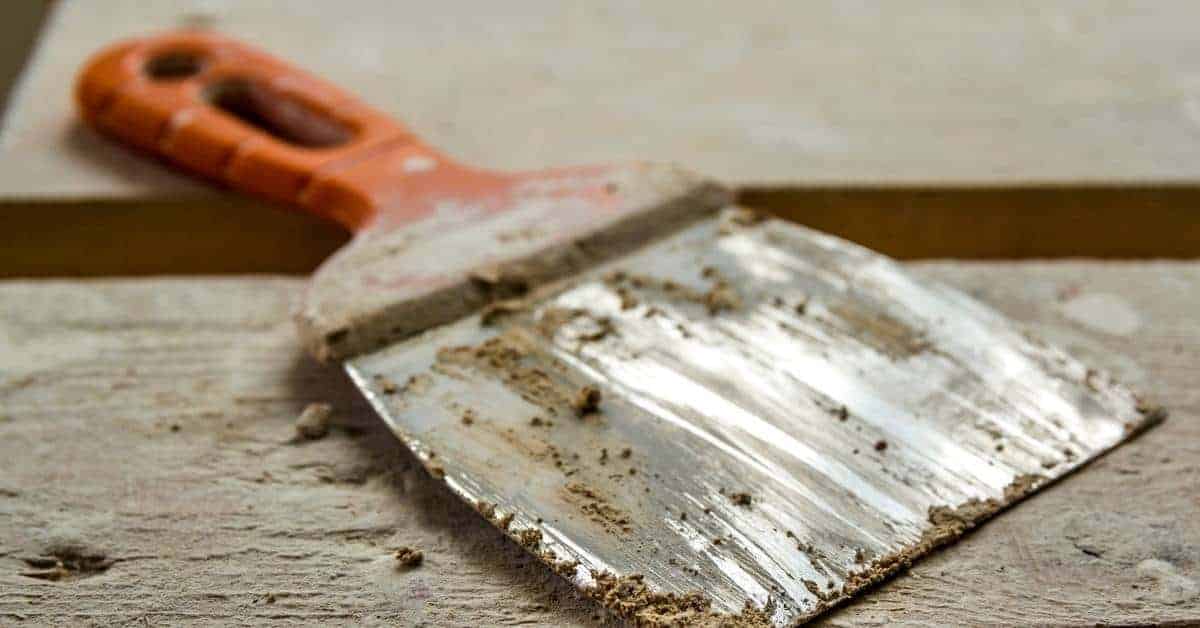
- Loose Plaster: Use a sharp, flat tool to carefully scrape off loose material. Be patient; rushing can damage the substrate.
- Feathering: Acceptable when the existing surface is stable and sound. Use a damp sponge to soften edges for blending with new plaster.
- Defined Repair Edge: For large repairs, create a defined edge using a sharp tool to prevent new plaster from crumbling into the old.
- Avoid: Using power tools like angle grinders. They can damage historic material and cause dust-related health issues.
- Wrong Material: Removing too much stable material weakens the wall, leading to cracking or staining.
Consolidation and primer options
Friable surfaces need consolidation for a strong bond. Use a lime-based consolidant, not cement or gypsum.
Lime Wash: Apply with a brush, allowing it to soak in. Repeat until the surface is stable but not saturated.
For priming, use breathable primers that allow moisture transport. Bonding agents can trap moisture, leading to failure.
Breathable Primers: Use lime-based or silicate primers. Apply thin coats, allowing each to dry before the next.
Salt remediation and isolation
Salts can cause new plaster to fail. Manage them with desalination poultices or sacrificial renders.
Desalination Poultices: Apply clay-based poultices, leaving them on until they harden. Remove, and repeat if necessary. This draws out salts but may take time.
For severe cases, use a Sacrificial Render: A thick lime render that absorbs salts before replastering.
Isolation: Before replastering, isolate salts with a layer of salt-resistant material like a lime-based render or a special membrane. This prevents new plaster from being affected by salts in the substrate.
Mix Design, Layering and Application Technique
Use a multi-coat approach with a scratch coat, a brown or float coat, and a final finish coat. Keep layer thicknesses consistent and ensure each layer can move with the wall. Poor sequencing is a common source of interlayer failure.
Align timing and workability with the product data sheet or manufacturer guidance, and adjust for environmental conditions per local rules. When in doubt, verify the recommended timing and cure expectations with the product instructions.
Layer sequencing and timing
Timing is crucial in concrete application. You don’t want to rush it or let it sit too long.
First layer: Apply the base layer, then check base compaction. Let it set for about 24 hours before applying the next layer. This gives it time to gain strength and prevents delamination.
Subsequent layers: Each following layer should be applied after the previous one has started to lose its gloss but is still tacky. This usually takes around 16-24 hours, depending on weather conditions. Check product labels for specific recommendations.
Final tip: Don’t overwork or apply too many layers at once. This can cause premature stiffening and weaken the final product.
Matching texture, thickness and aggregate grading
When fixing concrete, you want your repair to blend in with the existing surface. Here’s how to get that natural look:
Texture: Use a wire brush or scarifier to roughen up the edges of the repair area. This helps the new concrete bond better and reduces visible lines.
Thickness: Match the thickness of the existing concrete. If you’re adding more than 1/2″ (13mm), you’ll need to use a stronger mix design. Check your local codes for specific rules on repair thickness.
Aggregate grading: The size and type of aggregate in your mix should match what’s already there. Check the existing concrete or ask your local ready-mix supplier for advice. A good rule of thumb is to use a mix with aggregates no larger than half the thickness of your repair.
Tools, Tack and Profiling for Repairs
Before you start patching, gather your tools. You’ll need a trowel, a stiff-bristle brush, a whisk broom, and maybe an angle grinder with a diamond blade.
Tack coat: This is a thin layer of fresh concrete that improves adhesion. Don’t skip it, even if you’re in a hurry. Check your product label for the right mix ratio. Apply it evenly using a stiff-bristle brush or a trowel.
Profiling: This creates mechanical keys to help the patch stick. Here’s how:
- Use a whisk broom to remove any loose material from the repair area.
- With an angle grinder, roughen up the edges and bottom of the repair area. Be careful not to go too deep or you’ll weaken the base.
- Check base compaction: Before patching, make sure the base is well-compacted. Use a tamper if needed.
Now you’re ready to mix and apply your patch. Remember, the key to a durable repair is good preparation. Don’t rush through these steps.
Curing, Drying, and Environmental Controls
Control curing by managing temperature, humidity, and ventilation during the early hours and days after application. Avoid rapid drying that causes cracking or uneven shrinkage. Protect the patch from driving rain and freeze-thaw cycles until it reaches initial set.
Consult the product label or manufacturer instructions for curing windows and environmental limits, and follow any local requirements. If conditions aren’t clear, use a conservative approach and verify with guidelines or a professional.
Controlled drying and protection
Lime plaster needs gentle, controlled drying to prevent cracks. Rapid drying or freezing can cause it to shrink too quickly, leading to failure.
Here’s what you do:
Shade the area from direct sunlight using temporary screens or covers. This slows down evaporation and keeps the plaster cool.
Gently mist the surface with water a few times a day. This helps maintain a consistent moisture level, preventing rapid drying.
Set up wind breaks using cardboard or plastic sheets to protect from drafts and wind. This keeps the plaster from drying out too fast.
Monitoring moisture after repair
Before decorating, you need to ensure your lime plaster is dry enough. Too much moisture can cause paint or wallpaper to peel off.
Use a moisture meter. Insert probes into the plaster at various depths and locations. Aim for readings below 18% – if it’s higher, wait longer before decorating.
Check for condensation on the surface in the mornings. If you see water droplets, the plaster isn’t dry enough yet.
Be patient. Lime plaster dries slowly, so don’t rush redecoration. It’s better to wait too long than not long enough.
Finishes, Paints and Coatings That Maintain Compatibility
Choose breathable finishes such as limewash or mineral paints to let moisture escape naturally. These finishes support ongoing compatibility with historic walls. Avoid impermeable acrylics that can trap moisture and cause damage over time.
Check that the finish is compatible with your lime system by reading the label or manufacturer instructions, and consider local historic guidelines. If you’re unsure, test on a discreet area and confirm compatibility before full application.
Choosing breathable paints and finishes
When it comes to finishing your lime plaster walls, you want to maintain their natural ability to breathe. This means using coatings that allow moisture to evaporate through them.
Look for breathable, mineral-based paints and limewashes. These are made from natural ingredients like clay, chalk, or lime, which make them permeable to water vapor.
Stay away from impermeable acrylics and oil-based paints. They trap moisture in the wall, leading to potential issues down the line.
Decorative matching vs performance
It’s tempting to want your new repairs to match the existing walls exactly. But remember, aesthetics should not compromise performance. Your plaster needs to be able to handle moisture effectively.
If you’re using a limewash or mineral paint that matches your old walls perfectly, great! If not, don’t worry about it too much. What’s important is that the new plaster can breathe and manage moisture like the old stuff.
In some cases, you might need to compromise on color or texture for the sake of long-term performance. It’s better to have a wall that looks slightly different but will last, than one that looks perfect but fails due to trapped moisture.
Conclusion
Getting this right keeps your wall durable, safe, and looking good for years. When the lime repair is compatible with the existing wall, the patch won’t crumble, pop, or trap moisture, and you’ll avoid costly fixes later.
First, verify compatibility with a small test patch, confirm the lime type and any additives you plan to use, assess the substrate and keysite, prime as needed, design the mix for the wall section, apply in the correct layered order, and control curing, drying, and environmental conditions before finishing with a compatible coating. If any step feels unsure, test in a corner first and proceed only after the patch behaves well in that area.
Common mistakes to avoid: mixing in materials that aren’t lime-based or using cement in a lime repair, skipping the surface preparation or keysite priming, or applying too thick a patch and sealing in moisture. Always work in a well-ventilated space, wear appropriate safety gear, and test patches in a discreet spot before full-scale work. If moisture, salt, or structural issues are present, or the wall is heavily damaged, pause and re-check with a professional.
If the surface shows dampness, salts, or uncertain history, or you’re unsure about the substrate, call a pro rather than pushing ahead. With careful planning and steady steps, you’ll patch once and keep the wall working as it should for the long haul, not just today.
FAQ
How do I know if patching will fail later due to incompatibility?
If the old wall is lime-based, use lime or lime-putty repairs. If it’s cement or gypsum, patching with lime can crack or detach. Check the wall material and the patch product label for compatibility notes.
What should I check on the patching product before buying?
Read the manufacturer instructions for compatibility with lime and existing finishes. Look for guidance on lime mortars, binders, and suitable substrates. If in doubt, ask a store rep or consult the product datasheet.
How should I test the wall before committing to a patch?
Do a small test patch in an inconspicuous area. Observe adhesion, drying, and any cracking after a few days. If you see failures, reassess the material choice and primer requirements per the wall type.
What if the wall has moisture or salts present?
Moisture or efflorescence can ruin patches. Resolve moisture sources first and follow guidance for breathable finishes. If unsure, check local guidelines or the product instructions for moisture handling and compatible primers.