
Introduction
Horsehair plaster is plaster reinforced with animal hair to add strength. You can spot it by a fibrous texture and an uneven surface that feels a bit springy. Handle repairs with care and aim to match the look and feel of the surrounding area.
To identify it, look for a plaster layer with visible fibers and a softer finish beneath the surface. Choose repair materials that are compatible with the old binder and substrate, and always read the product label for mixing and set times. If in doubt, ask at the store or check the manufacturer guidelines and any local rules that apply to your project.
Key takeaways
- Inspect plaster surfaces for hair strands; older builds show visible fiber patterns.
- Test a small area non-destructively before scraping or mixing repair mortars.
- Wear eye protection and dust mask; horsehair plaster dust is irritating.
- Choose compatible lime-based or lime-putty repairs; avoid modern cement-only mixes.
- Document surroundings before repair: note lath, plaster thickness, and water damage.
- If tests confirm uncertainty, consult a licensed pro for confirmation.
Table of Contents
- Introduction
- Key takeaways
- What Is Horsehair Plaster?
- Visual Checkpoints for Identifying Horsehair Plaster
- Non-Destructive Onsite Tests and Observations
- When and How to Get Confirmatory Testing
- Common Failure Modes and Diagnostic Signs
- Principles for Choosing Compatible Repair Materials
- Practical Repair Approaches for Common Issues
- Tools and Materials Checklist (DIY-Friendly)
- Conclusion
- FAQ
What Is Horsehair Plaster?
Horsehair plaster is an old plaster mix that uses hair to reinforce a lime-based binding. The basic setup is a lime plaster binder with horsehair woven in, applied in thin layers over wooden lath. You’ll find it in many historic houses and older building types.
It behaves differently from modern plaster, so repairs need to respect its layering and texture. For DIY work, match the old method as closely as you can and follow the product label or manufacturer instructions if you’re purchasing materials. If you’re unsure about the process, check local guidance or seek experienced help before tearing into a wall.
Composition and typical layer structure
Horsehair plaster is made up of a binder, aggregate, and animal fiber. The binder can be either lime or gypsum, which holds everything together. The aggregate provides texture and bulk – it’s usually sand or another fine material. The horsehair itself acts as reinforcement, adding strength to the final product.
The plaster is typically applied in two coats: the scratch coat and the brown coat. The scratch coat goes on first, providing a rough surface for the second coat to adhere to. The brown coat is the final layer, giving the wall its smooth finish.
Historical context and where to expect it
Horsehair plaster was commonly used in the late 19th and early 20th centuries. You’ll find it in many older homes from this era, particularly in urban areas. It was often used in buildings like schools, hospitals, and apartment blocks.
Inside the home, horsehair plaster is typically found on interior walls and ceilings. It’s rarely used on exterior surfaces due to its susceptibility to moisture damage. If you’re renovating an older home, it’s likely that any original plaster walls will be made from this material.
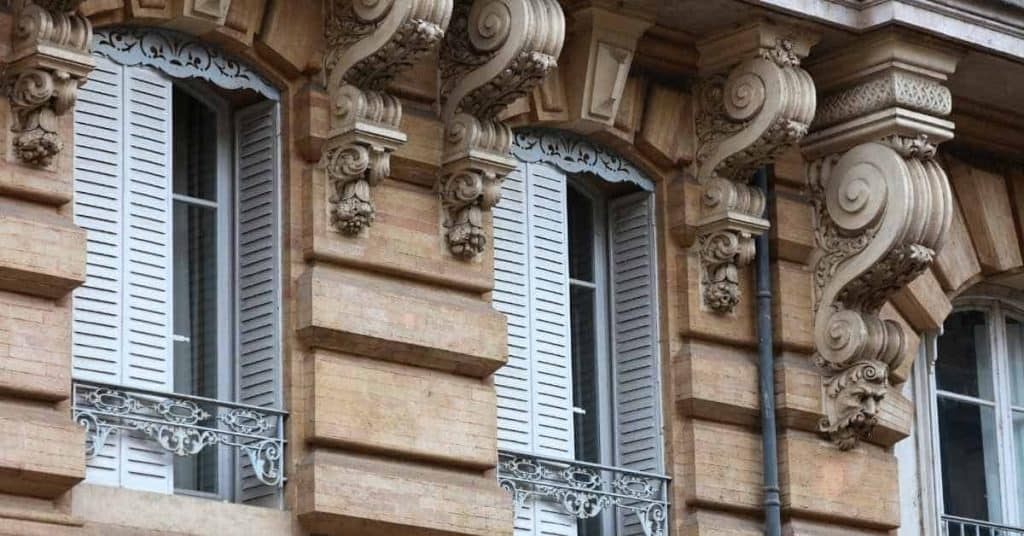
Visual Checkpoints for Identifying Horsehair Plaster
Before testing, inspect the surface with your eyes and hands. Look for a rough, fibrous texture and any hair strands visible in the plaster. If you can see wood lath patterns behind, that helps confirm the setup.
These signs help you identify horsehair plaster without tearing into it, so you can plan repairs without making a mess. Noting texture, hair visibility, and lath pattern now saves headaches later and reduces the risk of damaging the wall.
Surface texture and tool marks
Before you start any repair work, use this checklist to identify horsehair plaster by its distinctive surface textures and trowel marks.
- Rough, uneven surface: Unlike smooth gypsum board, horsehair plaster has a rough, uneven texture due to the aggregate used.
- Visible trowel marks: Look for wide, shallow grooves left by the trowel’s edge. Modern plasters have narrower, deeper grooves.
- Finishing techniques: Check for ‘floating’ or ‘skimming’ techniques used to embed hair and fibers into the plaster.
- Orange peel effect: Some horsehair plasters may exhibit an orange peel-like texture, especially in older homes.
- Cracking patterns: Hairline cracks running parallel or diagonally indicate horsehair plaster. Modern gypsum board cracks randomly.
- Color variation: Horsehair plaster often has color variations due to the natural aggregates used, unlike uniform gypsum board.
- Aging signs: Look for discoloration, efflorescence (salt deposits), or other signs of aging that modern plasters don’t exhibit.
- Tool marks at edges: Check for trowel marks near edges and corners, indicating hand-applied plaster.
Quick rule: If you’re unsure, compare the suspected horsehair plaster with a known sample or consult a professional.
Lath, nail patterns, and edges
Inspect damaged edges and trim junctions to identify lath, nail patterns, and other clues that point to horsehair plaster.
- Wood or metal lath: Look for visible wood strips (lath) or metal mesh behind the plaster. Modern gypsum board doesn’t require lath.
- Lath spacing: Check if laths are spaced about 12-16 inches apart, typical for horsehair plaster construction.
- Nail or tack evidence: See small nail or tack heads poking through the plaster at lath edges. Modern plasters use screws or no fasteners.
- Edge damage: Look for crumbling, chipped, or broken edges that reveal lath and nails beneath.
- Trim junctions: Check where trim meets the wall. If it’s tight against the plaster with no gap, it’s likely horsehair plaster.
- Lath width: Measure lath width; if it’s around 3-4 inches, it’s consistent with older construction methods.
- Nail spacing: Check if nails are spaced evenly along the lath, typically every 6-8 inches apart.
Quick rule: If you find a mix of wood and metal lath with consistent nail patterns, it’s likely horsehair plaster.
Hair/fiber evidence and scraping indicators
Gently scrape a small area to reveal fibers and confirm the presence of horsehair plaster. Be careful not to damage the surface.
- Scrape gently: Use a sharp, flat tool like a utility knife or a thin-bladed trowel to carefully scrape away a small amount of plaster.
- Look for fibers: Expose any visible horsehair, straw, or other fibers embedded in the plaster. Modern gypsum board doesn’t contain fibers.
- Hair orientation: Check if fibers run parallel to the surface and are evenly distributed throughout the plaster.
- Fiber appearance: Horsehair should look like thin, dark brown or gray strands. Straw fibers will be yellowish or light-colored.
- Avoid deep scraping: Scraping too deeply can damage the lath and weaken the plaster’s structure.
- Test multiple areas: Fibers may not be visible in every part of the wall, so test several spots if needed.
Quick rule: If you find fibers running parallel to the surface and evenly distributed, it’s likely horsehair plaster.
Non-Destructive Onsite Tests and Observations
You can spot horsehair plaster on site without sampling by doing simple checks. Look for hair fibers mixed with plaster at cracks or exposed edges. Tap or knock the wall and listen for a solid, non-hollow sound.
These checks help you decide next steps and avoid guessing. If you’re unsure, check the product label or manufacturer guidance for what a plaster with hair should look or sound like.
Sound and tapping test
Horsehair plaster has a distinct sound when tapped, unlike modern drywall or veneer plasters. Here’s how to tell:
Tap the wall gently with your knuckles. Listen for the resonance. Drywall will sound dull and dead. Veneer plaster might have a slight echo but not like horsehair.
Now, tap on suspected horsehair plaster. You’ll hear a hollow, somewhat echoing sound. It’s due to the space between the laths and the plaster layers. This indicates it’s likely horsehair over lath construction.
Probing, edge inspection, and lighting
Before you start poking holes, use this checklist to confirm your suspicions. It’s best done when the sun is low or use a flashlight.
- Check cracks: Look for hair fibers sticking out of cracks. If present, it’s a good sign of horsehair plaster.
- Inspect edges: Feel and look at the edges where walls meet ceilings or floors. You might see lath marks or fibers.
- Backlighting: Hold a flashlight against the wall. If it’s horsehair, you’ll see shadows from the laths behind the plaster.
- Dust inspection: Gently scrape at cracks with a screwdriver. If there’s dust but no fibers, it’s likely not horsehair.
- Trim gaps: Look for hair fibers in gaps around trim or where walls meet.
- Layer thickness: Try to see the layer thickness by looking at nail holes or deep cracks. Horsehair plaster is usually thicker than veneer.
- Avoid skipping: Missing these signs might lead you to repair with wrong materials, causing more damage.
Quick rule: If you’re unsure, probe gently with a screwdriver or awl. A little hole can save a lot of trouble later.
Moisture and efflorescence observation
Moisture damage, salts, or staining can affect your identification and repair choices. Here’s what to look for:
Check for water stains on the ceiling or walls. These could indicate moisture issues that might affect your repairs.
Look out for efflorescence: white, powdery deposits on the surface. It’s a sign of salt buildup due to moisture. If present, you’ll need to address the cause before repairing.
Finally, feel the wall. If it feels cold or damp to touch, there might be hidden moisture issues that could compromise your repairs. Never ignore these signs; they could lead to bigger problems down the line.
When and How to Get Confirmatory Testing
Destructive testing or lab analysis should be used only when you can’t trust the results from non-destructive checks and you need a real answer about strength, composition, or curing. Plan and limit any sampling to the smallest impact, and use approved methods.
Knowing when to test helps you avoid costly surprises and keeps your project safe. Use ethical, minimal-impact sampling and follow the product label or manufacturer instructions to choose what to test and how to send it to the lab.
Best practices for taking a small sample
When you need to confirm your plaster is horsehair, take a tiny sample. Here’s how:
Minimize damage: Use a sharp utility knife or chisel to carefully remove a sliver about the size of a pencil eraser from an inconspicuous spot like a corner or behind furniture.
Document: Note where you took the sample and its condition. This helps in analysis and repair planning.
What labs can identify and when to use them
Labs can confirm horsehair plaster and provide more info:
Fiber identification: They can verify the presence of horsehair fibers. This is useful if your visual checks are inconclusive or you suspect a mix of plasters.
Binder type analysis: Labs can determine the binder used (like lime, gypsum). This affects repair strategy and material choice. Use this when you need to match the original plaster exactly, like in historic restorations.

Common Failure Modes and Diagnostic Signs
Common deterioration shows up as cracking, delamination, sagging, or moisture damage. Each pattern points to a different underlying cause, so matching the signs to the right problem helps you pick the fix.
Understanding these patterns saves you from wasting time and money on the wrong repair. When in doubt, check the label or datasheet for guidance, and avoid risky shortcuts that can make things worse.
Cracking patterns and their causes
Horsehair plaster can crack over time due to various reasons. Understanding these cracks helps you pinpoint the issue and plan repairs.
Hairline cracks are thin, usually less than 1/8 inch wide. They often appear due to minor settlement or thermal movement in the building structure.
Mapping cracks follow a distinct pattern, often resembling a map. These are typically caused by impact damage, like a falling object or improper nailing during installation.
Structural cracks, wider than 1/8 inch, signal serious issues. They could indicate significant settlement, structural movement, or even foundation problems. Always consult a professional if you notice these.
Delamination, hollowness, and loss of adhesion
When plaster separates from its lath backing, it’s called delamination. This can lead to a hollow sound when tapped (as you’ve likely checked using the sound test mentioned earlier).
Gently tap the surface with a hammer or knuckle. A dull, hollow sound indicates delamination. The severity determines repair needs – minor issues might require spot repairs, while extensive delamination may need full replacement.
Loss of adhesion occurs when plaster pulls away from the lath due to poor initial installation or deterioration over time. Check edges and corners for signs of this. If you find any, repairs will involve reattaching the plaster to the lath using appropriate adhesives.
Moisture-related decay and biological issues
Prolonged moisture exposure can lead to various problems in horsehair plaster. Check for signs like efflorescence (white, powdery deposits), mold or mildew growth, and a musty odor.
Efflorescence indicates salt deposits from moisture penetration. If left untreated, these salts can cause further damage by pushing the plaster off the lath. Addressing the moisture source is crucial before making repairs.
Mold and mildew growth signal high humidity levels or water intrusion. These can compromise the plaster’s integrity and pose health risks. Remediation involves addressing the moisture issue, cleaning the affected area, and using mold-resistant materials for repairs.
Principles for Choosing Compatible Repair Materials
Choose repair materials that act like the plaster around them. They should flex with movement, breathe to let moisture out, and resist the same chemicals as the original plaster. If they don’t match, cracks and failed repairs follow.
Why it matters is simple: a compatible repair moves and dries with the rest of the plaster. If you pick something that doesn’t breathe or that jars with the original materials, cracks and failures follow. Always read the label and manufacturer directions for breathability and chemical compatibility.
Matching stiffness, adhesion, and curing behavior
Horsehair plaster is soft and flexible. Modern mixes can be too rigid. Use repair mortars with similar stiffness to avoid future cracking.
Adhesion: Ensure the repair mortar sticks well to the original plaster. Poor adhesion leads to delamination. Use compatible adhesives or primers.
Curing behavior: Lime-based plasters cure slowly, unlike modern cements. Match curing times to avoid stress from differential shrinkage.
Breathability and moisture movement considerations
Horsehair plaster breathes, allowing moisture to move through it. Non-breathable paints or sealants trap moisture, causing decay.
Use vapor-permeable materials. Keep the wall able to ‘breathe’ to prevent moisture buildup and efflorescence.
Moisture movement: Plaster expands when wet, contracts when dry. Choose materials that can handle this movement without cracking or delaminating.
Avoiding harmful ingredients and selecting safe additives
Choosing the wrong materials can ruin your repair. Strong setting accelerants or hardeners incompatible with lime-based plaster cause problems.
- Setting accelerants: Too fast a set causes stress, leading to cracking. Avoid products with high accelerator content.
- Hardeners: Some hardeners are incompatible with lime. They can stain the plaster or weaken the bond. Check compatibility before use.
- Additives: Use additives that enhance performance without compromising the plaster’s natural properties. Look for additives designed for lime-based plasters.
- Pigments: Some pigments react with lime, causing staining or weak bonds. Test pigments first to ensure compatibility.
- Avoid: Products with unknown ingredients or those marketed solely for modern cements. They may not work well with horsehair plaster.
Practical Repair Approaches for Common Issues
From small fixes to bigger patches, you can handle common concrete issues without tearing out whole sections. Start with the simplest repair that fits the problem and work your way up only when needed. Focus on choosing materials that match the existing concrete and keep interventions minimal.
That matters because a good match keeps strength and appearance, and it saves you time and money on the job. Using the right approach helps you avoid overdoing it or making the problem worse. Check labels and manufacturer guidance if you’re unsure about compatibility or methods.
Repairing small cracks and hairline splits
First, clean the area. Use a wire brush to remove any loose material.
Choose a compatible filler. Match stiffness, adhesion, and curing behavior with your existing plaster. A good option is a fine, lightweight acrylic filler.
Feather the edges of the crack using a flexible putty knife. This helps create a smooth transition between old and new material.
Apply the filler in thin layers, allowing each to dry before sanding lightly with fine-grit sandpaper. Finish with a light skim coat to blend the repair.
Patching larger areas and rekeying to lath
Prepare the backing by scraping off loose material. Use a utility knife to score the edges of the patch.
Choose a matching mortar. For horsehair plaster, use a lime-based or lime-cement mortar with a similar sand-to-binder ratio as your existing plaster.
Rekey into the lath by embedding the new mortar into the old using a trowel. Work from the center outwards to ensure good adhesion.
Apply finish coats, feathering the edges to blend texture. Use a wide trowel for smooth application and to avoid leaving visible strokes.
Replacing seriously damaged sections or stripping to lath
If the damage is extensive, partial or full removal may be necessary. Use a hammer and chisel to carefully strip back to the lath.
Inspect and repair any damaged lath before reinstalling it. If using new lath, ensure it’s compatible with your existing system.
Reinstall the lath or board-compatible backing. Apply a scratch coat of matching mortar, allowing it to cure properly.
Sequence coats to recreate the original build-up. Start with a base coat, followed by a brown coat, and finish with a topcoat. Feather each layer to ensure a smooth, seamless repair.
Tools and Materials Checklist (DIY-Friendly)
This section gives you a practical, prioritized toolkit of essential hand tools, safety gear, and compatible material options for common repairs. Keep it simple and reliable by choosing versatile tools that cover most jobs. Stick to basics, and note good alternatives if a preferred item isn’t available.
Using the right tools and materials saves time, reduces mistakes, and keeps you safe on the job. Always check the label or datasheet for guidance on use and compatibility.
Essential tools and personal protective equipment
Before you start any repair work, ensure you have the right tools and safety gear to protect yourself and achieve a successful outcome.
- Utility knife: For scraping off loose plaster. Skip this and you’ll struggle with adhesion.
- Hammer and cold chisel: To cut back damaged areas. Without these, you won’t create a sound key for your repair.
- Trowel (3″ – 6″): For mixing and applying repair mortar. A good trowel makes the job easier.
- Putty knife (1″ – 2″): To fill small cracks and crevices. Don’t skip this, or you’ll miss tiny defects that cause future issues.
- Safety glasses: Protect your eyes from dust and debris. No excuses here; safety first!
- Dust mask: To prevent inhaling plaster dust. This is crucial for your health.
- Gloves: To protect your hands from cuts and irritants. Don’t forget to check they’re compatible with the materials you’ll be using.
- Mold-resistant coveralls: To prevent mold growth on your clothes. Moisture is a given in plaster work, so protect yourself.
Quick rule: Always prioritize safety and use the right tools for the job.
Repair material options and selection tips
Choosing the right repair materials is key to a successful, long-lasting fix. Here’s what to consider:
- Lime-based mortars: Traditional, breathable, and compatible with historic plasters. Use for repairs where matching original material is crucial.
- Proprietary repair mortars: Modern, often faster-setting, and designed for specific issues. Ideal for new work or when speed is important.
- Bonding agents: To improve adhesion between old and new plaster. Skip this and your repair might peel off over time.
- Finishing compounds: For matching texture, color, and sheen of the original surface. Don’t skip this; it’s what makes a repair invisible.
- Hairline crack filler: To fill tiny cracks before applying mortar. Without this, you’ll struggle to achieve a smooth finish.
- Primer/sealer: To prepare the surface and prevent moisture migration. Skip this and your repair might fail due to moisture issues.
- Sand (fine to medium): For mixing into mortars to match original texture. Don’t skip this; it’s crucial for a seamless finish.
- Additives (fungicides, accelerators): To enhance performance or speed up curing. Consider these based on your specific needs and climate.
Quick rule: Always match stiffness, adhesion, and breathability to the original plaster for a lasting repair.
Visual checkpoints and finishing guidance
Before declaring your job complete, double-check these visual cues to ensure a successful match:
- Texture: Run your fingers over the repair. It should feel identical to the surrounding plaster.
- Color: Compare under natural light. The repair should blend seamlessly with the rest of the wall.
- Sheen: Check for any gloss or matte differences. A consistent sheen is key to an invisible repair.
- Edges: Ensure all edges are well-defined and blend smoothly into the surrounding plaster.
- Cracks/holes: No visible cracks or holes should remain after finishing.
- Moisture stains: Check for any signs of moisture-related issues. If present, re-evaluate your repair approach.
- Dust/mold: Ensure there’s no residual dust or mold growth on the surface. Clean if necessary.
- Consistency: The repair should look consistent across its entire area and with the surrounding plaster.
Quick rule: A successful repair is one that’s invisible to the naked eye, both in terms of texture and color.
Conclusion
Horsehair plaster requires respect for its fibers and the substrate. When you test, identify, and choose materials carefully, you protect safety, durability, and the look of the finished wall.
Start with a quick visual check to confirm horsehair plaster, then do small, non-destructive tests in a hidden or inconspicuous area. Look for fibers, old lime or gypsum mix, and any signs of moisture or delamination. If a test area shows good adherence and the repair material matches the original performance, proceed by following the compatible-material principles. Always proceed in a small, controlled area first, verify compatibility with the substrate, and limit moisture exposure during any repair work. If in doubt, confirm with simple tests and document observations before expanding.
Common mistakes to avoid are using modern drywall plaster over old horsehair without checking compatibility, neglecting moisture control, and choosing repair products that don’t breathe or bond properly to lime-based mixes. Safety rules: work in a well-ventilated space, wear eye protection and a dust mask, test materials on a small patch first, and keep moisture off intact plaster while you cure. If popping, cracking, or loose sections appear beyond a small test patch, pause and re-evaluate the approach before continuing.
If you encounter uncertain results, or the failed areas are large or structurally critical, it’s wise to bring in a professional. A pro can confirm the mix, select proven compatible repair materials, and prevent costly mistakes. Stay deliberate, document findings, and keep moving with steady, controlled steps toward solid, lasting repairs.
FAQ
How do I know which repair materials will work with horsehair plaster?
Check the manufacturer instructions or product label for compatibility with lime or gypsum-based plaster. Look for notes on bond strength, set time, and finish options. When in doubt, test a small area per the instructions before a full repair.
Can I mix repairs on-site with traditional lime-putty or modern Portland cement?
Yes, but you must match the base material and binder. Lime-based repairs work well with traditional horsehair plaster; cement-based mixes can harden too fast and crack. If you’re unsure, consult the product label or a supplier for a compatible mix type.
What should I do if moisture caused the plaster to fail?
Stop work on the affected area and address moisture first. Dry out with ventilation and dehumidification if needed. Use repair materials rated for damp conditions and test the area after drying before finishing.
How can I test a repair material before applying it to the whole wall?
Do a small patch in a concealed area or a scrap spot. Follow the product’s curing and adhesion guidelines exactly. If adhesion or finish looks off, don’t proceed with a full repair.