
Introduction
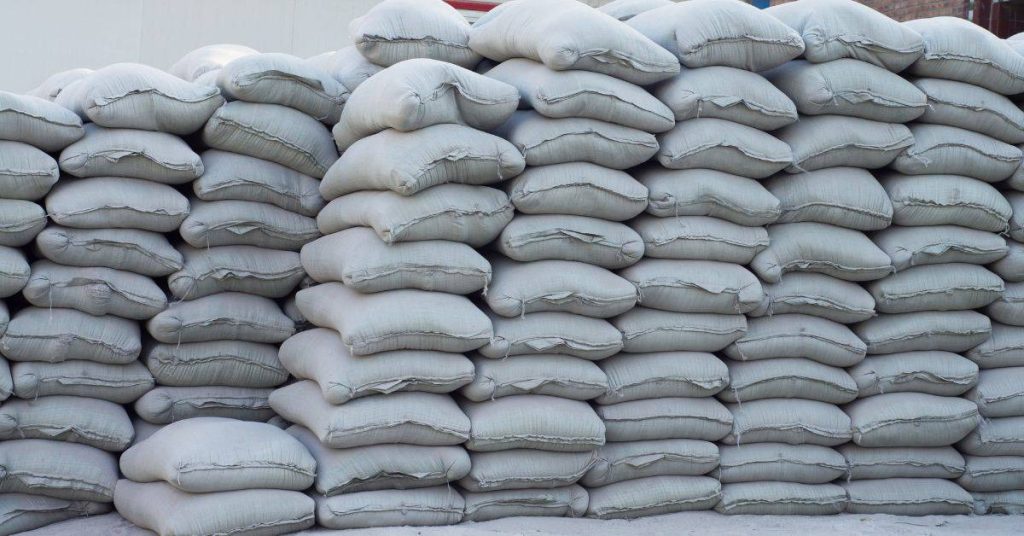
White concrete mix is a cement-based blend designed to produce a light, pale finish for clean architectural pieces.
When choosing cement, look for options that emphasize whiteness and low tint; check the label and manufacturer instructions to understand allowable color ranges. If in doubt, ask the supplier about pigments or whitening additives and how they might affect strength, setting, and finish.
Sand color and plasticizers are what mostly determine the final look and workability of the mix.
Choose sand that stays light when mixed and check whether the supplier can provide whitened or natural options, then verify color through a sample. Plasticizers can improve flow and reduce water demand; read the product label for recommended usage, compatibility with white cement, and any impact on curing.
Key takeaways
- Prioritize white cement with proven purity for clean architectural concrete.
- Select sand color that matches intended white tone without adding dark flecks.
- Test plasticizers compatibility early; check slump and finish impact per product label.
- Plan mix design with trial batches to validate color and workability.
- Wear PPE, use sealed formwork, and finish carefully to minimize imperfections.
- Apply appropriate sealers or surface treatments after curing for longevity.
Table of Contents
- Introduction
- Key takeaways
- Project Overview and Aesthetic Goals
- Choosing the Right Cement for White Concrete
- Sand and Fine Aggregate Color Selection
- Plasticizers and Admixtures: Types and Compatibility
- Mix Design, Batching, and Quality Control (Trial Batches)
- Formwork, Casting, and Finishing Techniques for Clean Surfaces
- Surface Treatments, Color Options, and Protective Coatings
- Maintenance, Cleaning, and Repair Strategies for Longevity
- Conclusion
- FAQ
Project Overview and Aesthetic Goals
Define the design intent in clear terms for your white concrete pieces. Specify the desired tone, texture, and gloss level to guide cement, sand, and finishing choices.
Set measurable targets for performance and appearance, such as surface hardness, durability, and color uniformity. Include acceptance checkpoints that cover mix, placement, curing, and final finish.
Desired appearance and tolerances
The look of your architectural pieces starts here. We’re aiming for a bright, soft white tone, smooth surface with a honed or brushed finish, and a slight gloss.
Color: Target F-color 1-2 on the Munsell scale. Allowable variation: +1/-1. Too much deviation means recasting.
Edge crispness: Sharp edges are key. Any rounding or raggedness is unacceptable. Inspect before final curing.
Texture: Smooth and even, with no visible aggregate. Allowable variation: 1mm max. deviation from flat plane. More than that? Recast and recheck.
Visual checkpoints and mockups
Before you pour, create sample panels to catch issues early. Here’s your checklist:
- Color uniformity: Check for consistent color across the panel. Inconsistencies? Adjust mix or recast.
- Blotting/bleeding control: No dark spots or streaks allowed. If present, adjust water-to-cement ratio.
- Gloss level: Target low gloss (20-30 GU). Too high? Reduce plasticizer dosage.
- Surface texture: Check for evenness and no aggregate exposure. Uneven? Adjust mix or recast.
- Edge crispness: Sharp edges are crucial. Any rounding? Rework the mold.
- Sample curing: Cure samples like full pieces to check final appearance. Discoloration? Adjust mix or cure regime.
- Sealing/Topcoat decision: Test different sealers/topcoats on samples. Choose one that enhances desired gloss and protects the surface.
- Final approval: Get sign-off from designer/architect before proceeding with full production.
Quick rule: If any checkpoint fails, fix it before moving forward to avoid costly mistakes.
Choosing the Right Cement for White Concrete
Explain how white-specific cements differ from general-purpose cements in color potential and performance. Look for notes on whiteness and composition that affect final hue and durability.
Emphasize checking data sheets and supplier reliability. Consider batch consistency, setting behavior, and long-term color stability when selecting cement for architectural pieces.
White cement vs. gray/ordinary cement
When it comes to white concrete, the choice of cement is crucial. White Portland cement or low-iron blended cements are your best bets for achieving that clean, architectural look.
Why not use ordinary gray cement? It’s cheaper but contains iron impurities that turn your mix gray, not white. Plus, it can cause discoloration over time due to its higher heat of hydration.
White cements are made with raw materials low in iron oxide and undergo a more rigorous milling process. Some even go through an additional heat treatment for extra whiteness. This makes them pricier but worth it for your white concrete project.
What to check on cement technical data sheets
Before you buy, always check the cement’s technical data sheet. It’s like the cement’s resume, telling you what you need to know.
- Whiteness Index: Look for a high number (around 80-90+) to ensure true whiteness.
- Pure White OPC or White Cement Class: Confirm it’s a genuine white cement, not just a gray one with added white pigment.
- Grind Size/Fineness: A finer grind means better color consistency and strength. Check the Blaine value (around 350-450 m2/kg).
- White Pigment Compatibility: Make sure it plays nice with any white pigments you plan to use.
- Setting Time: Consider your project’s needs. Too fast, and you’ll have issues; too slow, and curing could be a pain.
- Compressive Strength: Ensure it meets or exceeds your project’s strength requirements (usually 28-day strength).
- Heat of Hydration: Lower is better to prevent discoloration and cracking from excess heat.
- Sulfate Resistance: Check if it’s suitable for your environment, especially if you live in an area with high sulfate levels.
- Long-term Durability Indicators: Look at freeze-thaw resistance, abrasion resistance, and other durability tests to ensure longevity.
Quick rule: If it’s not on the data sheet or doesn’t meet your project’s needs, don’t buy it. Better safe than sorry.
Sand and Fine Aggregate Color Selection
Discuss how sand color and mineralogy influence the final appearance of white concrete. Relate target hue to the chosen sand and aggregate suite.
Address cleanliness, contamination risks, and the impact of particle shape and grading on texture and color uniformity. Plan simple tests to verify repeatability.
How sand color affects final tone
The color of your sand is crucial for achieving the desired hue in white concrete. Warm sands, with yellow or brown undertones, will shift your final product towards a creamier or off-white appearance.
Cool sands, on the other hand, are whiter and grayer, helping to achieve a brighter, cleaner look. For true whites, opt for cool sands.
Pro tip: Mixing warm and cool sands can help you dial in just the right tone. Just remember, a little goes a long way.
Cleanliness, grading, and fines control
A clean sand is key for consistent color and texture. Washing removes contaminants like clay, organic matter, and kiln dust that can cause stains or mottling.
Grading ensures your mix has the right particle sizes. Too much fine material (<150 micron) can lead to a weak, patchy surface. Too little can result in a rough, inconsistent finish.
Pro tip: Pre-blend your sand and aggregates before mixing. This helps ensure consistency batch-to-batch.
Plasticizers and Admixtures: Types and Compatibility
Outline how plasticizers and superplasticizers affect workability and finish while maintaining brightness. Focus on avoiding color shift with white cement.
Cover air-entraining agents and other specialty admixtures, and note how compatibility with white cement changes outcomes. Include practical workflow tips and validation steps.
Choosing a Plasticizer and Avoiding Discoloration
When selecting admixtures for your white concrete mix, it’s crucial to avoid those that can cause staining or off-colors. Here are some mistakes to steer clear of:
- Uncertified admixtures: Stick with products certified for use with white cement to prevent discoloration.
- Incompatible formulations: Check compatibility with your chosen white cement, silica sand, and pozzolanic components.
- Improper dosage: Follow recommended ranges to avoid excess or insufficient admixture, which can affect color stability.
- Lack of testing: Always perform small pilot mixes to validate final color under your specific conditions.
By following these guidelines, you’ll minimize the risk of discoloration and maintain the desired brightness of your white concrete.
Admixture Timing and Mixing Sequence
The order in which you dose admixtures and mix your concrete can significantly impact workability, finish, and color stability. Here’s why:
Dispersion: Adding admixtures early in the mixing process allows them to disperse evenly throughout the mix, enhancing their effectiveness.
Entrapped air: Incorporating admixtures too late or mixing improperly can introduce excess air, leading to potential finish issues and reduced durability.
Color issues: Inconsistent dosing or mixing can result in uneven distribution of admixtures, causing variations in color and translucency. To avoid these problems:
Start with water: Begin the mixing process by adding water to your mixing drum, followed by the white cement.
Add admixtures next: Introduce plasticizers or superplasticizers after the cement has been partially hydrated. This promotes even distribution and optimal performance.
Lastly, add aggregates: Once admixtures are well incorporated, add your clean silica sand and coarse aggregates, mixing thoroughly to ensure a homogeneous mix with consistent color and finish.
Mix Design, Batching, and Quality Control (Trial Batches)
Frame targets for whiteness, strength, and finishability without prescribing fixed ratios. Emphasize beginning with clear performance goals and test plans.
Describe a trial-batch approach with documented batch IDs, sequencing, and recording of results. Include criteria for advancing to larger pours based on visual and measured checks.
Pre-blending and batch-to-batch consistency
To ensure your white concrete mix is consistent from one batch to the next, follow these steps:
Weighing: Use accurate scales for each ingredient. Weigh out the exact amounts needed for your trial batches.
Dry pre-mixing: Combine dry ingredients – cement, sand, and aggregates – in a clean, dry mixer. Run it until they’re well-blended. This helps distribute any pigments evenly and reduces color variation.
Record each batch’s components and amounts to maintain consistency between batches.
Test panels and quick visual/physical checks
Before committing to full-scale production, cast small test panels to verify your mix’s performance:
Cure these panels under conditions similar to your planned production. Once cured, inspect them for:
- Color: Check if the color meets your desired whiteness.
- Finish: Ensure the surface is smooth and even, ready for sealers or coatings.
- Working time: Note how long it takes for the mix to set. This helps plan your production schedule.
These quick checks help you fine-tune your mix design before investing in larger batches.
Common mistakes and troubleshooting
Here are some common errors to avoid, along with troubleshooting steps:
- Contamination: Ensure all materials are clean and free of contaminants. Dirt or other impurities can discolor your mix.
- Inconsistent batching: Stick to your recorded batch amounts. Varying quantities can lead to color and strength inconsistencies.
- Admixture misuse: Follow manufacturer guidelines for plasticizers and other admixtures. Too much or too little can affect workability, set time, and final color.
- Moisture issues: Keep materials dry until ready to mix. Moisture can cause cement hydration to start prematurely, leading to strength loss and color variation.
If you encounter problems, isolate the issue by making small changes one at a time and re-testing your mix.
Formwork, Casting, and Finishing Techniques for Clean Surfaces
Choose form materials and surface treatments that minimize imprinting on white concrete. Note how release agents and liners interact with color and finish.
Describe vibration, compaction, demolding timing, and post-casting finishing steps. Include repair methods for blemishes and testing of surface hardness and porosity.
Form Liners, Sealers, and Release Agents Selection
Choosing the right form materials and release agents is crucial for achieving blemish-free white concrete surfaces. Start with sealed plywood or melamine-faced forms. These minimize imprinting and prevent dust from sticking to the cement.
For a smooth, stain-free surface, use a water-based release agent. It’s compatible with most plasticizers and won’t discolor your white concrete. Apply it evenly using a sprayer or roller, following the manufacturer’s guidelines for application intervals.
To create patterns or textures, consider using form liners. Choose ones designed for white concrete to avoid staining. Test them first on scrap material to ensure they work well with your chosen cement and sand color.
Finishing Tools and Timing for Crisp Edges
Proper finishing is key to maintaining sharp lines and a uniform texture on your white concrete surfaces. Here are some essential tools and their ideal usage times:
- Floating tool (1/4″ or 3/8″): Use within 20-30 minutes after casting to remove large air bubbles and level the surface.
- Trowel (4″-6″): Start troweling at around 30-45 minutes, using a straight edge to strike off excess material and create sharp edges. Use a bullfloat for larger surfaces.
- Edge trimmer: Trim edges within 1-2 hours after casting to prevent chipping. Rentable trimmers cost around $50-$75 per day.
- Power trowel (optional): Use after initial troweling for a super-smooth, polished finish. It’s rentable for about $80-$120 per day.
- Burnisher (optional): Apply at around 3-4 hours after casting to bring out the sheen and enhance the surface’s smoothness.
Surface Treatments, Color Options, and Protective Coatings
Compare integral pigmenting, topical coatings, stains, and sealers for appearance and maintenance. Explain how each option interacts with cement and sand color.
Assess permanence, repairability, and compatibility with the substrate. Outline a practical workflow from prep to sealing and long-term care.
Integral Coloring vs Surface Treatments
When it comes to white concrete, you’ve got two main ways to get your color: integral pigmenting and topical surface treatments. Let’s weigh the pros and cons of each.
Integral Pigmenting: This method adds color directly into your mix. Pros? It gives a uniform, consistent look throughout the entire piece. Wear and tear won’t show up as much either. But if you want to change the appearance later, it’s tough (and expensive) to do.
Topical Surface Treatments: These are paints, stains, or sealers applied after casting. Pros? They let you alter the look of your concrete easily. Want a different color? Just paint over it! But they can wear out faster and may need more maintenance.
Sealer Selection and Slip-Resistance Strategies
Choosing the right sealer is crucial for your white concrete. It protects, enhances color, and can even add slip-resistance.
Sealer Types: Glossy sealers give a high-sheen look, while matte ones tone it down. Choose based on your desired effect.
Slip-Resistance: For safety, consider adding non-slip additives to your sealer. They’re clear, so they won’t affect the white color. Just make sure to follow the manufacturer’s instructions for proper mixing and application.
Maintenance, Cleaning, and Repair Strategies for Longevity
Provide routine cleaning guidance with safe cleaners and methods that preserve whiteness. Recommend spacing and tools that minimize surface wear.
Outline re-sealing, stain management, and chip repair procedures. Include documentation habits to track color consistency and finish condition over time.
Safe cleaning protocols to preserve whiteness
White concrete surfaces need gentle care. Always test cleaners on samples first.
Use pH-neutral cleaners, they’re safe and won’t dull the finish. Avoid reactive chemicals like bleach or acids without testing.
Never use abrasive tools that can scratch the surface.
Patching and color-matching repairs
For chips or cracks, use minimal-impact repair mortars. Match the color with pigments, not just by eye.
Feather edges to blend repairs smoothly. Use mockups to confirm color match before final repair.
Patience is key here. Take your time to ensure a uniform appearance.
Conclusion
A clean, durable white concrete piece comes from careful material choices, proper mix design, and disciplined finishing. If you lock in the right cement, match the sand color, select compatible plasticizers, and test small batches before scaling up, you’ll get the look you want without compromising safety or longevity.
Check your plan in this order: confirm the cement type and lot for whiteness, verify sand color and consistence, choose compatible admixtures, run a trial mix with the designed proportions, document the results, set up clean formwork, cast and finish with the intended surface, apply a suitable surface treatment or coating, and schedule maintenance checks. Do the work in clean, well-lit spaces, wear PPE, and batch only what you can use in a session.
Common mistakes to avoid are using the wrong cement or mismatched additives that wash out whiteness, skipping trial batches and relying on guesswork, and skipping proper curing or early sealing that traps moisture or causes cracking. Always follow a small-batch test first, keep mixes consistent between pours, and never mix products that are not stated as compatible.
If the project is large, or you’re unsure about structural implications, formwork complexity, or finishing in situ, call a professional. For most homeowner-scale pieces, careful planning, controlled testing, and steady execution will yield a clean, lasting result—stay methodical, stay safe, and the finish will speak for itself.
FAQ
How do I choose a white concrete mix for clean architectural pieces?
Look for a mix labeled white or very light gray. Check the label for color options and finish goals. If unsure, ask the supplier for a sample batch to test in your formwork.
What should I know about cement choices for clean pieces?
White cement or cement with a light color base helps keep surfaces bright. Read the manufacturer instructions and local recommendations. If in doubt, compare options and pick the one that best matches your intended final look.
How do I decide on sand color for a clean white finish?
Choose sand that is close to white or a light gray to avoid dark spots. Avoid sands with visible impurities or strong color contrasts. Always check the bag label or quarry source notes for color range and any grading info.
How can a plasticizer improve the mix without causing problems?
Plasticizers reduce water demand and help flow without adding extra work. Use only products labeled for concrete mixes and compatible with your cement type. Follow the label instructions and your mix design, and test a small batch first.