
Introduction
Waterproofing cast concrete fountains and birdbaths means choosing a method to keep water from leaking through the concrete.
You can use coatings or liners, and each has its own pros for DIY setup and long-term maintenance. Check the product instructions and local rules to confirm compatibility with your concrete, climate, and any decorative finishes.
In practice, you’ll decide between a surface coating or a snug liner, then follow a careful prep and application process. Common sealants include silicone, tung oil, and epoxy, but check suitability for exterior use, UV exposure, and contact with water and plants. Keep maintenance simple: inspect for chips, reapply as needed, and watch for moisture or staining; price and availability will vary by brand and region.
Key takeaways
- Assess substrate, climate, and sun exposure before choosing coatings or liners.
- Silicone, tung oil, and epoxy options require different preparation and cure practices.
- Inspect fountains regularly for cracks, leaks, full coating integrity, and liner wear.
- Document seasonal inspection schedule and maintenance tasks to avoid hidden moisture.
- Follow safety: ventilation during solvent use, proper PPE, and child-pet access containment.
- Cost and availability vary by material, shop availability, and regional regulations.
Table of Contents
- Introduction
- Key takeaways
- Coatings Vs Liners — Definitions and Product Types
- How to Choose the Right Solution for Your Feature
- Step-by-Step Application Process (Prep, Apply, Cure)
- Maintenance Schedules and Inspection Routines
- Health, Safety, and Environmental Considerations
- Durability, Longevity, and Cost Implications
- Seasonal Planning and Winterizing Tips
- Common Mistakes, Troubleshooting, and Visual Checkpoints
- Conclusion
- FAQ
Coatings Vs Liners — Definitions and Product Types
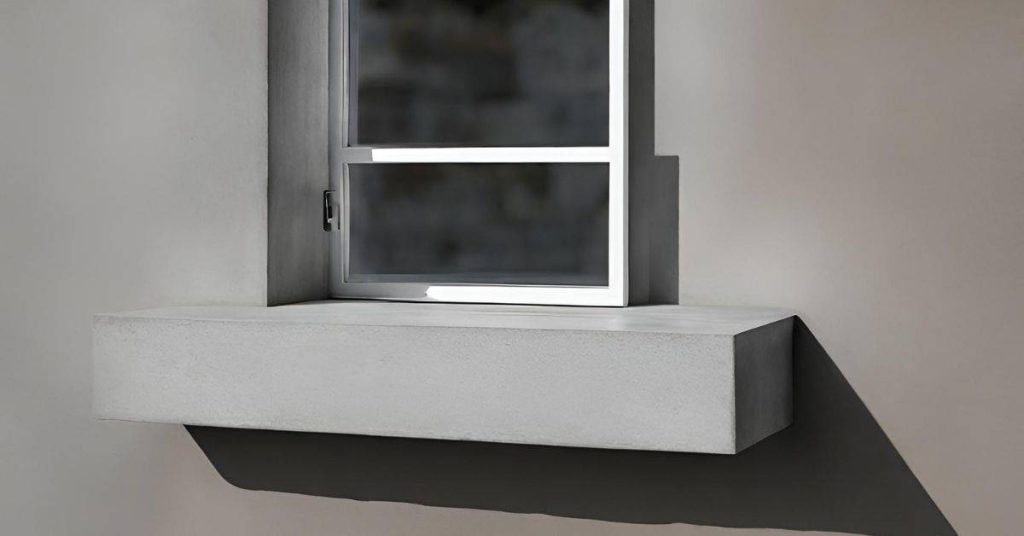
Coatings and liners are two primary paths for protecting concrete fountains and birdbaths. Coatings form a protective layer on the surface, while liners provide a separate barrier inside the feature. Each option aims to reduce water ingress, freeze-thaw damage, and mineral staining in different ways.
Common coating families include penetrating sealers, film-forming sealers, epoxy and polyurethane coatings, acrylics, and silicone blends. Liners encompass EPDM/rubber, PVC/thermoplastic, and flexible sheet liners, each with its own pros and drawbacks for outdoor water features.
Coating types (penetrating sealers, epoxy, polyurethane, acrylic)
Concrete coatings work by forming a barrier or penetrating the concrete to prevent water ingress. Here’s how different coating types bond and perform:
Penetrating Sealers soak into concrete, reacting with it chemically to form a water-repellent barrier deep within the surface. They’re ideal for new, unsealed concrete as they don’t alter the look of the surface.
Epoxy Coatings create a hard, durable film on top of the concrete. They’re great for high-traffic areas and can be used to protect against chemicals and abrasion. However, they may yellow over time when exposed to UV light.
Polyurethane Coatings are flexible and resistant to abrasion, chemicals, and moisture. They’re a good choice for outdoor water features as they maintain their flexibility in cold temperatures. Some types can be susceptible to UV degradation.
Acrylic Coatings provide a durable, long-lasting finish that resists fading, cracking, and peeling. They’re easy to apply but may not be as resistant to chemicals or abrasion as other options.
Liner types (rubber/EPDM, PVC pond liners, preformed bowls)
Liners provide a barrier between the water and the concrete. Here are common liner materials and their use-cases:
Rubber/EPDM Liners are flexible, durable, and resistant to UV, chemicals, and abrasion. They’re ideal for large fountains or birdbaths with complex shapes as they can be custom-fabricated to fit.
PVC Pond Liners are affordable, easy to install, and suitable for small to medium-sized water features. However, they may not be as durable or flexible as rubber liners and can degrade over time when exposed to UV light.
Preformed Bowls are factory-made liners designed to fit specific birdbath or fountain bases. They’re easy to install but may not be suitable for custom-shaped or large water features.
Quick pros & cons comparison
Here’s a concise look at the pros and cons of coatings vs liners:
Pros
- Coatings: Easy application, can enhance concrete’s appearance.
- Liners: Provide a barrier against water ingress, easy to install.
Cons
- Coatings: May not provide complete protection against freeze-thaw damage, susceptible to UV degradation.
- Liners: Can be more expensive, may require additional support for large features.
Choose coatings when you want to enhance the appearance of your concrete feature and don’t mind periodic reapplication. Opt for liners when complete waterproofing is crucial, especially in areas with extreme temperatures or heavy use.
How to Choose the Right Solution for Your Feature
Assess the concrete condition first: look for cracks, spalling, moisture intrusion, and efflorescence to gauge how coatings or liners will perform. Consider porosity and stain tendencies to estimate load and exposure effects. This helps match a solution to your feature.
Define usage and exposure: determine if the feature will hold drinking water or serve wildlife. This drives material choice toward non-toxic seals or wildlife-safe liners. Also evaluate sun exposure, freezing cycles, and potential chemical exposure when planning for long-term durability.
Step-by-Step Process
Follow these practical steps to choose the right waterproofing solution for your cast concrete fountain or birdbath.
- Inspect and prepare the site: Clear debris, wear gloves and safety glasses. Check for any hazards like electrical wires or gas lines.
- Assess concrete condition: See Assessing substrate and damage section for detailed checks.
- Define usage: Decide if the feature will hold drinking water, serve wildlife, or be a fountain with pumps. This drives material choice.
- Evaluate exposure: Consider sun/UV, freezing/thawing cycles, rain runoff, and chemical exposure. Plan for substrate expansion/contraction.
- Choose product: Based on condition, usage, exposure, desired appearance, and budget. See Coatings vs Liners — Definitions and Product Types and Quick pros & cons comparison for guidance.
- Prepare surface: Follow manufacturer’s instructions. This may include cleaning, etching, or priming.
- Apply product: Follow application guidelines closely. Use compatible materials if existing coatings/liners are present.
- Cure and inspect: Allow proper curing time before using the feature. Inspect for any signs of leakage or damage.
- Establish maintenance plan: Outline cleaning routines, inspection intervals, reapplication timelines, and document wear. Include budget and access for seasonal maintenance.
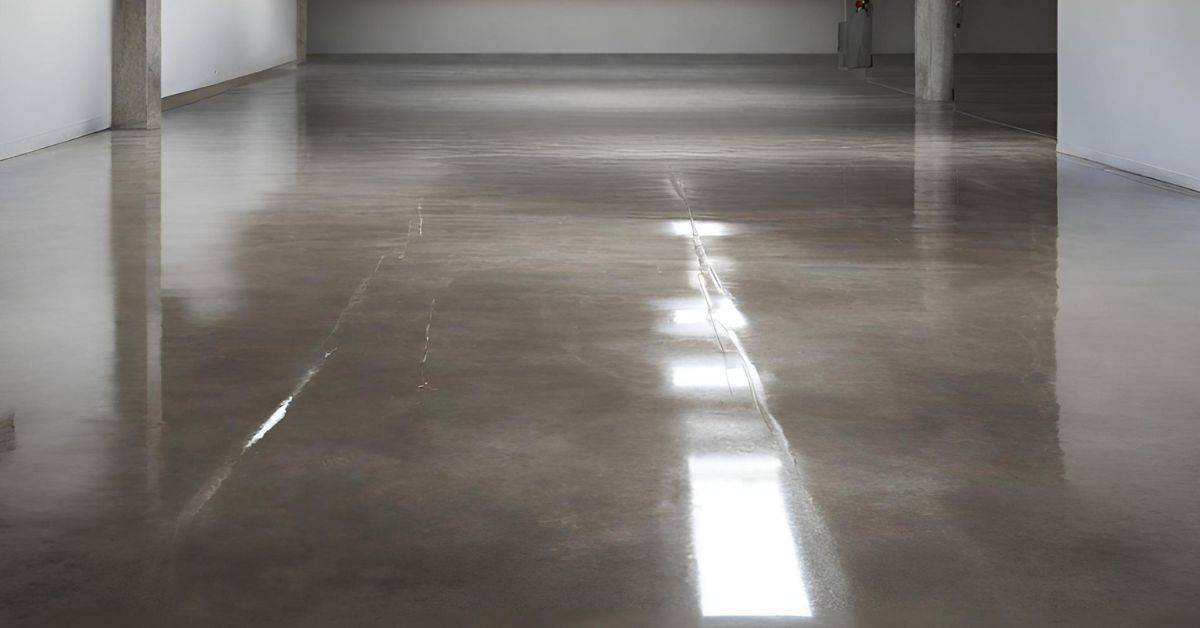
Assessing substrate and damage (porosity, cracks, spalling)
Before waterproofing, assess your concrete feature’s condition to ensure it’s structurally sound.
Check for: cracks (hairline or wider), spalling (flaking or chipping), moisture intrusion, and efflorescence (white powdery deposits).
Porosity: Test by splashing water on the surface. If it absorbs quickly, the concrete is porous. If it beads up, it’s dense.
Stain tendencies: Observe any discoloration or stains. This indicates how different coatings or liners will perform under load and exposure.
If you find significant cracks, spalling, or moisture intrusion, structural repair is needed before waterproofing. Consult a professional if unsure about repairs.
Use-case and safety priorities (potable water, wildlife, fountains with pumps)
Understanding your feature’s use case is crucial for choosing the right product.
Potable water: If the fountain or birdbath will hold drinking water, choose a non-toxic, food-safe liner or coating. Verify this on labels and datasheets.
Wildlife: For wildlife features, consider leachability and toxin concerns. Some coatings/liners may not be suitable for long-term contact with animals or their waste.
Fountains with pumps: Ensure the chosen product is compatible with any pumps, filters, or other mechanical components. Some products may degrade under constant water flow or heat from pumps.
Aesthetics, budget, and expected lifespan trade-offs
Balancing appearance, upfront cost, and maintenance commitments is key when selecting coatings vs liners.
Aesthetics: Decide on transparency vs color, texture, and finish. Consider how seams, joints, or liners will look in the surrounding landscape.
Budget: Upfront costs vary greatly between products. Cheaper options may have shorter lifespans or require more frequent maintenance.
Expected lifespan: Longer-lasting products often cost more upfront but save on maintenance and replacement costs over time. Consider your feature’s expected lifespan and how maintenance will affect aesthetics long-term.
Step-by-Step Application Process (Prep, Apply, Cure)
Start with precise prep steps: clean the surface, remove efflorescence, open pores if needed, and establish appropriate drying times for maximum adhesion. Address any structural concerns before coating or lining. These steps set a solid foundation for the rest of the job.
Then check substrate compatibility and environment: verify porosity, prior coatings, and overall stability. Plan around dry, warm, wind-free conditions and provide proper safety measures. Finish with a clear sequence: prep, primer if needed, sealer or liner, topcoat, and cure as directed.
Step-by-Step Process
Now that you’ve prepared your surface and gathered your materials, let’s dive into the step-by-step application process. This sequence will ensure a strong, durable concrete finish.
- Mix Concrete: Follow the manufacturer’s instructions for mixing. Typically, it’s 3 parts cement to 1 part water by volume. Mix until you reach a consistent, workable consistency. Check: The mix should hold its shape when squeezed in your hand but still spread easily.
- Pour Concrete: Pour the mixed concrete onto your prepared surface, starting from one corner and working your way across. Use a shovel or concrete rake to distribute it evenly. Check: The surface should be level and smooth.
- Spread Concrete: Use a concrete float to spread the mix over the entire surface, ensuring it’s even and fully covers the base. Work quickly but carefully to avoid creating air pockets. Check: The surface should look uniform with no low or high spots.
- Finish Concrete: Use a bullfloat to smooth out any remaining imperfections on the surface. This step also helps to compact the concrete and remove excess water. Check: The surface should be smooth, level, and free of marks from previous tools.
- Edge Forming: Use a straight edge or form to create clean edges around your concrete slab. This step also helps to prevent cracking at the edges. Check: Edges should be straight and smooth.
- Cure Concrete: Cover your newly poured concrete with a plastic sheet or wet burlap to keep it moist. This is crucial for proper curing, which can take up to 7 days. Check: The surface should remain consistently damp during this period.
- Seal Concrete (Optional): After the concrete has cured and any sealant-specific drying time has passed, apply a concrete sealer to protect your surface from stains and moisture damage. Follow manufacturer’s instructions for application. Check: The surface should have a consistent sheen or matte finish.
Pro tip: Always wear appropriate safety gear, including gloves, goggles, and a dust mask when working with concrete. Safety first!
Surface preparation and repairs (cleaning, etching, patching)
First things first, clean the surface. Use a wire brush or pressure washer to remove dirt, grease, and loose material. Check product labels for any specific cleaning requirements.
Now, check for damage. Small cracks need patching before you pour. For hairline cracks, use a concrete crack filler. Larger ones may require a concrete repair mortar. Always follow manufacturer instructions for best results.
Sometimes, light etching or acid prep is needed. This opens up the surface to improve bonding. Use muriatic acid diluted with water (1 part acid to 5 parts water). Wear protective gear and work in a well-ventilated area. Always check local rules before using acids.
Remember, preparation is key. Skimping on this step can lead to failed slabs. So take your time, do it right, and you’ll have a solid base for your concrete pour.
Tools and materials checklist
Before you start your concrete coating or lining project, use this checklist to ensure you have everything you need. This will help you avoid common mistakes and save time in the long run.
- Stiff-bristle broom: To clean and prepare the surface. Check: Bristles are firm and not worn out.
- Concrete cleaner (acid-based or alkaline): To remove dirt, grease, and contaminants. Check: Product label for correct dilution ratio.
- Etching solution (for coatings): To prepare the surface for better adhesion. Check: Manufacturer’s instructions for application guidelines.
- Concrete patching compound: For repairing cracks and holes. Check: Consistency is smooth and workable, not too thick or thin.
- Trowel (1/2″ to 3/4″): To apply patching compounds and level surfaces. Check: Trowel is straight and not bent or damaged.
- 9″ to 18″ roller with 1/4″ nap cover: For applying coatings. Check: Roller cover is in good condition, not worn out or missing bristles.
- 6″ to 9″ squeegee (for liners): To apply and level self-leveling liners. Check: Squeegee blade is straight and not damaged.
- Concrete primer: To seal the surface and improve adhesion. Check: Primer is within its shelf life and properly mixed (if necessary).
- Mixing tools (paddle mixer, drill, or concrete mixer): For mixing coatings and liners. Check: Tools are in good working condition.
- Inspection tools (trowel, level, straight edge): To check the surface before application. Check: Tools are clean and undamaged.
Quick rule: Always inspect your tools and materials before starting to ensure they’re in good condition and suitable for the job at hand.
Applying coatings vs installing liners (technique and common steps)
Alright, listen up. You’ve prepped your surface, now it’s time to apply your coating or install that liner. Here’s how you do it.
Coatings: You’re dealing with liquid here, so technique matters. Start by checking your product label for film build and coat sequencing. Typically, you’ll want a uniform thickness, around 10-20 mils per coat. Here’s the drill:
- Pour or spray your coating onto the surface.
- Use a squeegee or roller to spread it evenly, working from one side of the area to the other in smooth, overlapping strokes.
- Let it cure for the recommended time (usually 24-72 hours), then apply another coat. Repeat until you’ve reached your desired film build.
Liners: Liners are a different beast. You’re anchoring them down, so precision and attention to detail are key. Here’s what you do:
- Start by checking the manufacturer’s instructions for adhesive or sealant recommendations.
- Apply the adhesive or sealant to the base of your liner and the prepared surface using a notched trowel or caulking gun, following the recommended coverage rate (usually around 1/4″ to 3/8″).
- Unroll your liner and position it carefully. Use a straight edge to ensure it’s level.
- Press the liner firmly into place using a roller or your hands, ensuring good contact with the adhesive or sealant. Work from one side of the area to the other to avoid trapping air bubbles.
- Seam any overlapping edges using the recommended seam tape and adhesive, following the manufacturer’s instructions.
Maintenance Schedules and Inspection Routines
Describe maintenance scope by coating vs liner life cycles and outline typical failure modes. Identify when repairs should escalate to replacement to prevent water damage. Keep these expectations realistic for your feature.
Set a practical cadence: regular visual checks and seasonal inspections help catch wear early. Document wear, staining, or algae growth and plan re-coats or liner refreshes accordingly. Align with any manufacturer guidance you have on file.
Regular cleaning and seasonal inspections
Keep your fountain or birdbath looking its best and functioning properly by following this regular cleaning and inspection routine.
- Monthly visual check: Quickly inspect the surface for any signs of damage, staining, or algae growth. This helps catch minor issues early.
- Seasonal in-depth inspection (spring/fall): Thoroughly examine the feature before and after extreme weather conditions to ensure it’s ready for changing temperatures and prevents unexpected water damage.
- Check surface condition: Look for cracks, crazing, or pinholes that could compromise the waterproofing. Ignoring these can lead to leaks and costly repairs.
- Assess liner integrity: Inspect seams and edges for any signs of delamination or lifting. This is crucial as it prevents water from getting underneath and causing further damage.
- Check sealant tackiness: Gently touch the surface to ensure the sealant remains tacky. If it’s eroded, re-sealing may be necessary.
- Inspect for UV fade or color changes: Prolonged sun exposure can cause fading and discoloration. If severe, a refreshment coat might be needed.
- Look for water leakage: Check around the base and edges for any signs of water seepage. This could indicate a breach in the waterproofing.
- Assess substrate movement: Gently push or pull on the feature to ensure it’s secure. Movement can cause cracks and compromise the waterproofing.
Quick rule: Always follow manufacturer guidelines for cleaning and inspection frequency to maximize your coating or liner’s lifespan.
When to touch up, reseal, or replace a liner
Knowing when to perform minor touch-ups versus full resealing or replacement can save you time and money. Use this checklist to decide the best course of action.
- Minor touch-ups: If there are small cracks, chips, or stains, a simple touch-up might be all that’s needed. This is usually done with a paintbrush or roller.
- Resealing: If the sealant has eroded or lost its tackiness, resealing may be necessary. This involves applying a new layer of sealant over the existing one.
- Liner replacement: If there are large cracks, holes, or delamination, it’s time for a full liner replacement. This is a more involved process but ensures the longevity and effectiveness of your waterproofing.
- Check for leaks: Inspect the surface for any signs of water seepage. If found, immediate action is needed to prevent further damage.
- Inspect seams and edges: Look for any lifting or delamination around these areas. This can compromise the waterproofing and should be addressed promptly.
- Assess surface condition: Check for extensive cracking, crazing, or pinholes. These can indicate that a full reseal or replacement is necessary.
- Evaluate UV damage: If the surface has faded significantly due to sun exposure, a refreshment coat might be needed to restore its appearance and protect it from further damage.
Quick rule: Always address minor issues promptly to prevent them from becoming major problems that require costly repairs or replacement.
Health, Safety, and Environmental Considerations
Discuss toxicity and residue considerations for common coatings and sealants, including potential substances of concern. Highlight safer, lower-toxicity options with clear labeling to help you compare products. These choices influence both user safety and wildlife well-being.
Cover VOCs, odors, disposal, and end-of-life options. Compare water-based versus solvent-based products and note any local disposal rules. Include a quick checklist for choosing lower-impact options and safe handling practices.
Non-toxic and wildlife-safe options
When choosing coatings for your fountain or birdbath, consider the safety of birds, fish, and insects. Most water-based acrylic or polyurethane sealers are safe once cured. They’re often food-safe, making them ideal for birdbaths.
Steer clear of products containing heavy metals like lead or biocides that can harm aquatic life. Opt for formulations free from PFAS (per- and polyfluoroalkyl substances) and low in VOCs. Always check product labels and MSDS/SDS sheets.
For added peace of mind, look for certifications like GREENGUARD or ECOLOGO. These indicate products have been tested for low chemical emissions and minimal environmental impact.
PPE, ventilation, and chemical handling best practices
Safety first! When working with coatings, use the appropriate Personal Protective Equipment (PPE). This includes gloves, safety glasses, and a respirator for solvent-based products.
Always check the product’s Material Safety Data Sheet (MSDS) or Safety Data Sheet (SDS). It outlines necessary PPE, safe handling procedures, and disposal instructions. Keep these sheets handy during application.
Ensure proper ventilation. Open windows, use fans, or work outdoors if possible to minimize exposure to fumes. If you’re working indoors with a solvent-based product, consider using a respirator with a carbon filter.
After use, clean your tools and equipment thoroughly. Dispose of containers and rinsates according to local regulations. Never pour chemicals down drains.
Durability, Longevity, and Cost Implications
Compare durability profiles of coatings and liners, including how exposure to water, algae, and freeze-thaw cycles can affect performance. Explain common failure modes in plain terms so you can spot trouble early. Use this to guide your choice based on expected conditions.
Discuss maintenance burden and lifecycle costs, such as reapplication needs or liner replacement workflows. Consider installation costs, replacement intervals, and any tax or ecological considerations. End with practical recommendations based on budget and climate.
Typical Longevity Factors and Warranty Notes
Coatings and liners have different lifespan expectations, influenced by various factors. UV exposure, freeze-thaw cycles, and mechanical wear are the main culprits affecting durability.
UV Exposure: Both coatings and liners degrade over time when exposed to sunlight. Coatings typically last 5-10 years, while liners can last up to 20 years but are more susceptible to UV damage at the seams.
Freeze-Thaw Cycles: Freeze-thaw cycles can cause coatings to crack and peel, reducing their lifespan. Liners are less affected but can still develop leaks over time.
Always check manufacturer warranties and datasheets for specific product lifespans and coverage. Most offer 5-10 year warranties on coatings and 10-20 years on liners.
Cost Considerations and Lifecycle Thinking
The best choice depends on your budget, climate, and DIY skills. Here’s what to consider when comparing costs:
Initial Costs: Coatings are cheaper upfront, ranging from $0.50 to $2 per square foot. Liners cost more, around $3 to $7 per square foot, including installation.
Maintenance and Replacement: Coatings need regular touch-ups (every 1-5 years) and resealing (every 3-7 years). Liners may last longer but can leak or crack, requiring replacement every 10-20 years. Factor in these maintenance and replacement costs over the fountain’s lifespan.
Get local quotes for materials, tools, labor, and any additional costs like primer or sealant. Also, consider product datasheets and manufacturer warranties to estimate lifecycle costs accurately.
Seasonal Planning and Winterizing Tips
Outline the best seasons for application with a focus on reliable curing conditions and avoiding frost. Explain how coatings and liners behave under varying temperatures and moisture. This helps you schedule work to maximize results.
Provide winterizing steps like draining, drying, and using removable liners when appropriate. Include a yearly maintenance calendar and guidance on product choices that resist freeze-thaw effects. Remind readers to check warranty terms and local climate considerations.
Best time of year to apply or install
The ideal window for applying sealers or installing liners is late spring to early fall, when temperatures are consistently above ~50°F (10°C) and humidity is low. This ensures proper curing and adhesion.
Coatings need warmth to cure properly. If you’re working in cooler temps, expect longer cure times or use a product designed for lower temps. Liners, on the other hand, can be installed in wider temperature ranges but may require adjustments like using heat tape.
If you find yourself working outside ideal conditions, check your product’s data sheet for specific temperature and humidity guidelines. Some products offer extended cure times or additives to help with cooler temps.
Winter care for sealed vs lined features
Protecting your fountain or birdbath from freeze-thaw cycles is crucial. Here’s how to winterize sealed and lined features:
Sealed Features: Drain all water, dry thoroughly, and cover with a breathable material like burlap or a fitted plastic cover. Remove pumps and store indoors. Coatings can crack or lift if ice builds up, so prevent this by keeping the feature empty.
Lined Features: If using removable liners, take them out before freeze-ups. For permanent liners, drain and dry as with sealed features. Consider using heat tape to keep water in the liner from freezing. Insulate pumps if they can’t be removed.
Common Mistakes, Troubleshooting, and Visual Checkpoints
Highlight frequent errors such as improper surface prep, incorrect porosity assessment, or choosing incompatible products for water exposure. Describe how these issues can lead to peeling, hazing, or premature failure. Use this to avoid common pitfalls.
Offer troubleshooting guidance for typical failure modes like poor adhesion, efflorescence, or cloudy films. Provide clear visual checkpoints during and after application to confirm uniform coverage and identify early signs of trouble. Include guidance on coatings vs liners based on design features.
Top mistakes to avoid (selection, prep, mixing, cure)
Before you start waterproofing your cast concrete fountain or birdbath, review this checklist to avoid common pitfalls.
- Insufficient surface preparation: Dust, laitance, and contaminants can compromise adhesion. Ensure the surface is clean, dry, and free of any debris.
- Wrong product choice: Not all coatings or liners are suitable for your specific design, water exposure, temperature, or freeze-thaw cycles. Always check compatibility before application.
- Inadequate ventilation: Proper ventilation is crucial during application to prevent contamination and ensure even curing. Open windows and use fans if necessary.
- Rushing cure time: Allowing insufficient cure time can lead to premature failure. Follow the manufacturer’s guidelines for proper cure times.
- Incorrect substrate porosity: Porous substrates may require additional priming or sealing before application. Check your substrate’s porosity and adjust your prep accordingly.
- Moisture content issues: Applying coatings or liners over wet surfaces can lead to hazing, tackiness, or peeling. Ensure the surface is dry before application.
- Incorrect mixing ratios: Following the manufacturer’s mixing instructions ensures optimal performance and longevity of your coating or liner.
- Ignoring edge details: Pay special attention to edges and corners during application. These areas are prone to peeling if not properly coated or sealed.
Quick rule: Always follow the manufacturer’s guidelines for product selection, surface preparation, mixing, and cure times to avoid common mistakes.
Visual signs of failure and simple repairs
Regularly inspect your waterproofed fountain or birdbath for any signs of failure. Catching issues early can prevent costly repairs.
- Flaking or peeling: These are signs of poor adhesion, usually due to insufficient surface preparation or rushing the cure time. Scrape off loose material and reapply the coating or liner.
- Blisters: Blistering indicates trapped moisture or contaminants under the coating or liner. Remove the affected area and reapply.
- Seams lifting: Lifting seams suggest improper application, insufficient adhesion, or movement in the substrate. Reapply the coating or liner, ensuring proper adhesion and allowing sufficient cure time.
- Staining or mineral deposits: These indicate that your waterproofing is not breathable enough, leading to moisture buildup. Consider reapplying a more breathable product or increasing ventilation around the feature.
- Efflorescence: White, powdery deposits on the surface signal excessive moisture movement. Address any underlying moisture issues and reapply the coating or liner as needed.
Quick rule: If you notice any of these signs, address them promptly to prevent further damage. However, if the problem persists or worsens, consult a professional for expert advice.
Conclusion
Protecting the look and longevity of your water feature starts with choosing the right coating or liner and sticking to a solid prep, application, and cure routine. Safety, durability, and appearance all hinge on doing the work right and avoiding shortcuts.
To move forward, think like this: inspect the surface and plan winterizing, test a small area, clean and dry thoroughly, follow the product’s prep and application instructions, keep temperatures within the required range, allow the recommended cure time, seal joints or edges as needed, then schedule seasonal inspections and maintenance checks. If something feels off, stop and reassess before proceeding.
Avoid common mistakes: neglecting proper surface prep, rushing cure times, using the wrong product for your feature, or skipping a small test patch. Safety rules are simple: read and follow the manufacturer’s directions, wear protective gear, ventilate well, and never apply coatings or liners over damaged or damp surfaces. If in doubt, test first and err on the conservative side.
If you encounter big cracks, structural issues, or uncertain material compatibility, don’t push on alone. A qualified pro can verify the right solution and prevent costly mistakes. With the right approach, your fountain or birdbath stays watertight, safe, and clean looking for years to come.
FAQ
What sealant options work best for cast concrete fountains and birdbaths?
Common choices are silicone-based sealants, epoxy coatings, and penetrating sealants labeled for exterior use. Check the product label for water exposure and compatible substrates. If in doubt, read the manufacturer instructions and local recommendations before buying.
How do I apply the coating differently for concrete versus other materials like stone or metal?
Follow the product’s prep steps: clean and dry the surface, remove old coatings if required, and use the recommended primer if specified. Apply in thin, even coats and follow cure times exactly as the label says. For porous concrete, you may need more than one coat; non-porous surfaces often need less prep work.
What maintenance steps keep a waterproofed feature lasting?
Regularly inspect for peeling, cracks, or gaps after freezes or heavy use. Clean the surface with a mild, non-abrasive cleaner and reapply only where the coating shows wear. Replace or refresh seals periodically per the product’s guidance and your local conditions.
How should I think about cost, availability, and environmental impact?
Costs vary by product type and coverage, so compare labels and coverage claims rather than list prices alone. Look for products with low odor, fewer VOCs, and compatibility with your feature’s material. Check the data sheet for environmental notes and disposal instructions.