
Introduction
Plaster is a cement-based finish applied in a thick coat that hardens into a solid surface. Joint compound is a gypsum-based filler designed for walls and seams. For repairs, choose plaster on traditional, solid surfaces and use joint compound for drywall patches and quick fixes.
In practice, match the material to the repair and the wall type. Always check the product label, manufacturer instructions, and local rules for suitability. If unsure, start with joint compound for a fast patch and seek guidance before proceeding with plaster.
Key takeaways
- Choose plaster for traditional, solid walls; joint compound for quick repairs.
- Prep surfaces by cleaning, dampening dust, and priming where recommended.
- Apply in thin, even layers; allow proper drying between coats.
- Safety: wear eye protection, respirator, and gloves when mixing or sanding.
- Check compatibility with substrates and previous finishes per manufacturer instructions.
- Costs and availability vary by region; local rules affect use.
Table of Contents
- Introduction
- Key takeaways
- What Are Plaster and Joint Compound?
- Strengths and Weaknesses for Repairs
- Which Material for Which Repair Type
- Preparation and Application Differences
- Tools and Materials Checklist
- Drying, Curing, and Timing Considerations
- Cost, Availability, and Environmental Considerations
- Visual Checkpoints and Troubleshooting Common Problems
- Conclusion
- FAQ
What Are Plaster and Joint Compound?
Plaster and joint compound are both used to finish walls, but they come from different families. Plaster typically consists of lime or gypsum plaster that hardens through chemical setting, while joint compound is designed to be spreadable and sands easily. Modern formulations have variations in binders and additives, affecting workability and finish.
In practice, you’ll see several common formulations for each material, with some designed for quick-setting repairs and others for extended work time. Always check the product label or manufacturer data sheet for specifics. If you’re unsure, consult local rules or a supplier to confirm suitability for your wall type.
Types of plaster (lime, gypsum, cement)
Plaster comes in different types, each with its own properties and uses. Let’s look at the main ones:
Lime Plaster: Made from slaked lime and sand, it’s been around for centuries. It’s breathable, meaning it allows moisture to pass through, making it great for historic buildings or areas prone to damp.
Gypsum Plaster: This is what you’ll find in most modern homes. It’s made from gypsum, a mineral that sets quickly and hardens into a strong, smooth finish. It’s ideal for new construction and repairs.
Cement Plaster: Made from cement, sand, and water, this type is durable but not as breathable as lime plaster. It’s often used outdoors or in areas where strength is key.
Types of joint compound (all-purpose, setting-type)
Joint compounds are also available in different types to suit various needs:
All-Purpose Joint Compound: This is your everyday, versatile option. It’s ready-to-use and can be applied with a taping knife. It sets slowly, giving you time to smooth it out.
Setting-Type Joint Compound: This type comes in two parts – the powder (joint compound) and a liquid additive that makes it set faster. It’s great for repairs where speed is important, like when you’re working on multiple rooms or need to paint quickly.
The setting mechanism matters because it affects how long you have to work with the compound before it hardens. All-purpose compounds give you more time, while setting-type compounds are faster but require mixing and can be messier.
Strengths and Weaknesses for Repairs
Plaster tends to form a harder, more brittle surface with strong bonding to traditional lath or drywall paper when applied correctly. Joint compound usually offers better smoothing, easier sanding, and more flexibility for small shifts without cracking. Adhesion, hardness, and shrinkage vary by product, so read the instructions on the label.
Flexibility and sanding behavior are key differences you’ll feel during repairs. Joint compound is generally easier to feather and finish, while plaster can be more durable where a rigid repair is needed. Verify performance claims with the manufacturer instructions and local product data sheets before choosing one for a specific repair.
Durability and impact resistance
When it comes to durability, joint compound is your best bet. It’s tougher and more resistant to damage than plaster.
Plaster, especially lime-based ones, can be quite brittle. They’re great for fine details but not so much for high-traffic areas or walls that take a beating.
Use joint compound on walls that see a lot of action – like hallways, kids’ rooms, or near entryways. It’ll hold up better to bumps and scrapes.
Crack resistance and movement tolerance
Plaster, particularly gypsum-based ones, is more flexible than joint compound. This makes it better at handling building movement and temperature/humidity changes.
Joint compound, on the other hand, is less tolerant to movement. It can crack or shrink over time due to these factors.
Choose plaster for areas prone to cracks – like old homes with settling foundations or rooms subject to big temperature swings.
Which Material for Which Repair Type
For small nail holes or shallow surface blemishes, joint compound is usually sufficient and easier to blend. Deep gouges or edges near corners may benefit from plaster or a patch composed of plaster followed by a joint compound skim. For full re-plastering, use plaster as the finish layer over appropriate backing.
Skim coats and corner repairs often rely on joint compound for a smooth, buildable layer, but some setups require plaster for a true plaster finish. Always verify the recommended repair type with product instructions or a professional if you’re unsure about suitability for your substrate.
Small patches and surface blemishes
For shallow, cosmetic fixes like small nail holes or minor scratches, joint compound is your best bet. It’s lightweight, easy to apply, and sands smoothly.
Plaster isn’t typically used for these repairs because it’s heavier and more labor-intensive. Plus, using plaster for tiny repairs can lead to excess material waste.
Exception: If you’re working on an older home with original plaster walls, use plaster for small repairs to maintain authenticity and avoid compatibility issues.
Deep repairs, filling large voids, and structural cracks
When it comes to deep fills or large voids, plaster is the way to go. It has better bonding strength and can handle deeper layers.
For structural cracks, use a specialty setting-type joint compound designed for such repairs. These compounds have added polymers for enhanced strength.
Proper layering techniques are crucial here. Apply thin layers, allowing each to dry completely before sanding lightly. This helps prevent cracking and ensures a smooth finish.
Preparation and Application Differences
Start with a clean, sound surface and remove loose material. Dull glossy areas with light scuffing to improve adhesion. Mix to the product’s recommended consistency and keep tools clean as you work.
Apply in built-up layers for plaster, with careful attention to shaping and wet-edge work. For joint compound, use thin successive coats and allow each to dry before the next. Check mixing ratios and drying guidance on the label or manufacturer instructions.
Substrate preparation and priming
Before you start mixing concrete or laying mortar, prep your base right. Here’s what you need to do:
Clean the surface. Remove all dirt, debris, and old material. A wire brush can help with tough spots.
Check base compaction. Loose soil can cause issues later on. If it’s too loose, consider having it compacted by a professional.
Use bonding agents or primers. These help your new material stick to the old one. Check product labels for application instructions. Here are some options:
– For concrete: Use a primer designed for concrete surfaces. Apply it evenly with a brush or roller.
– For mortar: Consider using a scratch coat first. This helps create mechanical bond and improves adhesion. Apply it at a thickness of around 1/4″ to 3/8″.
Mixing, applying, and finishing techniques
First things first, always check your concrete mix ratio. It’s usually 1:2:4 (cement:sand:gravel), but check your product label. Now, let’s get mixing:
Use a shovel or a concrete mixer to combine the dry ingredients. Slowly add water while mixing until you reach a consistent, workable consistency. Not too wet, not too dry – think of it like Goldilocks’ porridge.
Now, onto applying. You’ve primed your substrate (if you haven’t, go back and do that), so let’s get this concrete on there:
Start by pouring the mix into the forms. Use a shovel or a concrete rake to spread it evenly. Then, grab your trowel or bullfloat – these are your new best friends. Work the concrete from one end of the slab to the other, using smooth, steady strokes. Remember, you’re not trying to paint a masterpiece here, just get that concrete level and compacted.
Once it’s all spread out, let’s finish this off right:
Grab your edger trowel and work the edges first. This helps prevent cracking. Then, use your bullfloat to smooth out the surface. After that, switch to a steel trowel for a final pass. You want a smooth, consistent finish. If you’re going for an exposed aggregate look, now’s the time to add those pebbles or seeds.
Finally, let’s talk sanding and feathering. This is where you blend the new concrete with the old:
Use a concrete edger to cut control joints at regular intervals – this helps prevent random cracking later on. Then, grab your groover float and work those edges. You want a smooth transition from old to new. If there are any rough spots or high areas, use a concrete grinder or sander to feather them down.

Tools and Materials Checklist
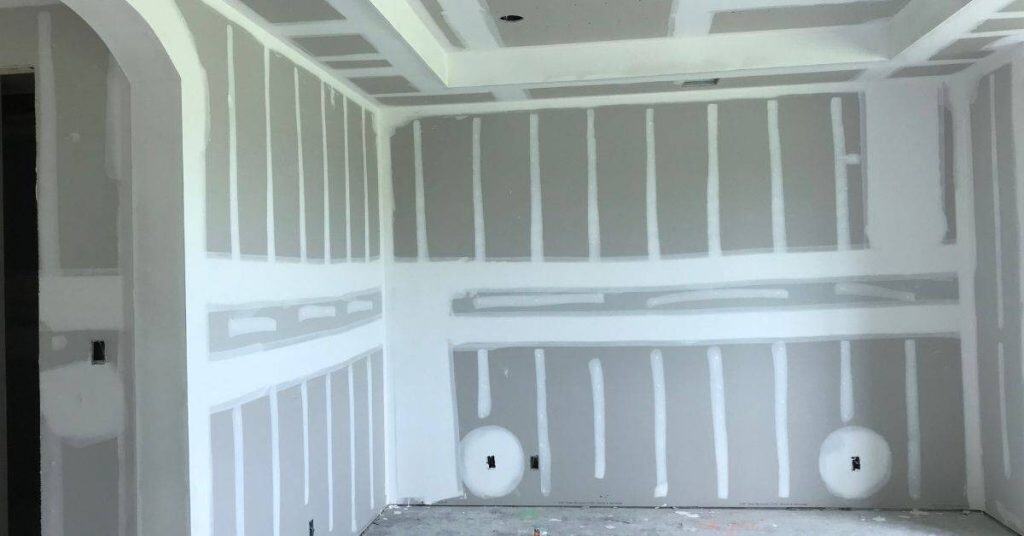
Common tools include trowels, knives, sanding blocks, a mud pan, and a mixer or drill with a paddle attachment. For plaster, you may need a hawk, a plastering trowel, and possibly a sandbag or lath material depending on the substrate. Have a damp sponge handy for smoothing edges.
Safety gear like eye protection, a dust mask, and gloves are essential. Depending on the job, you might need specialty items such as corner tapes, plaster bonding agents, or setting-type compounds. Always check the product instructions for any additional tools or safety requirements.
Common tools for joint compound jobs
Before you start applying joint compound to your drywall seams and corners, make sure you have all the necessary tools. Use this checklist to ensure you’re well-prepared.
- Taping Knife (4″ or 6″): Check for a sharp edge; run your thumb along it to feel for any nicks. A dull knife can cause uneven application and damage the joint tape.
- Hawk: Ensure it’s clean and free of old compound; wipe with a damp cloth if needed. A dirty hawk can contaminate your fresh mix, leading to poor adhesion.
- Sanding Blocks (12″ x 9″ or 18″ x 7″): Check for even wear and tear; replace if they’re too thin or uneven. Uneven blocks can cause inconsistent sanding results.
- Mixing Paddle (for drill): Make sure it’s the correct size for your bucket; check manufacturer guidelines. An improperly sized paddle can lead to under- or over-mixing, affecting compound consistency.
- Joint Compound: Check the label for type (lightweight, all-purpose, etc.) and expiration date. Using expired or wrong-type compound can result in weak joints that crack or crumble.
- Joint Tape: Inspect for tears or weak spots; discard if damaged. Damaged tape can lead to weak joints with reduced durability.
- Safety Glasses: Check for any cracks or damage; replace if necessary. Wearing damaged safety glasses can compromise your eye protection during sanding.
- Dust Mask: Ensure it fits well and is in good condition. A poor-fitting mask can allow dust to enter, causing discomfort or health issues.
Quick rule: Always inspect your tools before starting a job. Using damaged or improper tools can lead to rework, delays, and additional costs.
Tools and supplies for plaster work
Before you start applying plaster, make sure you have all the necessary tools and supplies. This checklist will help you ensure that you’re well-prepared.
- Trowels ( various sizes ): Check you have trowels ranging from 6″ to 12″. Confirm by measuring them.
- Floats ( medium and large ): Ensure you have a 12″ float for large areas and an 8″ or 10″ for detailed work. Measure to confirm.
- Scratchers: Check you have a scratch tool with stiff bristles. Test it by running your fingers through the bristles.
- Bonding agent: Ensure you have a suitable bonding agent for your plaster type. Check the product label to confirm compatibility.
- Lath ( if applicable ): If using lath, check it’s properly secured and aligned. Tap it gently; it should sound solid.
- Moisture-control tools: Have a moisture meter on hand to test the substrate before applying plaster. Check its batteries.
- Plaster mix (ready or dry): Ensure you have enough plaster for your project. Calculate based on coverage rates provided by the manufacturer.
- Protective gear: Don’t forget safety glasses, gloves, and a dust mask. Check them before starting work.
Quick rule: Always check your tools and supplies before starting any plastering job to avoid delays and rework.
Drying, Curing, and Timing Considerations
Drying in place depends on temperature, humidity, and airflow. It’s not the same as full curing, which is a chemical process that can continue after the surface feels dry. Plan repainting or topcoating around the product’s stated guidance in the instructions.
Ambient conditions can speed or slow curing; avoid high humidity and drafts that cause surface flaws. If you’re unsure about curing times, consult the manufacturer data sheet or labeling for the recommended window before finishing the repair.
How temperature and humidity affect outcomes
Temperature and humidity play a big role in how your repair dries and cures. Here’s what you need to know:
Temperature: Keep it between 65-75°F (18-24°C) for best results. Too cold, and the material won’t cure properly. Too hot, and it might dry too fast, causing cracks.
Humidity: Aim for around 50% humidity. Low humidity can cause repairs to dry out too quickly, while high humidity slows down drying and curing.
Adjust your environment if you can. If not, be prepared to wait longer for repairs to cure fully in extreme conditions.
When to sand, prime, and paint
Patience is key here. Rushing can lead to failures or poor finishes:
Sanding: Wait at least 24 hours after applying the repair material before sanding. This gives it time to set but not fully cure. Sand lightly, just enough to smooth out any rough spots.
Priming: Let your repair dry and cure for at least a week before priming. This ensures the surface is ready to accept paint. Use a primer suitable for your chosen finish.
Painting: Wait at least 24 hours after priming before painting. This gives the primer time to set and prepare the surface. Always follow the manufacturer’s instructions for specific wait times.
Cost, Availability, and Environmental Considerations
Costs vary by formulation, availability, and regional supply. Stock low-cost joint compounds or plasters at most home centers, but specialty products may come with longer lead times. Compare options based on your project size and accessibility.
VOC content and eco-friendly choices matter for indoor projects. Look for product labels that indicate low or zero VOCs and check manufacturer guidance for environmental considerations. Verify any eco-friendly claims with product data sheets or local regulations.
Budget-friendly choices and when not to skimp
Plaster and joint compound both have budget-friendly options, but knowing when to choose them is key.
Joint Compound: For small repairs like nail pops or minor surface damage, cheaper ready-mixed compounds can save you time and money. They’re easy to apply and clean up.
Plaster: When it comes to larger repairs or new work, spending a bit more on high-quality materials reduces the risk of repeat repairs. Cheaper plasters may crack or crumble over time.
Remember, skimping on materials for structural cracks can lead to costly rework down the line. Always consider the longevity and reliability of your repair.
Health, VOCs, and disposal tips
Both plaster and joint compound can emit volatile organic compounds (VOCs), so proper ventilation is crucial during application.
Joint Compound: Some low-VOC options are available. Always check the label before purchasing. Wear a mask when sanding to avoid inhaling dust. Dispose of unused product in accordance with local regulations, often at hazardous waste facilities.
Plaster: Traditional lime plasters have low VOC emissions but can be messy to work with. Gypsum plasters are easier to handle and also low-VOC. Always wear gloves when handling wet plaster to protect your skin. Leftover plaster should be disposed of as construction waste.
To minimize waste, buy only what you need and reuse any leftovers if possible. Check local recycling centers for options before disposing.
Visual Checkpoints and Troubleshooting Common Problems
Good repairs show a uniform texture, smooth feathered edges, and no visible ridges or cracking. Uneven sheen or transferred edges indicate a poor feather or improper finishing. Use a light raking pass to reveal surface issues before painting.
Common fixes involve re-smoothing, feathering, or applying a fresh skim. Bubbling, cracking, or poor adhesion should be addressed by cleaning, re-prepping the area, and following the product instructions for reapplication. If in doubt, verify the recommended corrective steps with the manufacturer instructions or local guidelines.
Identifying failed repairs and their causes
Inspect your repair work regularly to catch any issues early. Use this checklist to diagnose problems.
- Hairline cracks: Check for over-sanding or under-priming. Cracks can appear if the surface wasn’t properly prepared.
- Delamination: Look for peeling or flaking. This could be due to poor adhesion, usually caused by not cleaning the surface enough before applying the compound.
- Shrinkage: Check for concave areas. This is often a result of applying the material too thinly.
- Bubbling: Inspect for trapped air or moisture. Bubbles can form if the surface wasn’t dried properly before application.
- Cracking at joints: Check for movement in the substrate. This could be due to settling or expansion/contraction of the structure.
- Discoloration: Look for stains or yellowing. This might indicate that the wrong material was used, or that it wasn’t sealed properly.
- Uneven surface: Check for inconsistent application. This can happen if the compound wasn’t mixed well, or if it dried too quickly.
- Mold or mildew: Inspect for signs of moisture intrusion. These can grow if the area wasn’t sealed properly after repairs.
Quick rule: Regular inspection helps catch problems early, preventing costly rework.
Repairing botched jobs
If you’ve spotted a problem, don’t panic. Follow this checklist to fix it right the first time.
- Remove failed material: Scrape off any loose or damaged compound using a joint knife or putty knife. Be careful not to damage the substrate.
- Clean the surface: Wipe down the area with a damp cloth to remove dust and debris. Let it dry completely before proceeding.
- Inspect the substrate: Check for any underlying issues, like rot or damage. Repair these before applying new compound.
- Prime the surface: Apply a suitable primer to seal the surface and improve adhesion. Follow the manufacturer’s instructions for drying time.
- Choose the right material: Select the correct plaster or joint compound for your needs. Consider the substrate, climate, and intended finish.
- Mix properly: Follow the manufacturer’s instructions to ensure a consistent mix. This prevents lumps and ensures even drying.
- Apply carefully: Use a trowel or joint knife to apply the compound in thin layers. Allow each layer to dry according to the manufacturer’s recommendations before sanding lightly.
- Avoid common mistakes: Don’t rush the process, don’t skimp on materials, and don’t ignore warning signs. Patience and attention to detail are key.
Quick rule: Fixing a botched job requires patience and careful attention to detail. Don’t rush; do it right the first time.
Conclusion
Choosing the right material matters for safety, durability, and a clean look. If you pick plaster where joint compound is needed or vice versa, you’ll chase cracks, delamination, or a finish that looks wrong from day one.
To finish strong, run this quick check in order: inspect the repair area for moisture and dust, select the material that matches the repair type, prep the surface clean and primed, mix to the recommended consistency, apply in thin, even coats, feather edges, and let each coat dry fully with ventilation before adding another, then verify with a dry visual check and a light touch testing for firmness, finally finish and seal as appropriate for the room and environmental conditions.
Common mistakes to avoid are using too thick a coat, skipping surface prep, and ignoring drying or curing times. Wear gloves and a mask when sanding, ventilate well, and test a small area first to confirm compatibility and adhesion before committing to the whole repair. If the surface is actively damp, structural damage is suspected, or you’re unsure about the repair, don’t push ahead—call a professional and get a second opinion. When you stick to the basics, you’ll get reliable repairs that look right, hold up, and stay safe.
FAQ
When should I use plaster versus joint compound for patching holes in plaster walls?
If the wall is solid plaster, use plaster to patch repairs for a durable, matching repair. For drywall or plaster-done areas with seams, joint compound is usually easier to feather and finish. When in doubt, start with the material that matches the substrate and check the manufacturer instructions for compatibility.
Can I mix plaster and joint compound on the same repair?
You can, but plan the order carefully. Use plaster to rebuild the actual missing mass and then finish with joint compound for feathering and final coat. Do not rely on joint compound alone to replace significant plaster sections; it won’t perform the same under load and vibration.
How do I finish the repair so it blends with the surrounding wall?
Sand lightly after each coat to avoid gouges. Build up in thin layers and aim for a smooth, gradual transition. Always wipe away dust before applying the next coat and use a clean trowel or knife for each pass.
What should I check for before starting the repair?
Inspect the substrate and moisture: signs of dampness or efflorescence mean you need to address moisture first. Read the product label for recommended substrates and curing times. If you’re unsure, check the manufacturer instructions or local rules for guidance.