
Introduction
Cleaning, storage, and rescue tips help brushes and rollers last longer.
This hands-on guide walks you through practical steps you can use on a DIY project. You’ll learn how to keep bristles and handles in good shape between jobs.
Understanding the anatomy of an acrylic brush helps you spot where problems start. From quick cleanups to thorough rinsing, you’ll gain practical methods you can apply without special tools. When in doubt, check the product label or manufacturer instructions for storage and cleaning recommendations.
Key takeaways
- Know acrylic brush anatomy: ferrule, bristles, and handle influence cleaning limits.
- Use quick rinse after each coat to prevent stiff bristles and residue.
- Store brushes flat or in protective sleeve to maintain shape during travel.
- Rescue dried acrylic brushes by gentle soaking and careful combing with a brush.
- Drying and reshaping guide: air dry upright, reshaped bristles before storage.
- Follow safety rules: work in ventilated area, avoid solvents near skin.
Table of Contents
- Introduction
- Key takeaways
- Understanding Brushes and Rollers: Anatomy, Materials, and Why It Matters
- Quick Cleaning Routines to Prevent Damage While You Paint
- Deep Cleaning: Step-by-Step Procedures for Different Paint Types
- Drying, Reshaping, and Conditioning for Peak Performance
- Storage Strategies: Studio, Long-Term, and Travel Protection
- Rescue and Repair: Restoring Dried or Damaged Brushes and Rollers
- Maintenance Routine, Cost-Saving Strategies, and Lifecycle Planning
- Safety, Common Mistakes, and Environmental Considerations
- Conclusion
- FAQ
Understanding Brushes and Rollers: Anatomy, Materials, and Why It Matters
Brushes have bristles, a ferrule, and a handle. Rollers consist of a roller cover, core, frame, and end caps. These parts determine how you clean, dry, and store them properly.
Material choices matter too. Natural versus synthetic bristles behave differently, and foam versus fabric rollers affect porosity and drying. Knowing these differences helps you pick the right cleaners and storage methods for each tool.
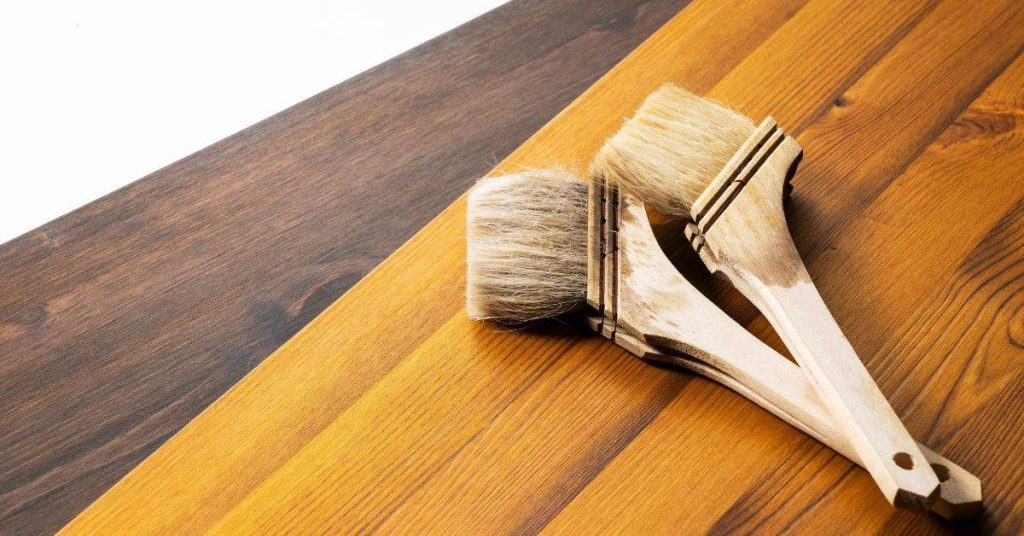
Brush Anatomy (Handle, Ferrule, Bristles, Glue)
A brush’s lifespan depends on its parts. Inspect them before and after use.
The handle is your grip. Check for cracks or splinters that can irritate hands. The ferrule, where handle meets bristles, holds everything together. A loose ferrule means the brush is worn out.
Bristles are key. Natural bristles are durable but may splay over time. Synthetics hold shape better but can become brittle. Check for broken or missing bristles. Glue holding them in place can also break down, so keep an eye on that too.
Roller Anatomy (Core, Nap, End Caps, Frame, Handle)
A roller’s parts determine its performance and lifespan. Here’s what to look for:
The core is the middle part around which the nap wraps. It should spin smoothly. The nap, or cover, comes in various materials (foam, fabric) and lengths. Longer naps hold more paint but can be messier to clean.
End caps keep the nap in place. Check they’re secure. The frame supports the core. Inspect for bends or cracks. Lastly, the handle should fit snugly and not wobble.
Materials and Care Differences (Natural vs Synthetic, Nap Lengths)
Material choices affect cleaning, conditioning, and storage. Here’s how:
- Natural bristles: Durable but can splay over time. Use for oil-based paints. Avoid water-based as they can swell.
- Synthetic bristles: Hold shape better, suitable for all paint types. Avoid high heat to prevent brittleness.
- Foam rollers: Inexpensive, good for small jobs. Clean with water-based cleaners only.
- Fabric rollers: More expensive but durable. Use for larger projects. Clean with appropriate solvents or water-based cleaners.
- Nap lengths: Longer naps (3/4″ to 1″) hold more paint, ideal for textured surfaces. Shorter naps (1/2″ to 3/8″) are better for smooth surfaces.
Quick Cleaning Routines to Prevent Damage While You Paint
Create a concise quick-clean routine for both brushes and rollers during short breaks. It should remove fresh paint and prevent setting on fibers or naps. Keep it simple and repeatable.
Describe how to handle acrylic or latex paints differently from oil-based paints, and show how to use rinse steps, towels, and wrap methods to minimize air exposure. Focus on speed without sacrificing tool longevity.
Quick clean for brushes
When you need a short break, don’t let paint dry on your brush. Here’s a quick routine:
Wipe excess paint off the bristles against the lip of your paint tray. Then, give it a brief rinse under lukewarm water. Shake off excess water and wrap the head in a damp cloth or plastic wrap to keep air out.
For oil-based paints, use mineral spirits instead of water for rinsing. Always rinse thoroughly before wrapping to prevent paint from setting in the bristles.
Quick clean for rollers
Rollers need love too. Here’s how to keep them fresh between coats:
First, roll the roller firmly against a folded piece of paper or cardboard in your paint tray to remove excess paint. Then, use a 5-in-1 tool or a hacksaw blade to scrape paint back into the tray.
Give it a quick rinse under lukewarm water (latex paints) or mineral spirits (oil-based). Shake off excess water or solvent, then wrap the roller in plastic to keep it moist and prevent air from drying out the nap.
Set up a fast-clean station
Having the right tools at hand makes quick cleaning a breeze. Here’s what you need:
A plastic tub or bucket for water (or solvent) and a separate one for rinsing. A spray bottle filled with water (or solvent) for easy application. A few microfiber towels or rags for wiping. And a comb to gently reshape bristles after cleaning.
For rollers, have some plastic wrap and a 5-in-1 tool or hacksaw blade ready. Keep your paint trays and liners nearby too. With these tools on hand, you’ll be in and out of breaks in no time.
Deep Cleaning: Step-by-Step Procedures for Different Paint Types
Split cleaning into water-based and solvent-based tracks, following label guidance and manufacturer instructions. Use soap and water for water-based paints and an appropriate solvent for solvent-based paints. Always check specific recommendations on the product label.
Outline a step-by-step flow for each type: rinse, pre-clean, scrub, rinse again, and dry. Include ferrule and core care to prevent rust or damage during cleaning.
Step-by-Step Cleaning Process
The following steps guide you through deep cleaning your brushes and rollers to ensure they last for future projects.
- Preparation: Gather your tools, materials, and safety gear. Set up a well-ventilated area.
- Initial Rinse: Quickly rinse the tool in clean water to remove excess paint. This prevents dried paint from clogging bristles or nap.
- Pre-Cleaning: Apply the appropriate cleaner (soap and water for water-based, solvent for oil/alkyd) to loosen the paint film. Let it soak for 5-10 minutes.
- Scrubbing: Use a brush comb or your hands to gently scrub the bristles or nap. Be careful not to damage the tool.
- Thorough Rinsing: Rinse thoroughly until no more cleaner or paint comes out. Check that water runs clear from the ferrules and cores.
- Final Drying: Allow tools to air dry completely, away from heat sources. Inspect for any remaining paint or damage before storing.
Thorough cleaning for water-based paints (acrylic, latex)
Water-based paints are easy to clean with mild soap and water. Follow these steps to maintain your tools:
Start by removing excess paint under running water. Then, mix a solution of warm water and mild soap or brush cleaner in a container.
Dip the tool into the solution, ensuring all bristles or nap are submerged. Let it soak for 10-15 minutes to loosen the paint. Gently agitate the tool during this time.
Rinse thoroughly under running water until no more paint comes out. Avoid using hot water or harsh agitation, as these can damage the glue holding the bristles or nap in place.
Thorough cleaning for oil/alkyd paints and solvents
Oil-based paints require solvents for effective cleaning. Follow these steps to clean your tools safely:
Choose a suitable solvent based on the paint type (mineral spirits, turpentine, or an appropriate solvent). Always check product labels if unsure.
In a well-ventilated area, pour some solvent into a container. Dip the tool into the solvent, ensuring all bristles or nap are submerged. Let it soak for 15-20 minutes to break down the paint.
Gently agitate the tool during this time to help remove grease and paint. After soaking, use a brush comb or your hands to scrub any remaining paint from the bristles or nap. Rinse thoroughly with clean solvent until no more paint comes out.
Tools and materials checklist for deep cleaning
Before you start, ensure you have the following tools and materials to make your deep cleaning process efficient and safe:
- Soft soap or brush cleaner: For water-based paints. Mild and gentle on tool bristles.
- Solvent (mineral spirits, turpentine): For oil/alkyd paints. Strong enough to dissolve paint but safe for tools.
- Brush comb or old toothbrush: To scrub bristles and remove dried paint.
- Disposable trays or containers: For soaking tools in cleaner or solvent.
- Nitrile gloves: Protect your hands from harsh chemicals and solvents.
- Rags or paper towels: To wipe off excess paint and dry tools.
- Ventilated area: Essential for safe use of solvents. Open windows, use fans, or work outdoors.
- Personal Protective Equipment (PPE): Includes safety glasses, apron, and long sleeves to protect from splashes.
Quick rule: Always follow manufacturer guidelines for tool care and cleaning. If unsure, consult the product label or contact the manufacturer.
Drying, Reshaping, and Conditioning for Peak Performance
Describe how to dry with bristles or naps oriented to prevent warping, avoiding direct sun and heat sources. Protect tools from excessive airflow that can cause brittleness. Keep environment cool and ventilated.
Provide cues for when drying is complete and how to reshape while damp. Mention conditioning with mild soap or conditioner in small amounts and how to store after drying to maintain shape and spring.
Correct drying orientation and airflow
After cleaning, it’s crucial to dry your brushes and rollers properly to maintain their shape and longevity. Here’s how:
Brushes: Hang them bristle-side down or lay them flat with the bristles facing downward. This prevents warping and keeps the ferrule (metal part) from bending.
Rollers: Stand them upright, nap side out, to allow air to circulate around the core. Avoid sitting them on their tips as this can damage the frame.
Reshaping bristles and roller naps
Over time, brushes and rollers can lose their shape. Here’s how to gently reshape them:
Brushes: While still damp, use your fingers or a bristle comb to realign the bristles. Gently work from the base to the tip, following the direction of the bristles.
Rollers: Use a roller nap comb or your fingertips to smooth and reshape the nap. Work in small sections, starting at one end and moving towards the other.
Conditioning and storage prep
Before storing, give your tools a light conditioning treatment to maintain their pliability. Here’s how:
Brushes: Apply a mild, residue-free soap or brush conditioner sparingly to the bristles. Work it in gently with your fingers, then rinse and dry.
Rollers: Remove any lint or debris from the nap using a roller nap comb or your fingertips. Ensure they’re completely dry before storing to prevent mildew growth.

Storage Strategies: Studio, Long-Term, and Travel Protection
Discuss ideal storage environments for brushes and rollers and how to shield them from pests, dust, and moisture. Separate short-term from long-term needs and adapt to your workspace. Make safety a habit by keeping cleaners away from storage areas.
Offer deformation prevention tips like upright hooks and breathable containers. Include guidance on travel protection with cases or padded sleeves for transport between sites.
Short-term studio storage and accessibility
When you’re working on a project, keep your brushes and rollers clean, dry, and easily accessible. Here’s how:
Upright or flat storage: Use hooks or racks to hang your tools upright, keeping bristles off the ground and preventing damage. For rollers, use roller hangers or lay them flat on a protected surface.
Protect from dust: Cover your brushes with plastic bags or caps when not in use. Keep your workbench area clean to minimize dust buildup.
Within reach: Store your tools near your workstation so you don’t have to walk far to grab them. This keeps your workspace organized and efficient.
Long-term storage and pest/moisture prevention
For long-term storage, protect your brushes and rollers from pests, moisture, and dust. Here’s how:
Enclosed cases or boxes: Store tools in sealed containers to keep out insects and rodents. Make sure they’re breathable to prevent mold growth.
Moisture control: Use silica gel packets or other moisture-absorbing materials inside your storage container. Ensure tools are completely dry before storing.
Cleanliness: Thoroughly clean and dry your brushes and rollers before long-term storage. This deters pests and prevents mold growth.
Packing for travel and site work
When moving or working on-site, protect your brushes and rollers from damage. Here’s how:
Protective cases: Use rugged cases or tube-style holders to safeguard your tools during transport. This prevents bristles from getting crushed or roller covers from being punctured.
Secure roller covers and frames: Keep roller covers on their frames when transporting. If you must remove them, secure the cover and frame separately to prevent loss or damage.
Clean and dry: Before packing, ensure your tools are clean and completely dry. This prevents moisture-related issues during transport.
Rescue and Repair: Restoring Dried or Damaged Brushes and Rollers
Start by identifying the type of tool and material to decide on a safe rescue path. Distinguish cosmetic damage from structural issues to set expectations. Gather compatible cleaners and tools before you begin.
Detail salvage steps for common problems: softening dried areas, realigning bristles, unclogging rollers, and reattaching loose parts. End with a quick post-rescue check to decide if replacement is needed.
Removing dried paint and softening clumped bristles
First, identify the type of paint – acrylic or oil-based. For acrylic, soak in warm water with a few drops of mild dish soap for 15-30 minutes. Gently work the bristles with your fingers to loosen clumps.
For oil-based paints, use paint thinner or mineral spirits instead of water. Soak longer if needed – up to an hour. Be careful not to soak too long as it may dissolve the ferrule’s glue.
After soaking, use a comb or brush cleaner tool to gently work through the bristles, removing any remaining dried paint. Rinse thoroughly and reshape the bristles for optimal performance.
Fixing handles, ferrules and roller frames
For loose handles, first try re-seating it by gently tapping the ferrule with a hammer. If that doesn’t work, apply wood glue to the handle’s base, let it dry, then secure with clamps overnight.
Loose ferrules can be tightened using pliers or a wrench, depending on their design. Be careful not to overtighten and damage the ferrule or bristles.
For loose roller frames, check if the end caps are still intact. If not, replace them. Tighten any screws or bolts using an appropriate screwdriver or wrench.
When to retire and recycle parts
A tool is beyond repair when it consistently sheds bristles, has structural damage like broken handles or frames, or doesn’t hold a charge (for electric tools).
Recycle metal ferrules and frames at your local recycling center. Check with them for specific guidelines as some metals may need to be separated.
Plastic parts can also be recycled, but check with your local center first. For bristles, they’re typically not recyclable due to their size and composition. Consider composting or disposing of them in the trash.
Maintenance Routine, Cost-Saving Strategies, and Lifecycle Planning
Outline a simple maintenance routine that fits how you work, including after-use rinse, a deep-clean when needed, and proper storage. Keep the workflow practical and repeatable. Track wear to avoid surprises.
Cover tool-specific care and when to repair versus replace, aiming for durable, mid-range options. Plan a lifecycle approach with logs and budget so tool costs stay predictable.
Routine Maintenance Checklist
Use this checklist after each use and during periodic inspections to keep your brushes and rollers in top shape.
- Immediate rinse: After each use, rinse thoroughly with water to remove residue. This prevents clumping and makes deep cleaning easier.
- Deep clean (weekly): Use a suitable cleaner – solvent for oil-based paints, water-based for latex – to remove any remaining residue. Soak if necessary.
- Inspect bristles/naps: Check for damage or wear. Replace or repair as needed.
- Check handles/frames: Ensure they’re secure and undamaged. Tighten screws if loose.
- Dry properly (24 hours): Allow to air-dry in a well-ventilated area, away from direct sunlight or heat sources.
- Store correctly: Store in a cool, dry place, away from moisture and pests. See ‘Storage Strategies’ for details.
- Label tools (if applicable): Keep track of when you last used and cleaned each tool.
- Rotate tools (if multiple): Use different tools for different tasks to extend their lifespan.
Quick rule: Regular, thorough care extends tool life. Don’t skip steps or wait until it’s too late.
Repair vs Replace: Decision Guide
Knowing when to repair and when to replace your tools can save you money and time in the long run. Here’s how to decide:
Repair: If damage is minor, like a few broken bristles or a loose handle, repairing is usually the best option. It’s cheaper and keeps tools out of landfills.
However, if repairs are frequent (more than once every 3-6 months) or the tool is old and worn, replacement might be more cost-effective.
Replace: If a tool is beyond repair – like a roller with severely matted naps or a brush with bent, splayed bristles – it’s time to replace. Also consider replacing if a tool is causing poor results on the job, as this can lead to rework and wasted materials.
Always compare repair costs with replacement costs. If the new tool offers significant improvements (like better quality or features), it might be worth the investment.
Cost-Saving Habits and Smart Tool Selection
Adopt these habits to save money on brushes and rollers without compromising quality:
- Rotate tools by task: Use dedicated tools for specific tasks. This extends their life and keeps them in better condition.
- Use disposables wisely: For messy jobs or when you don’t want to clean, use disposable tools. But remember, they’re not always cheaper in the long run.
- Choose mid-range quality: High-end tools last longer but are expensive. Mid-range offers a good balance between cost and durability for typical concrete jobs.
- Consider optional/rentable tools: For occasional use, consider renting or buying cheaper, lesser-quality tools. But be prepared to replace them more often.
- Buy in sets (if applicable): Buying a set of brushes or rollers can be cheaper per unit than buying individually.
- Inspect before use: Check your tools before each use. Catching issues early prevents further damage and downtime.
- Avoid extreme conditions: High heat, freezing temperatures, and direct sunlight can damage tools. Store properly when not in use.
- Keep a maintenance log: Track when you bought, used, and maintained each tool. This helps plan replacements and spot trends.
Safety, Common Mistakes, and Environmental Considerations
List essential PPE and ventilation guidelines for cleaners and solvents, plus warnings about mixing products. Emphasize safe handling and keeping heat sources away from chemicals. Prioritize user safety at every step.
Call out common mistakes that shorten tool life and offer quick fixes. Include waste handling, disposal rules, and local regulations that may apply to your area.
Safe cleaner choices and personal protective equipment
Prioritize milder cleaners, use gloves and ventilation, check manufacturers for compatibility.
- Gloves: Protect hands from harsh chemicals. Choose nitrile or latex for most solvents.
- Ventilation: Ensure good airflow to prevent fume buildup. Use fans or work outdoors when possible.
- Eye protection: Wear safety goggles to shield eyes from splashes and debris.
- Respirator mask (for solvents): Protect against harmful vapors, especially with strong solvents like paint thinner.
- Cleaner selection: Opt for mild soap and water or specialized cleaners. Avoid harsh chemicals like turpentine if possible.
Disposal and environmental best practices
Proper disposal of solvents and paint is crucial to minimize environmental impact. Always follow local regulations.
Solvents: Collect solvent waste in sealed containers for proper disposal at designated facilities or hazardous waste collection events.
Paint: Allow excess paint to dry, then dispose of dried paint and brushes/rollers with regular trash. Never rinse hazardous materials down drains.
Consider local recycling options for empty cleaner containers and unused paint. Segregate hazardous waste from other trash.
Top mistakes to avoid
Preventing these common errors will extend the life of your brushes and rollers.
- Leaving paint on tools: Clean immediately after use. Dried paint is tough to remove and shortens tool lifespan.
- Standing brushes on tips: This bends bristles, damaging the brush. Always store brushes upright or horizontally with bristles hanging over an edge.
- Storing damp items: Moisture promotes mold and mildew growth. Ensure tools are dry before storing.
- Using harsh solvents on delicate tools: Strong chemicals can damage tool components, especially handles and ferrules.
- Neglecting to rinse tools after cleaning: Residual cleaner can degrade tool performance over time.
Regular maintenance and proper storage habits will keep your brushes and rollers in top shape for years.
Conclusion
Clean, store, and maintain your brushes and rollers now to protect safety, durability, and a flawless finish on every project. When you respect the tools, your paintjob looks right and lasts longer.
Do a quick rinse after each use and wipe away excess paint, then follow the deeper cleaning steps for the next type of paint, rinse thoroughly, reshape, and let tools dry completely before storing in a protective sleeve or container; set a simple weekly maintenance check so nothing sits dirty or deformed.
Common mistakes to avoid are leaving tools soaking, skipping proper drying, and storing them with paint residue or in damp conditions. Safety rules are simple: wear gloves and eye protection when cleaning, ventilate the area, and test cleaners on a small, inconspicuous spot first if you use something unfamiliar.
If you encounter stubborn dried material, cracked ferrules, or signs of mold, it may be time to call a professional rather than pushing on. Stay practical, stay safe, and keep your kit organized—your next project will go faster and look better because of it.
FAQ
What is the anatomy of an acrylic brush and why does it matter for cleaning?
Acrylic brushes have a bristle shape, ferrule, and handle. The bristles can be natural or synthetic, and the ferrule holds them tight. Knowing this helps you choose the right cleaner and avoid relaxing or pulling bristles during cleaning.
How do I clean acrylic brushes quickly and thoroughly without wrecking them?
Rinse with lukewarm water to loosen paint, then use mild soap or a dedicated brush cleaner for a quick rinse. Gently work the bristles from base to tip and squeeze out excess moisture. Always follow the product label or manufacturer instructions for specific cleaners.
How should I store acrylic brushes for studio use vs. travel to jobsites?
For studio storage, keep brushes upright or laid flat in a clean area, out of direct sun. For travel, protect bristles with a cover or cap and prevent crushing the tips. Check label guidance for any temperature or humidity recommendations.
How can I rescue damaged acrylic brushes and extend their life?
Inspect for bent bristles, loose ferrules, or heavy caking. Soak or recondition as directed by the cleaner’s instructions, then reshape while damp and air-dry flat or suspended. If the ferrule is loose or bristles shed heavily, plan for replacement per manufacturer guidance.
What’s the right approach to cleaning and storing rollers?
Remove excess paint, rinse with water, and use a mild soap if needed. Squeeze out water and roll the roller on a clean surface to shape. Dry with the cover on or in a well-ventilated area, away from heat or direct sun, and store upright or in a protector that keeps the nap from flattening.