
Introduction
The timeline and duration of your project are crucial factors when choosing between cement and concrete. Understanding the setting times, curing processes, and overall project timelines can help you plan effectively.
This guide walks you through the key differences in timing for both materials, helping you make an informed decision based on your project’s schedule and requirements.
The Setting Time: Cement vs Concrete
One of the primary factors affecting your project timeline is the setting time of cement and concrete. Here’s a breakdown:
- Cement: Once mixed with water, cement begins to set within 30 minutes to an hour, reaching initial set in around 4-6 hours.
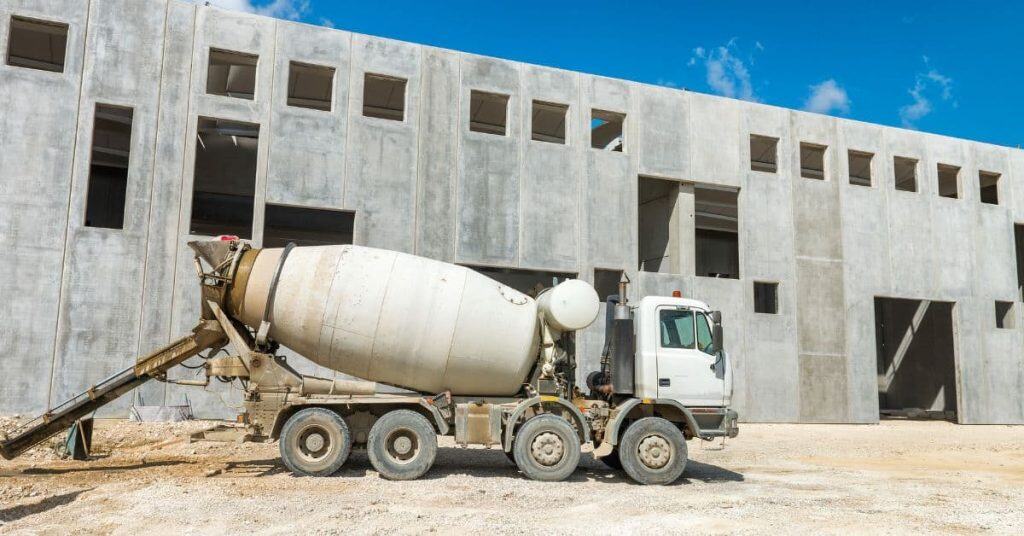
- Concrete: Concrete has a longer setting time due to the presence of aggregates. It typically takes 24-72 hours to reach its initial set and gains full strength over several weeks.
The faster setting time of cement makes it ideal for quick repairs or small projects with tight deadlines, while concrete’s slower setting allows for better workability and placement in larger-scale projects.
Key takeaways
Proper curing is essential to maintain the intended timeline. For both materials, keep them moist and covered during the initial setting period to prevent premature drying and cracking.
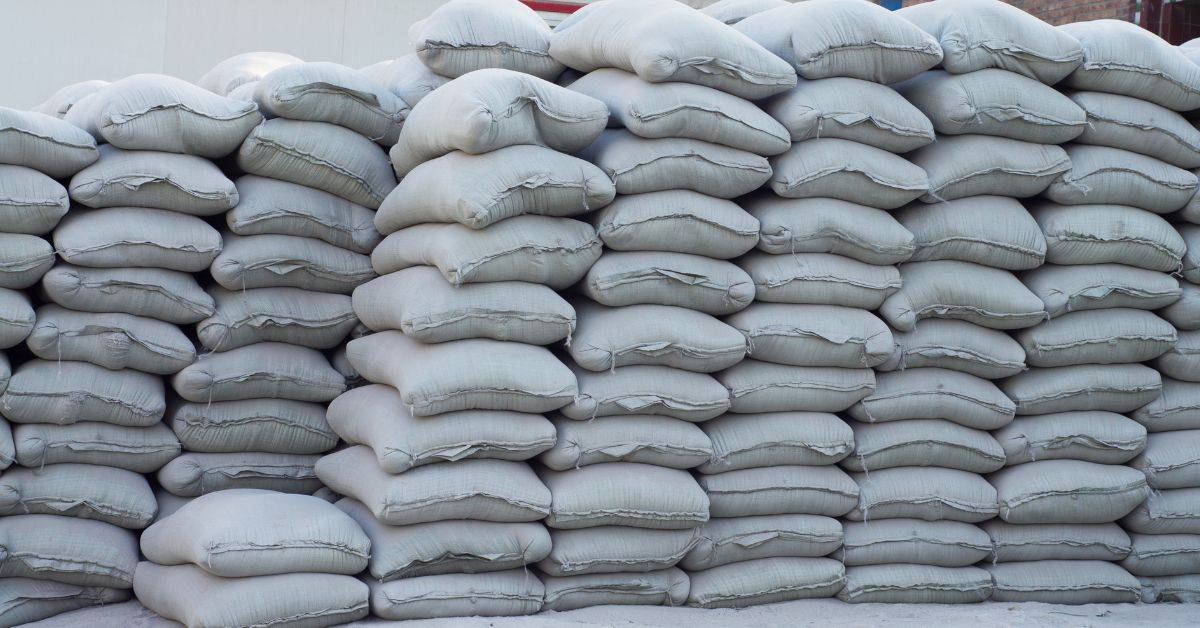
- Cement acts as a binder in concrete.
- Concrete is made by mixing cement with aggregates and water.
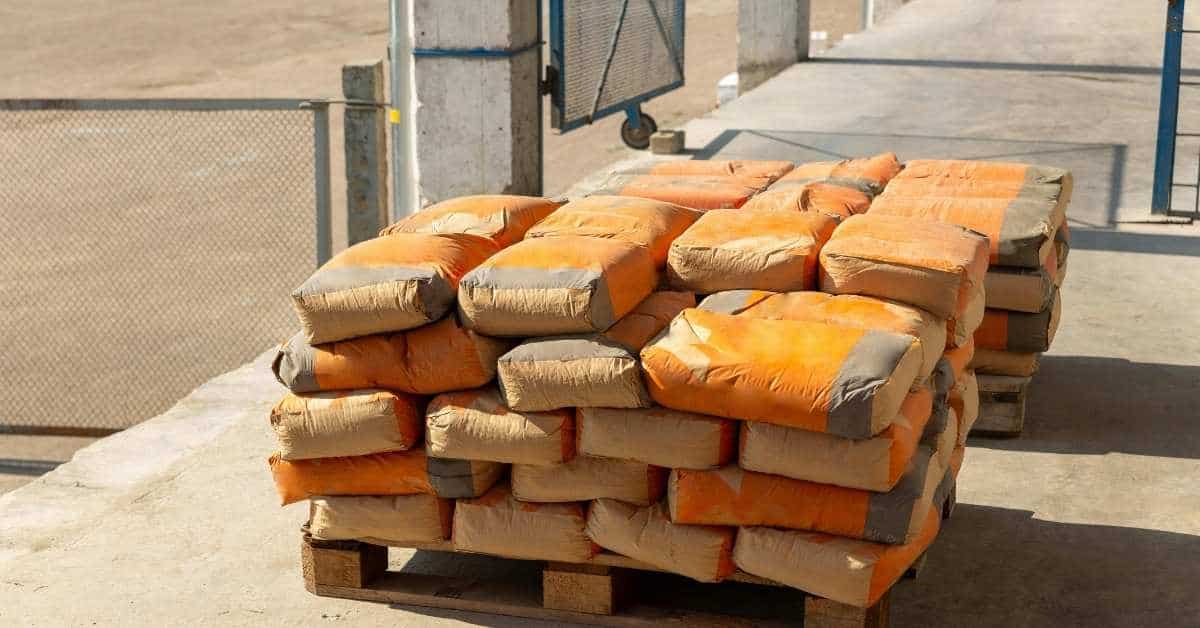
- Common types include Portland cement for concrete, which can be normal, lightweight, or high-strength.
- Use cement for grouts and mortars; use concrete for foundations and slabs.
- Concrete provides greater strength and durability compared to cement.
- Cement is typically cheaper per bag than concrete but covers less area.
- Select based on project requirements: consider strength, setting time, and budget.
Table of Contents
- Introduction
- Key takeaways
- Quick Definitions: Cement vs Concrete
- Ingredients and How They Work
- Common Types and Grades
- Typical Applications and When to Use Each
- Performance: Strength, Durability, and Longevity
- Pros and Cons: Cement vs Concrete
- Cost Comparison and Budgeting Guidance
- Safety and Handling Best Practices
- Environmental Impact and Sustainability
- How to Choose: Decision Checklist by Project Type
- Planning Tips, Common Mistakes, and Troubleshooting
- Conclusion
- FAQ
Quick Definitions: Cement vs Concrete
Cement is a fine powder used as a binder when mixed with water and aggregates like sand and gravel to form concrete.
Concrete is the composite material resulting from mixing cement, aggregates, and water. It’s not ready-to-use without these additional components.
What Is Cement?
Cement is a binding agent made from limestone and clay, ground into powder after high-temperature processing. When mixed with water, it hardens over time to bind materials together.
Portland cement is the most common type used in construction today.
What Is Concrete?
Concrete consists of cement as its binder along with sand, gravel, and water. The proportions vary based on the project requirements but ensure a solid yet workable mix.
Pouring concrete requires careful attention to moisture levels for optimal performance and longevity.
How People Commonly Mix up the Terms
The terms “cement” and “concrete” are often used interchangeably, leading to confusion. For example, asking for cement at a store when you actually need concrete can result in incorrect materials.
To avoid this:
- Check the product label or ask for assistance if unsure.
- Remember that cement is just one component of concrete.
- If you’re looking to buy, ensure the store carries both cement and aggregates (sand, gravel).
- When in doubt, consult a professional or local building codes for guidance.
Common mistake: Using only cement instead of mixing it with aggregates and water. This results in a weak, crumbly material that’s unsuitable for construction purposes.
Ingredients and How They Work
Cement is a binder mixed with water to create mortar or concrete, starting as clinker ground up with gypsum to control setting time. Aggregates like sand and gravel form the bulk of concrete, while cement acts as the glue.
Cement Ingredients and Chemistry
Cement production involves limestone, clay, and gypsum:
- Limestone: High-quality deposits are crucial for strong cement.
- Clay: Clean and free from impurities ensures better clinker formation.
- Gypsum: Finely ground to control setting time effectively.
The hydration process forms calcium silicate hydrate, providing strength. Store materials dry to maintain quality.
Concrete Mix Components and Aggregate Choices
Concrete includes cement, sand, gravel, water, and sometimes admixtures:
- Cement: Binds other ingredients together.
- Sand: Fine aggregate that fills gaps between coarse aggregates.
- Gravel: Coarse aggregate providing strength and stability.
- Water: Hydrates cement, triggering the curing process.
When choosing aggregates:
- Check their particle size distribution for a dense mix.
- Ensure they’re clean and free of organic matter or impurities.
- Consider using recycled aggregates to reduce environmental impact.
To determine the optimal water-cement ratio:
- If the mix is too dry (low water content), it will be hard to work with and may not cure properly.
- If the mix is too wet (high water content), it can weaken the concrete’s strength and increase drying time.
A common mistake is using too much or too little water. This can lead to weak, porous concrete that’s susceptible to cracking and freeze-thaw damage.
Additives and Admixtures: What They Do
Plasticizers improve workability, allowing easier placement and finishing. Accelerators speed up setting time for quicker completion.
Air entrainers enhance freeze-thaw resistance in cold climates. Fiber reinforcement adds tensile strength to prevent cracking.
Select additives based on specific needs such as weather conditions or desired properties of the concrete mix. For example, use air entrainers if your project is located in a region with frequent freezing and thawing cycles.
Common Types and Grades
Selecting the right cement type is crucial: Portland cement types I, II, and III are commonly used for general use, moderate sulfate resistance, and high early strength respectively. Blended cements offer enhanced properties like durability or workability by mixing Portland with other materials.
Masonry cement is ideal for bricklaying due to its bonding capabilities and ease of application. Quick-setting cement sets faster but may be less suitable in extreme weather conditions.
Cement Types (Portland, Blended, Quick-setting)
Concrete grades are classified by compressive strength, typically ranging from 2000 to 5000 psi for most DIY projects. High-strength mixes can exceed 8000 psi for critical load-bearing structures.
What to check when choosing cement types:
- Portland cement is the most common, suitable for general-purpose use and ideal for mixing with aggregates to create standard concrete.
- Blended cements contain added materials like fly ash or slag, offering improved durability and reduced heat of hydration. Choose these when long-term performance and crack resistance are priorities.
- Quick-setting cement accelerates the setting time, useful for projects with tight deadlines or cold weather conditions where rapid strength development is crucial.
Common mistake to avoid: Not considering the specific needs of your project. Using the wrong type of cement can lead to improper curing, reduced durability, and potential structural issues down the line.
Concrete Grades and Specialized Mixes
Lightweight concretes use expanded aggregates, reducing structural loads in buildings or bridges. Self-compacting concrete (SCC) flows easily without vibration, ideal for complex forms where traditional mixes might struggle.
Typical Applications and When to Use Each
Mortar is ideal for bonding bricks or stones together in masonry work, while grout fills gaps between tiles or serves as a base layer under tile installations. Both mortar and grout ensure strong bonds.
Cement is essential in concrete mixes, providing the binding agent that holds aggregates together once hardened. Concrete is best suited for structural applications such as foundations, driveways, and patios. For instance, a concrete slab can provide a solid base for your home’s foundation or serve as the surface for a driveway.
When pouring footings or walls, use reinforced concrete to ensure stability against soil pressure and weather conditions like freeze-thaw cycles. Concrete pavers can be used for walkways and patios, providing durability and design flexibility.
Uses of Cement (Not as a Finished Product)
Cement is primarily used to make mortars and grouts, not directly for finished concrete products like slabs or walls. Mortar ensures bricks or stones stay securely in place, while grout fills gaps between tiles or serves as a base layer under tile installations.
Uses of Concrete (Foundations, Slabs, Pavers, Structural)
Concrete is best suited for structural applications such as foundations, driveways, and patios. For instance, a concrete slab can provide a solid base for your home’s foundation or serve as the surface for a driveway.
When pouring footings or walls, use reinforced concrete to ensure stability against soil pressure and weather conditions like freeze-thaw cycles. Concrete pavers can be used for walkways and patios, providing durability and design flexibility.
When a Cement-based Product (Mortar/render) Is Better
Cement-based products like mortar and render are ideal for specific tasks due to their superior bonding properties. Here’s what to consider:
- Work Type: Mortar is best for masonry work, ensuring bricks or stones stay securely in place.
- Surface Repair/Finishing: Cement render can be used for repairing cracks or providing a smooth finish over concrete walls and ceilings.
- Waterproofing: Cement render protects exterior surfaces from water damage by creating a waterproof layer.
Decision Rule: If you’re working with existing masonry or need to repair cracks, choose cement-based products for better adhesion and protection.
Common Mistake: Using pure concrete mixes for repairs can lead to poor bonding, resulting in weakened structures that may crumble over time.
Performance: Strength, Durability, and Longevity
Cement-based mixes like mortars and plasters are lighter and easier to work with but lack the strength, stiffness, and long-term durability of concrete. Concrete generally provides good resistance to wear, freeze-thaw cycles, and chemical exposure due to its higher compressive strength and larger aggregates.
Improper curing or overworking can weaken concrete and lead to cracking, crazing, delamination, and early wear. Mix design—water-cement ratio, aggregate quality, air entrainment, and additives such as plasticizers or set accelerators—affects strength, shrinkage, and durability. Address signs of trouble like cracking, spalling, or exposed aggregates promptly.
Compressive Strength and Load-bearing Capacity
Cement-based mixes have lower compressive strengths compared to concrete, making them suitable for non-structural applications. Mortars might reach around 1000 psi while concrete can exceed 4000 psi.
When selecting a material, consider the following:
- Intended use: structural or non-structural
- Expected loads and stresses
- Local building codes and standards
If heavy loads or structural integrity is required, choose concrete. For smaller, non-structural tasks like brick laying or plastering where high compressive loads aren’t expected, cement-based mixes are suitable.
Common mistake: Using a mix with insufficient strength for the intended load, leading to structural failures over time.
Durability: Freeze-thaw, Abrasion, and Chemical Resistance
Mix design significantly affects durability.
- Freeze-thaw resistance: Check for air entrainment. If present (indicated by a blue color when fresh), it helps concrete resist freeze-thaw cycles by creating tiny bubbles that allow water to expand without damage.
- Abrasion resistance: Harder aggregates like crushed stone provide better abrasion resistance compared to softer materials such as sand or gravel. Check aggregate type and size for optimal performance.
- Chemical resistance: Quality additives and maintaining the right water-cement ratio enhance chemical resistance, especially in harsh environments. Ensure proper mix design and use of appropriate admixtures.
Common mistake: Neglecting to consider environmental factors when designing the concrete mix. Consequence: Reduced durability leading to premature deterioration and increased maintenance costs.
Proper sealing with protective coatings extends longevity by shielding from harmful elements, but it’s often overlooked or done incorrectly. Ensure proper application for maximum benefit.
Shrinkage, Cracking, and Curing Considerations
Cracking often results from improper curing or excessive drying shrinkage. To prevent this:
- Check for adequate moisture during the initial stages of curing.
- Monitor drying progress to avoid rapid water loss.
- Ensure proper hydration by following manufacturer guidelines on mixing ratios and timing.
If cracking occurs, stop work immediately and reassess your mix design and curing process. Curing typically takes several weeks for full strength development. Keep the surface moist without overwatering:
- Mist or cover with plastic to retain moisture.
- Avoid overwatering to prevent weak spots and increased likelihood of cracking.
Common mistake: Overworking the mix by adding too much water. Consequence: Weak spots and increased likelihood of cracking. Regular maintenance like sealing and timely repairs extend lifespan.
Pros and Cons: Cement vs Concrete
Cement and concrete aren’t the same thing, and choosing the right one matters for longevity and cost: cement is the binder used in mortars, while concrete is a cement-based mix with aggregates ready for slabs, patches, or foundations. In DIY work you’ll use cement-based mortars for bricks and repointing, and you’ll use concrete for poured slabs, driveways, and robust footings.
Advantages of Cement-based Products
Cement-based mortars typically provide good bonding properties, ideal for bricklaying and tuckpointing where a solid connection is crucial. Mortars offer smoother finishes compared to concrete, beneficial for surfaces that need a neat appearance.
Quick-setting options in cement products allow faster progress without compromising quality, suitable for small-scale repairs needing immediate results.
Cement-based mortars excel in precise workmanship like decorative stonework or intricate brick patterns. Their ease of mixing in smaller batches allows on-site customization to specific needs.
What to check:
- Consistency: A well-mixed cement mortar should have a uniform consistency, with no dry lumps or excessive water.
- Workability: The mortar should be easy to spread and apply without slumping or segregating. If it’s too stiff, add water; if too soupy, add more sand.
- Setting time: Quick-setting mortars can be identified by their packaging labels, allowing you to plan your work accordingly.
Common mistake: Using too much water in cement-based products. This weakens the mortar and can lead to poor bonding, reduced durability, and increased risk of cracking.
Advantages of Concrete
Concrete stands out with high compressive strength and durability, making it excellent for structural applications such as foundations, driveways, and sidewalks. Its versatility enables a variety of shapes and sizes from simple slabs to complex architectural features.
Cost-effectiveness is key in large-scale projects due to its pourability on-site, reducing transportation costs compared to pre-fabricated materials. This minimizes waste and simplifies logistics.
Concrete’s ability to incorporate various aggregates and additives enhances performance characteristics. Adding fibers or reinforcing mesh improves tensile strength and crack resistance, suitable for demanding environments requiring durability.
Drawbacks and Limitations of Each
Cement-based products like mortar can be brittle in thick applications, leading to shrinkage and cracking over time, making them less suitable for large-scale structural work. If you notice excessive cracking or settling during application, stop and reassess your approach.
- Check for proper water-to-cement ratio; too much water weakens the mix.
- Ensure adequate curing time to prevent rapid drying and cracking.
- Avoid applying in thick layers without proper reinforcement or control joints.
Concrete is heavier than cement-based mortars, requiring careful handling during placement. Its curing process takes longer, impacting project timelines and necessitating patience from DIY enthusiasts. To monitor the curing process:
- Keep concrete consistently moist for at least seven days.
- Avoid exposing fresh concrete to freezing temperatures.
- Regularly check for signs of excessive shrinkage or cracking.
Common mistake: Overusing cement-based products without proper reinforcement can lead to structural failures. Consequence: Structural instability, costly repairs, or even collapse.
The environmental impact of both materials should be considered: concrete production contributes significantly to carbon emissions due to its energy-intensive manufacturing processes. Improper disposal or excessive use of cement-based products can lead to waste issues affecting local ecosystems. To minimize environmental impact:
- Use recycled aggregates in your concrete mix.
- Consider alternative low-carbon binders like geopolymers.
- Properly dispose of or recycle leftover materials.
Finishing limitations of concrete mean it requires more effort and skill for a smooth surface compared to mortar applications, often involving additional steps like troweling and sealing to protect against weathering and stains. To achieve a smooth finish:
- Use appropriate formwork and ensure it’s clean before pouring.
- Vibrate the concrete to remove air bubbles and settle the mix.
- Apply finishing techniques like troweling, floating, or power troweling as needed.
Cost Comparison and Budgeting Guidance
Calculate costs by itemizing material expenses, including cement, aggregates, admixtures, chemicals, reinforcement, formwork, finishing tools, labor to place and finish the concrete slab. Include delivery fees, pump versus direct pour, mixer rental, formwork and shoring, site access considerations, and apply a standard contingency (10–20%) for unknowns, regional price swings, and weather variability.
Use unit-cost takeoffs and spreadsheets to capture waste, overages, crew rates, hours to place and finish, curing time, overtime expectations, and delays due to rain or extreme heat. This understanding helps choose between bagged versus ready-mix concrete, on-site batching versus centralized plants, and bulk purchasing strategies without sacrificing strength or durability.
Material Cost per Unit and Sample Calculations
To estimate material costs, calculate the volume of concrete needed for your project. For a small patio slab or footing, measure length, width, and depth to determine cubic yards.
What to check when calculating:
- Ensure measurements are in consistent units (feet/inches or meters).
- Round up your calculation for waste and rework.
- Consider any additional concrete needed for steps, edges, or other details.
When to consider ready-mix:
If your project requires more than 10 cubic yards of concrete, consider ready-mix delivery. It saves time and effort compared to mixing it yourself.
Common mistake to avoid:
Not accounting for moisture content in your calculations can lead to inaccurate volume estimates and wasted materials.
Check local suppliers for current prices per cubic yard. Material costs can vary widely based on location and quality needs. Always get quotes from at least two suppliers to ensure accuracy.
Labor, Equipment, and Additional Expenses
Mixing concrete requires careful planning and consideration of various factors to ensure a successful project.
- Labor: Check local labor rates or estimate your own time if doing it yourself. A small patio slab can take around 4-6 hours from start to finish.
- Equipment: Rent or purchase tools such as wheelbarrows, shovels, screeds, and finishing trowels. For larger pours, consider hiring a concrete pump for pouring over obstacles or at height, and a concrete mixer for on-site mixing if needed.
- Formwork: Essential for shaping the concrete into its final dimensions. Consider the cost of materials like plywood, screws, and stakes.
Decision Rule: If your project requires more than 10 cubic yards of concrete, consider hiring a professional to ensure proper mixing, pouring, and finishing.
Common Mistake: Not accounting for potential delays due to weather or other unforeseen issues can lead to additional costs and project setbacks. Always plan for contingencies in your timeline and budget.
When to Hire Pros vs DIY
Decide whether to do a concrete project yourself or hire professionals based on the complexity and size of your job. For small projects like patios, walkways, or simple footings, DIY can be cost-effective if you have some experience.
Larger jobs such as driveways, foundations, or structural elements often require professional expertise to ensure quality and safety. Professionals know how to handle complex forms, manage large volumes of concrete efficiently, and deal with site-specific challenges like uneven terrain or underground utilities.
Consider the scope and your own skill level when making this decision. If you’re unsure about any aspect of the project, it’s better to seek professional advice early on. Professionals can also provide valuable insights into materials, techniques, and potential cost savings that might not be obvious to a DIY homeowner.
Safety and Handling Best Practices
Safety starts with proper PPE: wear a dust mask or respirator rated for fine particulates, splash goggles, chemical-resistant gloves, and long sleeves to protect your skin and eyes. Ensure good ventilation and use local exhaust where possible to minimize inhalation risks.
Handle cement carefully to avoid burns and irritation. Measure by weight, add powder slowly, and keep the batch away from your face and clothes. Clean up spills promptly with a spill kit nearby to prevent tracking dust around the site.
CALL A PRO: If you’re unsure about any aspect of handling or mixing, consult a professional to avoid injuries or property damage.
Health Risks of Cement Dust and Wet Concrete
Cement dust can irritate your skin, eyes, nose, and throat. Wear gloves and a mask when handling dry cement powder to prevent inhalation.
- Look for itching or redness on your skin after contact with dry cement.
- If you experience sneezing, coughing, or difficulty breathing, move away from the dust source immediately.
If wet concrete splashes onto your skin or gets into your eyes, it can cause chemical burns. Have water nearby for quick rinsing; seek medical help immediately if you experience severe irritation.
Common mistake: Not wearing appropriate Personal Protective Equipment (PPE) when handling cement and concrete.
Consequence: Increased risk of skin irritation, respiratory issues, and chemical burns.
PPE and Safe Handling Procedures
Wear gloves to protect hands from harsh chemicals when handling cement powder or wet concrete.
Use a respirator when mixing dry powder to avoid inhaling dust, which can cause respiratory irritation. If you experience coughing, wheezing, or shortness of breath during mixing, immediately stop and leave the area.
Eyes should be protected with goggles or a face shield to prevent chemical burns and irritation from cement particles.
- Lift heavy bags using proper techniques: bend at your knees, keep the load close to your body, and avoid twisting your torso.
- Consider mechanical aids if possible, such as pallet jacks or forklifts, to minimize strain on your back and limbs.
- Mix wet concrete slowly in small batches to minimize dust generation. If you notice excessive dust while mixing, reduce the speed of your mixer.
Common mistake: Not wearing proper PPE when handling cement or concrete. Consequence: Increased risk of chemical burns, respiratory irritation, and musculoskeletal injuries.
Site Setup and Concrete Curing Safety
Clear the work area of obstacles before starting a pour. Use scaffolding or ladders for elevated work and wear fall protection gear when working at heights.
To protect curing concrete, cover it with plastic sheeting or use straw mulch to prevent contamination. Keep the site clean and free of debris to avoid accidental damage to fresh pours.
Environmental Impact and Sustainability
The embodied carbon in cement and concrete spans from raw material extraction to the finished product. Focus on high-impact phases such as material choice, transport, mixing, placement, and curing to reduce emissions.
Choose lower-carbon binders like fly ash, slag, or silica fume, recycled aggregates, and efficient mix designs that minimize waste without compromising strength. Plan for waste management by crushing demolished concrete for reuse, reducing formwork waste, and selecting greener options early in the project.
Carbon Footprint of Cement and Concrete
The carbon footprint starts with raw material extraction but peaks during clinker production due to high energy requirements.
What to check:
- Clinker content: Lower clinker content means lower emissions. Check for blends like Portland Pozzolana Cement (PPC) or Portland Slag Cement (PSC).
- Cement type: Some cements, like those with high slag or fly ash content, have a lower carbon footprint.
Decision rule: If your project requires a significant amount of concrete, consider using blended cements to reduce emissions.
Common mistake and consequence: Not considering the embodied carbon in cement can lead to an overall higher carbon footprint for your construction project, undermining sustainability goals.
To lower your project’s emissions, consider supplementary materials like fly ash or slag that decrease reliance on traditional clinker-based cement. These materials not only reduce the carbon footprint but also improve concrete properties like durability and strength.
Ways to Reduce Environmental Impact
Use supplementary cementitious materials such as fly ash or slag to replace some Portland cement and reduce carbon footprint. Recycled aggregates from crushed concrete can be reused in new mixes, saving resources and reducing landfill waste.
Low-carbon cements like limestone calcined clay or geopolymers offer further reductions by replacing traditional Portland cement with lower-embodied carbon materials. These options are becoming more available for sustainable construction.
Recycling, Reuse, and End-of-life Options
Crushed concrete from demolition is highly reusable as aggregate in new mixes or road bases, reducing the need for virgin materials and landfill waste.
Permeable concrete allows water to pass through it, managing stormwater naturally and reducing erosion. This type of concrete is useful in urban areas prone to flooding.
Follow responsible demolition practices by salvaging reusable materials like doors, windows, and bricks. Proper disposal methods should be followed for hazardous waste such as asbestos or PCBs to ensure safety and compliance with regulations.
Safety reminder: Consult local environmental regulations or professionals for advice tailored to your specific location and project.
How to Choose: Decision Checklist by Project Type
This decision checklist helps you pick the right cement, concrete, or cement-based product for each project type, from small repairs and mortar joints to new slabs, decorative work, or masonry repairs. Define your goal as structural, cosmetic, or substrate prep; map your project needs to cement-based products for mortars, concrete mixes for pours, and specialty cementitious products for grouts and overlays.
Follow a simple flow: state the goal, assess demands, choose a material category, pick a specific mix, plan mixing, curing, and finishing steps. This approach avoids common mistakes and ensures a durable, good-looking result. It clarifies what to test, when to prep the substrate, how long to cure, and budget considerations.
Step-by-step Process
To choose the right cement or concrete for your project:
- Define your goal: What do you want to achieve?
- Evaluate structural demands:
- Consider load-bearing requirements.
- Assess environmental factors like weather exposure.
- Check local building codes for material standards.
- Select material category: Choose between cement-based products, concrete mixes, or specialized cementitious materials based on the task. If you’re unsure, consult a professional.
- Pick a specific mix or product: Look for options that match your required strength, desired thickness, curing time, and aesthetic needs. For example, if you need high strength, consider high-performance concrete.
- Plan mixing ratios and methods: Determine how you’ll prepare your material according to its requirements. Follow manufacturer guidelines closely.
- Check local building codes and obtain necessary permits before gathering materials and tools.
- Prepare substrate and tools: Ensure surfaces are clean, level, and properly prepared. Gather necessary equipment such as trowels, mixers, and safety gear.
- Common mistake: Not allowing adequate curing time. This can lead to weakened material and increased likelihood of cracking or crumbling.
- Apply the material carefully: Follow instructions for application thickness and coverage area. Use a straight edge or level to ensure even application.
- Cure properly: Allow adequate time for drying and setting, following manufacturer guidelines. Keep the material moist during this period to prevent premature drying.
If you notice any movement or issues during curing, address them immediately to avoid long-term problems. If unsure about any step, stop and reassess; call a professional if needed.
Small Repairs and Masonry Joints
For minor repairs like filling cracks in concrete or repairing mortar joints, use pre-mixed cementitious repair products for ease of application.
What to check:
- Inspect the area for any signs of moisture or active leaks before starting repairs. If present, address these issues first to prevent further damage.
- Check if the existing material is compatible with the repair product you’ve chosen. Incompatibility can lead to poor adhesion and further deterioration.
Application steps:
- Choose a product based on the type of repair: patching compound for large areas, mortar mix for brickwork.
- Clean and prepare the surface by removing debris and ensuring it’s dry.
- Mix the material according to instructions; consistency should be like peanut butter.
- Apply in thin layers to avoid cracking or shrinking.
- Smooth out with a trowel for an even finish.
- Cover repairs with plastic sheeting to retain moisture during curing.
- Check for any gaps or voids and fill them promptly.
Common mistake: Not allowing the repair material to cure properly. This can lead to premature failure of the repair, requiring rework and additional costs.
If the material is not adhering properly, reapply after cleaning the area thoroughly. Stop and reassess if unsure; call a pro if needed.
Structural Pours, Slabs, and Foundations
For large structural projects like slabs or foundations, use high-grade concrete with proper reinforcement to ensure durability.
- Select a suitable grade of concrete based on load-bearing requirements.
- Use rebar or wire mesh for added strength in critical areas.
- Ensure forms are securely set and level before pouring.
- Pour in layers, not exceeding 6 inches at a time to avoid cracking.
- Vibrate the concrete gently to remove air bubbles and ensure compaction.
- Cover with plastic sheeting or straw mats for curing.
- Allow sufficient curing time before removing forms.
If you notice any movement in the slab during curing, address it immediately by reinforcing or adjusting supports as needed. Stop and reassess if unsure; call a pro if needed.
Decorative and Landscaping Projects
For decorative projects like stamped concrete patios or walkways, use specialized mixes that offer color options and easy finishing.
What to check:
- Ensure the mix is designed for coloring or stamping patterns into the surface.
- Check if the manufacturer’s instructions are clear on tools required and application process.
What you’ll see:
- Specialized mixes often come in pre-colored options or can be tinted at the ready-mix plant.
- The mix should have a consistent texture and workability suitable for stamping or texturing tools.
Common mistake to avoid: Not allowing enough time for proper curing. Inadequate curing can lead to cracking, discoloration, or reduced durability of the finished surface.
- Select a mix designed for coloring or stamping patterns into the surface.
- Lay out your design before pouring to ensure accuracy.
- Pour in thin layers and work quickly to achieve desired effects.
- Use stamps, rollers, or other tools as directed by the manufacturer.
- Cure with a breathable cover to prevent cracking.
- Apply sealers after curing to protect against weathering.
If you notice any unevenness in the surface during finishing, smooth it out immediately before the concrete sets completely. Stop and reassess if unsure; call a pro if needed.
Planning Tips, Common Mistakes, and Troubleshooting
Plan like a foreman: define the project scope, decide between cement and concrete, choose the right mix design and additives, and map an honest timetable from material selection to final cure, with clear decision criteria you can follow on a DIY day by day basis. Outline material checks, tool readiness, formwork and substrate prep, and environmental factors such as temperature, humidity, wind, and safety PPE, so you catch issues early and avoid surprises when you pull the first trowel.
Follow a concise, step by step flow from mix preparation to placement, finishing, and cure, with quick checks after each stage for slump or workability, air entrainment, surface finish, and form removal timing, plus blunt guidance on when to adjust water, aggregate size, or mix duration. Keep a troubleshooting cheatsheet handy for cracking, honeycombing, curling edges, surface dusting, bleed water, and efflorescence, plus clear rules on when to scrap and restart versus patching and how to rework a poor pour without wasting the whole job. A lightweight packing list, practical quick-check templates, and a one page project timeline help you minimize delays, stay mindful of substrate and curing conditions, and maintain safety while delivering durable, smooth finishes that resist cracks and curling over the long haul.
Top Mistakes DIYers Make and How to Avoid Them
Missteps in mixing, curing, or material selection can lead to weak concrete that cracks easily. Proper planning and adherence to basic principles prevent these issues.
- Mistake: Over-mixing the mix. This causes segregation of aggregates and weakens the structure.
What to check: Look for a homogeneous mixture; if you see dry or wet patches, stop mixing immediately.
Fix: Mix until just combined, about 3 minutes for a typical batch. - Mistake: Incorrect water-cement ratio. Too much water makes concrete too runny and weak.
What to check: Use a slump test; if it flows more than 2 inches, reduce the water content.
Fix: Aim for a slump of 1-2 inches. - Mistake: Not curing properly. Inadequate moisture leads to cracking and poor strength development.
What to check: Ensure the surface is moist; if it feels dry, re-wet it immediately.
Fix: Keep concrete moist for at least 7 days, using misting or curing blankets. - Mistake: Using the wrong type of cement or aggregate. Different projects require different mixes.
What to check: Consult a mix design chart based on your project’s requirements (e.g., strength, durability).
Fix: Choose materials that match your project needs. - Mistake: Not preparing the substrate properly. Loose soil or debris weakens bond strength.
What to check: Inspect the surface; if it’s loose, crumbly, or has debris, it’s not ready for pouring.
Fix: Clean and level the surface before pouring, ensuring proper adhesion.
Common mistake consequence: Improper concrete preparation can lead to costly repairs and project delays. Always inspect your materials and workspace thoroughly before starting any DIY concrete project.
The fastest fix on-site is to adjust the mix ratio immediately if you notice issues like excessive water or poor workability.
Quick Troubleshooting: Cracks, Weak Mixes, and Poor Finishes
What to check: Inspect for signs of improper curing or excessive drying (cracking), insufficient compaction or poor mix design (honeycombing), and incorrect timing for form removal or inadequate finishing tools (poor finishes).
- Cracks: Check if the surface is excessively dry or not properly cured.
- Honeycombing: Inspect the concrete’s compaction level and mix design.
- Poor Finishes: Ensure forms were removed at the correct time and proper finishing tools were used.
Decision rules: If cracks appear, rewet the surface to maintain moisture. When honeycombing is present, patch with fresh concrete if caught early enough. For poor finishes, remove forms when the concrete can support its own weight without damage.
Common mistake and consequence: Not allowing concrete to cure properly can lead to excessive drying and cracking, weakening the structure’s integrity over time.
When in doubt, consult an expert to assess structural integrity and recommend repairs.
Tools and Materials Checklist for Common Projects
Ensure a smooth concrete pour by having the right tools and materials on hand. Here’s what you need:
- Mixing equipment: wheelbarrow, shovel, hoe.
- Measuring devices: tape measure, level.
Before mixing, check your materials for freshness and consistency. If cement is lumpy or aggregates are damp, discard and replace them.
- Curing supplies: curing blankets, water hose.
- Safety gear: gloves, safety glasses, respirator.
Always prioritize safety. If you’re unsure about any tool or material, consult the manufacturer’s guidelines.
- Finishing tools: float, trowel, edger.
- Formwork materials: plywood sheets, form ties.
Inspect your forms for any cracks or leaks before pouring. If found, repair immediately to prevent weak spots in the final structure.
- Mix design ingredients: cement, aggregates (sand and gravel), water, admixtures.
When mixing, maintain a consistent water-to-cement ratio for optimal strength. If you notice the mix is too dry or wet, adjust accordingly.
Common mistake: Not allowing concrete to cure properly. Consequence: Weakened structure prone to cracking and early failure.
Stop and fix any movement or shifting in forms before it causes structural issues. Re-level forms and re-pour concrete if necessary.

Conclusion
Choosing the right material is about safety, durability, and a clean finish. Get the mix right, and your project will hold up and look steady for years.
First, verify your project type, decide whether you’ll use cement or concrete, check the correct mix ratios and cure times, plan for weather and timing, wear the right PPE, mix in manageable batches, and test a small area before full scale work. Then proceed in that order, document the results, and clean up thoroughly so nothing sets where it shouldn’t.
Common mistakes to avoid include using cement when you actually need concrete for structural strength, skipping or rushing curing, and neglecting proper safety gear or ventilation. Keep curing temperatures steady, protect joints, and never mix or pour in unsafe conditions or over large areas without planning. safety matters most and a small test patch can save you from costly repairs later.
If the work involves structural supports, large slabs, complex forms, or waterproofing concerns, don’t push past your limits. Call a professional when in doubt, or when project scope climbs beyond a DIY-friendly level. Stay deliberate, stay safe, and you’ll finish with a solid, lasting result.
FAQ
What’s the difference between cement and concrete?
Cement is just a part of concrete. It’s like the glue that holds everything together.
Think of it this way: cement = glue, concrete = cake (which needs flour, eggs, sugar – and in our case, cement, sand, gravel).
Can I just mix up some cement and make my own “concrete”?
Nope. That’s like thinking you can make a cake by just mixing flour.
You need other ingredients (sand, gravel) in the right amounts to make proper concrete.
Is all concrete the same?
No way! There are different types for driveways, foundations, and even those fancy countertops.
Some have fibers added for strength, others are extra strong for heavy loads. Pick what’s best for your job.
How do I know how much concrete to buy?
Calculate the volume you need using length x width x depth of the area you’re filling.
Then add about 5-10% extra for waste and errors. Don’t underestimate – it’s a pain to mix more on site!