
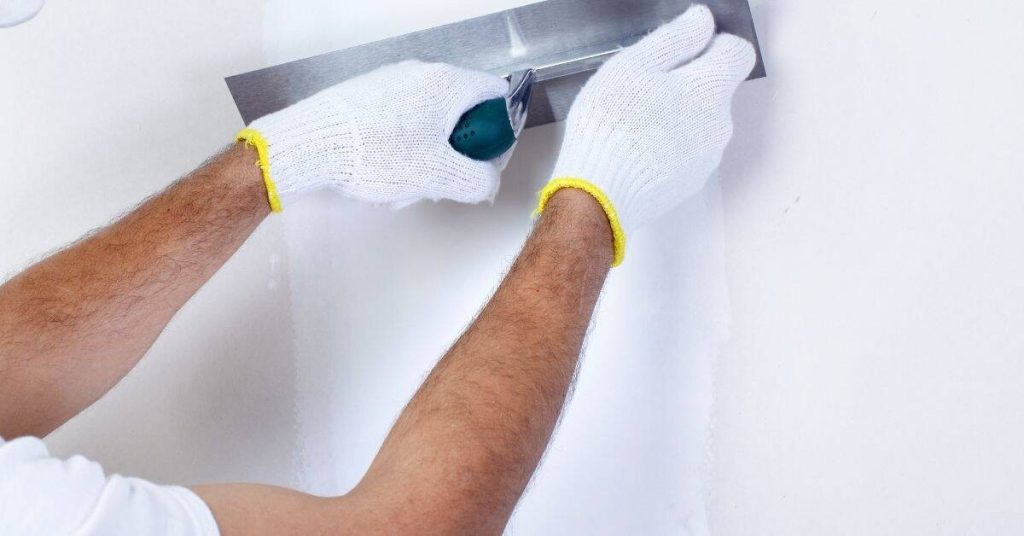
Introduction
The timeline of microcrack appearance in lime plaster can provide valuable insights into their cause, helping you decide whether they’re normal crazing or movement cracks. Understanding this timeline can save you time, money, and unnecessary repairs.
In this guide, we’ll explore the typical timeline of microcrack development in lime plaster, from application to curing, and discuss how different factors influence this timeline.
The Timeline of Microcrack Appearance
Microcracks in lime plaster can appear at various stages, from immediately after application to months or even years later. The timing of their appearance can help you differentiate between normal crazing and movement cracks caused by structural stresses.
- Immediate Crazing (Within Hours to Days): Fine, shallow hairline cracks may appear almost instantly due to surface shrinkage and glazes. These are typically normal crazing and not a cause for concern unless they’re excessively wide or deep.
- Delayed Crazing (Days to Weeks After Application): Some crazing may take days or even weeks to become visible as the plaster continues to cure and shrink. This is also usually normal, but if these cracks are wide or deep, they might indicate a problem with the plaster mix or application.
- Movement Cracks (Months to Years After Application): Movement cracks typically appear months or even years after the plaster has been applied. These cracks are usually wider and follow joints or stress points in the substrate. They can be caused by structural shifts, settling, or other forms of movement.
The timing of microcrack appearance is just one factor to consider when deciding whether they’re normal crazing or movement cracks. Other factors, such as crack depth and width, should also be taken into account.
Key takeaways
Understanding the timeline of microcrack appearance can help you plan your inspection and repair schedule more effectively. For example, if you know that certain cracks are likely to appear during a specific stage of curing, you can monitor the area more closely at that time.
- Crazing are fine surface cracks caused by shrinkage; whereas movement cracks indicate structural stress.
- Thermal mismatch and glaze composition can drive crazing independent of plaster thickness.
- Watch timing: crazing often appears after curing or seasonal changes, not during application.
- Moisture, salts and hygroscopic materials draw water, worsening microcracks under load.
- Check manufacturing and application quality: substrate prep, plaster mix, and cure conditions.
- Safety: wear eye protection, mask, and avoid disturbed lime plaster areas.
Table of Contents
- Introduction
- Key takeaways
- What Is Crazing and How Does It Differ from Microcracks Caused by Movement?
- Causes: Thermal Expansion Mismatch and Substrate–Plaster Compatibility
- Timing: Immediate Vs Delayed Crazing and Why It Matters
- Moisture, Salts and Hygroscopic Materials: Their Role in Microcrack Development
- Manufacturing and Application Quality Factors to Check
- Detection, Inspection and Testing Methods (DIY and Professional)
- Safety, Structural Implications and Lifecycle Costs
- How to Decide: a Decision-Making Checklist and Remediation Options
- Conclusion
- FAQ
What Is Crazing and How Does It Differ from Microcracks Caused by Movement?
Crazing in lime plaster is a network of very fine, interconnecting microcracks that usually sit in the surface skin of a lime-based finish. It typically appears on thin decorative coats or polished lime finishes and forms as the surface film tensions relieve during curing or rapid drying.
Movement-related microcracks are generally linear, stepped or zigzag and follow edges, framing lines or weak points in the substrate rather than forming a random mesh. Look for tactile and visual cues: crazing will feel mostly superficial and uniform, while movement cracks often have sharper, irregular edges, greater depth, and alignment with joints or structural elements.
Crazing (normal shrinkage cracks)
Crazing in lime plaster is a common sight. It’s fine, interconnected networks of microcracks that form during the setting and carbonation process. These cracks are typically less than 0.2mm wide and run randomly across the surface.
The cause? Shrinkage or surface tension as the lime-based finish dries out. You’ll find them in most lime plasters, especially on thicker finishes like lime render or thick lime mortar.
They’re usually not a concern. But if they bother you, they can often be filled and sanded over for a smoother look.
Movement-related microcracks
These cracks are wider than crazing, usually over 0.2mm. They often follow joints or appear as stepping/cracking through the plaster thickness.
The cause? Substrate movement, settlement, or thermal cycling. You might see them where there’s been structural movement – like near windows, doors, or corners. Or they could be due to temperature changes causing the substrate to expand and contract.
These cracks need attention. They could indicate a structural issue. If you see any widening or new cracks appearing, call in a professional for assessment.
Causes: Thermal Expansion Mismatch and Substrate–Plaster Compatibility
Thermal expansion mismatch means the substrate and lime plaster change size at different rates with temperature and moisture, producing stress at the interface that the plaster relieves as microcracks. Compatibility also covers stiffness and bond—stiff substrates or substrates that move more than the plaster will encourage cracking.
Different substrates (brick, stone, concrete, timber) vary in porosity and movement tendencies; these factors plus how well the surface was prepared and the plaster bonded determine whether cracks form. When diagnosing, check substrate type, history of movement, and manufacturer guidance for compatible lime products and detailing—if unsure, refer to product data sheets or local practice for compatible pairings and jointing details.
Thermal expansion and coefficient mismatch
Lime plaster and its substrate can expand and contract at different rates when temperatures change. This is due to their unique thermal expansion coefficients.
Imagine a hot summer day. Your lime plaster wants to expand more than your concrete wall. Tension builds up, pulling the plaster. When it cools down, the opposite happens – the plaster shrinks more than the wall, pushing it. These alternating tensions and compressions can cause microcracks.
To minimize this, match materials with similar expansion coefficients. If that’s not possible, design movement joints to accommodate differential movement.
Substrate properties and preparation
The substrate – the surface you’re applying lime plaster onto – plays a big role in how well it behaves. Here’s why:
Rigid substrates, like new concrete, have little give. If they move slightly due to temperature changes or moisture shifts, the rigid plaster can’t accommodate it, leading to cracks.
Flexible substrates, like some timber surfaces, can move more but might not provide a solid enough base for the plaster. This can also cause issues. Porous substrates, like old masonry, can suck up moisture from the plaster as it cures, causing it to shrink and crack.
Preparation is key. Ensure your substrate is clean, dry, and stable before applying lime plaster.
Effects of additives, pigments and eco-modifications
Adding fibers, pigments, cements, or plasticizers to your lime plaster can change its expansion and shrinkage behavior. Here’s how:
Fibers can help control cracking by absorbing some of the tension that builds up due to differential movement. Pigments might not affect expansion directly but can influence drying rates, which in turn affects shrinkage.
Cements added to lime plasters can increase their stiffness and strength, but they also reduce flexibility, making them more prone to cracking. Plasticizers do the opposite – they make the plaster more flexible, helping it accommodate movement better.
Eco-modifications like hempcrete or lime-putty mixes can change expansion coefficients and shrinkage behavior. Always test these modifications on a small scale first to understand their effects.
Timing: Immediate Vs Delayed Crazing and Why It Matters
Cracks that show up during application or within the initial cure period usually point toward mix, application or drying issues; those appearing after days, months or years more often indicate substrate movement, moisture changes, or long-term material shifts. Timing helps narrow cause and decide whether a repair is cosmetic or requires substrate work.
To attribute cause, document when cracks first appeared and correlate with recent work, weather events, or building movement; perform simple checks like touch tests and surface moisture readings and consult product instructions when a specific cure schedule or handling is in question. If cracking developed well after cure or widens with seasonal cycles, treat movement and moisture causes more seriously and consider professional assessment.
Immediate appearance (application and cure issues)
Cracks appearing during application or within hours to days after are usually due to issues with the plastering process itself. Here’s what to look for:
Over-thinning: Too much water in your mix can make it runny, leading to cracks as it dries.
Rapid drying: If the surface dries too quickly, especially due to high temperatures or low humidity, cracks may form.
Improper curing: Not keeping the plaster moist enough during initial cure can cause immediate cracking. Similarly, excessive thickness can lead to cracks as the outer layer dries faster than the inner layers.
Delayed appearance (environmental and chemical drivers)
Crazing that shows up months or years after application is often due to environmental factors or slow chemical processes. Here’s what might be happening:
Thermal cycling: Changes in temperature cause the plaster to expand and contract, which can lead to cracks over time.
Moisture cycles: Repeated wetting and drying can cause cracks, especially if there are salts present that can crystallize and push apart the plaster.
Carbonation changes: Over time, lime plaster reacts with carbon dioxide in the air, which can change its properties and lead to cracking. Similarly, slow incompatibility between the plaster and additives or pigments may cause stress that results in delayed crazing.
Moisture, Salts and Hygroscopic Materials: Their Role in Microcrack Development
Moisture uptake and repeated wetting/drying cycles cause the lime plaster matrix to swell and shrink, generating tensile stresses that can open microcracks over time—lime is hygroscopic and responds to ambient humidity changes. Soluble salts transported in water can crystallize in pores during drying, exerting crystallization pressure that forces microcracks or worsens existing hairlines.
Field checks should include looking for efflorescence, mapping cracks against known wetting sources, and testing for salts or elevated moisture before choosing a repair approach. If salt or moisture is implicated, follow product and lab instructions for salt remediation and compatible repair materials; when in doubt, verify salt testing methods and remediation limits with a specialist.
Moisture Cycling and Hygroscopic Substrates
Lime plaster, being a natural material, is highly hygroscopic. This means it absorbs and releases moisture from the air.
When it’s damp, lime plaster expands. When it dries out, it contracts. These dimensional changes put stress on the coating, leading to microcracks over time.
Key culprits: Repeated wetting/drying cycles and consistently damp substrates.
Salt-Induced Expansion and Efflorescence
Soluble salts, like those found in ground water or masonry, can migrate into lime plaster. When they encounter a dry surface, they crystallize.
This crystallization process exerts pressure on the surrounding material, causing it to expand. As more salt crystals form and grow, they force microcracks along interfaces within the plaster.
Efflorescence: The white, powdery deposits you see on walls are a sign of salt crystallization. If left untreated, these salts will continue to cause progressive craze formation.
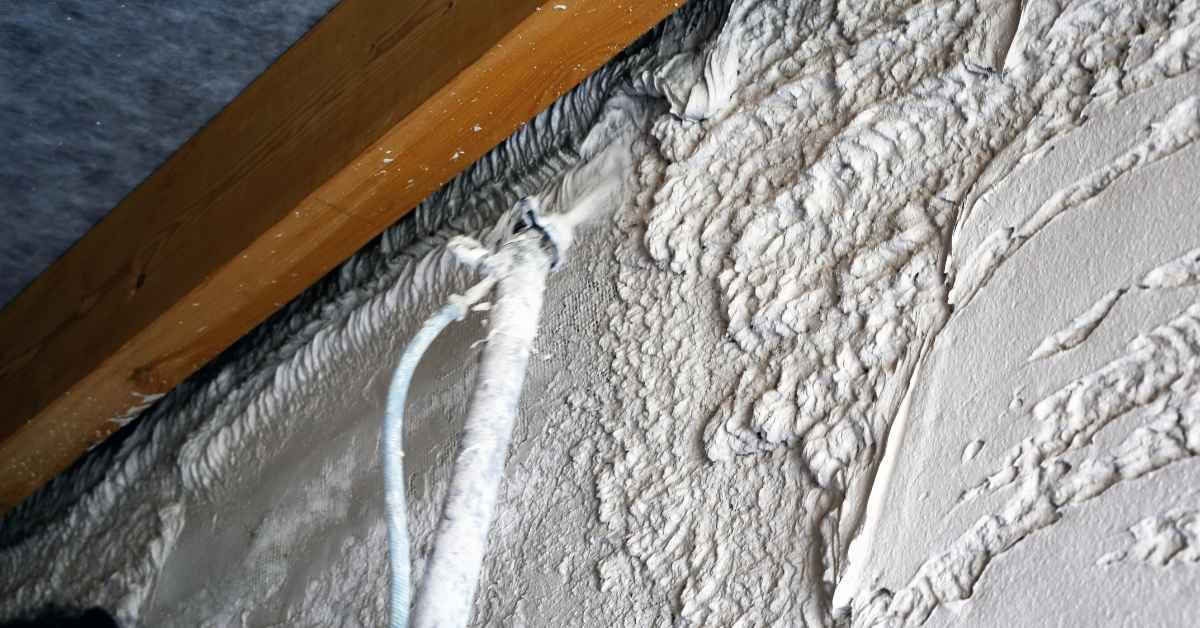
Manufacturing and Application Quality Factors to Check
Mistakes in mixing and application commonly cause surface microcracking: inconsistent batches, incorrect water content, overly thick coats, or wrong mix components change shrinkage and cohesion. Poor material selection or supplier variability can create a finish layer that is too stiff or brittle for the substrate or local conditions.
On-site checks include verifying batch consistency, noting coat thickness and between-coat timing, and confirming substrate preparation (damp-spring, keying, bonding). Follow product labels or manufacturer instructions for mixing and cure practices; if the product guidance is unclear, request technical data or installation guidance before proceeding with large repairs.
Mixing ratios, water content and curing practices
Getting your mix right is crucial. Too much or too little lime can cause cracks.
Lime:aggregate ratio: Stick to 1:2 or 1:3 for most jobs. Too low makes it crumble, too high causes shrinkage.
Water content: Add water gradually. Premature addition weakens the mix and promotes cracks. Check viscosity – it should coat a trowel like cream cheese.
Curing: Keep lime plaster damp for at least 7 days to slow down drying, reduce shrinkage, and minimize cracks.
Thickness, layering and joint detailing errors
These are common mistakes that lead to drying stresses and crack propagation. Avoid them:
- Excessive coat thickness: Keeps moisture in, causing cracks as it dries.
- Poor bedding of layers: Inadequate bonding leads to delamination and stress buildup.
- Missing movement joints: Allows stresses from expansion and contraction to build up and cause cracks.
- Insufficient keying: Poor bond between coats causes delamination and stress buildup.
Keep coats thin, bed layers well, include movement joints every 6-8 feet, and ensure good keying for a strong bond.
Detection, Inspection and Testing Methods (DIY and Professional)
Start with a systematic visual inspection: map crack patterns, note orientation, measure widths, and check whether cracks go through to the substrate or stay in the surface skin. Simple DIY tests include a knock test for delamination, a moisture check with a moisture meter or damp-indicating paper, and a tape or scratch adhesion test to gauge bond.
Record findings with dated photos and a sketch so you can monitor change over time; if cracks widen, recur, or you suspect structural movement or salts, consider professional testing such as petrographic analysis, adhesion testing or a structural survey. When ordering lab work, clarify what information you need from the lab and provide cure history, substrate description, and any onsite test results.
Visual checkpoints and simple tools
Before you start any tests, use these visual checks and simple tools to gather initial information.
- Crack pattern: Look for hairline cracks (crazing) vs. wider cracks (movement).
- Frequency: Count the number of cracks per square meter.
- Orientation: Note if cracks run horizontally, vertically, or diagonally.
- Depth: Use a magnifier to check if cracks go through plaster only or deeper into lath or substrate.
- Staining: Check for signs of moisture or salt staining around cracks.
- Crack width: Measure using a crack gauge or ruler. Record measurements.
- Moisture content: Use a moisture meter to check surface and underlying substrate.
- Adhesion: Perform a simple pull test with adhesive tape to check plaster–substrate bond.
Quick rule: If cracks are wide, deep, or recurring, consider professional help.
Pre-install and forensic tests to run
Before applying any repairs or new plaster, follow this testing protocol to understand the root cause.
- Mockups: Create small test areas with different mix ratios, thicknesses, and application methods.
- Accelerated cycles: Subject mockups to wet/dry or thermal cycles to mimic environmental conditions.
- Salt-path tests: Apply salt solutions to check for efflorescence and salt-induced expansion.
- Moisture assessment: Use a moisture meter to check substrate and plaster.
- Adhesion testing: Perform pull-off tests to check plaster–substrate bond strength.
- Petrographic analysis: Send samples to lab for detailed mineralogical examination if cracks recur or worsen.
Quick rule: If test results show recurring issues, consider professional lab involvement.
Safety, Structural Implications and Lifecycle Costs
Even fine microcracks can create moisture pathways that raise mold risk, degrade indoor air quality, and accelerate finish failure if left unchecked; extensive delamination can produce falling debris hazards. Evaluate whether cracks are allowing moisture into substrate materials or pointing to structural issues that could worsen under load, vibration or freeze–thaw cycles.
Weigh the long-term maintenance implications: recurring moisture- or movement-driven cracking increases repair frequency and lifecycle costs compared with addressing root causes early. Use crack pattern, width, and moisture history to decide between cosmetic repair and substrate stabilization, and document condition and any interventions for future owners or contractors.
When microcracks indicate structural risk
Microcracks in lime plaster can sometimes signal more than just a cosmetic issue. They might hint at underlying structural movement, requiring professional assessment.
Crack width: Hairline cracks (less than 0.2mm) are usually normal crazing. Wider cracks need closer inspection.
Crack pattern: Horizontal or diagonal cracks may indicate settlement or movement in the substrate. Vertical cracks could suggest problems with the plaster’s bond to the lath or substrate.
If you notice any of these signs, don’t wait. Consult a structural engineer immediately.
Repair cost vs prevention and maintenance planning
Addressing microcracks upfront can save you money in the long run. Here’s how:
Prevention: Ensure proper moisture management, use breathable finishes, and apply appropriate sealants during installation to minimize cracks.
Maintenance: Regularly inspect your lime plaster for signs of cracking. Early detection allows for cheaper repairs. A good maintenance schedule includes annual inspections and timely touch-ups.
Repair cost: Ignoring microcracks can lead to more expensive repairs or replacements down the line. Efflorescence, moisture ingress, and mold growth can cause significant damage over time. Proactive sealing and repairs are always cheaper than reactive ones.
How to Decide: a Decision-Making Checklist and Remediation Options
Follow a stepwise approach: identify the crack pattern and timing, run targeted moisture and adhesion checks, and map cracks against building joints and substrate features to isolate likely causes. Use simple measurements and photographs to decide whether the issue is surface crazing, moisture-related, or movement-driven before choosing a repair path.
For surface crazing choose compatible lime-based filling or re-finish; for moisture issues prioritize drying and salt remediation; for movement-related cracking address substrate stabilization or movement accommodation before replastering. Keep records of tests, product labels, and manufacturer instructions to ensure chosen materials and methods match the cause and building performance goals—bring in a structural or conservation professional if stabilization is needed or uncertainty remains.
Step-by-Step Process
Use this checklist once you’ve identified microcracks in your lime plaster. It guides you through decision-making, testing, and remediation.
- Preparation: Ensure safety – turn off power to nearby outlets, clear the area.
- Gather tools: Tape measure, crack width gauge, moisture meter, camera for documentation.
- Document cracks: Photograph and measure cracks. Note their pattern and width.
- Check movement: Gently push and pull on the plaster to assess if cracks are moving or static.
- Moisture check: Use a moisture meter to test surrounding substrate, tiles, and plaster. Check humidity levels in the room.
- Temperature exposure: Note any recent temperature changes that could cause expansion/contraction.
- Tile/plaster work history: Consider any recent tile or plaster work that might have caused stress.
- Assess structural implications: Check if cracks indicate structural issues (refer to ‘Safety, Structural Implications’ section).
- Evaluate repair/replace: Consider tolerances for movement, historic finish preservation, and long-term performance goals.
- Plan remediation: Based on crack type, choose suitable strategies (see ‘Remediation strategies’ section).
- Cleanup: After repairs, clean the area and dispose of waste materials properly.
Quick rule: Always prioritize safety first. If in doubt about structural integrity or complex movement, consult a professional.
Pre-install checklist and go/no-go criteria
Before full installation of lime plaster, use this checklist to ensure a successful application.
- Substrate dryness: Ensure the surface is clean, dry, and free from contaminants. Moisture content should be below 18%.
- Mockup performance: Apply a small test patch to assess color match, adhesion, and workability.
- Adhesion benchmarks: Perform an adhesion test on the mockup. Use a sharp object to try and lift off the plaster. If it lifts easily, re-evaluate your substrate preparation.
- Temperature check: Ensure room temperature is between 50-80°F (10-27°C) for optimal application.
- Humidity control: Maintain relative humidity below 60% during and after application to prevent moisture-related issues.
- Primer application: If required, apply a suitable primer to improve adhesion and seal the substrate.
Quick rule: If any test fails or results are marginal, re-evaluate your preparation steps before proceeding with full installation.
Remediation strategies and when to monitor
Use these strategies based on the type of microcracks identified. Monitoring may be acceptable in some cases.
- Movement-related cracks: Stabilize the area, consider expansion joints or reinforcing. Monitor for further movement.
- Crazing/shrinkage: Apply lime-putty or lime-putty-based sealants to fill and protect cracks. Monitor for re-cracking.
- Moisture-induced cracks: Implement drying, vapor control measures, and appropriate water management strategies. Monitor moisture levels.
- Cosmetic filling: For minor crazing or hairline shrinkage, use a compatible lime-based filler to fill cracks. Monitor for re-cracking.
- Removal/reapplication: If cracks are extensive or structural, remove and reapply plaster with compatible mixes. Monitor during the curing process.
Quick rule: Regular monitoring is crucial after remediation to ensure long-term performance and prevent recurrence of microcracks.
Conclusion
Safety and durability go hand in hand here. Focus on distinguishing true movement cracks from normal crazing, test moisture and salts first, and choose fixes that won’t cause bigger damage or expensive callbacks.
Begin by checking the area for signs of movement versus craze, test moisture levels and hygroscopic materials in a small, inconspicuous patch, compare substrate and plaster compatibility, review how the plaster was manufactured and applied, and then decide on a remediation path based on what you find—do simple DIY tests first, and if results are unclear, step back and reassess before pulling materials loose or making large repairs.
Avoid common traps: don’t ignore hidden moisture or salt sources, don’t over-tighten fixes that trap movement or moisture, and don’t rush into a full repair without confirming the root cause and doing a small-area trial. Safety comes first and test in a small area before any knock-out or recoat work, so you don’t waste time or risk bigger damage.
If movement or structural concerns appear or the area involves structural elements, or the DIY tests are inconclusive, call a professional rather than pushing on. With careful checks and measured steps, you can protect the wall, the house, and your budget, and finish with a stable, good-looking surface you can trust. Stay calm, stay methodical, and you’ll get there.
FAQ
What exactly is crazing vs movement cracks in lime plaster?
Crazing are fine, consistent network lines on the plaster surface. Movement cracks run irregular, wider, and often follow substrate shifts or structural movement.
Can coloring oxides influence crazing in lime plaster?
Yes. Some pigments or glaze components can affect how the plaster shrinks and cracks. Check the pigment label and manufacturer guidance to see if additives might change crazing tendency.
What symptoms and timing should I watch for to tell crazing from movement cracks?
Crazing usually appears as a fine, spider-web pattern soon after drying or during curing. Movement cracks tend to appear later, after movement or drying pauses, and are work-tacks for repair rather than surface-only patterns.
What manufacturing or material choices affect how crazing shows up and how should I pick them?
Look at the plaster mix components, binder quality, and glaze/finish. Always read the supplier’s instructions and product label. If unsure, compare options and choose based on what the label says about shrinkage and compatibility with the substrate.